2006 NISSAN TITAN remove seats
[x] Cancel search: remove seatsPage 50 of 360
cThe three-point seat belt in your vehicle
is equipped with an automatic locking
mode retractor which must be used
when installing a child restraint.
cFailure to use the retractor’s locking
mode will result in the child restraint
not being properly secured. The re-
straint could tip over or otherwise be
unsecured and cause injury to the child
in a sudden stop or collision. Also, it can
change the operation of the front pas-
senger air bag. See “Front passenger
air bag and status light” later in this
section.
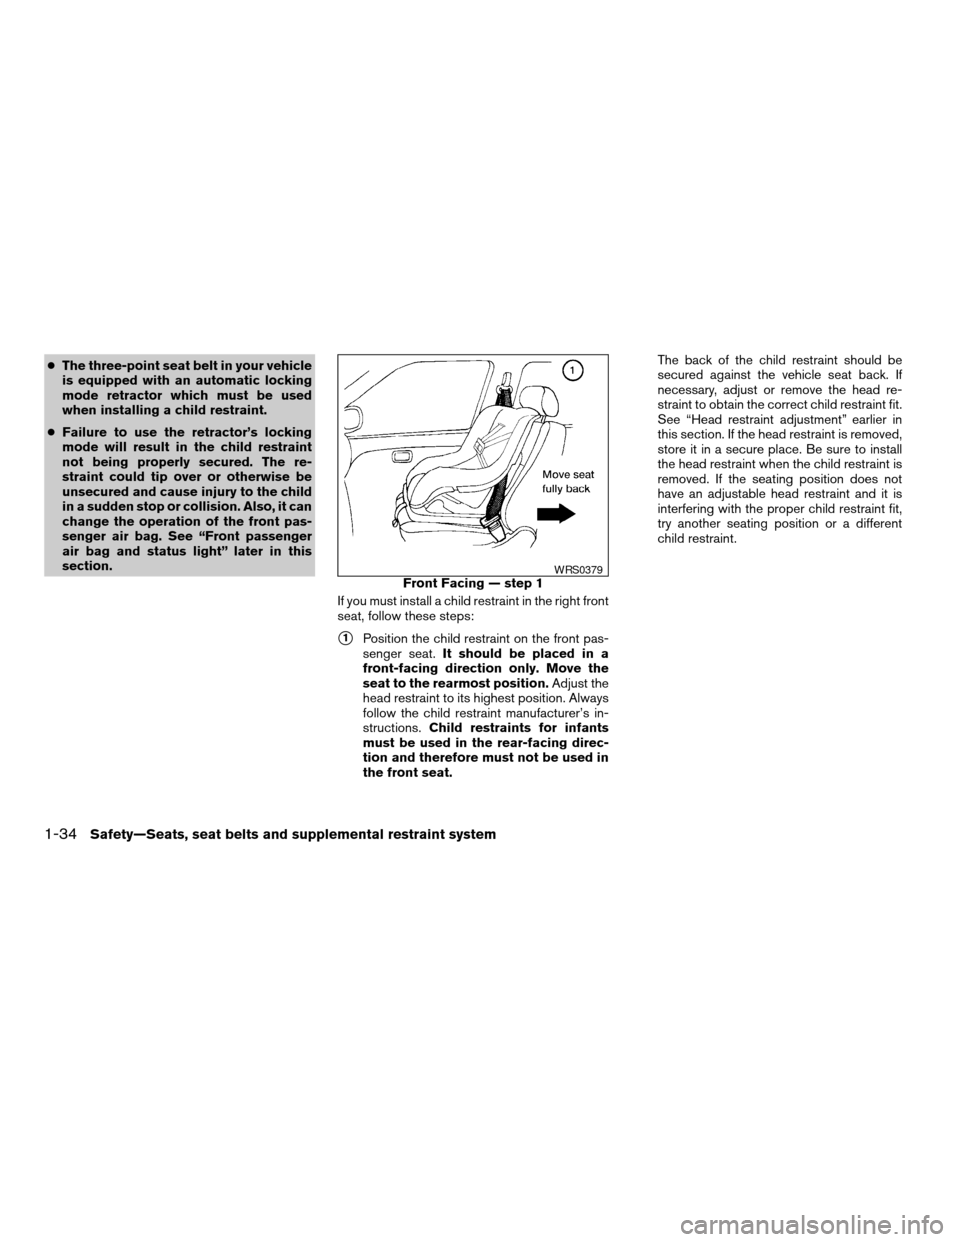
If you must install a child restraint in the right front
seat, follow these steps:
s1Position the child restraint on the front pas-
senger seat.It should be placed in a
front-facing direction only. Move the
seat to the rearmost position.Adjust the
head restraint to its highest position. Always
follow the child restraint manufacturer’s in-
structions.Child restraints for infants
must be used in the rear-facing direc-
tion and therefore must not be used in
the front seat.The back of the child restraint should be
secured against the vehicle seat back. If
necessary, adjust or remove the head re-
straint to obtain the correct child restraint fit.
See “Head restraint adjustment” earlier in
this section. If the head restraint is removed,
store it in a secure place. Be sure to install
the head restraint when the child restraint is
removed. If the seating position does not
have an adjustable head restraint and it is
interfering with the proper child restraint fit,
try another seating position or a different
child restraint.
Front Facing — step 1WRS0379
1-34Safety—Seats, seat belts and supplemental restraint system
ZREVIEW COPYÐ2006 Titan(tzw)
Owners ManualÐUSA_English(nna)
06/15/05Ðdebbie
X
Page 51 of 360

s2Route the seat belt tongue through the child
restraint and insert it into the buckle until you
hear and feel the latch engage.
Be sure to follow the child restraint manu-
facturer’s instructions for belt routing.s3Pull on the shoulder belt until all of the belt is
fully extended. At this time, the seat belt
retractor is in the automatic locking mode
(child restraint mode) . It reverts to emer-
gency locking mode when the seat belt is
fully retracted.s4Allow the seat belt to retract slightly. Pull up
on the shoulder belt to remove any slack in
the belt.
Front Facing — step 2
WRS0159
Front Facing — step 3
WRS0160
Front Facing — step 4
LRS0457
Safety—Seats, seat belts and supplemental restraint system1-35
ZREVIEW COPYÐ2006 Titan(tzw)
Owners ManualÐUSA_English(nna)
06/15/05Ðdebbie
X
Page 52 of 360
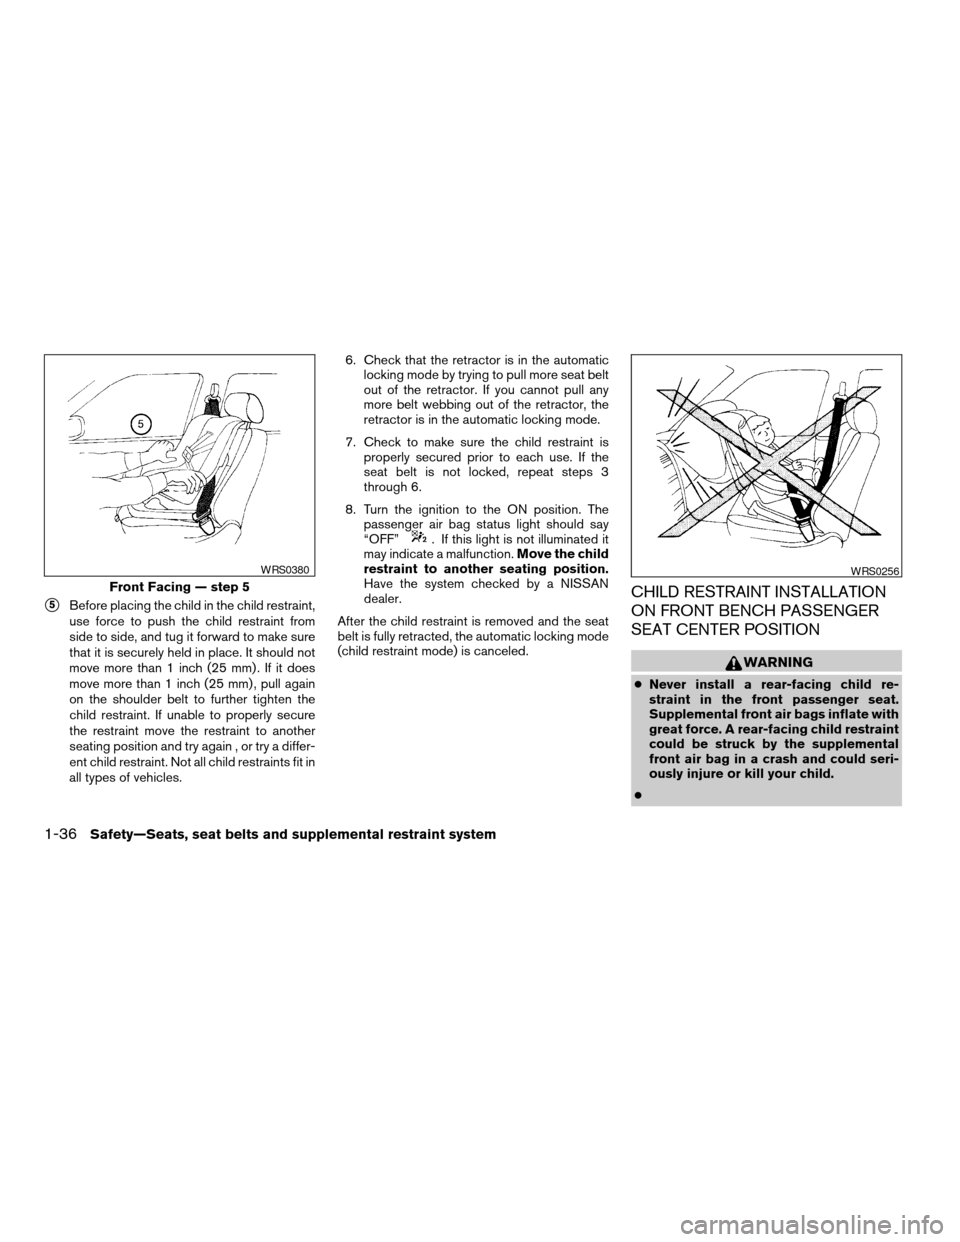
s5Before placing the child in the child restraint,
use force to push the child restraint from
side to side, and tug it forward to make sure
that it is securely held in place. It should not
move more than 1 inch (25 mm) . If it does
move more than 1 inch (25 mm) , pull again
on the shoulder belt to further tighten the
child restraint. If unable to properly secure
the restraint move the restraint to another
seating position and try again , or try a differ-
ent child restraint. Not all child restraints fit in
all types of vehicles.6. Check that the retractor is in the automatic
locking mode by trying to pull more seat belt
out of the retractor. If you cannot pull any
more belt webbing out of the retractor, the
retractor is in the automatic locking mode.
7. Check to make sure the child restraint is
properly secured prior to each use. If the
seat belt is not locked, repeat steps 3
through 6.
8. Turn the ignition to the ON position. The
passenger air bag status light should say
“OFF”
. If this light is not illuminated it
may indicate a malfunction.Move the child
restraint to another seating position.
Have the system checked by a NISSAN
dealer.
After the child restraint is removed and the seat
belt is fully retracted, the automatic locking mode
(child restraint mode) is canceled.
CHILD RESTRAINT INSTALLATION
ON FRONT BENCH PASSENGER
SEAT CENTER POSITION
WARNING
cNever install a rear-facing child re-
straint in the front passenger seat.
Supplemental front air bags inflate with
great force. A rear-facing child restraint
could be struck by the supplemental
front air bag in a crash and could seri-
ously injure or kill your child.
c
Front Facing — step 5
WRS0380WRS0256
1-36Safety—Seats, seat belts and supplemental restraint system
ZREVIEW COPYÐ2006 Titan(tzw)
Owners ManualÐUSA_English(nna)
07/01/05Ðmarlene
X
Page 53 of 360
cNISSAN recommends that child re-
straints be installed in the rear seat.
However, if you must install a forward
facing child restraint in the front center
bench seat, follow these instructions
carefully.
cA child restraint with a top tether strap
should not be used in the front passen-
ger seat.
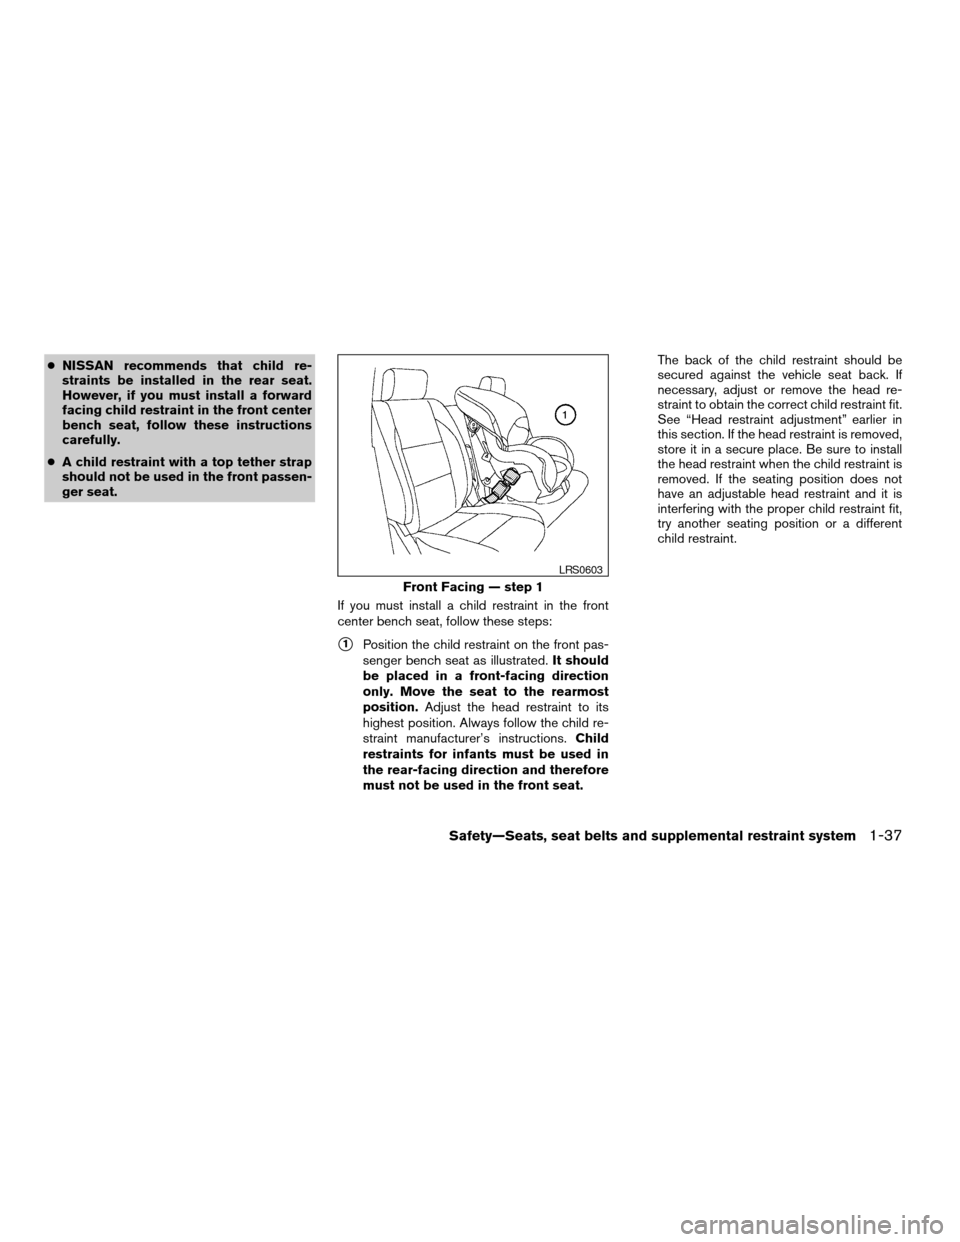
If you must install a child restraint in the front
center bench seat, follow these steps:
s1Position the child restraint on the front pas-
senger bench seat as illustrated.It should
be placed in a front-facing direction
only. Move the seat to the rearmost
position.Adjust the head restraint to its
highest position. Always follow the child re-
straint manufacturer’s instructions.Child
restraints for infants must be used in
the rear-facing direction and therefore
must not be used in the front seat.The back of the child restraint should be
secured against the vehicle seat back. If
necessary, adjust or remove the head re-
straint to obtain the correct child restraint fit.
See “Head restraint adjustment” earlier in
this section. If the head restraint is removed,
store it in a secure place. Be sure to install
the head restraint when the child restraint is
removed. If the seating position does not
have an adjustable head restraint and it is
interfering with the proper child restraint fit,
try another seating position or a different
child restraint.
Front Facing — step 1
LRS0603
Safety—Seats, seat belts and supplemental restraint system1-37
ZREVIEW COPYÐ2006 Titan(tzw)
Owners ManualÐUSA_English(nna)
06/15/05Ðdebbie
X
Page 54 of 360

s2Route the seat belt tongue through the child
restraint and insert it into the buckle until you
hear and feel the latch engage.
Be sure to follow the child restraint manu-
facturer’s instructions for belt routing.s3Remove all slack in the lap belt for a very tight
fit by pulling forcefully on the lap belt adjust-
ment.s4Before placing the child in the child restraint,
use force to push the child restraint from
side to side, and tug it forward to make sure
that it is securely held in place. It should not
move more than 1 inch (25 mm) . If it does
move more than 1 inch (25 mm) , pull again
on the shoulder belt to further tighten the
child restraint. If unable to properly secure
the restraint move the restraint to another
seating position and try again , or try a differ-
ent child restraint. Not all child restraints fit in
all types of vehicles.
Front Facing — step 2
LRS0604
Front Facing — step 3
LRS0605
Front Facing — step 4
LRS0606
1-38Safety—Seats, seat belts and supplemental restraint system
ZREVIEW COPYÐ2006 Titan(tzw)
Owners ManualÐUSA_English(nna)
06/15/05Ðdebbie
X
Page 58 of 360
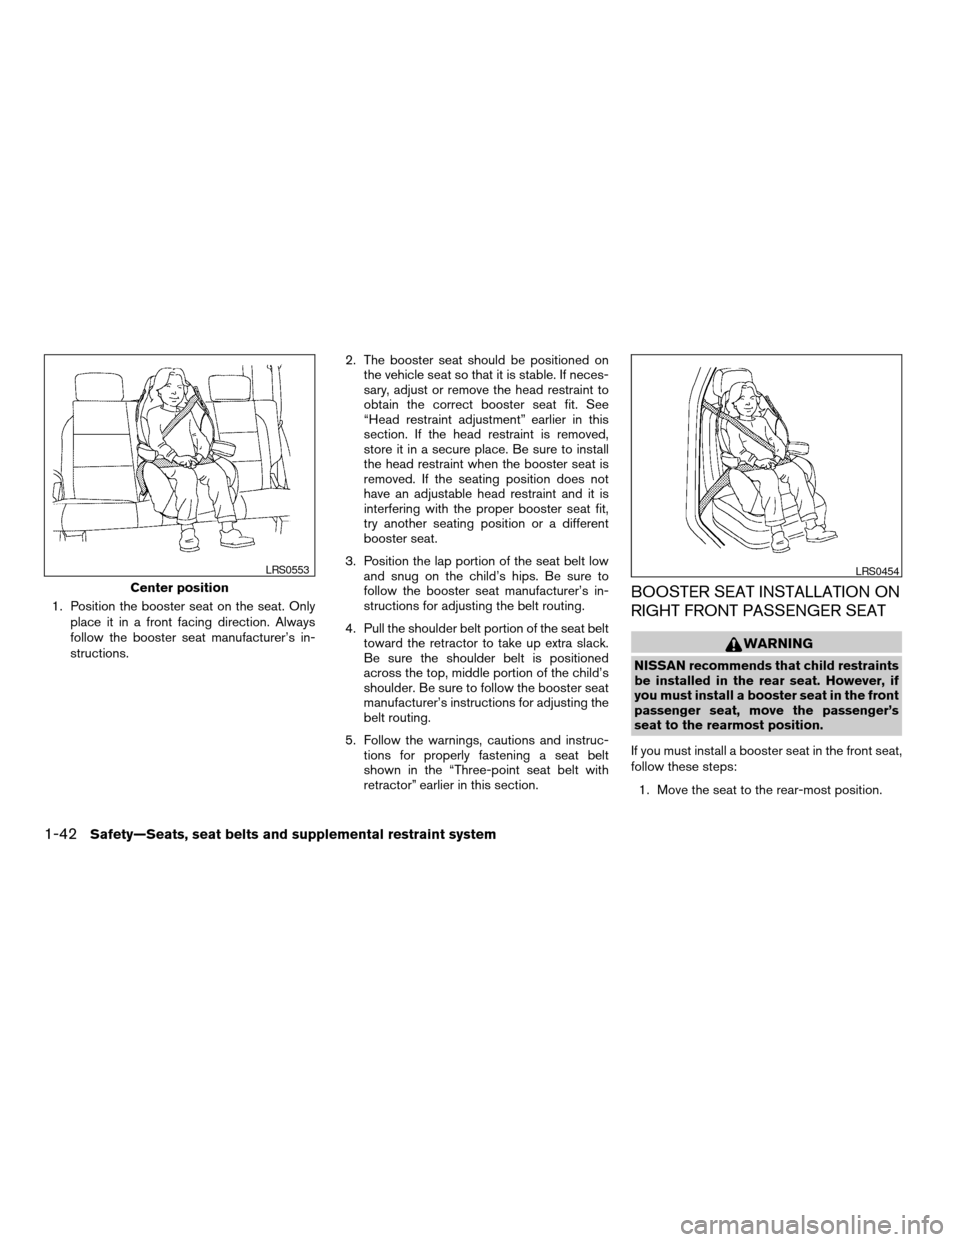
1. Position the booster seat on the seat. Only
place it in a front facing direction. Always
follow the booster seat manufacturer’s in-
structions.2. The booster seat should be positioned on
the vehicle seat so that it is stable. If neces-
sary, adjust or remove the head restraint to
obtain the correct booster seat fit. See
“Head restraint adjustment” earlier in this
section. If the head restraint is removed,
store it in a secure place. Be sure to install
the head restraint when the booster seat is
removed. If the seating position does not
have an adjustable head restraint and it is
interfering with the proper booster seat fit,
try another seating position or a different
booster seat.
3. Position the lap portion of the seat belt low
and snug on the child’s hips. Be sure to
follow the booster seat manufacturer’s in-
structions for adjusting the belt routing.
4. Pull the shoulder belt portion of the seat belt
toward the retractor to take up extra slack.
Be sure the shoulder belt is positioned
across the top, middle portion of the child’s
shoulder. Be sure to follow the booster seat
manufacturer’s instructions for adjusting the
belt routing.
5. Follow the warnings, cautions and instruc-
tions for properly fastening a seat belt
shown in the “Three-point seat belt with
retractor” earlier in this section.BOOSTER SEAT INSTALLATION ON
RIGHT FRONT PASSENGER SEAT
WARNING
NISSAN recommends that child restraints
be installed in the rear seat. However, if
you must install a booster seat in the front
passenger seat, move the passenger’s
seat to the rearmost position.
If you must install a booster seat in the front seat,
follow these steps:
1. Move the seat to the rear-most position.
Center position
LRS0553LRS0454
1-42Safety—Seats, seat belts and supplemental restraint system
ZREVIEW COPYÐ2006 Titan(tzw)
Owners ManualÐUSA_English(nna)
06/15/05Ðdebbie
X
Page 59 of 360

2. Position the booster seat on the seat. Only
place it in a front facing direction. Always
follow the booster seat manufacturer’s in-
structions.
3. The booster seat should be positioned on
the vehicle seat so that it is stable. If neces-
sary, adjust or remove the head restraint to
obtain the correct booster seat fit. See
“Head restraint adjustment” earlier in this
section. If the head restraint is removed,
store it in a secure place. Be sure to install
the head restraint when the booster seat is
removed. If the seating position does not
have an adjustable head restraint and it is
interfering with the proper booster seat fit,
try another seating position or a different
booster seat.
4. Position the lap portion of the seat belt low
and snug on the child’s hips. Be sure to
follow the booster seat manufacturer’s in-
structions for adjusting the belt routing.
5. Pull the shoulder belt portion of the seat belt
toward the retractor to take up extra slack.
Be sure the shoulder belt is positioned
across the top, middle portion of the child’s
shoulder. Be sure to follow the booster seat
manufacturer’s instructions for adjusting the
belt routing.6. Follow the warnings, cautions and instruc-
tions for properly fastening a seat belt
shown in the “Three-point seat belt with
retractor” earlier in this section.
7. When the ignition is turned to the ON posi-
tion, the passenger air bag status light may
or may not be illuminated, depending on the
size of the child and the type of booster seat
being used. See “NISSAN advanced air bag
system” later in this section.PRECAUTIONS ON
SUPPLEMENTAL RESTRAINT
SYSTEM
This Supplemental Restraint System (SRS) sec-
tion contains important information concerning
the driver and passenger supplemental front air
bags (NISSAN Advanced Air Bag System) ,
supplemental side air bags, curtain side-impact
and rollover air bags and pre-tensioner seat belts.
Supplemental front impact air bag system:
The NISSAN advanced air bag system can help
cushion the impact force to the head and chest of
the driver and right front, passenger in certain
frontal collisions.
Supplemental side-impact air bag system
(if so equipped):This system can help cushion
the impact force to the chest area of the driver
and right front, passenger in certain side impact
collisions. The supplemental side air bag is de-
signed to inflate on the side where the vehicle is
impacted.
Supplemental curtain side-impact and roll-
over air bag system (if so equipped):This
system can help cushion the impact force to the
head of occupants in front and rear outboard
seating positions in certain side impact or rollover
collisions. In a side impact, the curtain air bags
are designed to inflate on the side where the
SUPPLEMENTAL RESTRAINT
SYSTEM
Safety—Seats, seat belts and supplemental restraint system1-43
ZREVIEW COPYÐ2006 Titan(tzw)
Owners ManualÐUSA_English(nna)
06/15/05Ðdebbie
X
Page 106 of 360
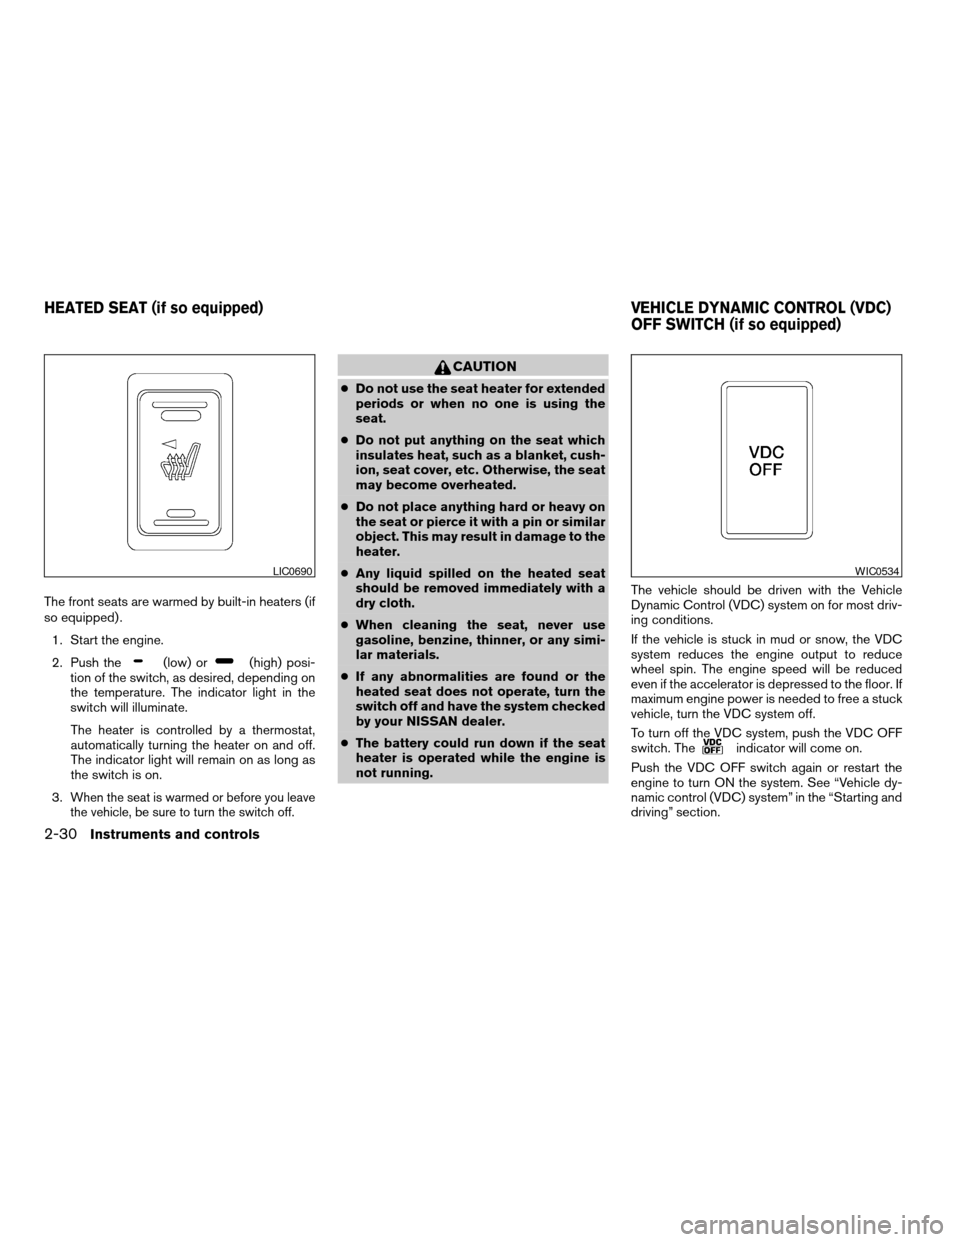
The front seats are warmed by built-in heaters (if
so equipped) .
1. Start the engine.
2. Push the
(low) or(high) posi-
tion of the switch, as desired, depending on
the temperature. The indicator light in the
switch will illuminate.
The heater is controlled by a thermostat,
automatically turning the heater on and off.
The indicator light will remain on as long as
the switch is on.
3.
When the seat is warmed or before you leave
the vehicle, be sure to turn the switch off.
CAUTION
cDo not use the seat heater for extended
periods or when no one is using the
seat.
cDo not put anything on the seat which
insulates heat, such as a blanket, cush-
ion, seat cover, etc. Otherwise, the seat
may become overheated.
cDo not place anything hard or heavy on
the seat or pierce it with a pin or similar
object. This may result in damage to the
heater.
cAny liquid spilled on the heated seat
should be removed immediately with a
dry cloth.
cWhen cleaning the seat, never use
gasoline, benzine, thinner, or any simi-
lar materials.
cIf any abnormalities are found or the
heated seat does not operate, turn the
switch off and have the system checked
by your NISSAN dealer.
cThe battery could run down if the seat
heater is operated while the engine is
not running.The vehicle should be driven with the Vehicle
Dynamic Control (VDC) system on for most driv-
ing conditions.
If the vehicle is stuck in mud or snow, the VDC
system reduces the engine output to reduce
wheel spin. The engine speed will be reduced
even if the accelerator is depressed to the floor. If
maximum engine power is needed to free a stuck
vehicle, turn the VDC system off.
To turn off the VDC system, push the VDC OFF
switch. The
indicator will come on.
Push the VDC OFF switch again or restart the
engine to turn ON the system. See “Vehicle dy-
namic control (VDC) system” in the “Starting and
driving” section.
LIC0690WIC0534
HEATED SEAT (if so equipped) VEHICLE DYNAMIC CONTROL (VDC)
OFF SWITCH (if so equipped)
2-30Instruments and controls
ZREVIEW COPYÐ2006 Titan(tzw)
Owners ManualÐUSA_English(nna)
06/15/05Ðdebbie
X