2006 NISSAN PATHFINDER warning
[x] Cancel search: warningPage 158 of 344
The “MAINTENANCE NOTICE” screen displays
each time the key is turned ON until one of the
following conditions are met:
c“RESET” is selected.
c“Display Maintenance and Notification” is
set OFF.
cthe maintenance interval is set again.
Tire pressure information
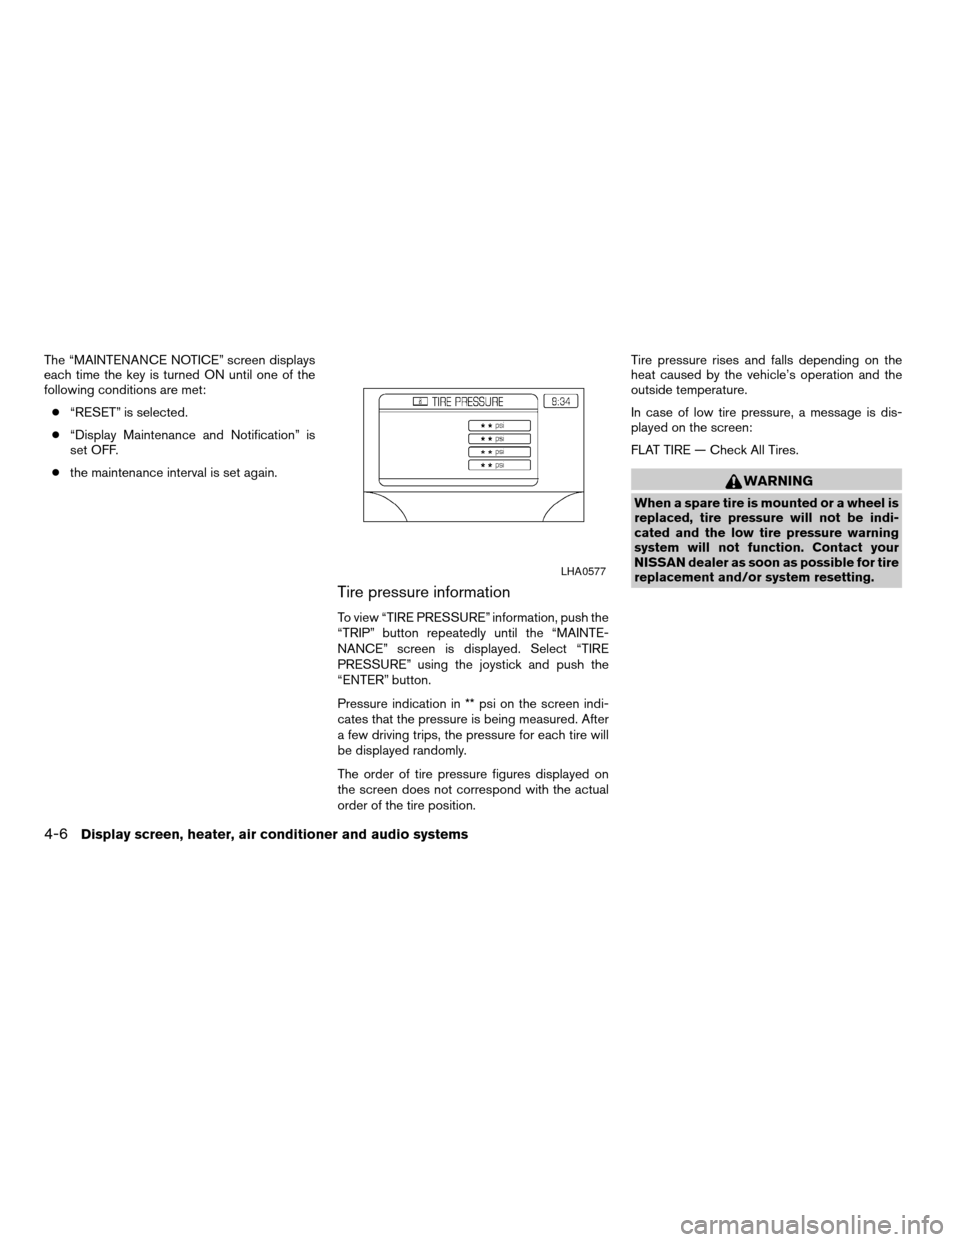
To view “TIRE PRESSURE” information, push the
“TRIP” button repeatedly until the “MAINTE-
NANCE” screen is displayed. Select “TIRE
PRESSURE” using the joystick and push the
“ENTER” button.
Pressure indication in ** psi on the screen indi-
cates that the pressure is being measured. After
a few driving trips, the pressure for each tire will
be displayed randomly.
The order of tire pressure figures displayed on
the screen does not correspond with the actual
order of the tire position.Tire pressure rises and falls depending on the
heat caused by the vehicle’s operation and the
outside temperature.
In case of low tire pressure, a message is dis-
played on the screen:
FLAT TIRE — Check All Tires.
WARNING
When a spare tire is mounted or a wheel is
replaced, tire pressure will not be indi-
cated and the low tire pressure warning
system will not function. Contact your
NISSAN dealer as soon as possible for tire
replacement and/or system resetting.
LHA0577
4-6Display screen, heater, air conditioner and audio systems
ZREVIEW COPYÐ2006 Pathfinder(pat)
Owners ManualÐUSA_English(nna)
08/19/05Ðrhinson
X
Page 165 of 344
WARNING
cThe air conditioner cooling function op-
erates only when the engine is running.
cDo not leave children or adults who
would normally require the assistance
of others alone in your vehicle. Pets
should also not be left alone. They
could accidentally injure themselves or
others through inadvertent operation of
the vehicle. Also, on hot, sunny days,
temperatures in a closed vehicle could
quickly become high enough to cause
severe or possibly fatal injuries to
people or animals.
cDo not use the recirculation mode for
long periods as it may cause the interior
air to become stale and the windows to
fog up.
cPositioning of the heater and/or air
conditioner controls should not be
done while driving so full attention may
be given to vehicle operation.
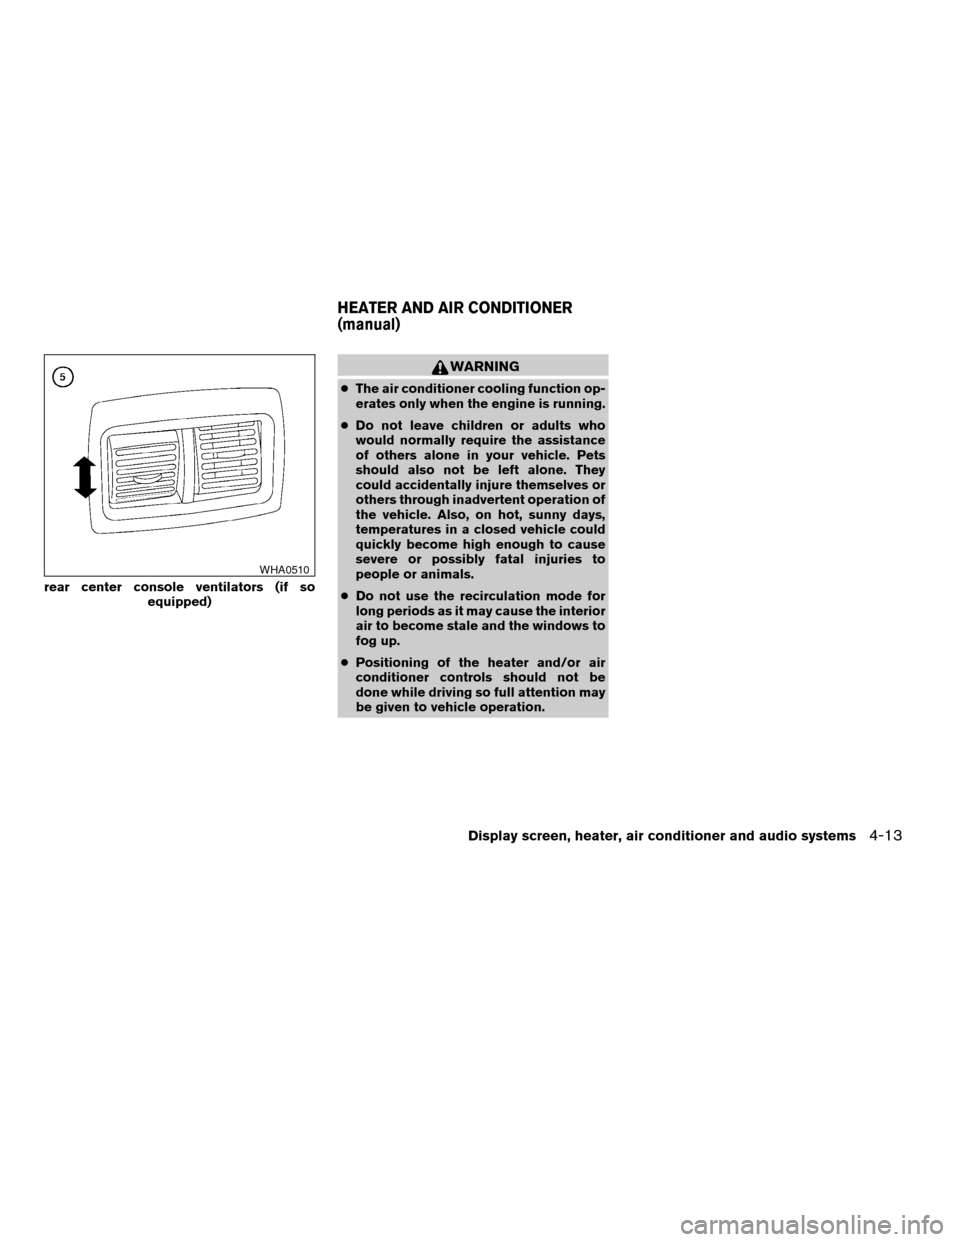
rear center console ventilators (if so
equipped)
WHA0510
HEATER AND AIR CONDITIONER
(manual)
Display screen, heater, air conditioner and audio systems4-13
ZREVIEW COPYÐ2006 Pathfinder(pat)
Owners ManualÐUSA_English(nna)
07/29/05Ðcathy
X
Page 173 of 344
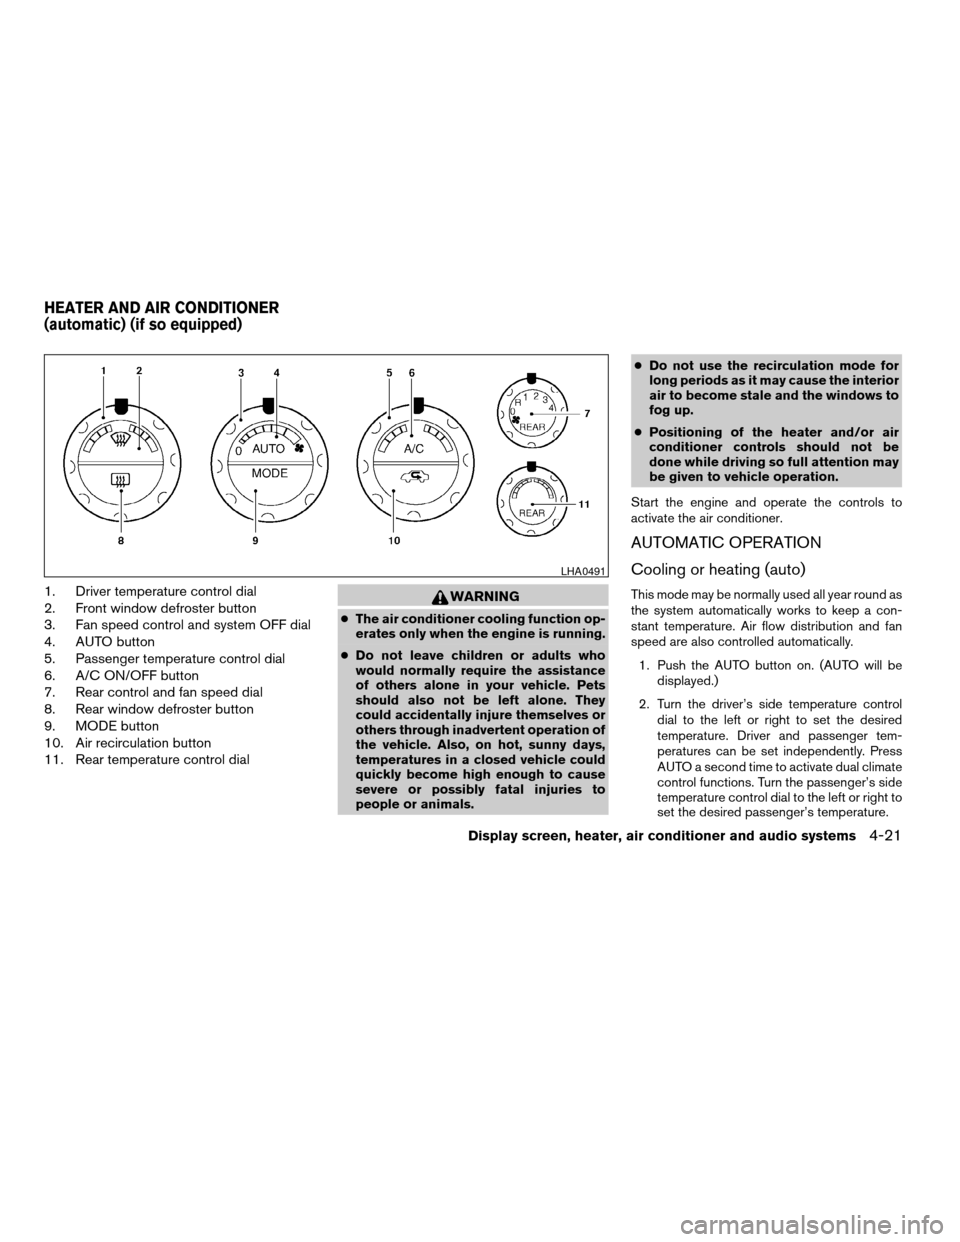
1. Driver temperature control dial
2. Front window defroster button
3. Fan speed control and system OFF dial
4. AUTO button
5. Passenger temperature control dial
6. A/C ON/OFF button
7. Rear control and fan speed dial
8. Rear window defroster button
9. MODE button
10. Air recirculation button
11. Rear temperature control dialWARNING
cThe air conditioner cooling function op-
erates only when the engine is running.
cDo not leave children or adults who
would normally require the assistance
of others alone in your vehicle. Pets
should also not be left alone. They
could accidentally injure themselves or
others through inadvertent operation of
the vehicle. Also, on hot, sunny days,
temperatures in a closed vehicle could
quickly become high enough to cause
severe or possibly fatal injuries to
people or animals.cDo not use the recirculation mode for
long periods as it may cause the interior
air to become stale and the windows to
fog up.
cPositioning of the heater and/or air
conditioner controls should not be
done while driving so full attention may
be given to vehicle operation.
Start the engine and operate the controls to
activate the air conditioner.
AUTOMATIC OPERATION
Cooling or heating (auto)
This mode may be normally used all year round as
the system automatically works to keep a con-
stant temperature. Air flow distribution and fan
speed are also controlled automatically.
1. Push the AUTO button on. (AUTO will be
displayed.)
2. Turn the driver’s side temperature control
dial to the left or right to set the desired
temperature. Driver and passenger tem-
peratures can be set independently. Press
AUTO a second time to activate dual climate
control functions. Turn the passenger’s side
temperature control dial to the left or right to
set the desired passenger’s temperature.
LHA0491
HEATER AND AIR CONDITIONER
(automatic) (if so equipped)
Display screen, heater, air conditioner and audio systems4-21
ZREVIEW COPYÐ2006 Pathfinder(pat)
Owners ManualÐUSA_English(nna)
07/29/05Ðcathy
X
Page 176 of 344
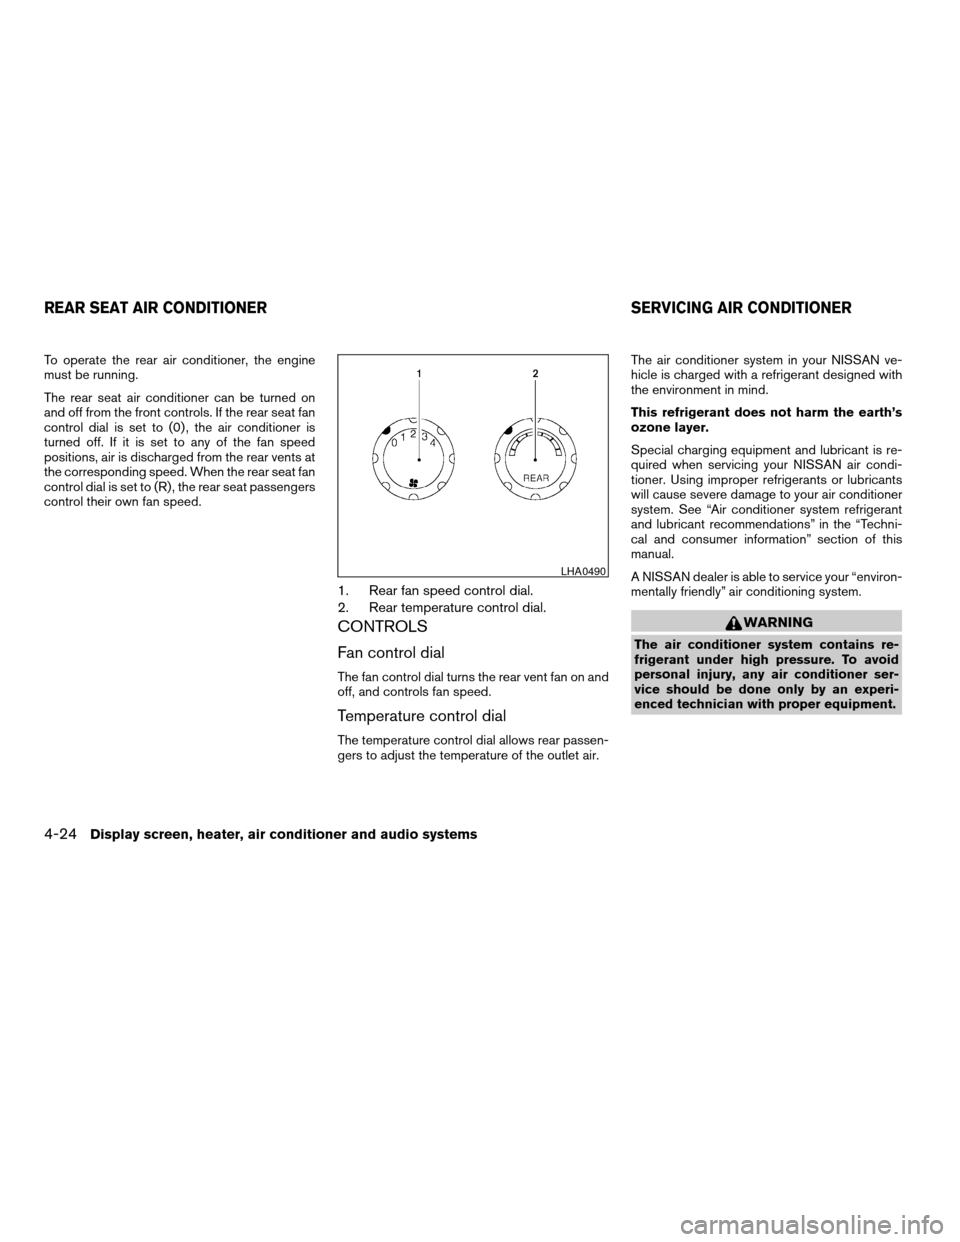
To operate the rear air conditioner, the engine
must be running.
The rear seat air conditioner can be turned on
and off from the front controls. If the rear seat fan
control dial is set to (0) , the air conditioner is
turned off. If it is set to any of the fan speed
positions, air is discharged from the rear vents at
the corresponding speed. When the rear seat fan
control dial is set to (R) , the rear seat passengers
control their own fan speed.
1. Rear fan speed control dial.
2. Rear temperature control dial.
CONTROLS
Fan control dial
The fan control dial turns the rear vent fan on and
off, and controls fan speed.
Temperature control dial
The temperature control dial allows rear passen-
gers to adjust the temperature of the outlet air.The air conditioner system in your NISSAN ve-
hicle is charged with a refrigerant designed with
the environment in mind.
This refrigerant does not harm the earth’s
ozone layer.
Special charging equipment and lubricant is re-
quired when servicing your NISSAN air condi-
tioner. Using improper refrigerants or lubricants
will cause severe damage to your air conditioner
system. See “Air conditioner system refrigerant
and lubricant recommendations” in the “Techni-
cal and consumer information” section of this
manual.
A NISSAN dealer is able to service your “environ-
mentally friendly” air conditioning system.
WARNING
The air conditioner system contains re-
frigerant under high pressure. To avoid
personal injury, any air conditioner ser-
vice should be done only by an experi-
enced technician with proper equipment.
LHA0490
REAR SEAT AIR CONDITIONER SERVICING AIR CONDITIONER
4-24Display screen, heater, air conditioner and audio systems
ZREVIEW COPYÐ2006 Pathfinder(pat)
Owners ManualÐUSA_English(nna)
07/29/05Ðcathy
X
Page 184 of 344
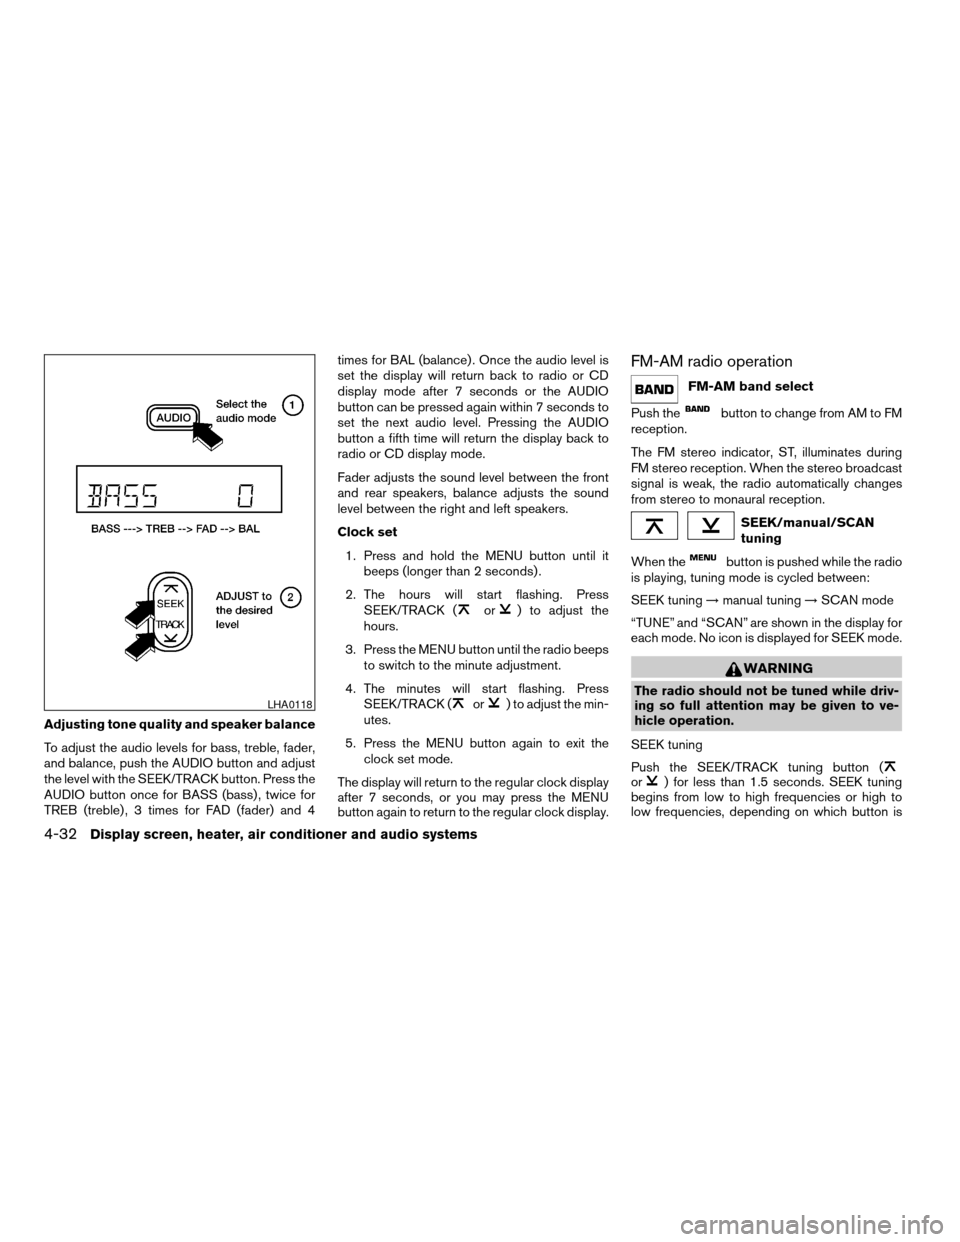
Adjusting tone quality and speaker balance
To adjust the audio levels for bass, treble, fader,
and balance, push the AUDIO button and adjust
the level with the SEEK/TRACK button. Press the
AUDIO button once for BASS (bass) , twice for
TREB (treble) , 3 times for FAD (fader) and 4times for BAL (balance) . Once the audio level is
set the display will return back to radio or CD
display mode after 7 seconds or the AUDIO
button can be pressed again within 7 seconds to
set the next audio level. Pressing the AUDIO
button a fifth time will return the display back to
radio or CD display mode.
Fader adjusts the sound level between the front
and rear speakers, balance adjusts the sound
level between the right and left speakers.
Clock set
1. Press and hold the MENU button until it
beeps (longer than 2 seconds) .
2. The hours will start flashing. Press
SEEK/TRACK (
or) to adjust the
hours.
3. Press the MENU button until the radio beeps
to switch to the minute adjustment.
4. The minutes will start flashing. Press
SEEK/TRACK (
or) to adjust the min-
utes.
5. Press the MENU button again to exit the
clock set mode.
The display will return to the regular clock display
after 7 seconds, or you may press the MENU
button again to return to the regular clock display.
FM-AM radio operation
FM-AM band select
Push the
button to change from AM to FM
reception.
The FM stereo indicator, ST, illuminates during
FM stereo reception. When the stereo broadcast
signal is weak, the radio automatically changes
from stereo to monaural reception.
SEEK/manual/SCAN
tuning
When the
button is pushed while the radio
is playing, tuning mode is cycled between:
SEEK tuning!manual tuning!SCAN mode
“TUNE” and “SCAN” are shown in the display for
each mode. No icon is displayed for SEEK mode.
WARNING
The radio should not be tuned while driv-
ing so full attention may be given to ve-
hicle operation.
SEEK tuning
Push the SEEK/TRACK tuning button (
or) for less than 1.5 seconds. SEEK tuning
begins from low to high frequencies or high to
low frequencies, depending on which button is
LHA0118
4-32Display screen, heater, air conditioner and audio systems
ZREVIEW COPYÐ2006 Pathfinder(pat)
Owners ManualÐUSA_English(nna)
07/29/05Ðcathy
X
Page 189 of 344
select the following display modes: Folder num-
berÃ!Track titleÃ!Folder titleÃ!Disc title
Ã!Disc number.
Once a display mode is selected press the AU-
DIO knob again to store the setting.
cFolder number mode displays the folder
number and the file number of the folder
currently being played.
cDisc number mode displays the number se-
lected disc and the track that is currently
being played.
cTrack title mode displays the ID3 track title of
the MP3 file.
cDisc title mode displays the ID3 disc title of
the MP3 file.
cFolder title mode displays the folder name
given to the MP3 folder.
Display satellite radio display mode (if so
equipped)
To change the text displayed when listening to
satellite radio (if so equipped) press the DISP
button. The DISP button will scroll through the
broadcasted information as follows: NameÃ!
TitleÃ!Current display mode.
To change the default display mode push the
tune knob to display mode and rotate the knob toselect the following display modes: Channel
numberÃ!Channel nameÃ!NameÃ!
Title. Once the display mode is selected press
the tune knob again to store the setting. If the
tuning knob is not pressed after 8 seconds the
display will refresh with the last selected display
mode setting.
cChannel number mode displays the channel
number of the selected satellite radio sta-
tion.
cChannel name mode displays the channel
name of the selected satellite radio station.
cName mode displays the name of the artist,
host or weather condition of the selected
satellite radio station.
cTitle mode displays the song title, show
name, or temperature of the selected satel-
lite radio station.
FM/AM/SAT radio operation
FM/AM/SAT band select:
Pushing the RADIO button will change the band
as follows:
AMÃ!FM or SAT (Satellite, if so equipped)
When the RADIO button is pushed while the
ignition switch is in the ACC or ON position, the
radio will come on at the station last played.The last station played will also come on when
the POWER/VOLUME control knob is de-
pressed to ON.
No satellite radio reception is available when the
RADIO button is pressed to access satellite radio
stations unless optional satellite receiver and an-
tenna are installed and an XMTor SIRIUS™ sat-
ellite radio service subscription is active. Satellite
radio can only be installed in vehicles that were
factory pre-wired for satellite radio. Satellite radio
is not available in Alaska, Hawaii and Guam. If
satellite radio is not operational then the RADIO
button is used to toggle between AM and FM
bands.
If a compact disc is playing when the RADIO
button is pushed, the compact disc will automati-
cally be turned off and the last radio station
played will come on.
The FM stereo indicator ST will glow during FM
stereo reception. When the stereo broadcast
signal is weak, the radio will automatically change
from stereo to monaural reception.
CAT FOLDER (Tuning):
WARNING
The radio should not be tuned while driv-
ing so full attention may be given to ve-
hicle operation.
Display screen, heater, air conditioner and audio systems4-37
ZREVIEW COPYÐ2006 Pathfinder(pat)
Owners ManualÐUSA_English(nna)
07/29/05Ðcathy
X
Page 195 of 344
cFolder title mode displays the folder name
given to the MP3 folder.
Display satellite radio display mode (if so
equipped)
To change the text displayed when listening to
satellite radio (if so equipped) press the DISP
button. The DISP button will scroll through the
broadcasted information as follows: NameÃ!
TitleÃ!Current display mode.
To change the default display mode push the
tune knob to display mode and rotate the knob to
select the following display modes: Channel
numberÃ!Channel nameÃ!NameÃ!
Title. Once the display mode is selected press
the tune knob again to store the setting. If the
tuning knob is not pressed after 8 seconds the
display will refresh with the last selected display
mode setting.
cChannel number mode displays the channel
number of the selected satellite radio sta-
tion.
cChannel name mode displays the channel
name of the selected satellite radio station.
cName mode displays the name of the artist,
host or weather condition of the selected
satellite radio station.cTitle mode displays the song title, show
name, or temperature of the selected satel-
lite radio station.
Pause/mute button:
To mute or pause the audio sound, push the
PAUSE/MUTE button. Radio mute will flash in the
display screen.
To release the mute or pause, push the button
again.
FM/AM/SAT radio operation
FM/AM/SAT band select:
Pushing the RADIO button will change the band
as follows:
AMÃ!FM or SAT (Satellite, if so equipped)
When the RADIO button is pushed while the
ignition switch is in the ACC or ON position, the
radio will come on at the station last played.
The last station played will also come on when
the POWER/VOLUME control knob is de-
pressed to ON.
No satellite radio reception is available when the
RADIO button is pressed to access satellite radio
stations unless optional satellite receiver and an-
tenna are installed and an XMTor SIRIUS™ sat-
ellite radio service subscription is active. Satellite
radio can only be installed in vehicles that werefactory pre-wired for satellite radio. Satellite radio
is not available in Alaska, Hawaii and Guam. If
satellite radio is not operational then the RADIO
button is used to toggle between AM and FM
bands.
If a compact disc is playing when the RADIO
button is pushed, the compact disc will automati-
cally be turned off and the last radio station
played will come on.
The FM stereo indicator ST will glow during FM
stereo reception. When the stereo broadcast
signal is weak, the radio will automatically change
from stereo to monaural reception.
CAT FOLDER (Tuning):
WARNING
The radio should not be tuned while driv-
ing so full attention may be given to ve-
hicle operation.
To manually tune the radio, push the CAT
FOLDER tune button (
or) or turn
the tuning knob to right or left.
To move quickly through the channels, hold either
the
orbutton down for more than
1.5 seconds.
Display screen, heater, air conditioner and audio systems4-43
ZREVIEW COPYÐ2006 Pathfinder(pat)
Owners ManualÐUSA_English(nna)
07/29/05Ðcathy
X
Page 199 of 344
MODE select switch
Push the mode select switch to change the mode
in the following sequence: PRESET A, PRESET
B or PRESET C radio stations, CD and DVD (if so
equipped) .
Volume control switch
Push the volume control switch up or down to
increase or decrease the volume.
Tuning
Memory change (radio):
Push the tuning switch (
or) for less
than 1.5 seconds to change presets.
Seek tuning (radio):
Push the tuning switch (
or) for
more than 1.5 seconds to seek the next or previ-
ous radio station.
Next/Previous track (CD):
Push the tuning switch
orfor less
than 1.5 seconds to return to the beginning of the
present track or skip to the next track. Push
several times to skip back or skip through tracks.Change disc (CD) (if so equipped):
Push the tuning switch
orfor more
than 1.5 seconds to change the playing disc up
or down.
ANTENNA
Window antenna
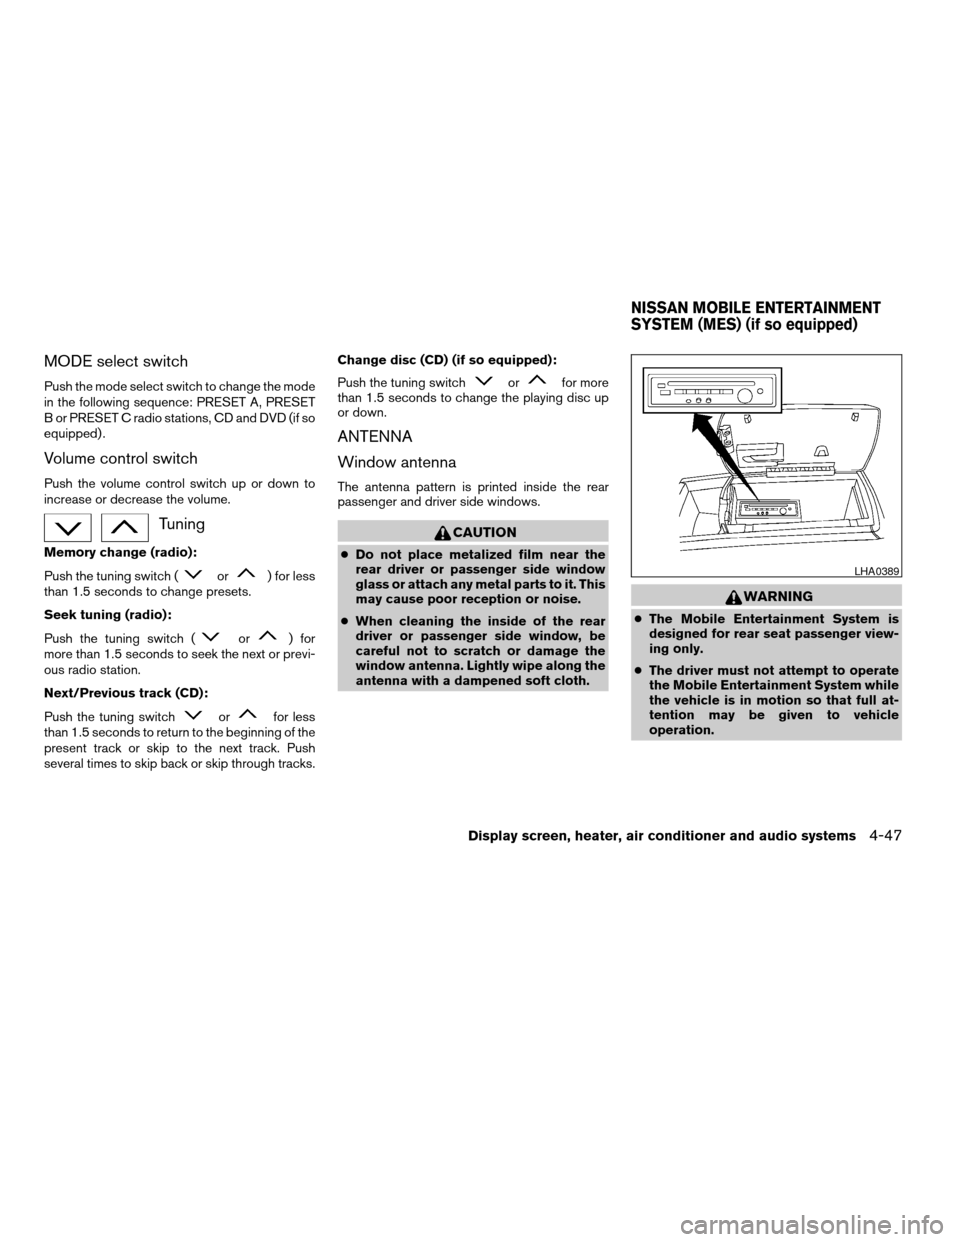
The antenna pattern is printed inside the rear
passenger and driver side windows.
CAUTION
cDo not place metalized film near the
rear driver or passenger side window
glass or attach any metal parts to it. This
may cause poor reception or noise.
cWhen cleaning the inside of the rear
driver or passenger side window, be
careful not to scratch or damage the
window antenna. Lightly wipe along the
antenna with a dampened soft cloth.
WARNING
cThe Mobile Entertainment System is
designed for rear seat passenger view-
ing only.
cThe driver must not attempt to operate
the Mobile Entertainment System while
the vehicle is in motion so that full at-
tention may be given to vehicle
operation.
LHA0389
NISSAN MOBILE ENTERTAINMENT
SYSTEM (MES) (if so equipped)
Display screen, heater, air conditioner and audio systems4-47
ZREVIEW COPYÐ2006 Pathfinder(pat)
Owners ManualÐUSA_English(nna)
07/29/05Ðcathy
X