2006 NISSAN FRONTIER ECO mode
[x] Cancel search: ECO modePage 135 of 336

WARNING
cDo not use the HomeLinkTUniversal
Transceiver with any garage door
opener that lacks safety stop and re-
verse features as required by federal
safety standards. (These standards be-
came effective for opener models
manufactured after April 1, 1982) . A ga-
rage door opener which cannot detect
an object in the path of a closing garage
door and then automatically stop and
reverse, does not meet current federal
safety standards. Using a garage door
opener without these features in-
creases the risk of serious injury or
death.
cDuring the programming procedure
your garage door or security gate will
open and close (if the transmitter is
within range) . Make sure that people or
objects are clear of the garage door,
gate, etc. that you are programming.
cYour vehicle’s engine should be turned
off while programming the HomeLinkT
Universal Transceiver.
PROGRAMMING HOMELINKT
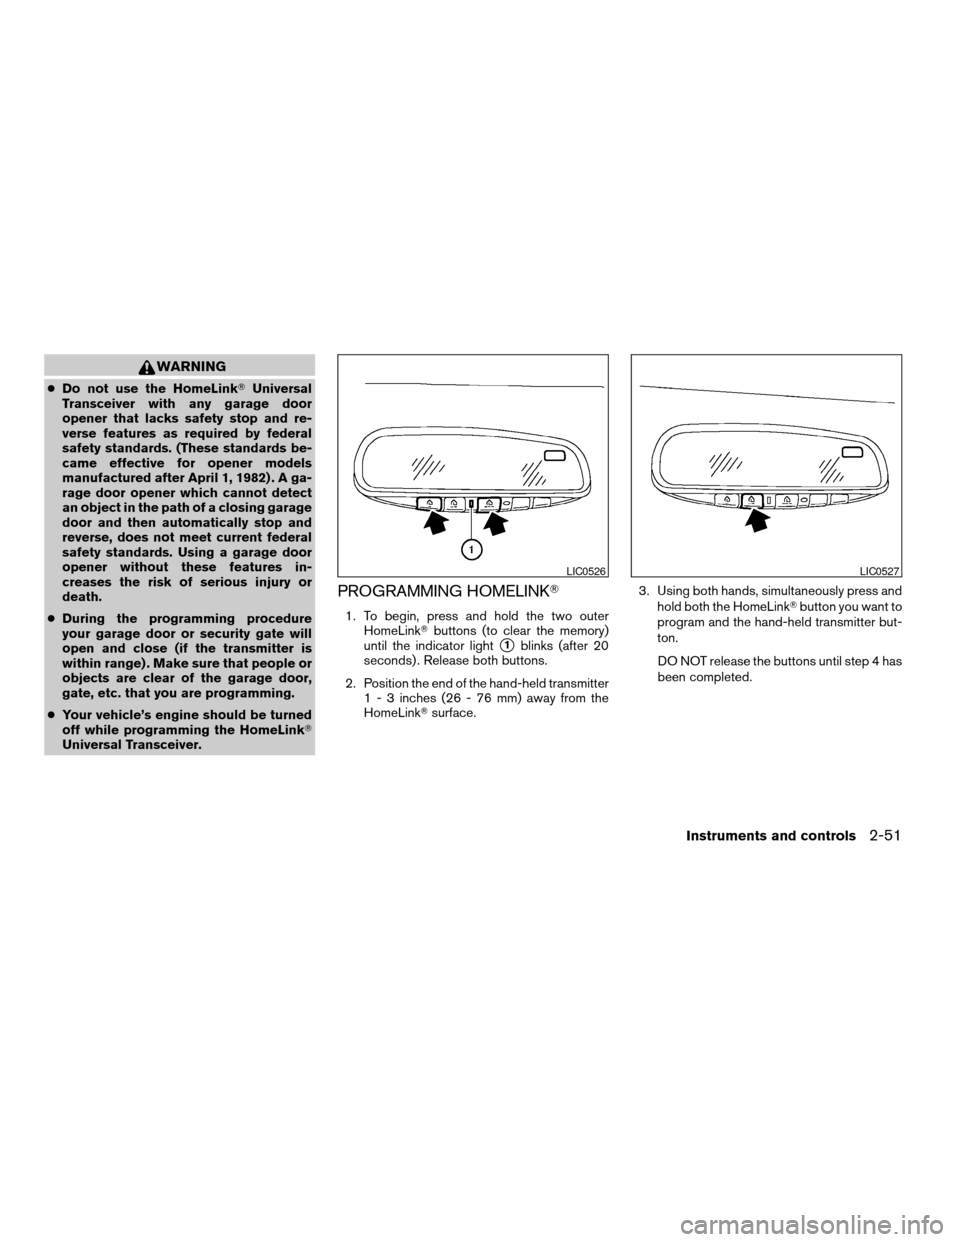
1. To begin, press and hold the two outer
HomeLinkTbuttons (to clear the memory)
until the indicator light
s1blinks (after 20
seconds) . Release both buttons.
2. Position the end of the hand-held transmitter
1 - 3 inches (26 - 76 mm) away from the
HomeLinkTsurface.3. Using both hands, simultaneously press and
hold both the HomeLinkTbutton you want to
program and the hand-held transmitter but-
ton.
DO NOT release the buttons until step 4 has
been completed.
LIC0526LIC0527
Instruments and controls2-51
ZREVIEW COPYÐ2006 Truck/Frontier(d22)
Owners ManualÐUSA_English(nna)
10/17/05Ðdebbie
X
Page 136 of 336

4. Hold down both buttons until the indicator
light on the HomeLinkTflashes, changing
from a “slow blink” to a “rapidly flashing
blink”. This could take up to 90 seconds.
When the indicator light flashes rapidly, both
buttons may be released. The rapidly flash-
ing light indicates successful programming.
To activate the garage door or other pro-
grammed device, press and hold the pro-
grammed HomeLinkTbutton — releasing
when the device begins to activate.
5. If the indicator light on the HomeLinkTblinks
rapidly for 2 seconds and then turns solid,
HomeLinkThas picked up a “rolling code”
garage door opener signal. You will need to
proceed with the next steps to train the
HomeLinkTto complete the programming
which may require a ladder and another per-
son for convenience.
6. Press and release the “smart” or “learn” pro-
gram button located on the garage door
opener’s motor to activate the “training
mode”. This button is usually located near
the antenna wire that hangs down from the
motor. If the wire originates from under a
light lens, you will need to remove the lens to
access the program button.NOTE:
Once you have pressed and released the
program button on the garage door open-
er’s motor and the “training light” is lit, you
have 30 seconds in which to perform step 7.
Use the help of a second person for conve-
nience to assist when performing this step.
7. Within 30 seconds of pressing and releas-
ing the garage door opener program button,
quickly and firmly press and release the
HomeLinkTbutton you’ve just programmed.
Press and release the HomeLinkTbutton up
to 3 times to complete the training.
8. Your HomeLinkTbutton should now be pro-
grammed. (To program the remaining
HomeLinkTbuttons for additional door or
gate openers, follow steps 2-8 only.)
NOTE:
Do not repeat step 1 unless you want to
“clear” all previously programmed
HomeLinkTbuttons.
If you have any questions or are having difficulty
programming your HomeLinkTbuttons, refer to
the HomeLinkTweb site at: www.homelink.com
or call 1-800-355-3515.PROGRAMMING HOMELINKTFOR
CANADIAN CUSTOMERS
Prior to 1992, D.O.C. regulations required hand-
held transmitters to stop transmitting after 2 sec-
onds. To program your hand-held transmitter to
HomeLinkT, continue to press and hold the
HomeLinkTbutton (note steps2-4under “Pro-
gramming HomeLinkT”) while you press and re-
press (“cycle”) your hand-held transmitters every
2 seconds until the indicator light flashes rapidly
(indicating successful programming) .
NOTE:
When programming a garage door opener,
etc., it is advised to unplug the device dur-
ing the “cycling” process to prevent pos-
sible damage to the garage door opener
components.
OPERATING THE HOMELINKT
UNIVERSAL TRANSCEIVER
The HomeLinkTUniversal Transceiver (once pro-
grammed) may now be used to activate the ga-
rage door, etc. To operate, simply press the ap-
propriate programmed HomeLinkTUniversal
Transceiver button. The red indicator light will
illuminate while the signal is being transmitted.
2-52Instruments and controls
ZREVIEW COPYÐ2006 Truck/Frontier(d22)
Owners ManualÐUSA_English(nna)
10/17/05Ðdebbie
X
Page 144 of 336

CHILD SAFETY REAR DOOR LOCK
(Crew Cab models only)
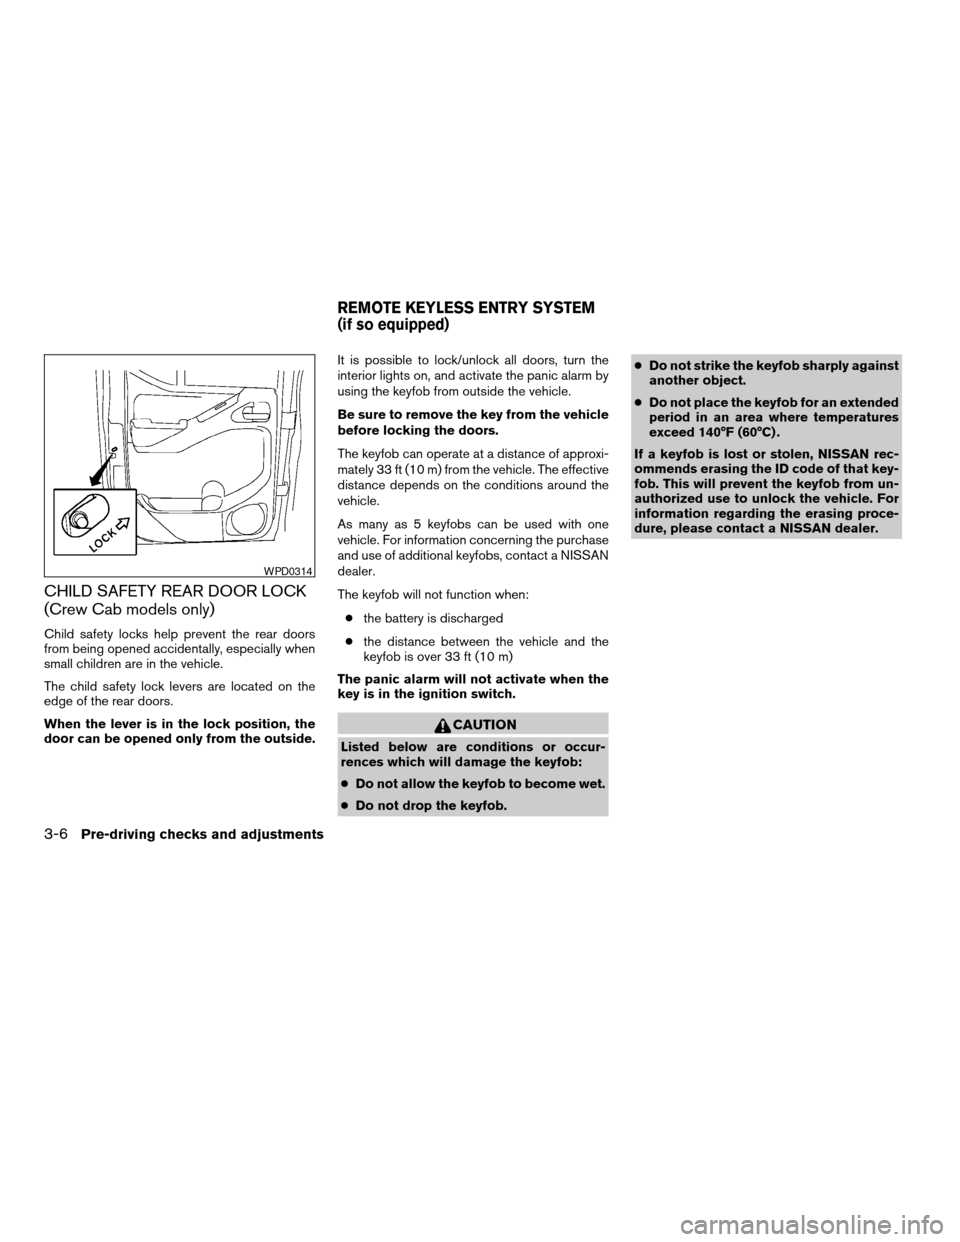
Child safety locks help prevent the rear doors
from being opened accidentally, especially when
small children are in the vehicle.
The child safety lock levers are located on the
edge of the rear doors.
When the lever is in the lock position, the
door can be opened only from the outside.It is possible to lock/unlock all doors, turn the
interior lights on, and activate the panic alarm by
using the keyfob from outside the vehicle.
Be sure to remove the key from the vehicle
before locking the doors.
The keyfob can operate at a distance of approxi-
mately 33 ft (10 m) from the vehicle. The effective
distance depends on the conditions around the
vehicle.
As many as 5 keyfobs can be used with one
vehicle. For information concerning the purchase
and use of additional keyfobs, contact a NISSAN
dealer.
The keyfob will not function when:
cthe battery is discharged
cthe distance between the vehicle and the
keyfob is over 33 ft (10 m)
The panic alarm will not activate when the
key is in the ignition switch.
CAUTION
Listed below are conditions or occur-
rences which will damage the keyfob:
cDo not allow the keyfob to become wet.
cDo not drop the keyfob.cDo not strike the keyfob sharply against
another object.
cDo not place the keyfob for an extended
period in an area where temperatures
exceed 140°F (60°C) .
If a keyfob is lost or stolen, NISSAN rec-
ommends erasing the ID code of that key-
fob. This will prevent the keyfob from un-
authorized use to unlock the vehicle. For
information regarding the erasing proce-
dure, please contact a NISSAN dealer.
WPD0314
REMOTE KEYLESS ENTRY SYSTEM
(if so equipped)
3-6Pre-driving checks and adjustments
ZREVIEW COPYÐ2006 Truck/Frontier(d22)
Owners ManualÐUSA_English(nna)
10/17/05Ðdebbie
X
Page 158 of 336

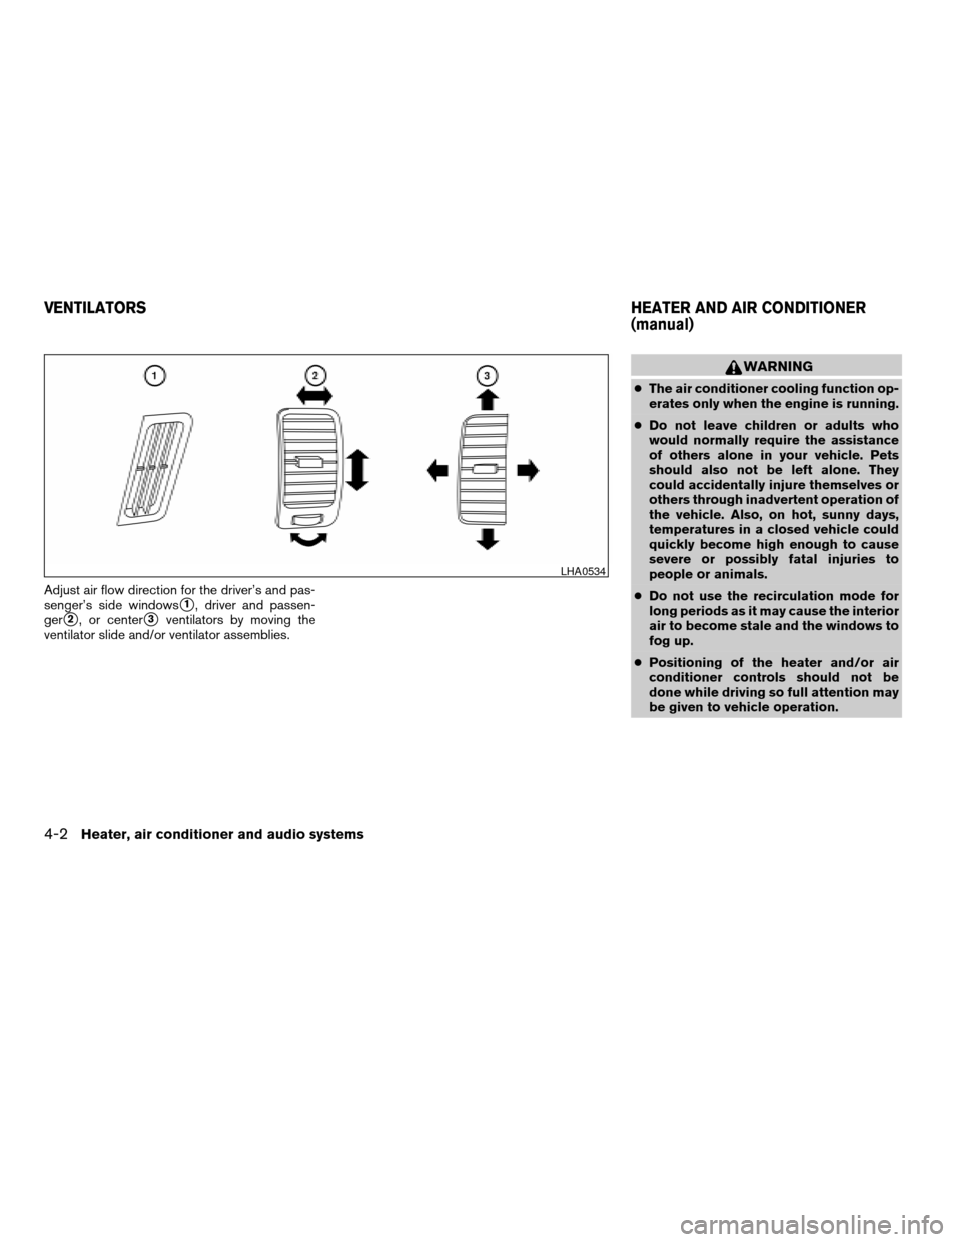
Adjust air flow direction for the driver’s and pas-
senger’s side windows
s1, driver and passen-
ger
s2, or centers3ventilators by moving the
ventilator slide and/or ventilator assemblies.
WARNING
cThe air conditioner cooling function op-
erates only when the engine is running.
cDo not leave children or adults who
would normally require the assistance
of others alone in your vehicle. Pets
should also not be left alone. They
could accidentally injure themselves or
others through inadvertent operation of
the vehicle. Also, on hot, sunny days,
temperatures in a closed vehicle could
quickly become high enough to cause
severe or possibly fatal injuries to
people or animals.
cDo not use the recirculation mode for
long periods as it may cause the interior
air to become stale and the windows to
fog up.
cPositioning of the heater and/or air
conditioner controls should not be
done while driving so full attention may
be given to vehicle operation.
LHA0534
VENTILATORSHEATER AND AIR CONDITIONER
(manual)
4-2Heater, air conditioner and audio systems
ZREVIEW COPYÐ2006 Truck/Frontier(d22)
Owners ManualÐUSA_English(nna)
10/17/05Ðdebbie
X
Page 173 of 336

Adjusting tone quality and speaker balance
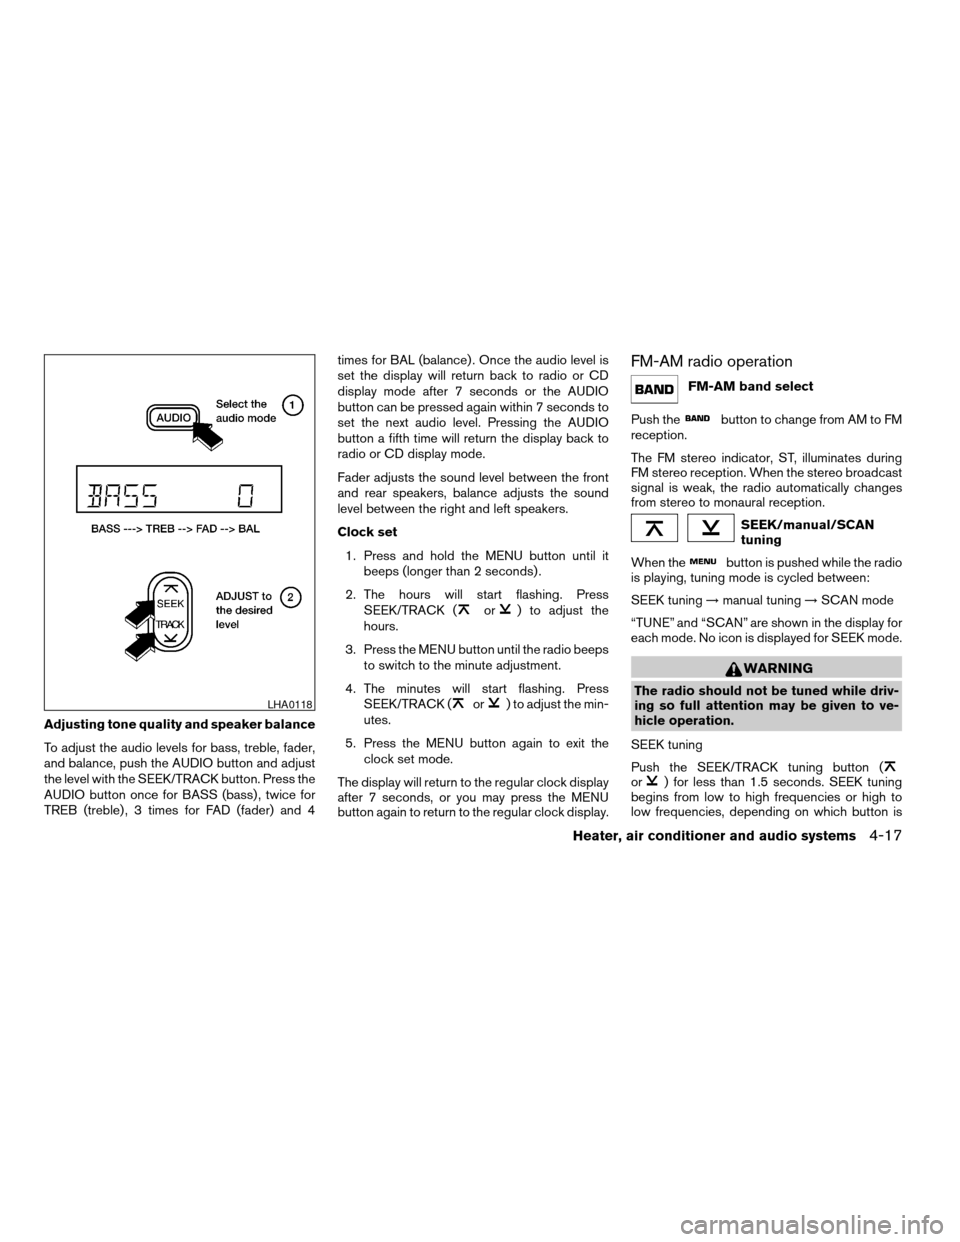
To adjust the audio levels for bass, treble, fader,
and balance, push the AUDIO button and adjust
the level with the SEEK/TRACK button. Press the
AUDIO button once for BASS (bass) , twice for
TREB (treble) , 3 times for FAD (fader) and 4times for BAL (balance) . Once the audio level is
set the display will return back to radio or CD
display mode after 7 seconds or the AUDIO
button can be pressed again within 7 seconds to
set the next audio level. Pressing the AUDIO
button a fifth time will return the display back to
radio or CD display mode.
Fader adjusts the sound level between the front
and rear speakers, balance adjusts the sound
level between the right and left speakers.
Clock set
1. Press and hold the MENU button until it
beeps (longer than 2 seconds) .
2. The hours will start flashing. Press
SEEK/TRACK (
or) to adjust the
hours.
3. Press the MENU button until the radio beeps
to switch to the minute adjustment.
4. The minutes will start flashing. Press
SEEK/TRACK (
or) to adjust the min-
utes.
5. Press the MENU button again to exit the
clock set mode.
The display will return to the regular clock display
after 7 seconds, or you may press the MENU
button again to return to the regular clock display.
FM-AM radio operation
FM-AM band select
Push the
button to change from AM to FM
reception.
The FM stereo indicator, ST, illuminates during
FM stereo reception. When the stereo broadcast
signal is weak, the radio automatically changes
from stereo to monaural reception.
SEEK/manual/SCAN
tuning
When the
button is pushed while the radio
is playing, tuning mode is cycled between:
SEEK tuning!manual tuning!SCAN mode
“TUNE” and “SCAN” are shown in the display for
each mode. No icon is displayed for SEEK mode.
WARNING
The radio should not be tuned while driv-
ing so full attention may be given to ve-
hicle operation.
SEEK tuning
Push the SEEK/TRACK tuning button (
or) for less than 1.5 seconds. SEEK tuning
begins from low to high frequencies or high to
low frequencies, depending on which button is
LHA0118
Heater, air conditioner and audio systems4-17
ZREVIEW COPYÐ2006 Truck/Frontier(d22)
Owners ManualÐUSA_English(nna)
10/17/05Ðdebbie
X
Page 174 of 336

pressed, and stops at the next broadcasting sta-
tion. If using thebutton, once the highest
broadcasting station is reached, the radio contin-
ues in the SEEK mode at the lowest broadcasting
station. If using the
button, once the lowest
broadcasting station is reached, the radio contin-
ues in the SEEK mode at the highest broadcast-
ing station.
Manual tuning
Use the
andbuttons for manual
tuning. To move quickly through the channels,
hold either of the tuning buttons down.
SCAN tuning
Push and hold the SEEK/TRACK tuning button
(
or) for more than 1.5 seconds.
SCAN illuminates in the display window, and the
radio station blinks. SCAN tuning begins from
low to high frequencies or high to low frequen-
cies, depending on which button is pressed.
SCAN tuning stops at each broadcasting station
for 5 seconds. When scanning, SCAN is solid
and the radio station blinks. When temporarily
stopped on a station, SCAN blinks and the sta-
tion display is solid. Pushing the button again
during this 5 second period stops SCAN tuning
and the radio remains tuned to that station.Station memory operations
Each preset mode (A, B or C) has 6 presets,
capable of storing any combination of AM and FM
stations.Press the PRESET ABC button to change be-
tween the presets:
A!B!C
The radio displays icon A, B or C to indicate
which set of presets is active.
To store a radio station in a preset:
1. Select the desired preset by pressing PRE-
SET ABC.
2. Tune to the desired station.
3. Press the desired station select button for
more than 3 seconds. For example, in the
illustrations, ch2 is to be memorized. The
radio mutes when the select button is
pushed.
4. When the indicator illuminates in the display
and the sound resumes, memorizing is com-
plete.
5. Other station select buttons can be set in
the same manner.
If the battery cable is disconnected, or if the radio
fuse opens, the radio memory is canceled. In that
case, reset the desired stations.
LHA0119
4-18Heater, air conditioner and audio systems
ZREVIEW COPYÐ2006 Truck/Frontier(d22)
Owners ManualÐUSA_English(nna)
10/17/05Ðdebbie
X
Page 177 of 336

Audio main operation
POWER/VOLUME control:
Turn the ignition key to ACC or ON, and then
push the POWER/VOLUME control knob while
the system is off to call up the mode (radio or CD)
which was playing immediately before the system
was turned off.
To turn the system off, press the
POWER/VOLUME control knob.
Turn the POWER/VOLUME control knob to ad-
just the volume.
This vehicle may be equipped with speed sensi-
tive control volume (SSV) for audio. The audio
volume changes as the driving speed changes.
AUDIO knob (BASS, MIDRANGE, TREBLE,
FADE, BALANCE and SSV if so equipped):
Press the AUDIO knob to change the mode as
follows:
BASS!MID!TREBLE!FADE!BALANCE
!SSV (if so equipped)
To adjust Bass, Mid (Midrange) , Treble, Fade and
Balance, press the AUDIO knob until the desired
mode appears in the display. Turn the Tuning
knob to adjust Bass and Treble to the desired
level. You can also use the Tuning knob to adjust
Fader and Balance modes. Fader adjusts thesound level between the front and rear speakers
and Balance adjusts the sound between the right
and left speakers.
To change the SSV mode to OFF, LOW, MID or
HIGH, turn the Tuning knob to the right or left.
Once you have adjusted the sound quality to the
desired level, press the AUDIO knob repeatedly
until the radio or CD display reappears. Other-
wise, the radio or CD display will automatically
reappear after about 10 seconds.
Clock set
1. Press the CLOCK button until it beeps
(>1.5 seconds) .
2. The hours will start flashing. Press CAT
FOLDER (
or) or SEEK TRACK
(or) to adjust the hours.
3. Press the CLOCK button again to switch to
the minute adjustment.
4. Press CAT FOLDER (
or)or
SEEK-TRACK (or) to adjust
the minutes.
5. Press the CLOCK button again to exit the
clock set mode.
The display will return to the regular clock display
after 7 seconds, or you may press the CLOCK
button again to return to the regular clock display.DISP (display) button:
This DISP (display) button will show text about
MP3, SAT or CD information in the audio display.
CD display mode
To change the text displayed while playing a CD
with text, press the DISP button. The DISP button
will allow you to scroll through CD text as follows:
Disc titleÃ!Track title.
To change the default display mode press the
AUDIO knob repeatedly until DISPLAY MODE
appears on the display, then rotate the knob to
select the following display modes: Disc titleÃ!
Track titleÃ!Track number.
Once the display mode is selected press the
AUDIO knob again to store the setting. If the
AUDIO knob is not pressed within 8 seconds the
display will refresh with the last selected display
mode setting.
cTrack title mode displays the title of the se-
lected CD track.
cDisk title mode displays the title of the CD
being played.
cTrack number mode displays the number
selected disc and the track that is currently
being played on the disk.
Heater, air conditioner and audio systems4-21
ZREVIEW COPYÐ2006 Truck/Frontier(d22)
Owners ManualÐUSA_English(nna)
10/17/05Ðdebbie
X
Page 178 of 336

MP3 display mode
To change the text displayed when listening to an
MP3 with MP3 text (when CD with text is being
used) , press the DISP button. The DISP button
will scroll through the CD text as follows: Disc
titleÃ!Track titleÃ!Folder title.
To change the default display mode press the
AUDIO knob repeatedly until DISPLAY MODE
appears on the display, then rotate the knob to
select the following display modes: Folder num-
berÃ!Track titleÃ!Folder titleÃ!Disc title
Ã!Disc number.
Once a display mode is selected press the AU-
DIO knob again to store the setting.
cFolder number mode displays the folder
number and the file number of the folder
currently being played.
cDisc number mode displays the number se-
lected disc and the track that is currently
being played.
cTrack title mode displays the ID3 track title of
the MP3 file.
cDisc title mode displays the ID3 disc title of
the MP3 file.
cFolder title mode displays the folder name
given to the MP3 folder.Display satellite radio display mode (if so
equipped)
To change the text displayed when listening to
satellite radio (if so equipped) press the DISP
button. The DISP button will scroll through the
broadcasted information as follows: NameÃ!
TitleÃ!Current display mode.
To change the default display mode push the
tune knob to display mode and rotate the knob to
select the following display modes: Channel
numberÃ!Channel nameÃ!NameÃ!
Title. Once the display mode is selected press
the tune knob again to store the setting. If the
tuning knob is not pressed after 8 seconds the
display will refresh with the last selected display
mode setting.
cChannel number mode displays the channel
number of the selected satellite radio sta-
tion.
cChannel name mode displays the channel
name of the selected satellite radio station.
cName mode displays the name of the artist,
host or weather condition of the selected
satellite radio station.
cTitle mode displays the song title, show
name, or temperature of the selected satel-
lite radio station.FM/AM/SAT radio operation
FM/AM/SAT band select:
Pushing the RADIO button will change the band
as follows:
AMÃ!FM or SAT (Satellite, if so equipped)
When the RADIO button is pushed while the
ignition switch is in the ACC or ON position, the
radio will come on at the station last played.
The last station played will also come on when
the POWER/VOLUME control knob is de-
pressed to ON.
No satellite radio reception is available when the
RADIO button is pressed to access satellite radio
stations unless optional satellite receiver and an-
tenna are installed and an XMTor SIRIUS™ sat-
ellite radio service subscription is active. Satellite
radio can only be installed in vehicles that were
factory pre-wired for satellite radio. Satellite radio
is not available in Alaska, Hawaii and Guam. If
satellite radio is not operational then the RADIO
button is used to toggle between AM and FM
bands.
If a compact disc is playing when the RADIO
button is pushed, the compact disc will automati-
cally be turned off and the last radio station
played will come on.
4-22Heater, air conditioner and audio systems
ZREVIEW COPYÐ2006 Truck/Frontier(d22)
Owners ManualÐUSA_English(nna)
10/17/05Ðdebbie
X