2006 NISSAN FRONTIER warning
[x] Cancel search: warningPage 281 of 336
Wheel nut tightening torque:
98 ft-lb (133 N·m)
The wheel nuts must be kept tight-
ened to specifications at all times. It
is recommended that wheel nuts be
tightened to specification at each
tire rotation interval.
WARNING
cAfter rotating the tires, check and
adjust the tire pressure.
cRetighten the wheel nuts when
the vehicle has been driven for
600 miles (1,000 km) (also in
cases of a flat tire, etc.) .
cDo not include the spare tire in
the tire rotation.
cFor additional information re-
garding tires, refer to “Important
Tire Safety Information” (US) or
“Tire Safety Information”
(Canada) in the Warranty Infor-
mation Booklet.
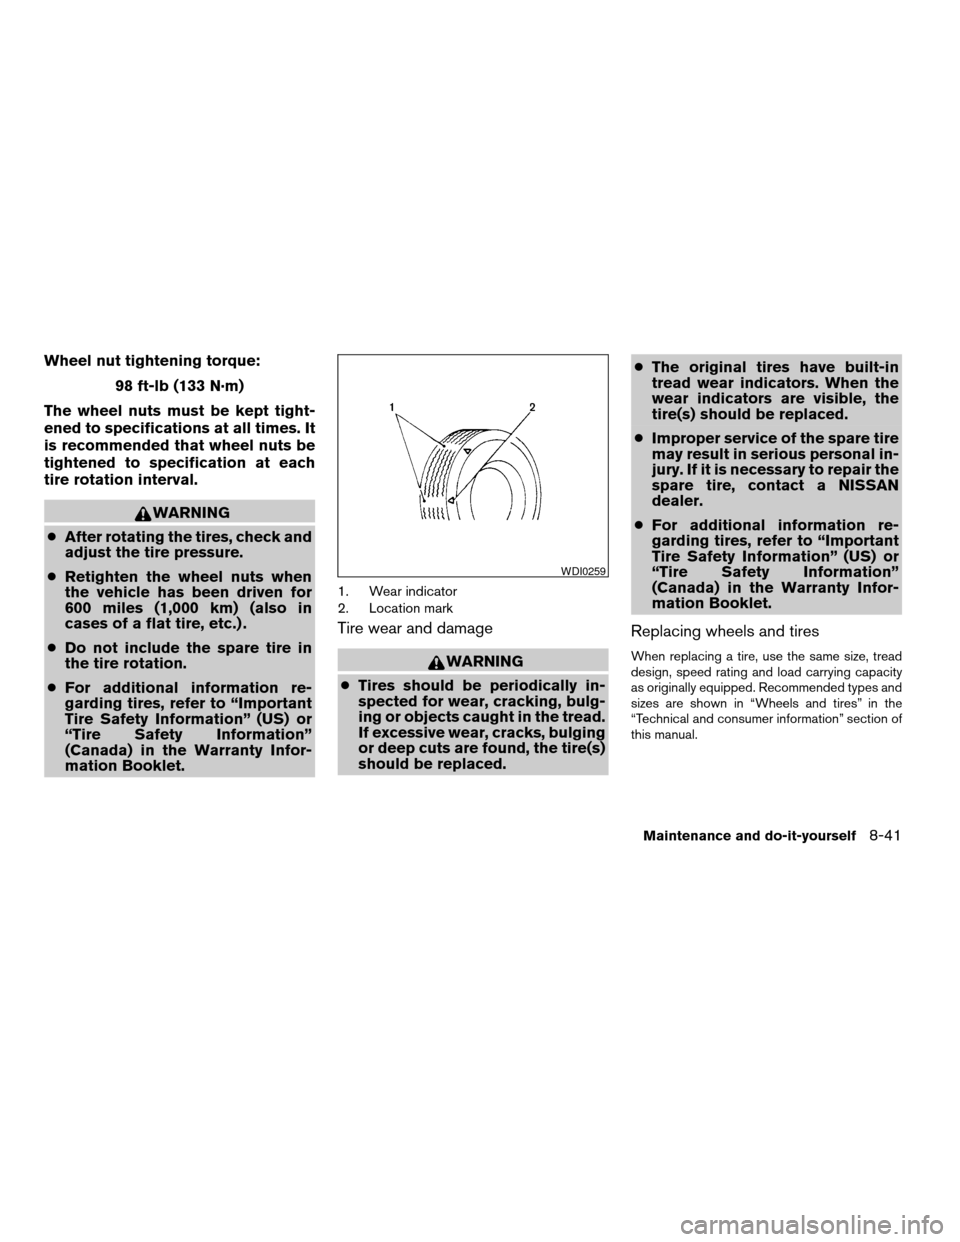
1. Wear indicator
2. Location mark
Tire wear and damage
WARNING
cTires should be periodically in-
spected for wear, cracking, bulg-
ing or objects caught in the tread.
If excessive wear, cracks, bulging
or deep cuts are found, the tire(s)
should be replaced.cThe original tires have built-in
tread wear indicators. When the
wear indicators are visible, the
tire(s) should be replaced.
cImproper service of the spare tire
may result in serious personal in-
jury. If it is necessary to repair the
spare tire, contact a NISSAN
dealer.
cFor additional information re-
garding tires, refer to “Important
Tire Safety Information” (US) or
“Tire Safety Information”
(Canada) in the Warranty Infor-
mation Booklet.
Replacing wheels and tires
When replacing a tire, use the same size, tread
design, speed rating and load carrying capacity
as originally equipped. Recommended types and
sizes are shown in “Wheels and tires” in the
“Technical and consumer information” section of
this manual.
WDI0259
Maintenance and do-it-yourself8-41
ZREVIEW COPYÐ2006 Truck/Frontier(d22)
Owners ManualÐUSA_English(nna)
10/17/05Ðdebbie
X
Page 282 of 336
WARNING
cThe use of tires other than those recom-
mended or the mixed use of tires of
different brands, construction (bias,
bias-belted or radial) , or tread patterns
can adversely affect the ride, braking,
handling, ground clearance, body-to-
tire clearance, tire chain clearance,
speedometer calibration, headlight aim
and bumper height. Some of these ef-
fects may lead to accidents and could
result in serious personal injury.
cIf the wheels are changed for any rea-
son, always replace with wheels which
have the same off-set dimension.
Wheels of a different off-set could
cause premature tire wear, degrade ve-
hicle handling characteristics and/or
interference with the brake
discs/drums. Such interference can
lead to decreased braking efficiency
and/or early brake pad/shoe wear. Re-
fer to “Wheels and tires” in the “Techni-
cal and consumer information” section
of this manual for wheel off-set
dimensions.cWhen a spare tire is mounted or a wheel
is replaced, tire pressure will not be
indicated, the TPMS will not function
and the low tire pressure warning light
will flash. Contact your NISSAN dealer
as soon as possible for tire replacement
and/or system resetting.
cReplacing tires with those not originally
specified by NISSAN could affect the
proper operation of the TPMS.
cDo not install a deformed wheel or tire
even if it has been repaired. Such
wheels or tires could have structural
damage and could fail without warning.
cThe use of retread tires is not
recommended.
cFor additional information regarding
tires, refer to “Important Tire Safety In-
formation” (US) or “Tire Safety Informa-
tion” (Canada) in the Warranty Informa-
tion Booklet.
Four-wheel drive models
CAUTION
Always use tires of the same type, size,
brand, construction (bias, bias-belted or
radial) , and tread pattern on all four
wheels. Failure to do so may result in a
circumference difference between tires
on the front and rear axles which will
cause excessive tire wear and may dam-
age the transmission, transfer case and
differential gears.
If excessive tire wear is found, it is recommended
that all four tires be replaced with tires of the
same size, brand, construction and tread pattern.
The tire pressure and wheel alignment should
also be checked and corrected as necessary.
Contact a NISSAN dealer.
Wheel balance
Unbalanced wheels may affect vehicle handling
and tire life. Even with regular use, wheels can get
out of balance. Therefore, they should be bal-
anced as required.
Wheel balance service should be per-
formed with the wheels off the vehicle.
Spin balancing the wheels on the vehicle
could lead to mechanical damage.
8-42Maintenance and do-it-yourself
ZREVIEW COPYÐ2006 Truck/Frontier(d22)
Owners ManualÐUSA_English(nna)
10/17/05Ðdebbie
X
Page 296 of 336
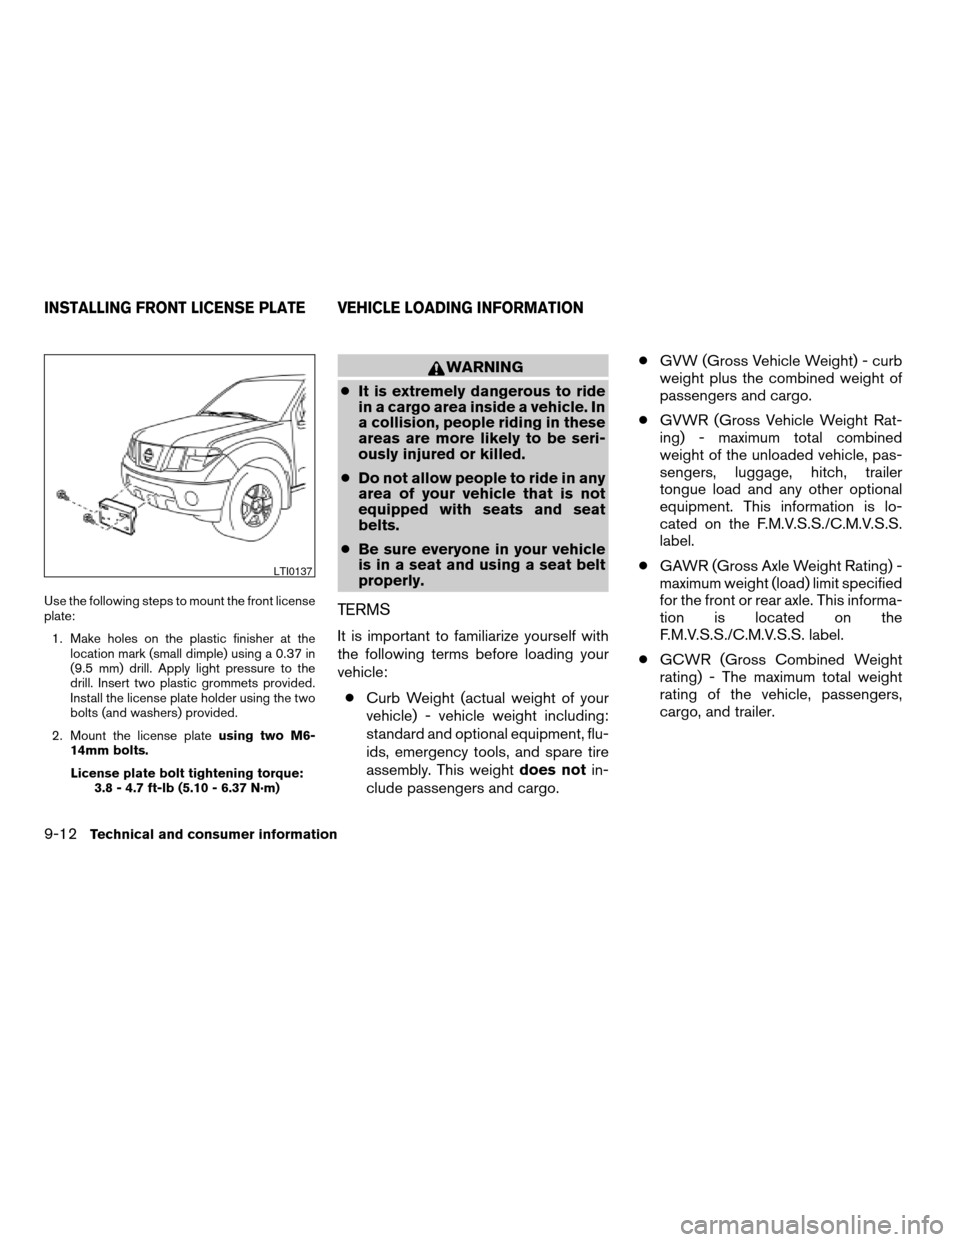
Use the following steps to mount the front license
plate:
1. Make holes on the plastic finisher at the
location mark (small dimple) using a 0.37 in
(9.5 mm) drill. Apply light pressure to the
drill. Insert two plastic grommets provided.
Install the license plate holder using the two
bolts (and washers) provided.
2. Mount the license plateusing two M6-
14mm bolts.
License plate bolt tightening torque:
3.8 - 4.7 ft-lb (5.10 - 6.37 N·m)
WARNING
cIt is extremely dangerous to ride
in a cargo area inside a vehicle. In
a collision, people riding in these
areas are more likely to be seri-
ously injured or killed.
cDo not allow people to ride in any
area of your vehicle that is not
equipped with seats and seat
belts.
cBe sure everyone in your vehicle
is in a seat and using a seat belt
properly.
TERMS
It is important to familiarize yourself with
the following terms before loading your
vehicle:
cCurb Weight (actual weight of your
vehicle) - vehicle weight including:
standard and optional equipment, flu-
ids, emergency tools, and spare tire
assembly. This weightdoes notin-
clude passengers and cargo.cGVW (Gross Vehicle Weight) - curb
weight plus the combined weight of
passengers and cargo.
cGVWR (Gross Vehicle Weight Rat-
ing) - maximum total combined
weight of the unloaded vehicle, pas-
sengers, luggage, hitch, trailer
tongue load and any other optional
equipment. This information is lo-
cated on the F.M.V.S.S./C.M.V.S.S.
label.
cGAWR (Gross Axle Weight Rating) -
maximum weight (load) limit specified
for the front or rear axle. This informa-
tion is located on the
F.M.V.S.S./C.M.V.S.S. label.
cGCWR (Gross Combined Weight
rating) - The maximum total weight
rating of the vehicle, passengers,
cargo, and trailer.
LTI0137
INSTALLING FRONT LICENSE PLATE VEHICLE LOADING INFORMATION
9-12Technical and consumer information
ZREVIEW COPYÐ2006 Truck/Frontier(d22)
Owners ManualÐUSA_English(nna)
10/17/05Ðdebbie
X
Page 299 of 336
5. Determine the combined weight of
luggage and cargo being loaded on
the vehicle. That weight may not
safely exceed the available cargo and
luggage load capacity calculated in
Step 4.
6. If your vehicle will be towing a trailer,
load from your trailer will be trans-
ferred to your vehicle. Consult this
manual to determine how this re-
duces the available cargo and lug-
gage load capacity of your vehicle.
Before driving a loaded vehicle, confirm
that you do not exceed the Gross Vehicle
Weight Rating (GVWR) or the Gross Axle
Weight Rating (GAWR) for your vehicle.
See “Measurement of Weights” later in
this section.
Also check tires for proper inflation pres-
sures. See the Tire and Loading Informa-
tion label.
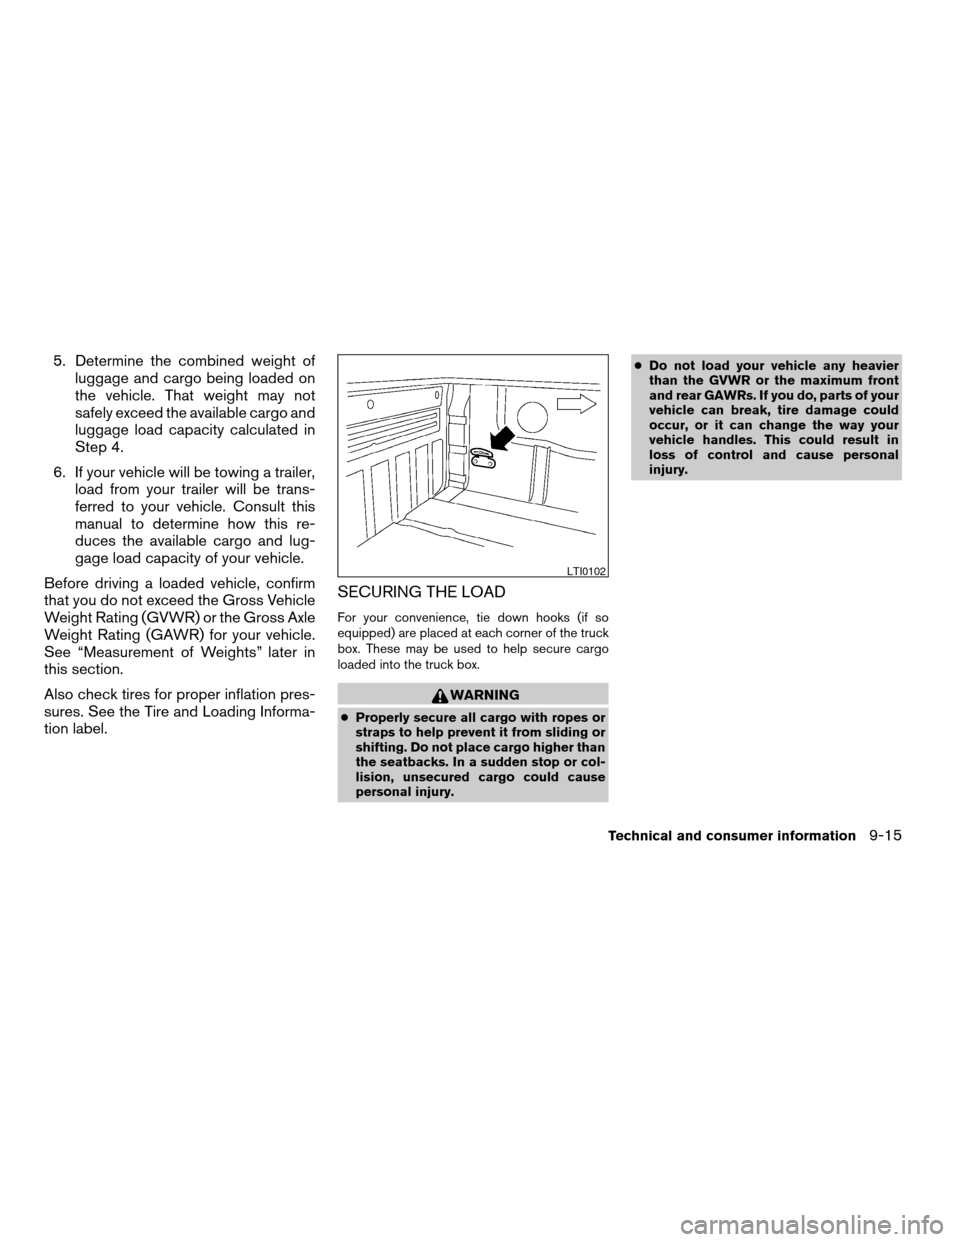
SECURING THE LOAD
For your convenience, tie down hooks (if so
equipped) are placed at each corner of the truck
box. These may be used to help secure cargo
loaded into the truck box.
WARNING
cProperly secure all cargo with ropes or
straps to help prevent it from sliding or
shifting. Do not place cargo higher than
the seatbacks. In a sudden stop or col-
lision, unsecured cargo could cause
personal injury.cDo not load your vehicle any heavier
than the GVWR or the maximum front
and rear GAWRs. If you do, parts of your
vehicle can break, tire damage could
occur, or it can change the way your
vehicle handles. This could result in
loss of control and cause personal
injury.
LTI0102
Technical and consumer information9-15
ZREVIEW COPYÐ2006 Truck/Frontier(d22)
Owners ManualÐUSA_English(nna)
10/26/05Ðtbrooks
X
Page 300 of 336
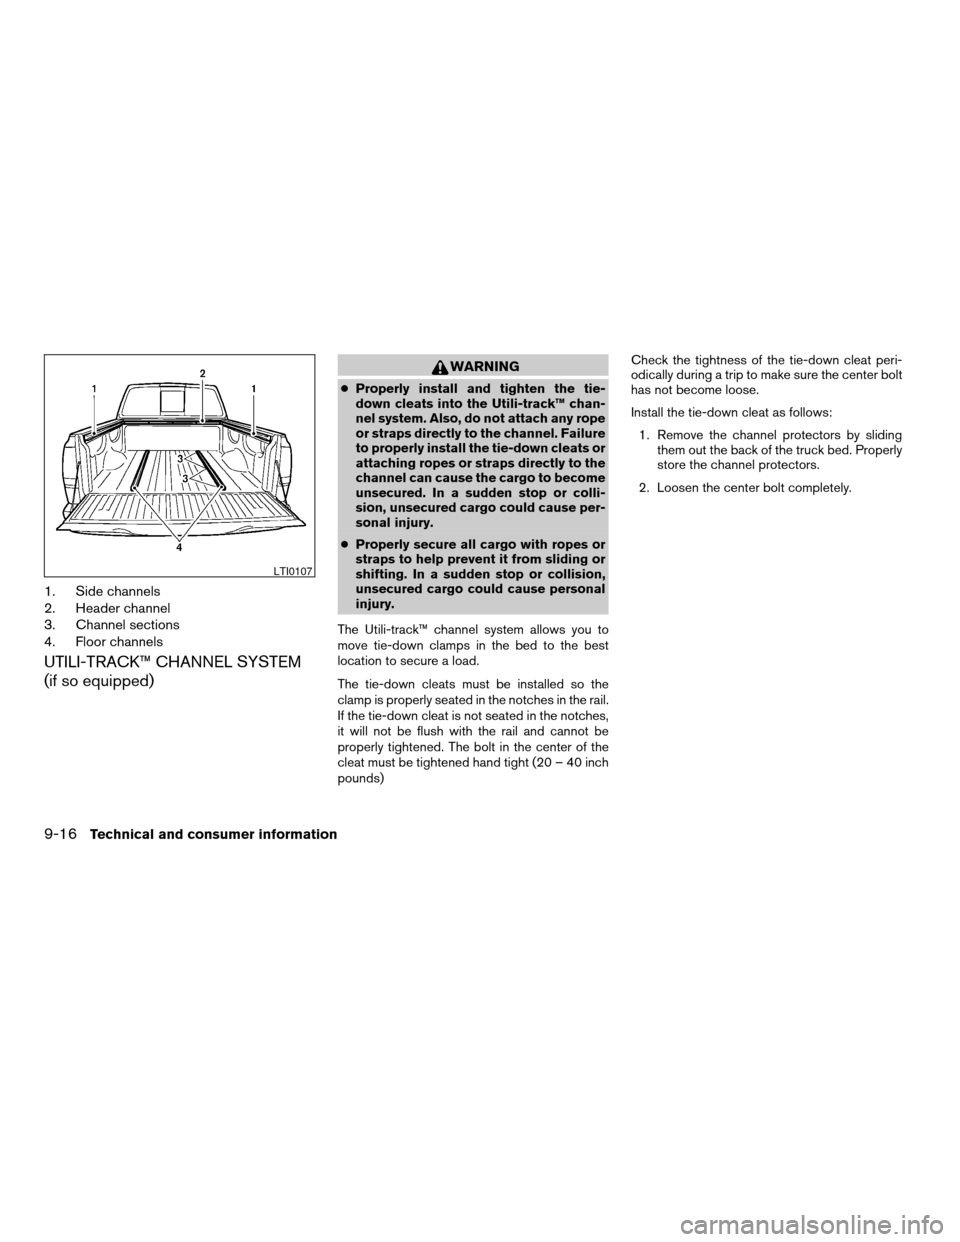
1. Side channels
2. Header channel
3. Channel sections
4. Floor channels
UTILI-TRACK™ CHANNEL SYSTEM
(if so equipped)
WARNING
cProperly install and tighten the tie-
down cleats into the Utili-track™ chan-
nel system. Also, do not attach any rope
or straps directly to the channel. Failure
to properly install the tie-down cleats or
attaching ropes or straps directly to the
channel can cause the cargo to become
unsecured. In a sudden stop or colli-
sion, unsecured cargo could cause per-
sonal injury.
cProperly secure all cargo with ropes or
straps to help prevent it from sliding or
shifting. In a sudden stop or collision,
unsecured cargo could cause personal
injury.
The Utili-track™ channel system allows you to
move tie-down clamps in the bed to the best
location to secure a load.
The tie-down cleats must be installed so the
clamp is properly seated in the notches in the rail.
If the tie-down cleat is not seated in the notches,
it will not be flush with the rail and cannot be
properly tightened. The bolt in the center of the
cleat must be tightened hand tight (20 – 40 inch
pounds)Check the tightness of the tie-down cleat peri-
odically during a trip to make sure the center bolt
has not become loose.
Install the tie-down cleat as follows:
1. Remove the channel protectors by sliding
them out the back of the truck bed. Properly
store the channel protectors.
2. Loosen the center bolt completely.
LTI0107
9-16Technical and consumer information
ZREVIEW COPYÐ2006 Truck/Frontier(d22)
Owners ManualÐUSA_English(nna)
10/17/05Ðdebbie
X
Page 304 of 336
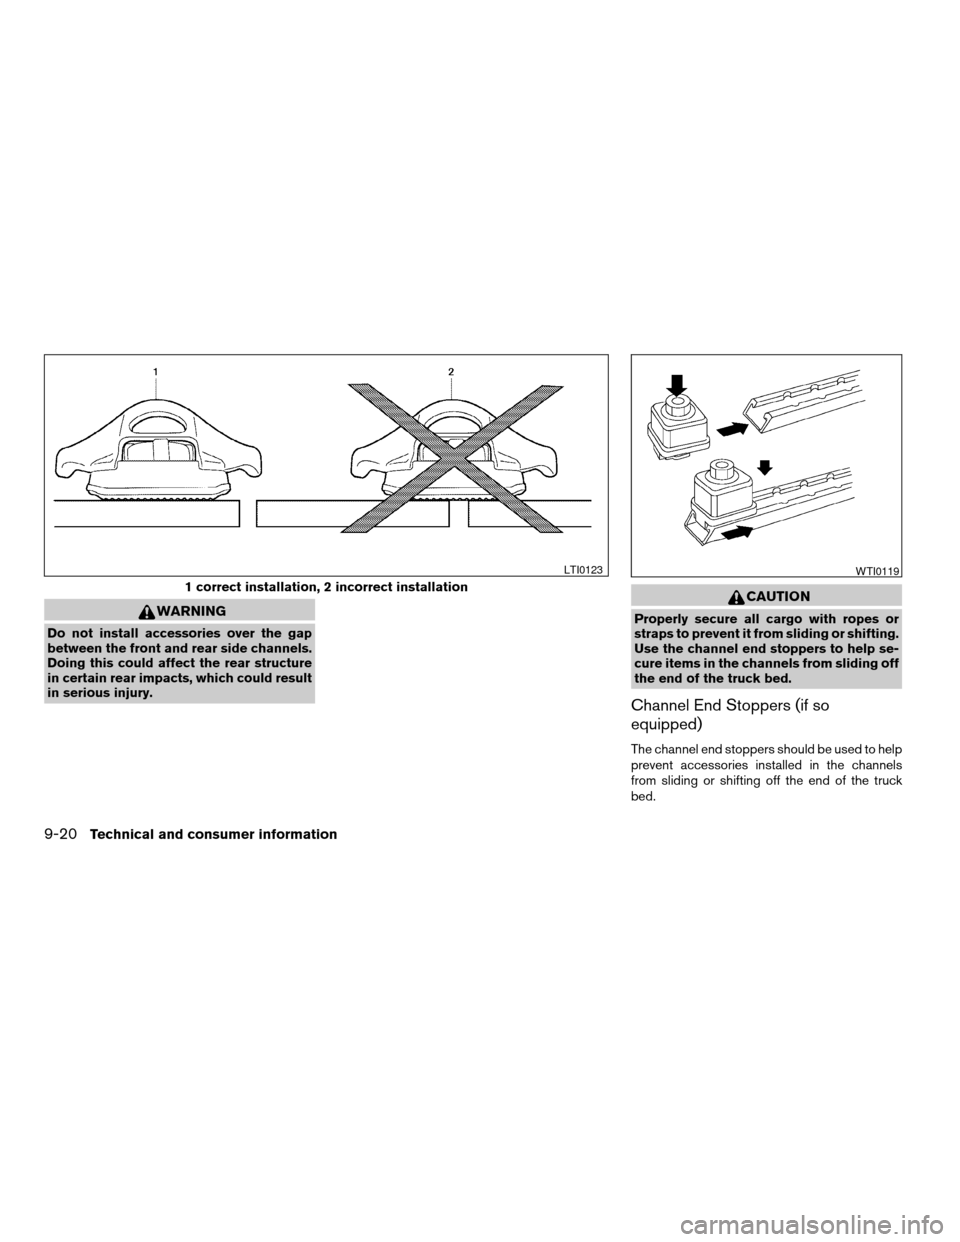
WARNING
Do not install accessories over the gap
between the front and rear side channels.
Doing this could affect the rear structure
in certain rear impacts, which could result
in serious injury.
CAUTION
Properly secure all cargo with ropes or
straps to prevent it from sliding or shifting.
Use the channel end stoppers to help se-
cure items in the channels from sliding off
the end of the truck bed.
Channel End Stoppers (if so
equipped)
The channel end stoppers should be used to help
prevent accessories installed in the channels
from sliding or shifting off the end of the truck
bed.
1 correct installation, 2 incorrect installation
LTI0123WTI0119
9-20Technical and consumer information
ZREVIEW COPYÐ2006 Truck/Frontier(d22)
Owners ManualÐUSA_English(nna)
10/17/05Ðdebbie
X
Page 305 of 336
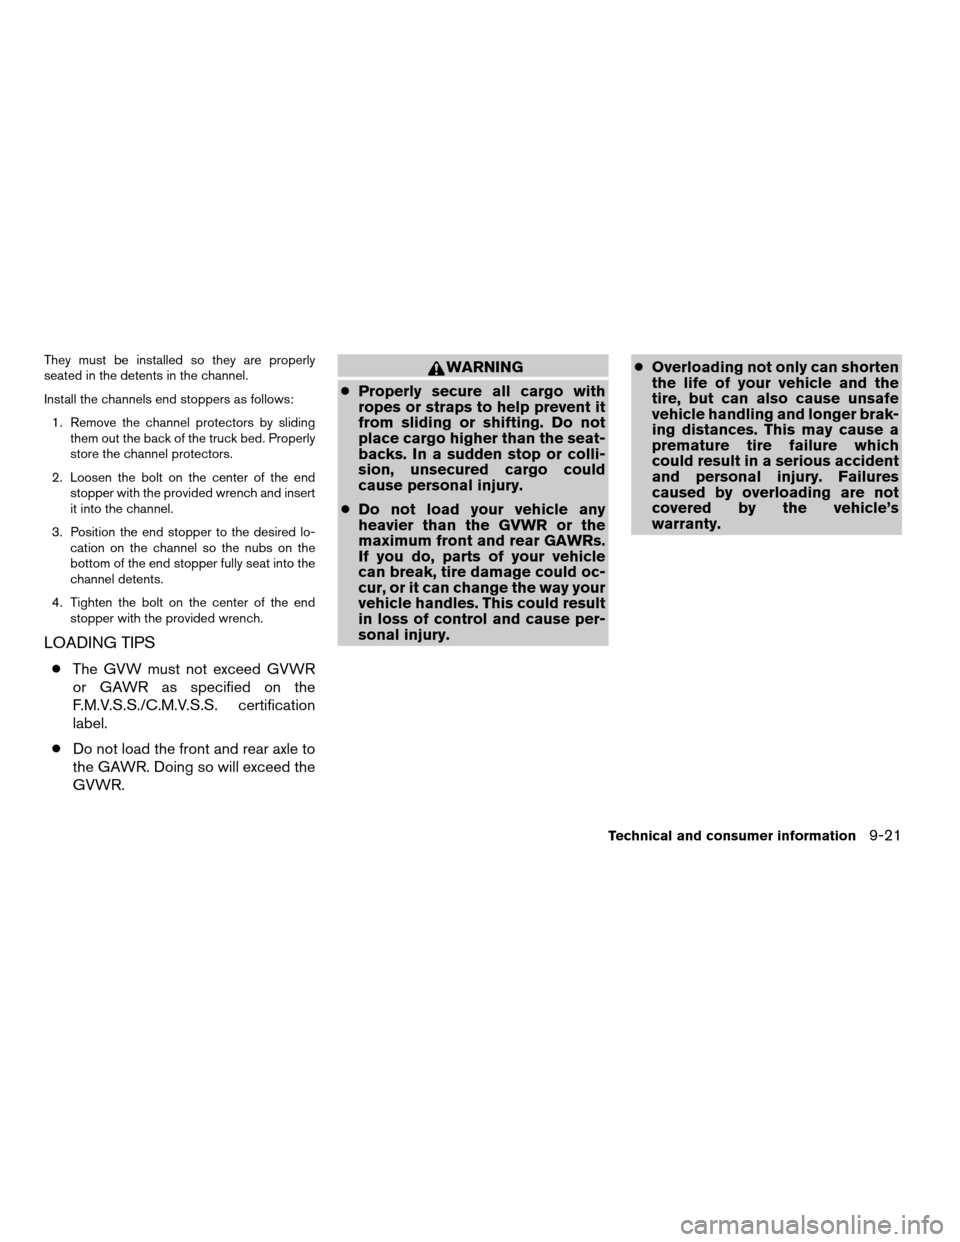
They must be installed so they are properly
seated in the detents in the channel.
Install the channels end stoppers as follows:
1. Remove the channel protectors by sliding
them out the back of the truck bed. Properly
store the channel protectors.
2. Loosen the bolt on the center of the end
stopper with the provided wrench and insert
it into the channel.
3. Position the end stopper to the desired lo-
cation on the channel so the nubs on the
bottom of the end stopper fully seat into the
channel detents.
4. Tighten the bolt on the center of the end
stopper with the provided wrench.
LOADING TIPS
cThe GVW must not exceed GVWR
or GAWR as specified on the
F.M.V.S.S./C.M.V.S.S. certification
label.
cDo not load the front and rear axle to
the GAWR. Doing so will exceed the
GVWR.
WARNING
cProperly secure all cargo with
ropes or straps to help prevent it
from sliding or shifting. Do not
place cargo higher than the seat-
backs. In a sudden stop or colli-
sion, unsecured cargo could
cause personal injury.
cDo not load your vehicle any
heavier than the GVWR or the
maximum front and rear GAWRs.
If you do, parts of your vehicle
can break, tire damage could oc-
cur, or it can change the way your
vehicle handles. This could result
in loss of control and cause per-
sonal injury.cOverloading not only can shorten
the life of your vehicle and the
tire, but can also cause unsafe
vehicle handling and longer brak-
ing distances. This may cause a
premature tire failure which
could result in a serious accident
and personal injury. Failures
caused by overloading are not
covered by the vehicle’s
warranty.
Technical and consumer information9-21
ZREVIEW COPYÐ2006 Truck/Frontier(d22)
Owners ManualÐUSA_English(nna)
10/17/05Ðdebbie
X
Page 306 of 336
CREW CAB MODELS
Crew Cab models should not be used to
carry a slide-in camper.
KING CAB MODELS
This information is provided for you to properly
install a slide-in camper and is based on the
National Highway Traffic Safety Administration
regulations. It is recommended that, before in-
stalling the camper, you carefully read the follow-
ing information and ensure that the camper
meets the specifications.
This information may not apply to some Canada
model vehicles.
SPECIAL BODY VEHICLES
Some vehicles are equipped with commercial or
camper bodies. However, this Owner’s Manual
does not cover these options. For further infor-
mation, please refer to the body manufacturer’s
instruction manual.
LOCATION FOR CENTER OF
GRAVITY
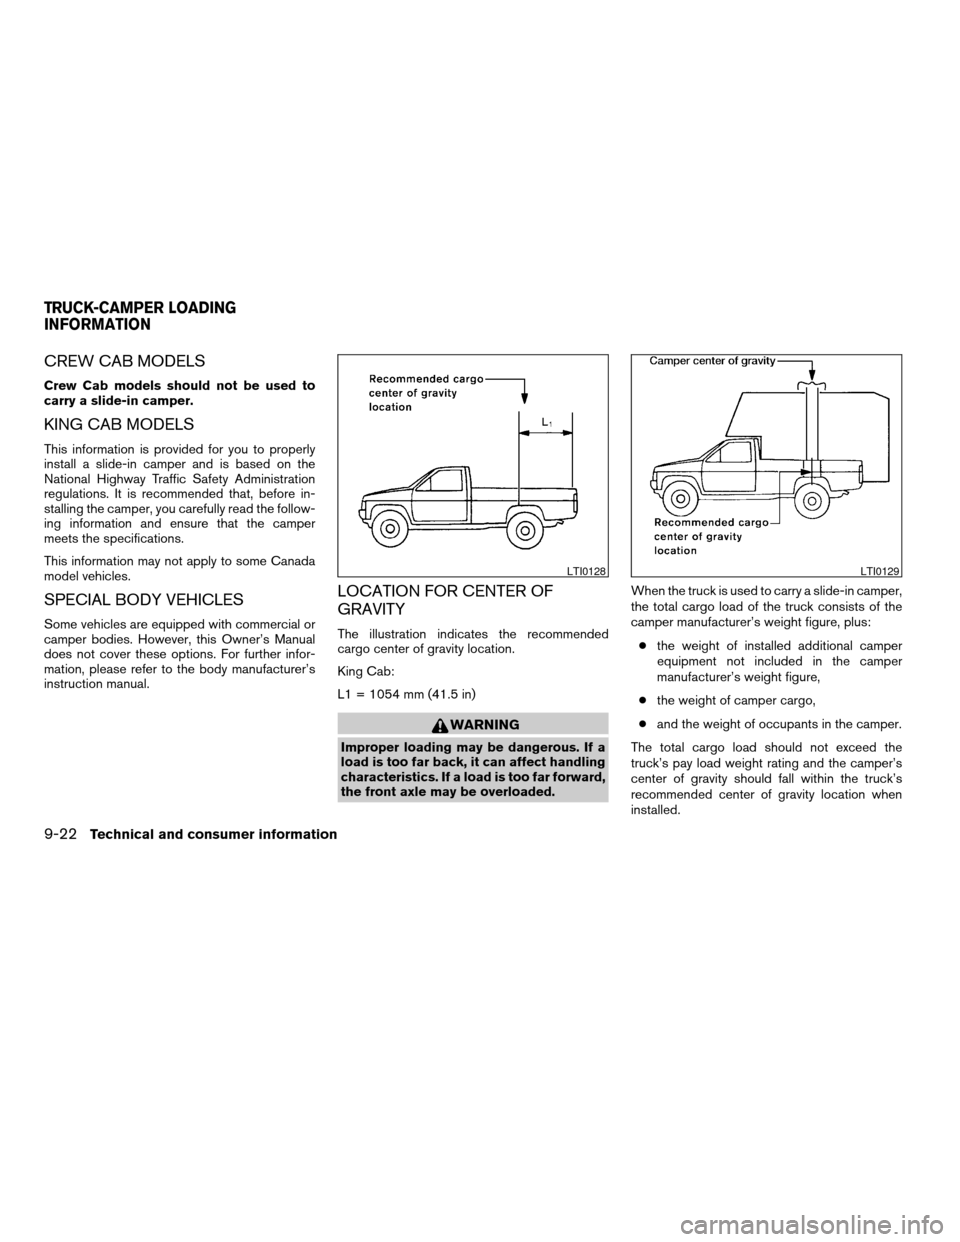
The illustration indicates the recommended
cargo center of gravity location.
King Cab:
L1 = 1054 mm (41.5 in)
WARNING
Improper loading may be dangerous. If a
load is too far back, it can affect handling
characteristics. If a load is too far forward,
the front axle may be overloaded.When the truck is used to carry a slide-in camper,
the total cargo load of the truck consists of the
camper manufacturer’s weight figure, plus:
cthe weight of installed additional camper
equipment not included in the camper
manufacturer’s weight figure,
cthe weight of camper cargo,
cand the weight of occupants in the camper.
The total cargo load should not exceed the
truck’s pay load weight rating and the camper’s
center of gravity should fall within the truck’s
recommended center of gravity location when
installed.
LTI0128LTI0129
TRUCK-CAMPER LOADING
INFORMATION
9-22Technical and consumer information
ZREVIEW COPYÐ2006 Truck/Frontier(d22)
Owners ManualÐUSA_English(nna)
10/17/05Ðdebbie
X