2006 NISSAN ARMADA turn signal
[x] Cancel search: turn signalPage 112 of 352

Your vehicle has two types of security systems:
cVehicle security system
cNISSAN Vehicle Immobilizer System
VEHICLE SECURITY SYSTEM
The vehicle security system provides visual and
audible alarm signals if someone opens the doors
when the system is armed. It is not, however, a
motion detection type system that activates when
a vehicle is moved or when a vibration occurs.
The system helps deter vehicle theft but cannot
prevent it, nor can it prevent the theft of interior or
exterior vehicle components in all situations. Al-
ways secure your vehicle even if parking for abrief period. Never leave your keys in the ignition,
and always lock the vehicle when unattended. Be
aware of your surroundings, and park in secure,
well-lit areas whenever possible.
Many devices offering additional protection, such
as component locks, identification markers, and
tracking systems, are available at auto supply
stores and specialty shops. Your NISSAN dealer
may also offer such equipment. Check with your
insurance company to see if you may be eligible
for discounts for various theft protection features.
How to arm the vehicle security
system
1. Close all windows.(The system can be
armed even if the windows are open.)
2. Remove the key from the ignition switch.
3. Close all doors. Lock all doors. The doors
can be locked with the key, power door lock
switch or with the keyfob.
Keyfob operation:
cPush the
button on the keyfob.
All doors lock. The hazard lights flash
twice and the horn beeps once to indicate
all doors are locked.cWhen the
button is pushed with
all doors locked, the hazard lights flash
twice and the horn beeps once as a re-
minder that the doors are already locked.
The horn may or may not beep. Refer to
“Silencing the horn beep feature” (vehicles
without navigation system) in the “Pre-
driving checks and adjustments” section or
“Vehicle electronic systems” (vehicles with
navigation system) in the “Display screen,
heater, air conditioner and audio systems”
section.
4. Confirm that the
indicator light comes
on. Thelight stays on for about 30
seconds. The vehicle security system is now
pre-armed. After about 30 seconds the ve-
hicle security system automatically shifts
into the armed phase. The
light begins
to flash once every 3 seconds. If, during the
30-second pre-arm time period, the door is
unlocked by the key or the keyfob, or the
ignition key is turned to ACC or ON, the
system will not arm.
cIf the key is turned slowly when locking
the door, the system may not arm. Fur-
thermore, if the key is turned beyond
the vertical position toward the unlock
position to remove the key, the system
may be disarmed when the key is re-
LIC0559
SECURITY SYSTEMS
2-20Instruments and controls
ZREVIEW COPYÐ2006 Armada(wzw)
Owners ManualÐUSA_English(nna)
06/15/05Ðdebbie
X
Page 116 of 352

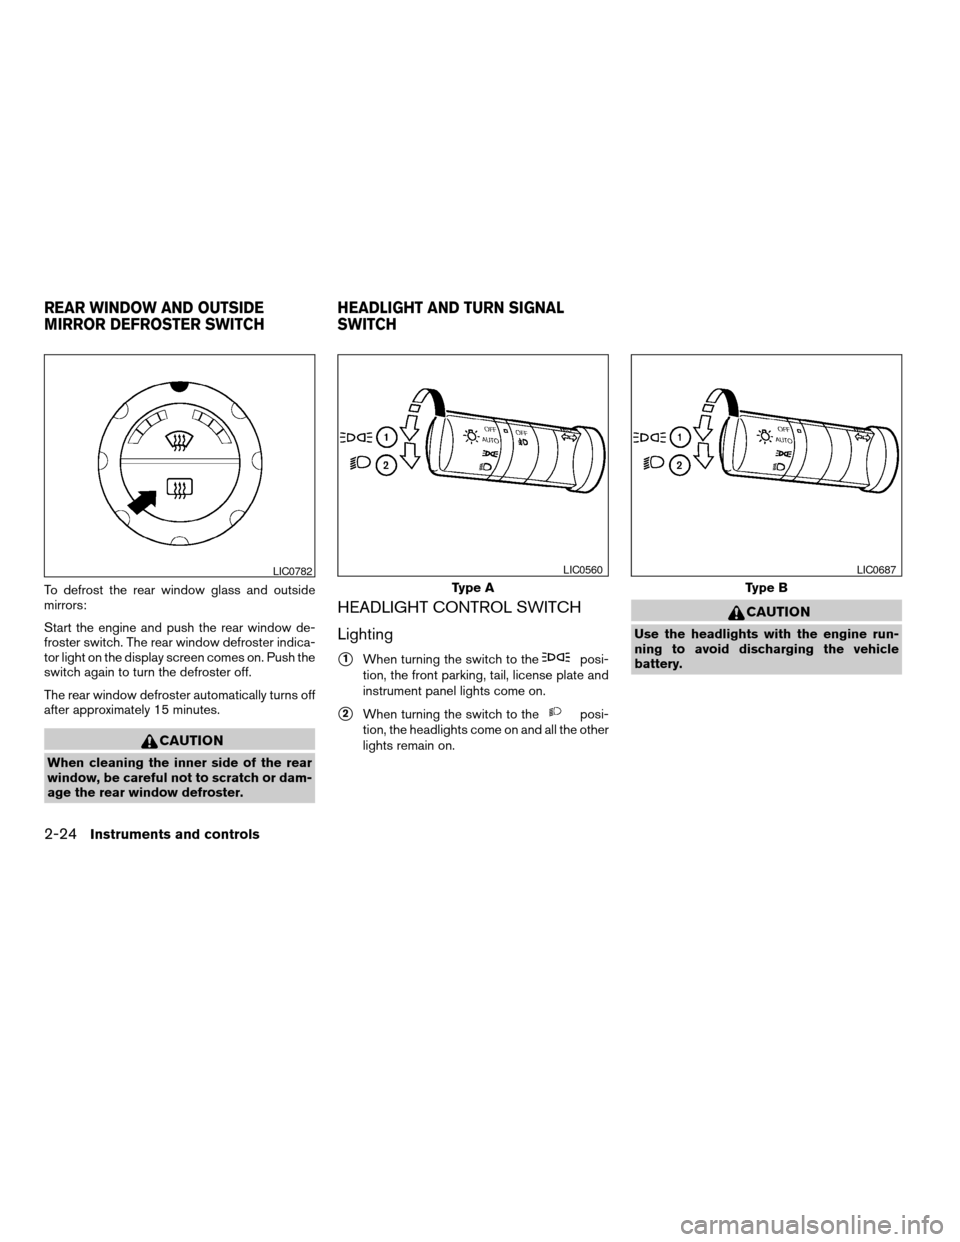
To defrost the rear window glass and outside
mirrors:
Start the engine and push the rear window de-
froster switch. The rear window defroster indica-
tor light on the display screen comes on. Push the
switch again to turn the defroster off.
The rear window defroster automatically turns off
after approximately 15 minutes.
CAUTION
When cleaning the inner side of the rear
window, be careful not to scratch or dam-
age the rear window defroster.
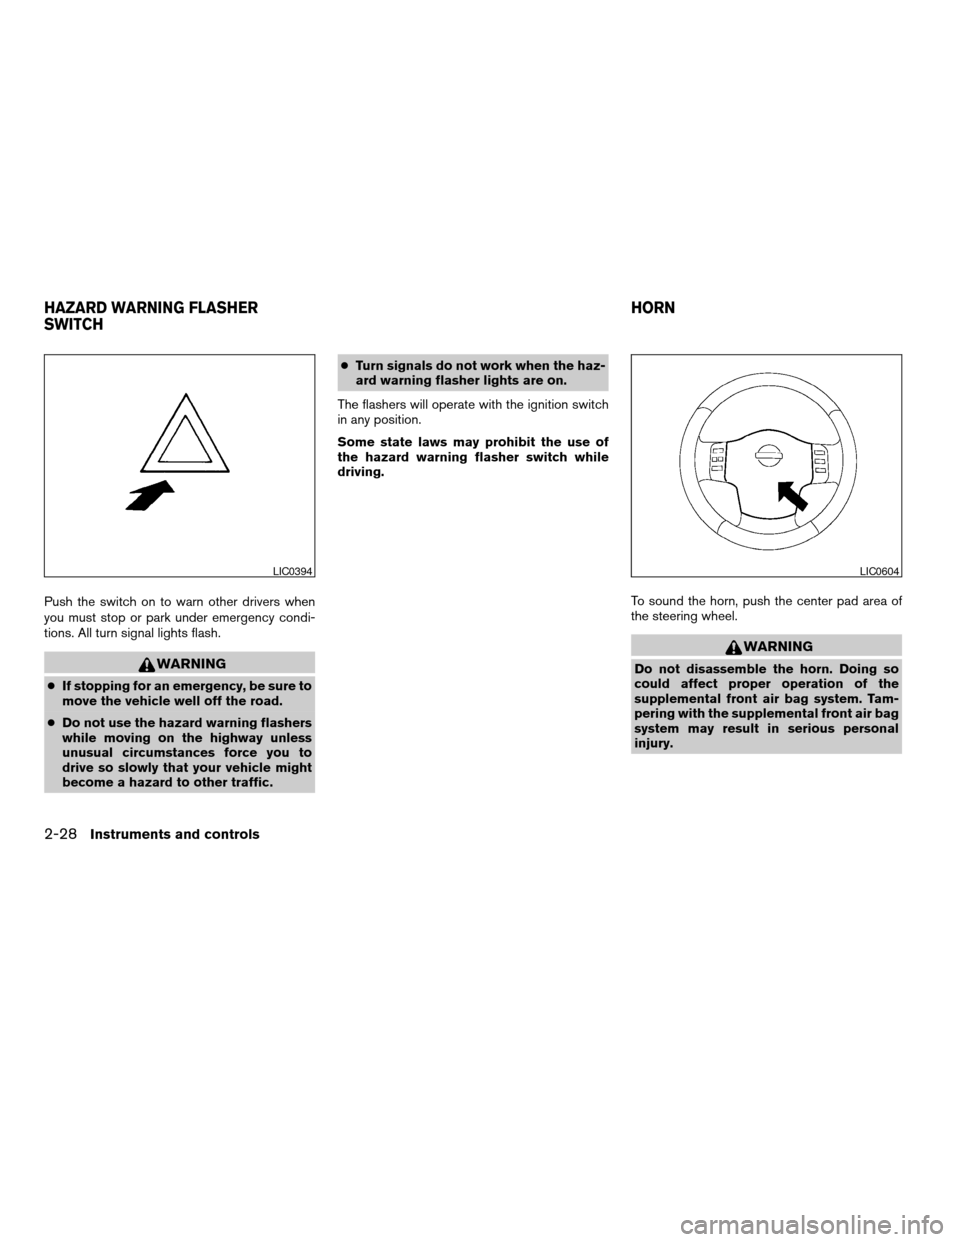
HEADLIGHT CONTROL SWITCH
Lighting
s1When turning the switch to theposi-
tion, the front parking, tail, license plate and
instrument panel lights come on.
s2When turning the switch to theposi-
tion, the headlights come on and all the other
lights remain on.
CAUTION
Use the headlights with the engine run-
ning to avoid discharging the vehicle
battery.
LIC0782
Type A
LIC0560
Type B
LIC0687
REAR WINDOW AND OUTSIDE
MIRROR DEFROSTER SWITCHHEADLIGHT AND TURN SIGNAL
SWITCH
2-24Instruments and controls
ZREVIEW COPYÐ2006 Armada(wzw)
Owners ManualÐUSA_English(nna)
06/15/05Ðdebbie
X
Page 119 of 352

INSTRUMENT BRIGHTNESS
CONTROL
The instrument brightness control operates when
the headlight control switch is in
the
,or AUTO position (with auto-
lights activated) .
Turn the control to adjust the brightness of instru-
ment panel lights when driving at night.
TURN SIGNAL SWITCH
Turn signal
s1Move the lever up or down to signal the
turning direction. When the turn is com-
pleted, the turn signals cancel automatically.
Lane change signal
s2To signal a lane change, move the lever up or
down to the point where the indicator light
begins to flash, but the lever does not latch.
FOG LIGHT SWITCH (if so equipped)
To turn the fog lights on, turn the headlight switch
to theposition, then turn the fog light
switch to theposition.
To turn the fog lights on with the headlight switch in
the AUTO position, the headlights must be on, then
turn the fog light switch to the
position.
To turn the fog lights off, turn the fog light switch
to the OFF position.
The headlights must be on and the low beams
selected for the fog lights to operate. The fog
lights automatically turn off when the high beam
headlights are selected.
LIC0392LIC0563LIC0564
Instruments and controls2-27
ZREVIEW COPYÐ2006 Armada(wzw)
Owners ManualÐUSA_English(nna)
06/15/05Ðdebbie
X
Page 120 of 352

Push the switch on to warn other drivers when
you must stop or park under emergency condi-
tions. All turn signal lights flash.
WARNING
cIf stopping for an emergency, be sure to
move the vehicle well off the road.
cDo not use the hazard warning flashers
while moving on the highway unless
unusual circumstances force you to
drive so slowly that your vehicle might
become a hazard to other traffic.cTurn signals do not work when the haz-
ard warning flasher lights are on.
The flashers will operate with the ignition switch
in any position.
Some state laws may prohibit the use of
the hazard warning flasher switch while
driving.
To sound the horn, push the center pad area of
the steering wheel.
WARNING
Do not disassemble the horn. Doing so
could affect proper operation of the
supplemental front air bag system. Tam-
pering with the supplemental front air bag
system may result in serious personal
injury.
LIC0394LIC0604
HAZARD WARNING FLASHER
SWITCHHORN
2-28Instruments and controls
ZREVIEW COPYÐ2006 Armada(wzw)
Owners ManualÐUSA_English(nna)
06/15/05Ðdebbie
X
Page 145 of 352

5. If the indicator light on the HomeLinkTblinks
rapidly for 2 seconds and then turns solid,
HomeLinkThas picked up a “rolling code”
garage door opener signal. You will need to
proceed with the next steps to train the
HomeLinkTto complete the programming
which may require a ladder and another per-
son for convenience.6. Press and release the “smart” or “learn” pro-
gram button located on the garage door
opener’s motor to activate the “training
mode”. This button is usually located near
the antenna wire that hangs down from the
motor. If the wire originates from under a
light lens, you will need to remove the lens to
access the program button.
NOTE:
Once you have pressed and released the
program button on the garage door open-
er’s motor and the “training light” is lit, you
have 30 seconds in which to perform step 7.
Use the help of a second person for conve-
nience to assist when performing this step.
7. Within 30 seconds of pressing and releas-
ing the garage door opener program button,
quickly and firmly press and release the
HomeLinkTbutton you’ve just programmed.
Press and release the HomeLinkTbutton up
to 3 times to complete the training.
8. Your HomeLinkTbutton should now be pro-
grammed. (To program the remaining
HomeLinkTbuttons for additional door or
gate openers, follow steps 2-8 only.)NOTE:
Do not repeat step 1 unless you want to
“clear” all previously programmed
HomeLinkTbuttons.
If you have any questions or are having difficulty
programming your HomeLinkTbuttons, refer to
the HomeLinkTweb site at: www.homelink.com
or call 1-800-355-3515.
PROGRAMMING HOMELINKTFOR
CANADIAN CUSTOMERS
Prior to 1992, D.O.C. regulations required hand-
held transmitters to stop transmitting after 2 sec-
onds. To program your hand-held transmitter to
HomeLinkT, continue to press and hold the
HomeLinkTbutton (note steps2-4under “Pro-
gramming HomeLinkT”) while you press and re-
press (“cycle”) your hand-held transmitters every
2 seconds until the indicator light flashes rapidly
(indicating successful programming) .
NOTE:
When programming a garage door opener,
etc., it is advised to unplug the device dur-
ing the “cycling” process to prevent pos-
sible damage to the garage door opener
components.
Type B
LIC0677
Instruments and controls2-53
ZREVIEW COPYÐ2006 Armada(wzw)
Owners ManualÐUSA_English(nna)
06/15/05Ðdebbie
X
Page 188 of 352

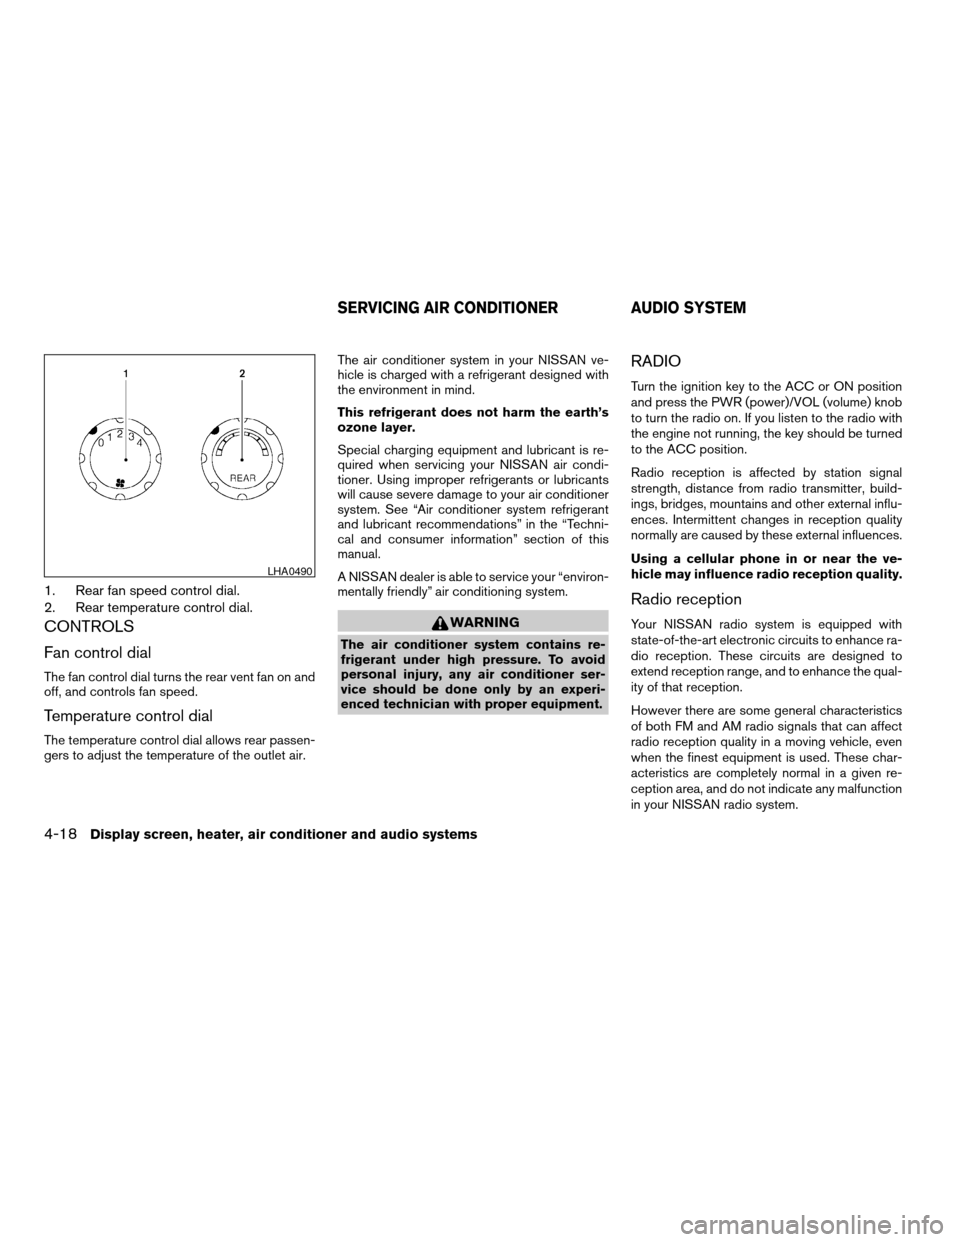
1. Rear fan speed control dial.
2. Rear temperature control dial.
CONTROLS
Fan control dial
The fan control dial turns the rear vent fan on and
off, and controls fan speed.
Temperature control dial
The temperature control dial allows rear passen-
gers to adjust the temperature of the outlet air.The air conditioner system in your NISSAN ve-
hicle is charged with a refrigerant designed with
the environment in mind.
This refrigerant does not harm the earth’s
ozone layer.
Special charging equipment and lubricant is re-
quired when servicing your NISSAN air condi-
tioner. Using improper refrigerants or lubricants
will cause severe damage to your air conditioner
system. See “Air conditioner system refrigerant
and lubricant recommendations” in the “Techni-
cal and consumer information” section of this
manual.
A NISSAN dealer is able to service your “environ-
mentally friendly” air conditioning system.
WARNING
The air conditioner system contains re-
frigerant under high pressure. To avoid
personal injury, any air conditioner ser-
vice should be done only by an experi-
enced technician with proper equipment.
RADIO
Turn the ignition key to the ACC or ON position
and press the PWR (power)/VOL (volume) knob
to turn the radio on. If you listen to the radio with
the engine not running, the key should be turned
to the ACC position.
Radio reception is affected by station signal
strength, distance from radio transmitter, build-
ings, bridges, mountains and other external influ-
ences. Intermittent changes in reception quality
normally are caused by these external influences.
Using a cellular phone in or near the ve-
hicle may influence radio reception quality.
Radio reception
Your NISSAN radio system is equipped with
state-of-the-art electronic circuits to enhance ra-
dio reception. These circuits are designed to
extend reception range, and to enhance the qual-
ity of that reception.
However there are some general characteristics
of both FM and AM radio signals that can affect
radio reception quality in a moving vehicle, even
when the finest equipment is used. These char-
acteristics are completely normal in a given re-
ception area, and do not indicate any malfunction
in your NISSAN radio system.
LHA0490
SERVICING AIR CONDITIONER AUDIO SYSTEM
4-18Display screen, heater, air conditioner and audio systems
ZREVIEW COPYÐ2006 Armada(wzw)
Owners ManualÐUSA_English(nna)
06/16/05Ðdebbie
X
Page 197 of 352

MP3 display mode
To change the text displayed when listening to an
MP3 with MP3 text (when CD with text is being
used) , press the DISP button. The DISP button
will scroll through the CD text as follows: Disc
titleÃ!Track titleÃ!Folder title.
To change the default display mode push the
tune knob to display mode and rotate the knob to
select the following display mode: Folder number
Ã!Track titleÃ!Folder titleÃ!Disc title
Ã!Disc number.
Once a display mode is selected press the tune
knob again to store the setting.
cFolder number mode displays the folder
number and the file number of the folder
currently being played.
cDisc number mode displays the number se-
lected disc and the track that is currently
being played.
cTrack title mode displays the ID3 track title of
the MP3 file.
cDisc title mode displays the ID3 disc title of
the MP3 file.
cFolder title mode displays the folder name
given to the MP3 folder.Display satellite radio display mode (if so
equipped)
To change the text displayed when listening to
satellite radio (if so equipped) press the DISP
button. The DISP button will scroll through the
broadcasted information as follows: NameÃ!
TitleÃ!Current display mode.
To change the default display mode push the
tune knob to display mode and rotate the knob to
select the following display modes: Channel
numberÃ!Channel nameÃ!NameÃ!
Title. Once the display mode is selected press
the tune knob again to store the setting. If the
tuning knob is not pressed after 8 seconds the
display will refresh with the last selected display
mode setting.
cChannel number mode displays the channel
number of the selected satellite radio sta-
tion.
cChannel name mode displays the channel
name of the selected satellite radio station.
cName mode displays the name of the artist,
host or weather condition of the selected
satellite radio station.
cTitle mode displays the song title, show
name, or temperature of the selected satel-
lite radio station.FM/AM/SAT radio operation
FM/AM/SAT band select:
Pushing the RADIO button will change the band
as follows:
AMÃ!FM or SAT (Satellite-if so equipped)
When the RADIO button is pushed while the
ignition switch is in the ACC or ON position, the
radio will come on at the station last played.
The last station played will also come on when
the POWER/VOLUME control knob is de-
pressed to ON.
No satellite radio reception is available and “NO
SAT” is displayed when the RADIO button is
pressed to access satellite radio stations unless
optional satellite receiver and antenna are in-
stalled and an XMTor SIRIUS™ satellite radio
service subscription is active. Satellite radio is
not available in Alaska, Hawaii and Guam.
If a compact disc is playing when the RADIO
button is pushed, the compact disc will automati-
cally be turned off and the last radio station
played will come on.
The FM stereo indicator ST will glow during FM
stereo reception. When the stereo broadcast
signal is weak, the radio will automatically change
from stereo to monaural reception.
Display screen, heater, air conditioner and audio systems4-27
ZREVIEW COPYÐ2006 Armada(wzw)
Owners ManualÐUSA_English(nna)
06/16/05Ðdebbie
X
Page 218 of 352

Please note that the TPMS is not a substitute for
proper tire maintenance, and it is the driver’s
responsibility to maintain correct tire pressure,
even if underinflation has not reached the level to
trigger illumination of the TPMS low tire pressure
telltale.
Your vehicle has also been equipped with a TPMS
malfunction indicator to indicate when the system
is not operating properly. The TPMS malfunction
indicator is combined with the low tire pressure
telltale. When the system detects a malfunction,
the telltale will flash for approximately one minute
and then remain continuously illuminated. This se-
quence will continue upon subsequent vehicle
start-ups as long as the malfunction exists. When
the malfunction indicator is illuminated, the system
may not be able to detect or signal low tire pressure
as intended. TPMS malfunctions may occur for a
variety of reasons, including the installation of re-
placement or alternate tires or wheels on the ve-
hicle that prevent the TPMS from functioning prop-
erly. Always check the TPMS malfunction telltale
after replacing one or more tires or wheels on your
vehicle to ensure that the replacement or alternate
tires and wheels allow the TPMS to continue to
function properly.
Additional information:
cThis system does not monitor the tire pres-
sure of the spare tire.cThe low tire pressure warning system will
activate only when the vehicle is driven at
speeds above 20 MPH (32 km/h) . Also, this
system may not detect a sudden drop in tire
pressure (for example a flat tire while driv-
ing) .
cTire pressure rises and falls depending on
the heat caused by the vehicle’s operation
and the outside temperature. Low outside
temperature can lower the temperature of
the air inside the tire which can cause a
lower tire inflation pressure. This may cause
the low tire pressure warning light to illumi-
nate. If the warning light illuminates in low
ambient temperature, check the tire pres-
sure for all four tires.
cYou can also check the pressure of all tires
(except the spare tire) on the display screen.
The order of the tire pressure figures dis-
played on the screen does not correspond
with the actual order of the tire position. See
“Tire pressure information” in the “Display
screen, heater, air conditioner and audio
systems” section.
For additional information, see “Low tire pressure
warning light” in the “Instruments and controls”
section, “Low tire pressure warning system” in
the “In case of emergency” section.
WARNING
cIf the low tire pressure warning light
flashes while driving, avoid sudden steer-
ing maneuvers or abrupt braking, reduce
vehicle speed, pull off the road to a safe
location and stop the vehicle as soon as
possible. Serious vehicle damage could
occur and may lead to an accident and
could result in serious personal injury.
Check the tire pressure for all four tires.
Adjust the tire pressure to the recom-
mended COLD tire pressure shown on
the Tire and Loading Information label to
turn the low tire pressure warning light
OFF. If you have a flat tire, replace it with
a spare tire as soon as possible. (See
“Flat tire” in the “In case of emergency”
section for changing a flat tire.)
cWhen a spare tire is mounted or a wheel
is replaced, tire pressure will not be
indicated and the low tire pressure
warning system will not function. Con-
tact your NISSAN dealer as soon as
possible for tire replacement and/or
system resetting.
cDo not inject any tire liquid or aerosol
tire sealant into the tires, as this may
cause a malfunction of the tire pressure
sensors.
5-4Starting and driving
ZREVIEW COPYÐ2006 Armada(wzw)
Owners ManualÐUSA_English(nna)
06/16/05Ðdebbie
X