2006 NISSAN ARMADA clock
[x] Cancel search: clockPage 115 of 352
CAUTION
cDo not operate the washer continu-
ously for more than 30 seconds.
cDo not operate the washer if the reser-
voir tank is empty.
cDo not fill the window washer reservoir
tank with washer fluid concentrates at
full strength. Some methyl alcohol
based washer fluid concentrates may
permanently stain the grille if spilled
while filling the window washer reser-
voir tank.
cPre-mix washer fluid concentrates with
water to the manufacturer’s recom-
mended levels before pouring the fluid
into the window washer reservoir tank.
Do not use the window washer reservoir
tank to mix the washer fluid concen-
trate and water.The rear window wiper and washer operate when
the ignition switch is in the ON position.
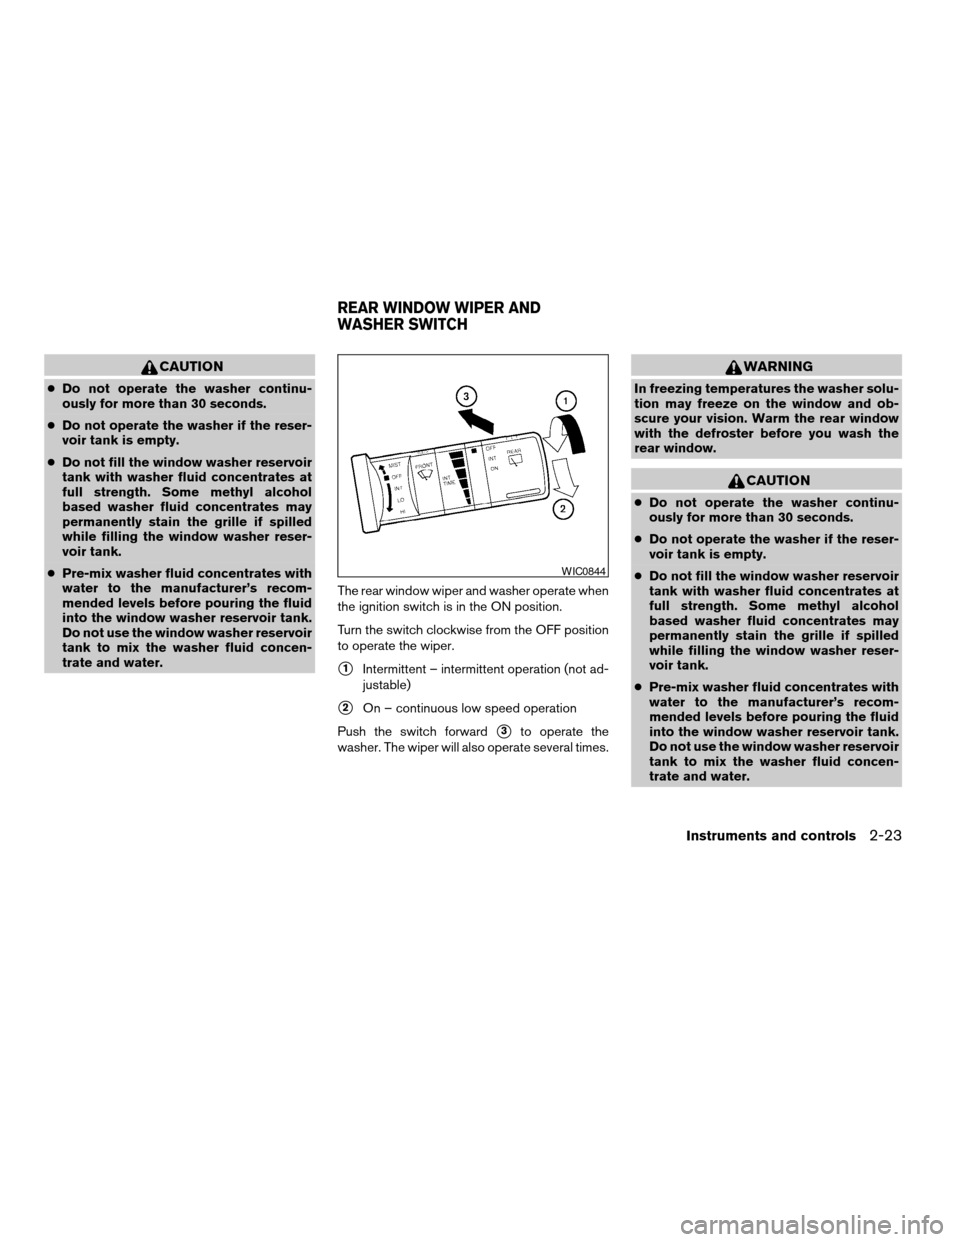
Turn the switch clockwise from the OFF position
to operate the wiper.
s1Intermittent – intermittent operation (not ad-
justable)
s2On – continuous low speed operation
Push the switch forward
s3to operate the
washer. The wiper will also operate several times.
WARNING
In freezing temperatures the washer solu-
tion may freeze on the window and ob-
scure your vision. Warm the rear window
with the defroster before you wash the
rear window.
CAUTION
cDo not operate the washer continu-
ously for more than 30 seconds.
cDo not operate the washer if the reser-
voir tank is empty.
cDo not fill the window washer reservoir
tank with washer fluid concentrates at
full strength. Some methyl alcohol
based washer fluid concentrates may
permanently stain the grille if spilled
while filling the window washer reser-
voir tank.
cPre-mix washer fluid concentrates with
water to the manufacturer’s recom-
mended levels before pouring the fluid
into the window washer reservoir tank.
Do not use the window washer reservoir
tank to mix the washer fluid concen-
trate and water.
WIC0844
REAR WINDOW WIPER AND
WASHER SWITCH
Instruments and controls2-23
ZREVIEW COPYÐ2006 Armada(wzw)
Owners ManualÐUSA_English(nna)
06/15/05Ðdebbie
X
Page 162 of 352
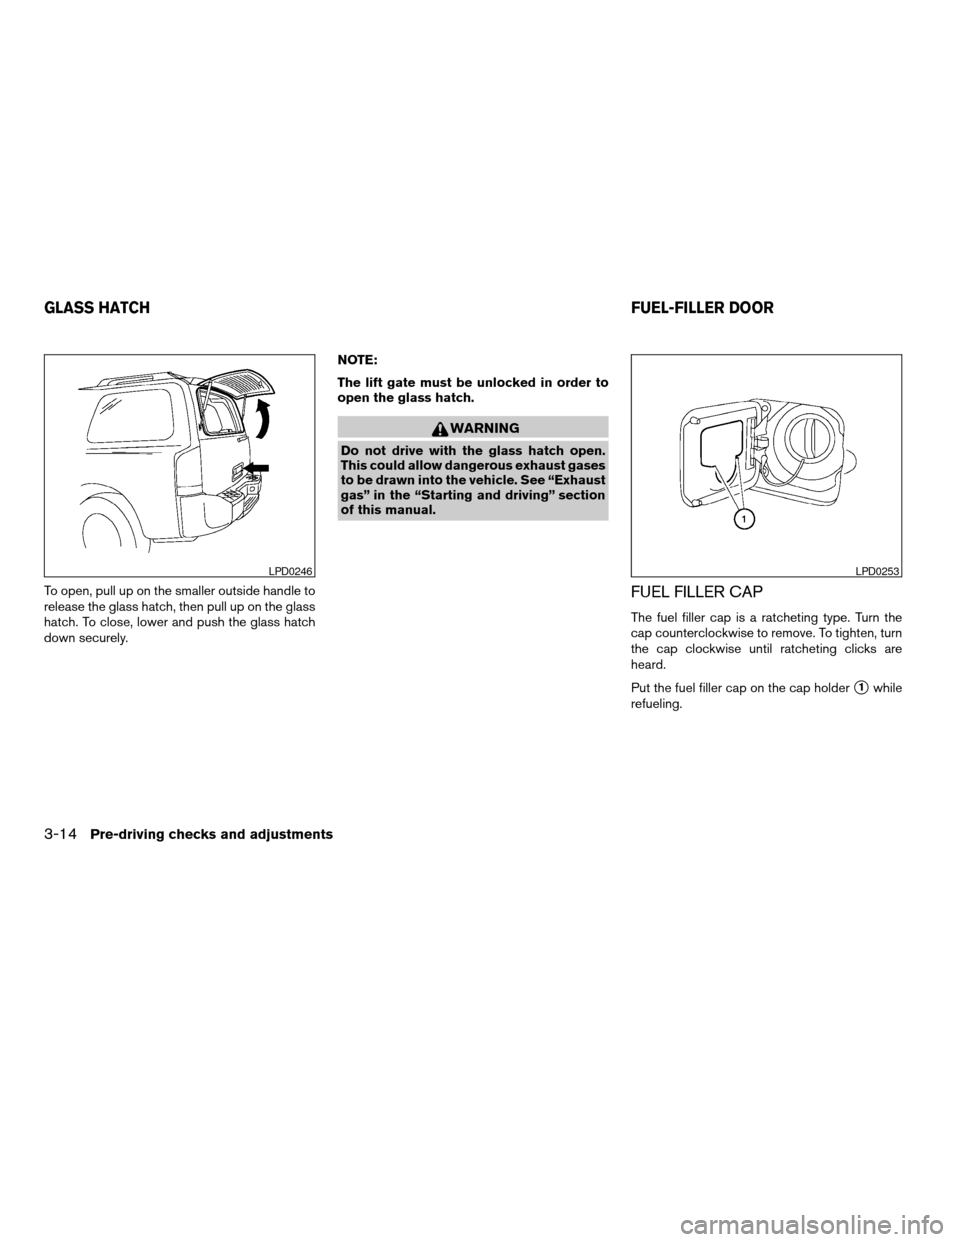
To open, pull up on the smaller outside handle to
release the glass hatch, then pull up on the glass
hatch. To close, lower and push the glass hatch
down securely.NOTE:
The lift gate must be unlocked in order to
open the glass hatch.
WARNING
Do not drive with the glass hatch open.
This could allow dangerous exhaust gases
to be drawn into the vehicle. See “Exhaust
gas” in the “Starting and driving” section
of this manual.
FUEL FILLER CAP
The fuel filler cap is a ratcheting type. Turn the
cap counterclockwise to remove. To tighten, turn
the cap clockwise until ratcheting clicks are
heard.
Put the fuel filler cap on the cap holder
s1while
refueling.
LPD0246LPD0253
GLASS HATCHFUEL-FILLER DOOR
3-14Pre-driving checks and adjustments
ZREVIEW COPYÐ2006 Armada(wzw)
Owners ManualÐUSA_English(nna)
06/15/05Ðdebbie
X
Page 176 of 352
Tire pressure information
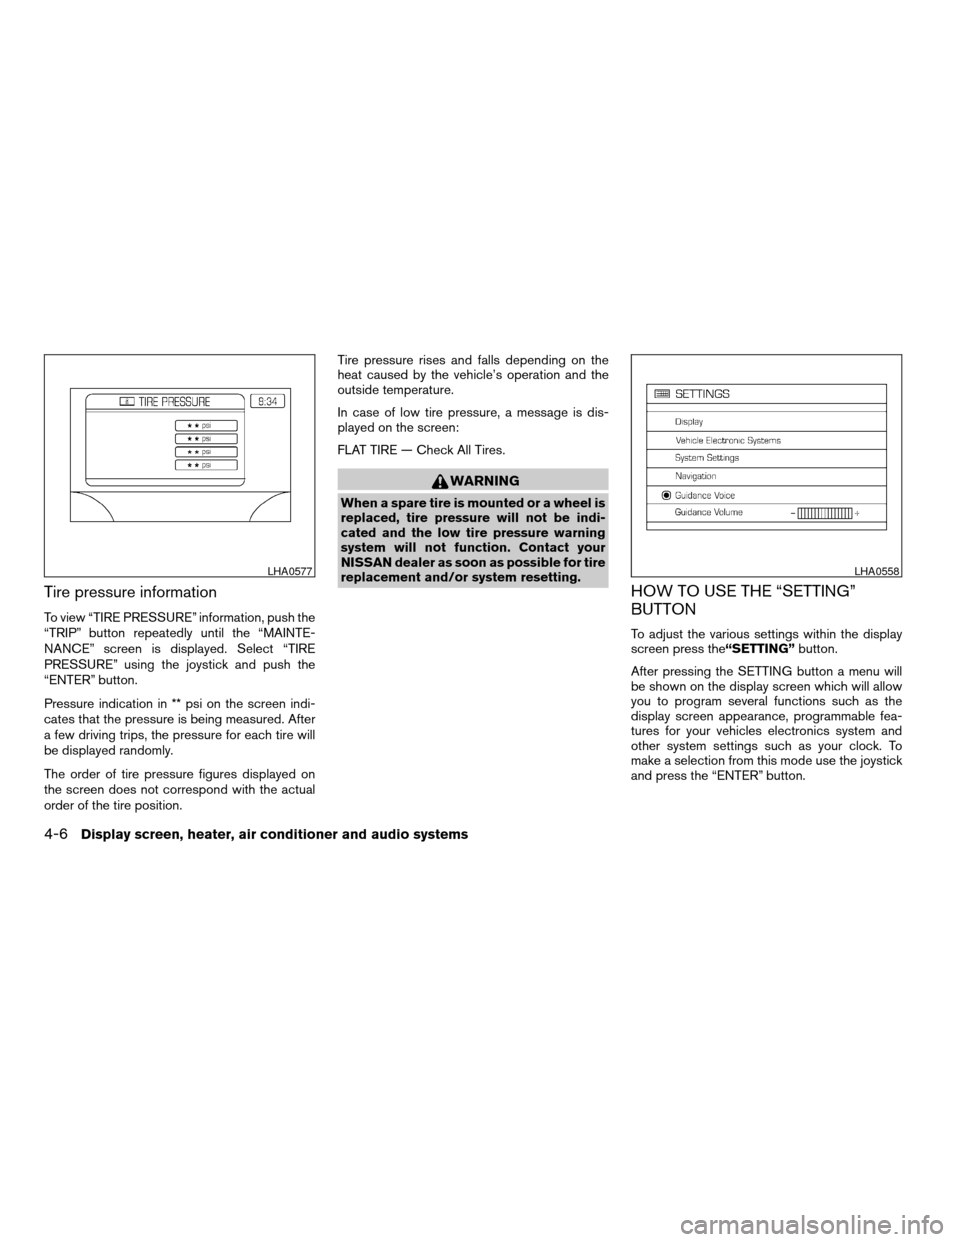
To view “TIRE PRESSURE” information, push the
“TRIP” button repeatedly until the “MAINTE-
NANCE” screen is displayed. Select “TIRE
PRESSURE” using the joystick and push the
“ENTER” button.
Pressure indication in ** psi on the screen indi-
cates that the pressure is being measured. After
a few driving trips, the pressure for each tire will
be displayed randomly.
The order of tire pressure figures displayed on
the screen does not correspond with the actual
order of the tire position.Tire pressure rises and falls depending on the
heat caused by the vehicle’s operation and the
outside temperature.
In case of low tire pressure, a message is dis-
played on the screen:
FLAT TIRE — Check All Tires.
WARNING
When a spare tire is mounted or a wheel is
replaced, tire pressure will not be indi-
cated and the low tire pressure warning
system will not function. Contact your
NISSAN dealer as soon as possible for tire
replacement and/or system resetting.
HOW TO USE THE “SETTING”
BUTTON
To adjust the various settings within the display
screen press the“SETTING”button.
After pressing the SETTING button a menu will
be shown on the display screen which will allow
you to program several functions such as the
display screen appearance, programmable fea-
tures for your vehicles electronics system and
other system settings such as your clock. To
make a selection from this mode use the joystick
and press the “ENTER” button.
LHA0577LHA0558
4-6Display screen, heater, air conditioner and audio systems
ZREVIEW COPYÐ2006 Armada(wzw)
Owners ManualÐUSA_English(nna)
06/16/05Ðdebbie
X
Page 180 of 352

Clock
Adjusting the time:
Select the“Hours”or“Minutes”key and move
the joystick to the right or left to adjust the time.
The time will change step by step.
After completion of the setting, press the
“BACK”button.Setting daylight savings time:
Use the“Daylight Saving Time”key to adjust
the clock to daylight savings time.
ON: The displayed time advances by 1 hour.
OFF: The current time is displayed.Adjusting the time to the GPS:
Select the“Auto Adjust”key.
The time will be reset to the GPS time.
LHA0562LHA0566LHA0567
4-10Display screen, heater, air conditioner and audio systems
ZREVIEW COPYÐ2006 Armada(wzw)
Owners ManualÐUSA_English(nna)
06/16/05Ðdebbie
X
Page 181 of 352
![NISSAN ARMADA 2006 1.G Owners Manual Selecting the time zone:
1. Select the“Select Time Zone”key.
The [TIME ZONE] screen will appear.2. Select one of the following zones depending
on the current location.
cPacific zone
cMountain zone NISSAN ARMADA 2006 1.G Owners Manual Selecting the time zone:
1. Select the“Select Time Zone”key.
The [TIME ZONE] screen will appear.2. Select one of the following zones depending
on the current location.
cPacific zone
cMountain zone](/manual-img/5/704/w960_704-180.png)
Selecting the time zone:
1. Select the“Select Time Zone”key.
The [TIME ZONE] screen will appear.2. Select one of the following zones depending
on the current location.
cPacific zone
cMountain zone
cCentral zone
cEastern zone
cAtlantic zone
cNewfoundland zone
After selection, the [CLOCK SETTINGS] screen
will appear.The GPS time (manual time) corresponding to
the selected zone will be displayed. Pacific zone
has been set as the initial (default) setting.
Beep setting
With this option ON, a beep will sound if any
audio button is pushed.
BUTTON
To change the display brightness, push
thebutton. Pushing the button again will
change the display to DAY or NIGHT display.
Then, adjust the brightness moving the joystick
right or left.
If no operation is done within 10 seconds, or if the
“BACK”button is pushed, the display will return
to the previous display.
LHA0568LHA0563
Display screen, heater, air conditioner and audio systems4-11
ZREVIEW COPYÐ2006 Armada(wzw)
Owners ManualÐUSA_English(nna)
06/16/05Ðdebbie
X
Page 195 of 352
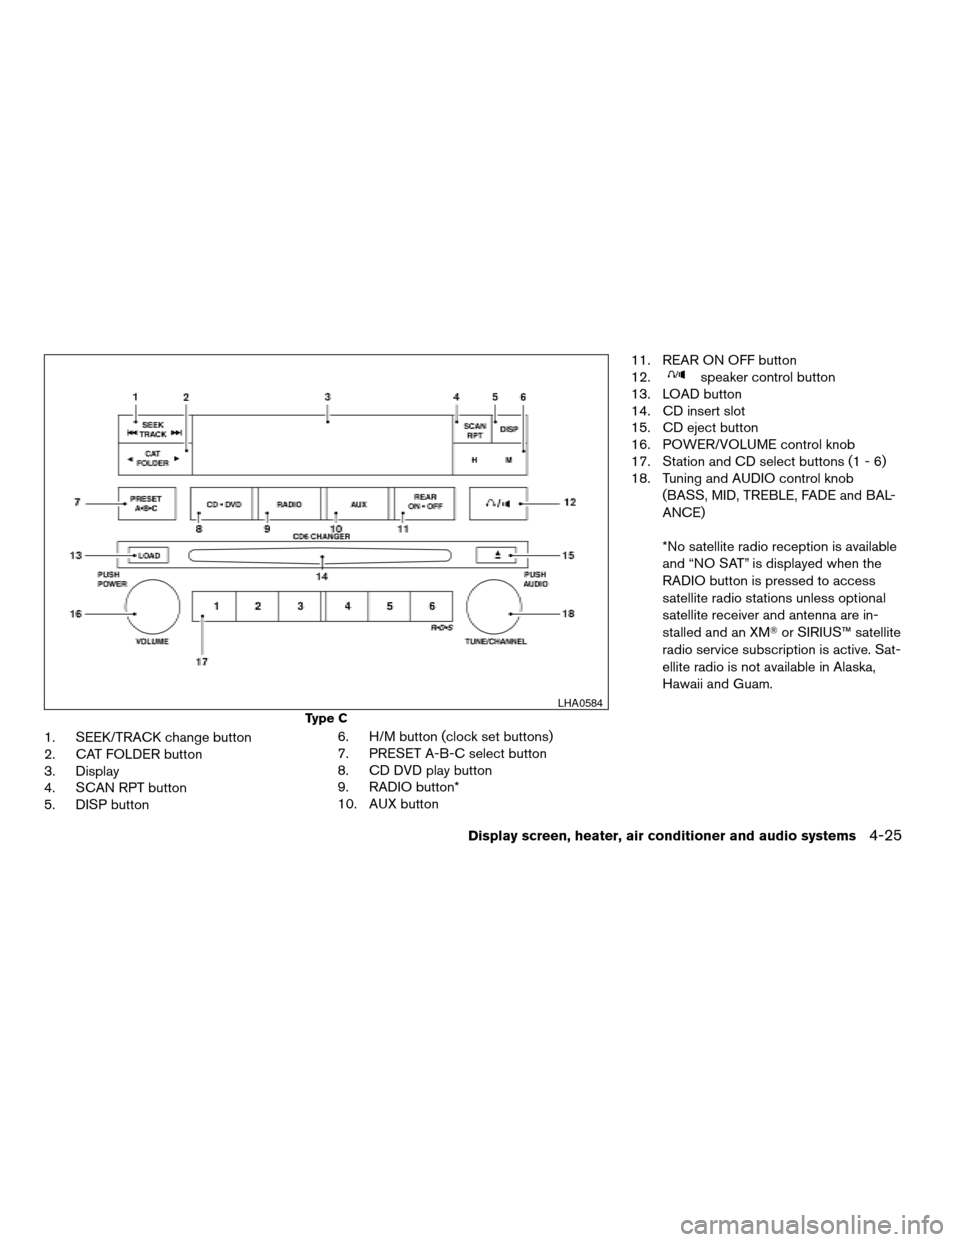
1. SEEK/TRACK change button
2. CAT FOLDER button
3. Display
4. SCAN RPT button
5. DISP button6. H/M button (clock set buttons)
7. PRESET A-B-C select button
8. CD DVD play button
9. RADIO button*
10. AUX button11. REAR ON OFF button
12.
speaker control button
13. LOAD button
14. CD insert slot
15. CD eject button
16. POWER/VOLUME control knob
17. Station and CD select buttons (1 - 6)
18. Tuning and AUDIO control knob
(BASS, MID, TREBLE, FADE and BAL-
ANCE)
*No satellite radio reception is available
and “NO SAT” is displayed when the
RADIO button is pressed to access
satellite radio stations unless optional
satellite receiver and antenna are in-
stalled and an XMTor SIRIUS™ satellite
radio service subscription is active. Sat-
ellite radio is not available in Alaska,
Hawaii and Guam.
Type C
LHA0584
Display screen, heater, air conditioner and audio systems4-25
ZREVIEW COPYÐ2006 Armada(wzw)
Owners ManualÐUSA_English(nna)
06/16/05Ðdebbie
X
Page 196 of 352

FM-AM-SAT RADIO WITH
COMPACT DISC (CD) CHANGER
(Type A, B and C) (if so equipped)
No satellite radio reception is available and “NO
SAT” is displayed when the RADIO button is
pressed to select satellite radio stations unless
optional satellite receiver and antenna are in-
stalled and an XMTor SIRIUS™ satellite radio
service subscription is active. Satellite radio is
not available in Alaska, Hawaii and Guam.
Audio main operation
POWER/VOLUME control:
Turn the ignition key to ACC or ON, and then
push the POWER/VOLUME control knob while
the system is off to call up the mode (radio or CD)
which was playing immediately before the system
was turned off.
To turn the system off, press the
POWER/VOLUME control knob.
Turn the POWER/VOLUME control knob to ad-
just the volume.
This vehicle may be equipped with speed sensi-
tive control volume (SSV) for audio. The audio
volume changes as the driving speed changes.AUDIO knob (BASS, MIDRANGE, TREBLE,
FADE, BALANCE and SSV if so equipped):
Press the AUDIO knob to change the mode as
follows:
BASS!MID!TREBLE!FADE!BALANCE
!SSV (if so equipped)
To adjust Bass, Mid (Midrange) , Treble, Fade and
Balance, press the AUDIO knob until the desired
mode appears in the display. Turn the Tuning
knob to adjust Bass and Treble to the desired
level. You can also use the Tuning knob to adjust
Fader and Balance modes. Fader adjusts the
sound level between the front and rear speakers
and Balance adjusts the sound between the right
and left speakers.
To change the SSV mode to OFF, LOW, MID or
HIGH, turn the Tuning knob to the right or left.
Once you have adjusted the sound quality to the
desired level, press the AUDIO knob repeatedly
until the radio or CD display reappears. Other-
wise, the radio or CD display will automatically
reappear after about 10 seconds.
Clock set (type C only)
1. Press and hold the H button to advance
hours.
2. Press and hold the M button to advance
minutes.For setting the clock on type A and B audio
systems see “Adjusting the time” earlier in this
section.
DISP (display) button:
This DISP (display) button will show text about
MP3, SAT or CD information in the audio display.
CD display mode
To change the text displayed while playing a CD
with text, press the DISP button. The DISP button
will allow you to scroll through CD text as follows:
Disc titleÃ!Track title.
To change the default display mode push the
tune knob to display mode and rotate the knob to
select the following display mode: Disc titleÃ!
Track titleÃ!Track number.
Once the display mode is selected press the tune
knob to store your selection. If the tuning knob is
not pressed after 8 seconds the display will re-
fresh with the last selected display mode setting.
cTrack title mode displays the title of the se-
lected CD track.
cDisk title mode displays the title of the CD
being played.
cTrack number mode displays the number
selected disc and the track that is currently
being played on the disk.
4-26Display screen, heater, air conditioner and audio systems
ZREVIEW COPYÐ2006 Armada(wzw)
Owners ManualÐUSA_English(nna)
06/16/05Ðdebbie
X
Page 222 of 352
To remove the key from the ignition switch:
1. Shift the selector lever to the P (Park) posi-
tion with the key in the ON position.
2. Turn the key to the LOCK position.
3. Remove the key from the ignition.
If the selector lever is shifted to the P (Park)
position after the key is turned to the OFF posi-
tion or when the key cannot be turned to the
LOCK position, proceed as follows to remove the
key.
1. Move the shift selector lever into the P (Park)
position.
2. Turn the ignition key slightly toward the ON
position.
3. Turn the key to the LOCK position.
4. Remove the key.
The shift selector lever is designed so it cannot
moved out of P (Park) and into any of the other
gear positions if the ignition key is turned to OFF
position or if the key is removed from the switch.
The shift selector lever can be moved if the
ignition switch is in the ON position and the
foot brake pedal is depressed.There is an OFF position between the
LOCK and ACC positions. The OFF position
is indicated by a “1” on the key cylinder.
When the ignition is in the OFF position,
the steering wheel is not locked.
In order for the steering wheel to be locked, it
must be turned about 1/8 of a turn clockwise
from the straight up position.
To lock the steering wheel, turn the key to
the LOCK position. Remove the key. To
unlock the steering wheel, insert the key
and turn it gently while rotating the steer-
ing wheel slightly right and left.
If the key will not turn from the LOCK posi-
tion, turn the steering wheel to the left or
right while turning the key to unlock the
key cylinder.
WARNING
Never remove or turn the key to the LOCK
position while driving. The steering wheel
will lock. This may cause the driver to lose
control of the vehicle and could result in
serious vehicle damage or personal injury.
KEY POSITIONS
LOCK: Normal parking position (0)
OFF: (Not used) (1)
ACC: (Accessories) (2)
This position activates electrical accessories
such as the radio when the engine is not running.
ON: Normal operating position (3)
This position turns on the ignition system and the
electrical accessories.
START: (4)
This position starts the engine. As soon as the
engine has started, release the key. It automati-
cally returns to the ON position.
NISSAN VEHICLE IMMOBILIZER
SYSTEM
The NISSAN Vehicle Immobilizer System will not
allow the engine to start without the use of the
registered key.
5-8Starting and driving
ZREVIEW COPYÐ2006 Armada(wzw)
Owners ManualÐUSA_English(nna)
06/16/05Ðdebbie
X