2006 NISSAN ARMADA four wheel drive
[x] Cancel search: four wheel drivePage 234 of 352
The transfer case 4WD shift switch is used to
select either 2WD or 4WD depending on the
driving conditions. There are four types of drive
modes available, AUTO, 2WD, 4H and 4LO.
The 4WD shift switch electronically controls the
transfer case operation. Rotate the switch to
move between each mode, 2WD, AUTO, 4H and
4LO.
You must push the switch in to select 4LO,
and the vehicle MUST be stationary and the
automatic transmission selector lever in
the N position when changing into or out of
4LO.
WARNING
When parking, apply the parking brake
before stopping the engine and make sure
that the 4WD shift indicator light is on and
the ATP warning light goes off. Otherwise,
the vehicle could unexpectedly move even
if the automatic transmission is in the P
position.
CAUTION
cNever shift the 4WD shift switch be-
tween 4LO and 4H while driving.
cThe 4H position provides greater trac-
tion. Avoid excessive speed, as it will
cause increased fuel consumption and
higher oil temperatures, and could
damage drivetrain components.
Speeds over 62.5 MPH (100 km/h) in 4H
is not recommended.
cThe 4LO position provides maximum
power and traction. Avoid raising ve-
hicle speed excessively, as the maxi-
mum speed is approximately 31 MPH
(50 km/h) .
cWhen driving straight, shift the 4WD
shift switch to the 2WD, AUTO or 4H
position. Do not move the 4WD shift
switch when making a turn or reversing.
cDo not shift the 4WD shift switch (be-
tween 2WD, AUTO and 4H) while driving
on steep downhill grades. Use the en-
gine brake and low automatic transmis-
sion gears (D1 or D2) for engine
braking.cDo not operate the 4WD shift switch
(between 2WD, AUTO and 4H) with the
rear wheels spinning.
cDo not drive on dry hard surface roads
in the 4H or 4LO position. Driving on dry
hard surfaces in 4H or 4LO may cause
unnecessary noise and tire wear.
NISSAN recommends driving in the
2WD or AUTO position under these
conditions.
cThe 4WD transfer case may not be
shifted between 4H and 4LO at low am-
bient temperatures and the transfer
4LO position indicator light may blink
even when the 4WD shift switch is
shifted. After driving for a while you can
change the 4WD transfer case between
4H and 4LO.
When driving on rough roads,
cSet the 4WD shift switch to AUTO, 4H or
4LO.
cDrive carefully according to the road surface
conditions.
When the vehicle is stuck,
cPlace stones or wooden blocks under the
tires to free the vehicle.
5-20Starting and driving
ZREVIEW COPYÐ2006 Armada(wzw)
Owners ManualÐUSA_English(nna)
06/16/05Ðdebbie
X
Page 236 of 352
cEngine idling speed is high while warm-
ing up the engine. Be especially careful
when starting or driving on slippery sur-
faces with the 4WD shift switch set in
AUTO.
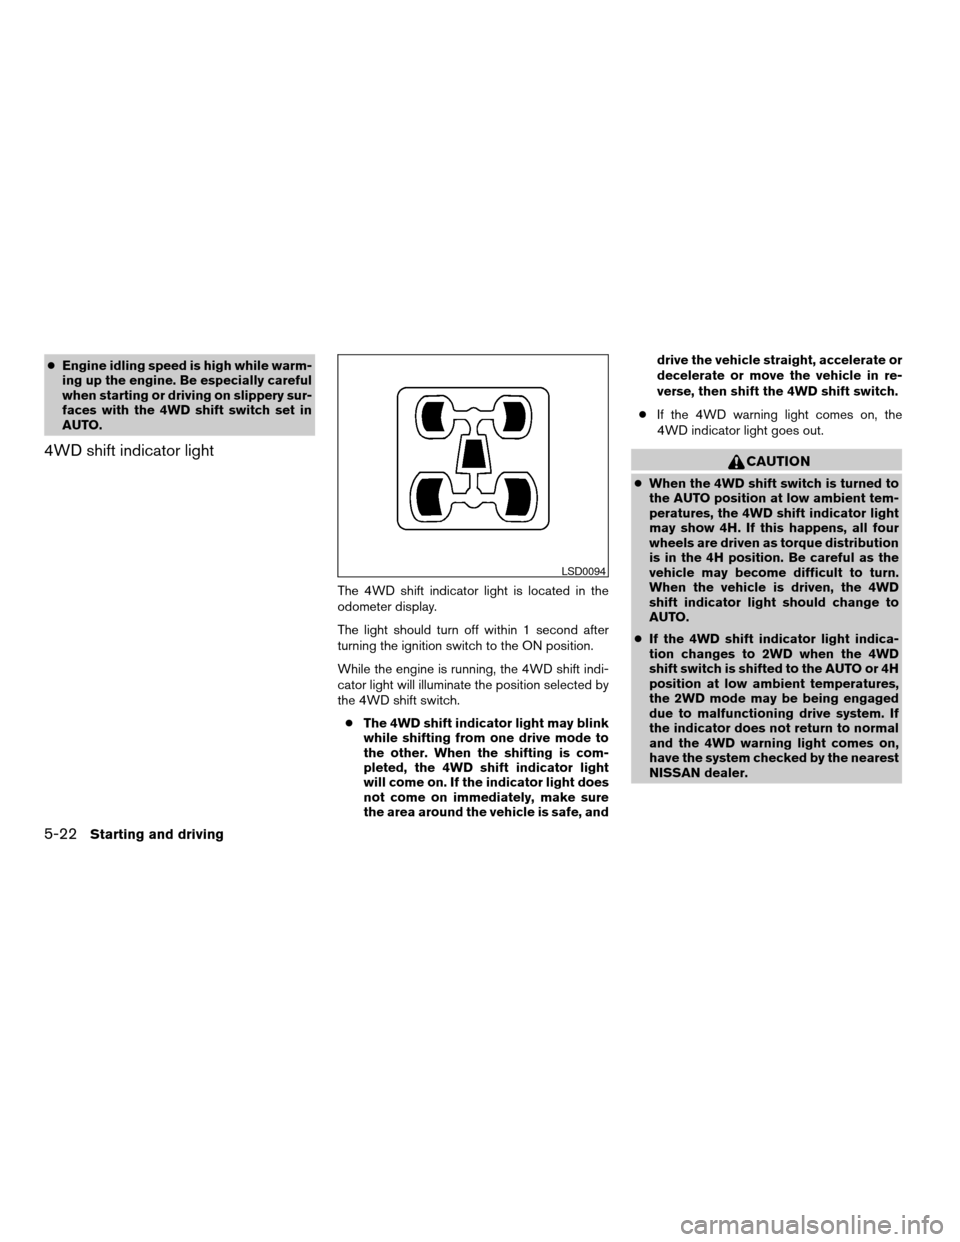
4WD shift indicator light
The 4WD shift indicator light is located in the
odometer display.
The light should turn off within 1 second after
turning the ignition switch to the ON position.
While the engine is running, the 4WD shift indi-
cator light will illuminate the position selected by
the 4WD shift switch.
cThe 4WD shift indicator light may blink
while shifting from one drive mode to
the other. When the shifting is com-
pleted, the 4WD shift indicator light
will come on. If the indicator light does
not come on immediately, make sure
the area around the vehicle is safe, anddrive the vehicle straight, accelerate or
decelerate or move the vehicle in re-
verse, then shift the 4WD shift switch.
cIf the 4WD warning light comes on, the
4WD indicator light goes out.
CAUTION
cWhen the 4WD shift switch is turned to
the AUTO position at low ambient tem-
peratures, the 4WD shift indicator light
may show 4H. If this happens, all four
wheels are driven as torque distribution
is in the 4H position. Be careful as the
vehicle may become difficult to turn.
When the vehicle is driven, the 4WD
shift indicator light should change to
AUTO.
cIf the 4WD shift indicator light indica-
tion changes to 2WD when the 4WD
shift switch is shifted to the AUTO or 4H
position at low ambient temperatures,
the 2WD mode may be being engaged
due to malfunctioning drive system. If
the indicator does not return to normal
and the 4WD warning light comes on,
have the system checked by the nearest
NISSAN dealer.
LSD0094
5-22Starting and driving
ZREVIEW COPYÐ2006 Armada(wzw)
Owners ManualÐUSA_English(nna)
06/16/05Ðdebbie
X
Page 240 of 352
This procedure is described in the vehicle service
manual and can be performed by a NISSAN
dealer.
ANTI-LOCK BRAKE SYSTEM (ABS)
The anti-lock brake system controls the brakes so
the wheels do not lock when braking abruptly or
when braking on slippery surfaces. The system
detects the rotation speed at each wheel and
varies the brake fluid pressure to prevent each
wheel from locking and sliding. By preventing
wheel lockup, the system helps the driver main-
tain steering control and helps to minimize swerv-
ing and spinning on slippery surfaces.
Using the system
Depress the brake pedal and hold it down.
WARNING
Do not pump the brake pedal. Doing so
may result in increased stopping
distances.
Normal operation
The anti-lock brake system does not operate at
speeds below3-6MPH(5-10km/h) . (The
speeds vary according to road conditions.)
When driving, the anti-lock brake system con-
trols the wheels so they will not lock when brak-ing abruptly or when braking on a slippery road.
Thus, difficult steering and swerving of the ve-
hicle due to locked wheels is minimized. The
system detects the wheel rotation rate and elec-
tronically controls the pressure applied to each
brake. Slight vibration on the brake pedal accom-
panied by noise usually occurs while the ABS
system is operating. Such vibration and noise
encountered during abrupt braking is not a prob-
lem, but indicates that the system is functioning
properly. However, the pulsation may indicate
that road conditions are hazardous and extra care
is required while driving.
Self-test feature
The anti-lock brake system consists of electronic
sensors and hydraulic solenoids controlled by a
computer. The computer has a built-in diagnostic
feature that tests the system each time you start
the engine and move the vehicle at a low speed in
forward or reverse. When the self-test occurs,
you may hear a ‘‘clunk’’ noise and/or feel a pulsa-
tion in the brake pedal. This is normal and is not
an indication of any malfunction. If the computer
senses any malfunction, it switches the anti-lock
brake system off and turns on the ABS brake
warning light on the instrument panel. The brake
system then operates normally, but without anti-
lock assistance.If the light comes on during the self-test or while
driving, take the vehicle to a NISSAN dealer for
repair.
WARNING
cThe anti-lock brake system is a sophis-
ticated device, but it cannot prevent ac-
cidents resulting from careless or dan-
gerous driving techniques. It can help
maintain vehicle control during braking
on slippery surfaces, but remember that
the stopping distance on slippery sur-
faces will be longer than on normal
surfaces even with the anti-lock brake
system. Stopping distances may also
be longer on rough, gravel or snow cov-
ered roads, or if you are using tire
chains. Tire type and condition may also
affect braking effectiveness. Always
maintain a safe distance from the ve-
hicle in front of you. Ultimately, the re-
sponsibility for safety of self and others
rests in the hands of the driver.
cTire type and condition of tires may also
affect braking effectiveness.
cWhen replacing tires, install the speci-
fied size of tires on all four wheels.
5-26Starting and driving
ZREVIEW COPYÐ2006 Armada(wzw)
Owners ManualÐUSA_English(nna)
06/16/05Ðdebbie
X
Page 244 of 352
DRAINING OF COOLANT WATER
If the vehicle is to be left outside without anti-
freeze, drain the cooling system, including the
engine block. Refill before operating the vehicle.
For details, see ‘‘Changing engine coolant’’ in the
‘‘Maintenance and do-it-yourself’’ section of this
manual.
TIRE EQUIPMENT
1. SUMMER tires have a tread designed to
provide superior performance on dry pave-
ment. However, the performance of these
tires will be substantially reduced in snowy
and icy conditions. If you operate your ve-
hicle on snowy or icy roads, NISSAN recom-
mends the use of MUD & SNOW or ALL
SEASON TIRES on all four wheels. Please
consult a NISSAN dealer for the tire type,
size, speed rating and availability informa-
tion.
2. For additional traction on icy roads, studded
tires may be used. However, some U.S.
states and Canadian provinces prohibit their
use. Check local, state and provincial laws
before installing studded tires.
Skid and traction capabilities of studded
snow tires on wet or dry surfaces may be
poorer than that of non-studded snow tires.3. Tire chains may be used.
Use of tire chains may be prohibited accord-
ing to location. Check the local laws before
installing tire chains. When installing tire
chains, make sure they are the proper size
for the tires on your vehicle and are installed
according to the chain manufacturer’s sug-
gestions.Use only SAE Class “S”
chains.Class “S” chains are used on ve-
hicles with restricted tire to vehicle clear-
ance. Vehicles that can use Class “S” chains
are designed to meet the minimum clear-
ances between the tire and the closest ve-
hicle suspension or body component re-
quired to accommodate the use of a winter
traction device (tire chains or cables) . The
minimum clearances are determined using
the factory equipped tire size. Other types
may damage your vehicle. Use chain ten-
sioners when recommended by the tire
chain manufacturer to ensure a tight fit.
Loose end links of the tire chain must be
secured or removed to prevent the possibil-
ity of whipping action damage to the fenders
or underbody. If possible, avoid fully loading
your vehicle when using tire chains. In addi-
tion, drive at a reduced speed. Otherwise,
your vehicle may be damaged and/or vehicle
handling and performance may be adversely
affected.Never install tire chains on spare tires. Do
not use tire chains on dry roads.
SPECIAL WINTER EQUIPMENT
It is recommended that the following items be
carried in the vehicle during winter:
cA scraper and stiff-bristled brush to remove
ice and snow from the windows and wiper
blades.
cA sturdy, flat board to be placed under the
jack to give it firm support.
cA shovel to dig the vehicle out of snowdrifts.
cExtra window washer fluid to refill the reser-
voir tank.
DRIVING ON SNOW OR ICE
WARNING
cWet ice (32°F, 0°C and freezing rain) ,
very cold snow or ice can be slick and
very hard to drive on. The vehicle will
have much less traction or “grip” under
these conditions. Try to avoid driving on
wet ice until the road is salted or
sanded.
5-30Starting and driving
ZREVIEW COPYÐ2006 Armada(wzw)
Owners ManualÐUSA_English(nna)
06/16/05Ðdebbie
X
Page 248 of 352
LOW TIRE PRESSURE WARNING
SYSTEM
This vehicle is equipped with the low tire pres-
sure warning system. It monitors tire pressure of
all tires except the spare. When the low tire
pressure warning light is lit, one or more of your
tires is significantly underinflated. If equipped, the
system also displays pressure of all tires (except
the spare tire) on the display screen by sending a
signal from a sensor that is installed in each
wheel. If the vehicle is being driven with low tire
pressure, the low tire pressure warning system
will activate and warn you of it by the low tire
pressure warning light. This system will activate
only when the vehicle is driven at speeds above
20 MPH (32 km/h) . For more details, refer to
“Warning/indicator lights and audible reminders”
in the “Instruments and controls” section, “Tire
pressure information” in the “Display screen,
heater, air conditioner and audio systems” sec-
tion and “Low tire pressure warning system” in
the “Starting and driving” section.
WARNING
cIf the low tire pressure warning light
illuminates while driving, avoid sudden
steering maneuvers or abrupt braking,
reduce vehicle speed, pull off the road
to a safe location and stop the vehicle
as soon as possible. Serious vehicle
damage could occur and may lead to an
accident and could result in serious
personal injury. Check the tire pressure
for all four tires. Adjust the tire pressure
to the recommended COLD tire pres-
sure shown on the Tire and Loading
Information label to turn the low tire
pressure warning light OFF. If you have
a flat tire, replace it with a spare tire as
soon as possible.
cWhen a spare tire is mounted or a wheel
is replaced, tire pressure will not be
indicated and the low tire pressure
warning system will not function. Con-
tact your NISSAN dealer as soon as
possible for tire replacement and/or
system resetting.
cDo not inject any tire liquid or aerosol
tire sealant into the tires, as this may
cause a malfunction of the tire pressure
sensors.
CHANGING A FLAT TIRE
If you have a flat tire, follow the instructions be-
low.
Stopping the vehicle
1. Safely move the vehicle off the road and
away from traffic.
2. Turn on the hazard warning flashers.
3. Park on a level surface and apply the parking
brake. Shift the transmission into P (Park) .
4. Turn off the engine.
5. Raise the hood to warn other traffic and to
signal professional road assistance person-
nel that you need assistance.
6. Have all passengers get out of the vehicle
and stand in a safe place, away from traffic
and clear of the vehicle.
WARNING
cMake sure the parking brake is securely
applied and the automatic transmission
is shifted into P (Park) .
cNever change tires when the vehicle is
on a slope, ice or slippery areas. This is
hazardous.
FLAT TIRE
6-2In case of emergency
ZREVIEW COPYÐ2006 Armada(wzw)
Owners ManualÐUSA_English(nna)
06/16/05Ðdebbie
X
Page 258 of 352
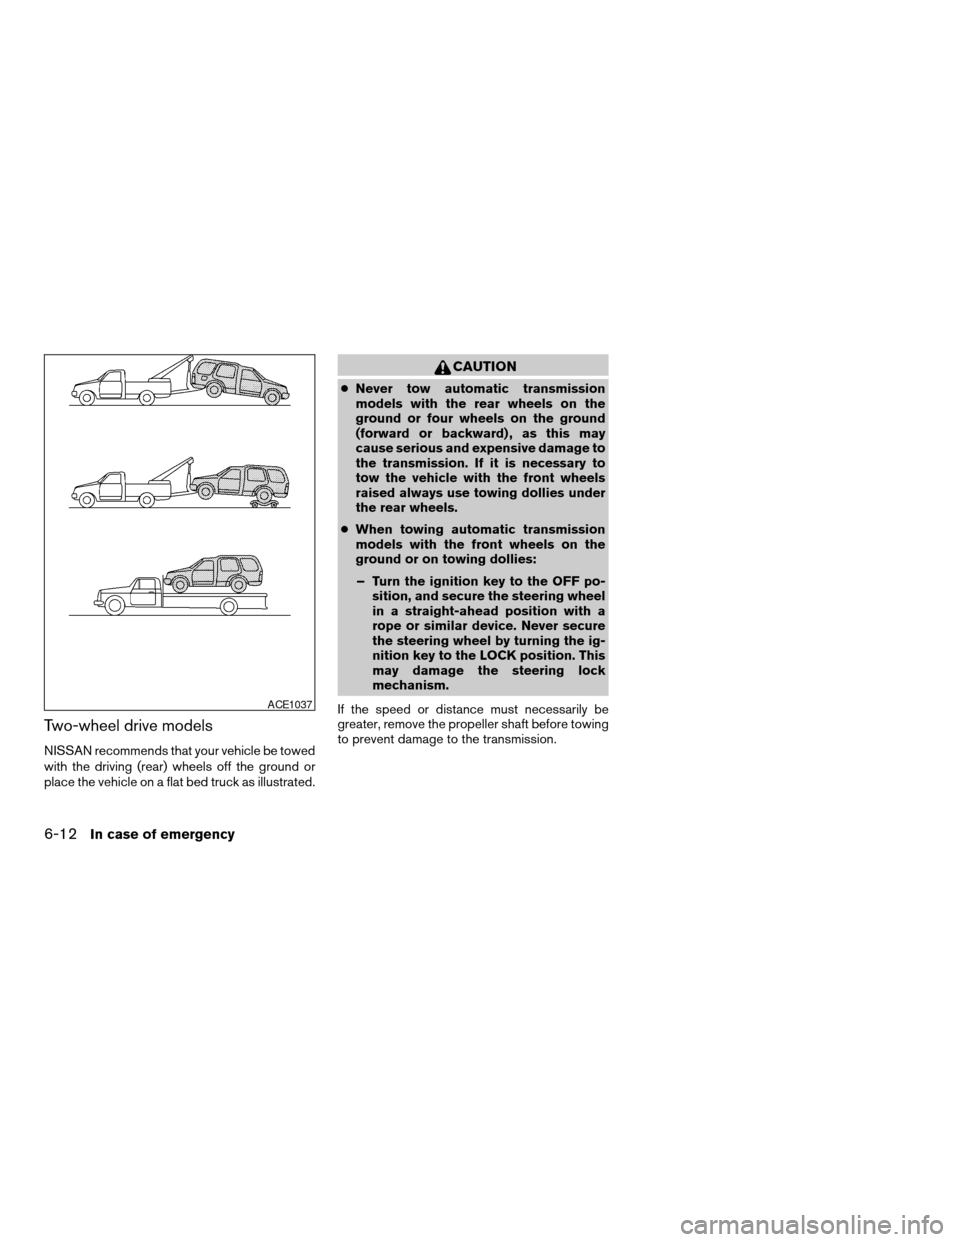
Two-wheel drive models
NISSAN recommends that your vehicle be towed
with the driving (rear) wheels off the ground or
place the vehicle on a flat bed truck as illustrated.
CAUTION
cNever tow automatic transmission
models with the rear wheels on the
ground or four wheels on the ground
(forward or backward) , as this may
cause serious and expensive damage to
the transmission. If it is necessary to
tow the vehicle with the front wheels
raised always use towing dollies under
the rear wheels.
cWhen towing automatic transmission
models with the front wheels on the
ground or on towing dollies:
– Turn the ignition key to the OFF po-
sition, and secure the steering wheel
in a straight-ahead position with a
rope or similar device. Never secure
the steering wheel by turning the ig-
nition key to the LOCK position. This
may damage the steering lock
mechanism.
If the speed or distance must necessarily be
greater, remove the propeller shaft before towing
to prevent damage to the transmission.
ACE1037
6-12In case of emergency
ZREVIEW COPYÐ2006 Armada(wzw)
Owners ManualÐUSA_English(nna)
06/16/05Ðdebbie
X
Page 259 of 352
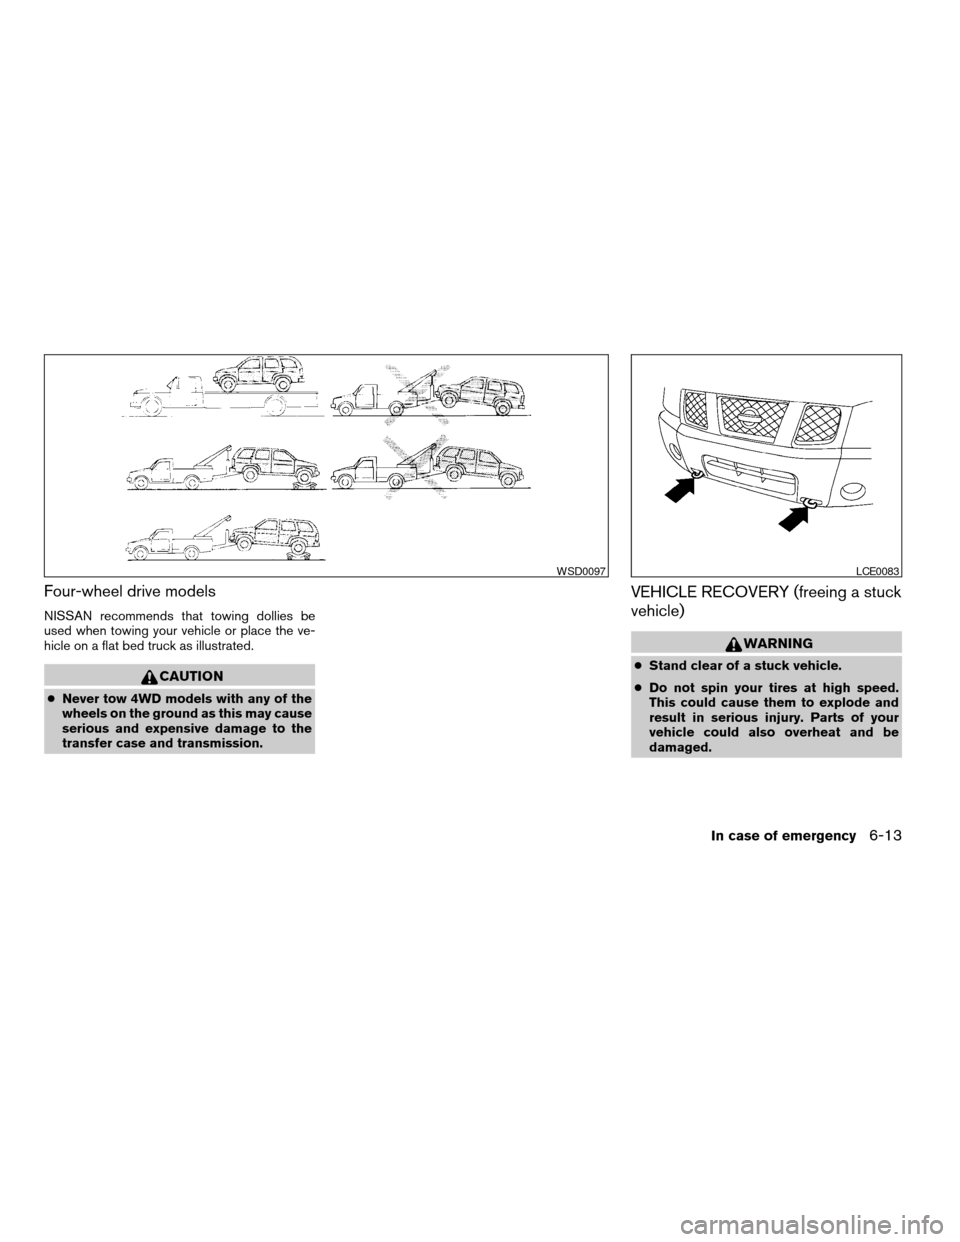
Four-wheel drive models
NISSAN recommends that towing dollies be
used when towing your vehicle or place the ve-
hicle on a flat bed truck as illustrated.
CAUTION
cNever tow 4WD models with any of the
wheels on the ground as this may cause
serious and expensive damage to the
transfer case and transmission.
VEHICLE RECOVERY (freeing a stuck
vehicle)
WARNING
cStand clear of a stuck vehicle.
cDo not spin your tires at high speed.
This could cause them to explode and
result in serious injury. Parts of your
vehicle could also overheat and be
damaged.
WSD0097LCE0083
In case of emergency6-13
ZREVIEW COPYÐ2006 Armada(wzw)
Owners ManualÐUSA_English(nna)
06/16/05Ðdebbie
X
Page 305 of 352

If you install snow tires, they must be the same
size, brand, construction and tread pattern on all
four wheels.
For additional traction on icy roads, studded tires
may be used. However, some U.S. states and
Canadian provinces prohibit their use. Check
local, state and provincial laws before installing
studded tires. Skid and traction capabilities of
studded snow tires on wet or dry surfaces may be
poorer than that of non-studded snow tires.
TIRE CHAINS
Use of tire chains may be prohibited according to
location. Check the local laws before installing
tire chains. When installing tire chains, make sure
they are the proper size for the tires on your
vehicle and are installed according to the chain
manufacturer’s suggestions.Use only SAE
class “S” chains.Class9S9chains are used on
vehicles with restricted tire to vehicle clearance.
Vehicles that can use Class “S” chains are de-
signed to meet the minimum clearances between
the tire and the closest vehicle suspension or
body component required to accommodate the
use of a winter traction device (tire chains or
cables) . The minimum clearances are determined
using the factory equipped tire size. Other types
may damage your vehicle. Use chain tensioners
when recommended by the tire chain manufac-
turer to ensure a tight fit. Loose end links of thetire chain must be secured or removed to prevent
the possibility of whipping action damage to the
fenders or underbody. If possible, avoid fully load-
ing your vehicle when using tire chains. In addi-
tion, drive at a reduced speed. Otherwise, your
vehicle may be damaged and/or vehicle handling
and performance may be adversely affected.
Tire chains must be installed only on the
rear wheels and not on the front wheels.
Do not use tire chains on dry roads. Driving with
chains in such conditions can cause damage to
the various mechanisms of the vehicle due to
some overstress.
Use only the 2WD range when driving on clear
paved roads.
CHANGING WHEELS AND TIRES
Tire rotation
NISSAN recommends rotating the tires
every 7,500 miles (12,000 km) .
See “Flat tire” in the “In case of emer-
gency” section in this manual for tire re-
placing procedures.
As soon as possible, tighten the
wheel nuts to the specified torque
with a torque wrench.
WDI0258
Maintenance and do-it-yourself8-39
ZREVIEW COPYÐ2006 Armada(wzw)
Owners ManualÐUSA_English(nna)
06/16/05Ðdebbie
X