2006 NISSAN ALTIMA oil pressure
[x] Cancel search: oil pressurePage 70 of 304

2 Instruments and controls
Instrument panel...................................2-2
Meters and gauges................................2-3
Speedometer and odometer.....................2-4
Trip computer (if so equipped)...................2-5
Tachometer....................................2-7
Engine coolant temperature gauge...............2-8
Fuel gauge....................................2-8
Engine oil pressure gauge (if so equipped)........2-9
Voltmeter (if so equipped)......................2-10
Fuel consumption gauge (if so equipped)........2-10
Warning/indicator lights and audible reminders......2-11
Checking bulbs...............................2-11
Warning lights................................2-11
Indicator lights................................2-14
Audible reminders.............................2-15
Security systems.................................2-16
Vehicle security system (if so equipped)..........2-16
Nissan vehicle immobilizer system...............2-17
Windshield wiper and washer switch...............2-19
Switch operation..............................2-19
Rear window and outside mirror (if so equipped)
defroster switch..................................2-20
Headlight and turn signal switch....................2-21Xenon headlights (if so equipped)...............2-21
Headlight control switch........................2-21
Daytime running light system (Canada only)......2-24
Instrument brightness control...................2-24
Turn signal switch.............................2-25
Fog light switch (if so equipped)................2-25
Hazard warning flasher switch.....................2-26
Horn............................................2-26
Heated seat (if so equipped).......................2-27
Traction control system (TCS) off switch
(if so equipped)..................................2-28
Power outlet.....................................2-28
Cigarette lighter and ashtray (if so equipped)........2-29
Storage.........................................2-30
Map pockets..................................2-30
Seatback pockets (if so equipped)..............2-31
Sunglasses holder.............................2-31
Cup holders..................................2-32
Glove box....................................2-33
Console box..................................2-33
Instrument panel storage (if so equipped)........2-35
Covered storage box (if so equipped)............2-36
Grocery hooks (if so equipped).................2-36
ZREVIEW COPYÐ2006 Altima(l30)
Owners ManualÐUSA_English(nna)
09/08/05Ðdebbie
X
Page 74 of 304

Triple meter (if so equipped):
1. Fuel consumption gauge
2. Engine oil pressure gauge
3. Voltmeter1. Speedometer
2. Odometer/twin trip display
3. Change button
SPEEDOMETER AND ODOMETER
Speedometer
The speedometer indicates vehicle speed in
miles per hour (MPH) and kilometers per hour
(km/h) .
Odometer/Twin trip odometer (if so
equipped)
The odometer/twin trip odometer (if so equipped)
is displayed when the ignition key is in the ON
position.
The odometer records the total distance the ve-
hicle has been driven.
The twin trip odometer (if so equipped) records
the distance of individual trips.
LIC0746LIC0682
2-4Instruments and controls
ZREVIEW COPYÐ2006 Altima(l30)
Owners ManualÐUSA_English(nna)
09/08/05Ðdebbie
X
Page 79 of 304

Theindicates that the fuel-filler door is
located on the driver’s side of the vehicle.
CAUTION
cIf the vehicle runs out of fuel,
the
malfunction indicator light
(MIL) may come on. Refuel as soon as
possible. After a few driving trips,
the
light should turn off. If the
light remains on after a few driving
trips, have the vehicle inspected by a
NISSAN dealer.
cFor additional information, see “Mal-
function indicator light (MIL)” later in
this section.
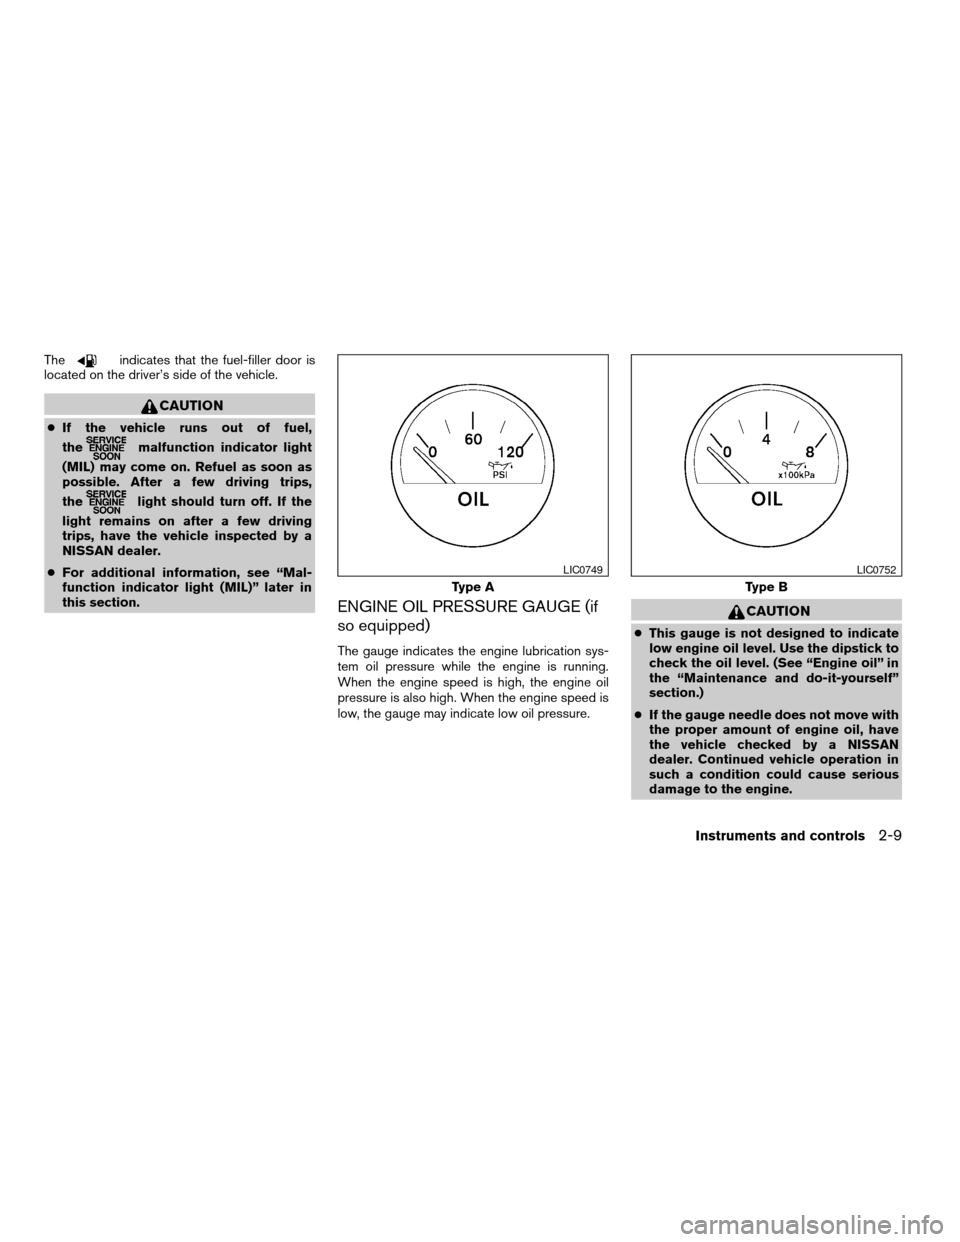
ENGINE OIL PRESSURE GAUGE (if
so equipped)
The gauge indicates the engine lubrication sys-
tem oil pressure while the engine is running.
When the engine speed is high, the engine oil
pressure is also high. When the engine speed is
low, the gauge may indicate low oil pressure.
CAUTION
cThis gauge is not designed to indicate
low engine oil level. Use the dipstick to
check the oil level. (See “Engine oil” in
the “Maintenance and do-it-yourself”
section.)
cIf the gauge needle does not move with
the proper amount of engine oil, have
the vehicle checked by a NISSAN
dealer. Continued vehicle operation in
such a condition could cause serious
damage to the engine.
Type A
LIC0749
Type B
LIC0752
Instruments and controls2-9
ZREVIEW COPYÐ2006 Altima(l30)
Owners ManualÐUSA_English(nna)
09/08/05Ðdebbie
X
Page 81 of 304

orAnti-lock brake warning light (if
so equipped)Low windshield washer fluid warning lightFront passenger air bag status light
Automatic transmission check warning light (if
so equipped)Seat belt warning light and chimeHigh beam indicator light (Blue)
orBrake warning lightSupplemental air bag warning lightMalfunction indicator light (MIL)
Charge warning lightTrunk lid open warning lightSlip indicator light (if so equipped)
Door open warning lightAutomatic transmission position indicator light
(A/T models)Traction control system off indicator light (if so
equipped)
Engine oil pressure warning lightCRUISE main switch indicator light (if so
equipped)Turn signal/hazard indicator lights
Low fuel warning lightCruise SET switch indicator light (if so
equipped)
CHECKING BULBS
With all doors closed, apply the parking brake
and turn the ignition key to the ON position
without starting the engine. The following lights
will come on:
,or,,,
The following lights come on briefly and then go
off:
or,,,,
If any light fails to come on, it may indicate
a burned-out bulb or an open circuit in the
electrical system. Have the system repaired
promptly.
WARNING LIGHTS
orAnti-lock brake
warning light (if so
equipped)
If the light comes on while the engine is running,
it may indicate the anti-lock brake system is not
functioning properly. Have the system checked
by a NISSAN dealer.
WARNING/INDICATOR LIGHTS AND
AUDIBLE REMINDERS
Instruments and controls2-11
ZREVIEW COPYÐ2006 Altima(l30)
Owners ManualÐUSA_English(nna)
09/08/05Ðdebbie
X
Page 82 of 304

If an abnormality occurs in the system, the anti-
lock function ceases, but the regular braking
system continues to operate.
If the light comes on while you are driving,
contact a NISSAN dealer for repair.
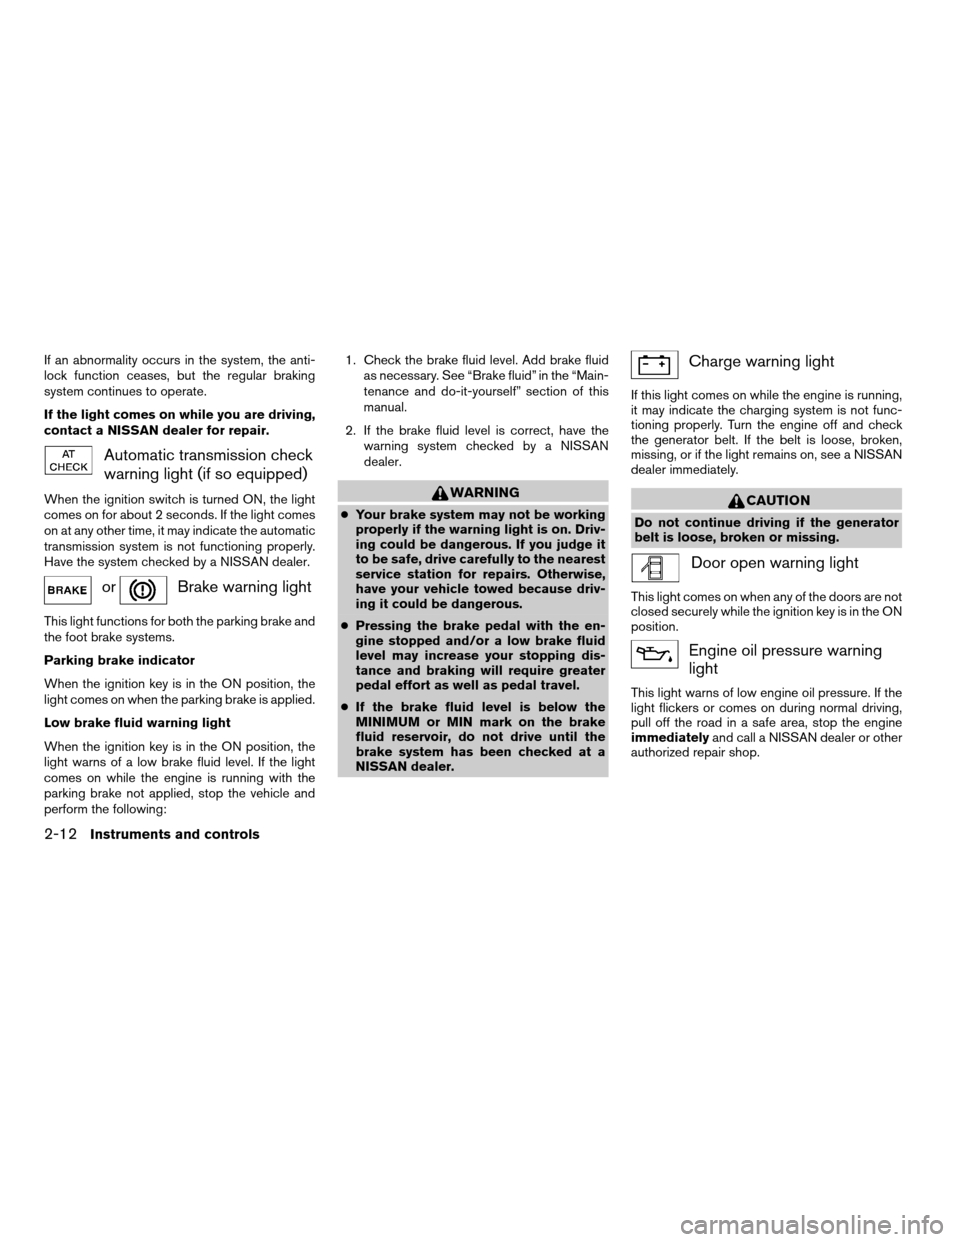
Automatic transmission check
warning light (if so equipped)
When the ignition switch is turned ON, the light
comes on for about 2 seconds. If the light comes
on at any other time, it may indicate the automatic
transmission system is not functioning properly.
Have the system checked by a NISSAN dealer.
orBrake warning light
This light functions for both the parking brake and
the foot brake systems.
Parking brake indicator
When the ignition key is in the ON position, the
light comes on when the parking brake is applied.
Low brake fluid warning light
When the ignition key is in the ON position, the
light warns of a low brake fluid level. If the light
comes on while the engine is running with the
parking brake not applied, stop the vehicle and
perform the following:1. Check the brake fluid level. Add brake fluid
as necessary. See “Brake fluid” in the “Main-
tenance and do-it-yourself” section of this
manual.
2. If the brake fluid level is correct, have the
warning system checked by a NISSAN
dealer.
WARNING
cYour brake system may not be working
properly if the warning light is on. Driv-
ing could be dangerous. If you judge it
to be safe, drive carefully to the nearest
service station for repairs. Otherwise,
have your vehicle towed because driv-
ing it could be dangerous.
cPressing the brake pedal with the en-
gine stopped and/or a low brake fluid
level may increase your stopping dis-
tance and braking will require greater
pedal effort as well as pedal travel.
cIf the brake fluid level is below the
MINIMUM or MIN mark on the brake
fluid reservoir, do not drive until the
brake system has been checked at a
NISSAN dealer.
Charge warning light
If this light comes on while the engine is running,
it may indicate the charging system is not func-
tioning properly. Turn the engine off and check
the generator belt. If the belt is loose, broken,
missing, or if the light remains on, see a NISSAN
dealer immediately.
CAUTION
Do not continue driving if the generator
belt is loose, broken or missing.
Door open warning light
This light comes on when any of the doors are not
closed securely while the ignition key is in the ON
position.
Engine oil pressure warning
light
This light warns of low engine oil pressure. If the
light flickers or comes on during normal driving,
pull off the road in a safe area, stop the engine
immediatelyand call a NISSAN dealer or other
authorized repair shop.
2-12Instruments and controls
ZREVIEW COPYÐ2006 Altima(l30)
Owners ManualÐUSA_English(nna)
09/08/05Ðdebbie
X
Page 83 of 304

The engine oil pressure warning light is not
designed to indicate a low oil level.Use the
dipstick to check the oil level. See “Engine oil” in
the “Maintenance and do-it-yourself” section of
this manual.
CAUTION
Running the engine with the engine oil
pressure warning light on could cause se-
rious damage to the engine almost imme-
diately. Such damage is not covered by
warranty. Turn off the engine as soon as it
is safe to do so.
Low fuel warning light
This light comes on when the fuel level in the fuel
tank is getting low. Refuel as soon as it is conve-
nient, preferably before the fuel gauge reaches E
(Empty) .There will be a small reserve of fuel
in the tank when the fuel gauge needle
reaches E (Empty) .
Low windshield washer fluid
warning light
This light comes on when the windshield washer
fluid is at a low level. Add windshield washer fluid
as necessary. See “Window washer fluid” in the
“Maintenance and do-it-yourself” section of this
manual.
Seat belt warning light and
chime
The light and chime remind you to fasten your
seat belts. The light illuminates whenever the
ignition key is turned to the ON or START position
and remains illuminated until the driver’s seat belt
is fastened. At the same time, the chime sounds
for about 6 seconds unless the driver’s seat belt
is securely fastened.
The seat belt warning light may also illuminate if
the front passenger’s seat belt is not fastened
when the front passenger’s seat is occupied (if
so equipped) . For 5 seconds after the ignition
switch is in the ON position, the system does not
activate the warning light for the front passenger.
Refer to “Seat belts” in the “Safety—Seats, seat
belts and supplemental restraint system” section
for precautions on seat belt usage.
Supplemental air bag warning
light
When the ignition key is in the ON or START
position, the supplemental air bag warning light
illuminates for about 7 seconds and then turns
off. This means the system is operational.
If any of the following conditions occur, the
supplemental front air bag, supplemental side air
bag (if so equipped) , curtain side-impact air bags(if so equipped) , and pre-tensioner seat belt sys-
tems need servicing and your vehicle must be
taken to a NISSAN dealer:
cThe supplemental air bag warning light re-
mains on after approximately 7 seconds.
cThe supplemental air bag warning light
flashes intermittently.
cThe supplemental air bag warning light does
not come on at all.
Unless checked and repaired, the supplemental
restraint system (air bag system) and/or the pre-
tensioner seat belts may not function properly.
For additional details see “Supplemental restraint
system” in the “Safety—Seats, seat belts and
supplemental restraint system” section of this
manual.
WARNING
If the supplemental air bag warning light
is on, it could mean that the supplemental
front air bag, supplemental side air bag (if
so equipped) , curtain side-impact air bag
systems (if so equipped) and/or pre-
tensioner seat belt systems will not oper-
ate in an accident. To help avoid injury to
yourself or others, have your vehicle
checked by a NISSAN dealer as soon as
possible.
Instruments and controls2-13
ZREVIEW COPYÐ2006 Altima(l30)
Owners ManualÐUSA_English(nna)
09/08/05Ðdebbie
X
Page 203 of 304

Installing the spare tire
The spare tire is designed for emergency
use. See specific instructions under the
heading “Wheels and tires” in the “Mainte-
nance and do-it-yourself” section of this
manual.
1. Clean any mud or dirt from the surface be-
tween the wheel and hub.
2. Carefully put the spare tire on and tighten
the wheel nuts finger tight.
3. With the wheel nut wrench, tighten wheel
nuts alternately and evenly as illustrated until
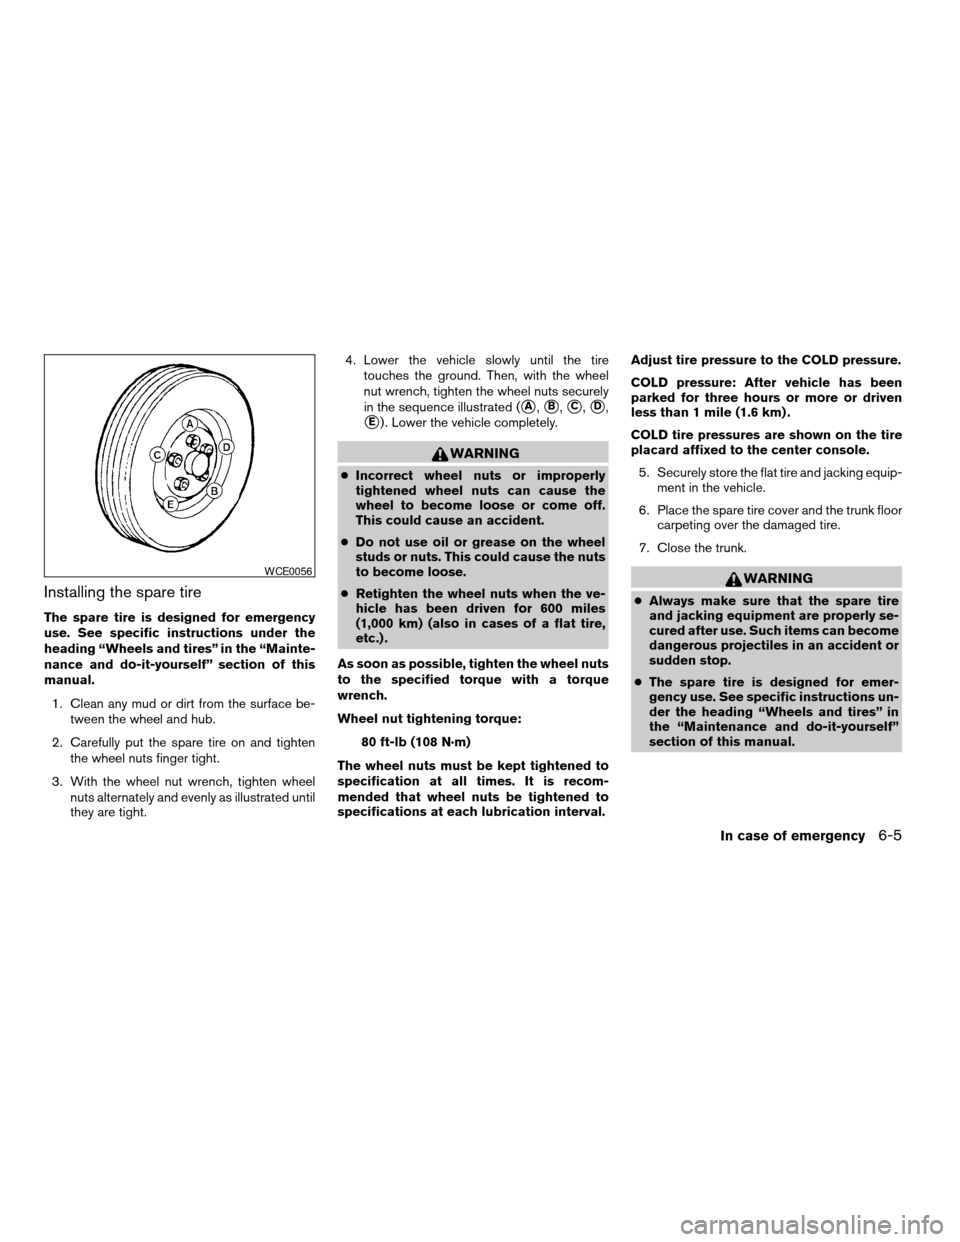
they are tight.4. Lower the vehicle slowly until the tire
touches the ground. Then, with the wheel
nut wrench, tighten the wheel nuts securely
in the sequence illustrated (
sA,sB,sC,sD,
sE) . Lower the vehicle completely.
WARNING
cIncorrect wheel nuts or improperly
tightened wheel nuts can cause the
wheel to become loose or come off.
This could cause an accident.
cDo not use oil or grease on the wheel
studs or nuts. This could cause the nuts
to become loose.
cRetighten the wheel nuts when the ve-
hicle has been driven for 600 miles
(1,000 km) (also in cases of a flat tire,
etc.) .
As soon as possible, tighten the wheel nuts
to the specified torque with a torque
wrench.
Wheel nut tightening torque:
80 ft-lb (108 N·m)
The wheel nuts must be kept tightened to
specification at all times. It is recom-
mended that wheel nuts be tightened to
specifications at each lubrication interval.Adjust tire pressure to the COLD pressure.
COLD pressure: After vehicle has been
parked for three hours or more or driven
less than 1 mile (1.6 km) .
COLD tire pressures are shown on the tire
placard affixed to the center console.
5. Securely store the flat tire and jacking equip-
ment in the vehicle.
6. Place the spare tire cover and the trunk floor
carpeting over the damaged tire.
7. Close the trunk.
WARNING
cAlways make sure that the spare tire
and jacking equipment are properly se-
cured after use. Such items can become
dangerous projectiles in an accident or
sudden stop.
cThe spare tire is designed for emer-
gency use. See specific instructions un-
der the heading “Wheels and tires” in
the “Maintenance and do-it-yourself”
section of this manual.
WCE0056
In case of emergency6-5
ZREVIEW COPYÐ2006 Altima(l30)
Owners ManualÐUSA_English(nna)
09/08/05Ðdebbie
X
Page 218 of 304

8 Maintenance and do-it-yourself
Maintenance requirements..........................8-2
General maintenance..............................8-2
Explanation of general maintenance items.........8-2
Maintenance precautions...........................8-5
Engine compartment check locations................8-6
Engine cooling system.............................8-8
Checking engine coolant level...................8-8
Changing engine coolant........................8-9
Engine oil.........................................8-9
Checking engine oil level........................8-9
Changing engine oil...........................8-10
Changing engine oil filter.......................8-12
4-speed automatic transmission fluid...............8-13
Temperature conditions for checking.............8-13
5-speed automatic transmission fluid...............8-15
Power steering fluid...............................8-15
Brake and clutch fluid.............................8-15
Brake fluid....................................8-16
Clutch fluid...................................8-16
Window washer fluid.............................8-16
Window washer fluid reservoir..................8-16
Battery..........................................8-17
Jump starting.................................8-18Drive belts.......................................8-19
Spark plugs......................................8-20
Replacing spark plugs.........................8-20
Air cleaner.......................................8-21
In-cabin microfilter (if so equipped)..............8-21
Windshield wiper blades..........................8-24
Cleaning.....................................8-24
Replacing....................................8-24
Parking brake and brake pedal.....................8-25
Checking parking brake........................8-25
Checking brake pedal..........................8-25
Brake booster.................................8-26
Fuses...........................................8-26
Engine compartment...........................8-26
Passenger compartment.......................8-28
Keyfob battery replacement........................8-29
Lights...........................................8-30
Headlights....................................8-30
Front park/turn/sidemarker light.................8-31
Fog lights (if so equipped)......................8-31
Exterior and interior lights.......................8-32
Wheels and tires.................................8-39
Tire pressure..................................8-39
ZREVIEW COPYÐ2006 Altima(l30)
Owners ManualÐUSA_English(nna)
09/08/05Ðdebbie
X