2006 NISSAN ALTIMA ignition
[x] Cancel search: ignitionPage 67 of 304

SUPPLEMENTAL AIR BAG
WARNING LIGHT
The supplemental air bag warning light,
displayingin the instrument panel, moni-
tors the circuits of the supplemental front air bag,
supplemental side air bag and curtain side-
impact air bag (if so equipped) and pre-tensioner
seat belt systems. The circuits monitored by the
supplemental air bag warning light are the diag-
nosis sensor unit, crash zone sensor, satellite
sensors, front air bag modules, side air bag mod-
ules, curtain side-impact air bag modules, pre-
tensioner seat belts and all related wiring.When the ignition key is in the ON or START
position, the supplemental air bag warning light
illuminates for about 7 seconds and then turns
off. This means the system is operational.
If any of the following conditions occur, the
supplemental front air bag, supplemental side air
bag and curtain side-impact air bag (if so
equipped) and pre-tensioner seat belt systems
need servicing:
cThe supplemental air bag warning light re-
mains on after approximately 7 seconds.
cThe supplemental air bag warning light
flashes intermittently.
cThe supplemental air bag warning light does
not come on at all.
Under these conditions, the supplemental front
air bag, supplemental side air bags and curtain
side-impact air bag (if so equipped) or pre-
tensioner seat belt systems may not operate
properly. It must be checked and repaired. Take
your vehicle to the nearest NISSAN dealer.
WARNING
If the supplemental air bag warning light
is on, it could mean that the supplemental
front air bag, supplemental side air bag,
curtain side-impact air bag systems (if so
equipped) and/or pre-tensioner seat belt
systems will not operate in an accident. To
help avoid injury to yourself or others,
have your vehicle checked by a NISSAN
dealer as soon as possible.
Repair and replacement procedure
The supplemental front air bags, supplemental
side air bags, curtain side-impact air bags (if so
equipped) and pre-tensioner seat belts are de-
signed to inflate on a one-time-only basis. As a
reminder, unless it is damaged, the supplemental
air bag warning light remains illuminated after
inflation has occurred. Repair and replacement of
these supplemental air bag systems should be
done only by a NISSAN dealer.
When maintenance work is required on the ve-
hicle, the supplemental front air bags, supple-
mental side air bags, curtain side-impact air bags
(if so equipped) , pre-tensioner seat belts and
related parts should be pointed out to the person
performing the maintenance. The ignition key
should always be in the LOCK position when
working under the hood or inside the vehicle.LRS0100
Safety—Seats, seat belts and supplemental restraint system1-49
ZREVIEW COPYÐ2006 Altima(l30)
Owners ManualÐUSA_English(nna)
09/08/05Ðdebbie
X
Page 73 of 304

17. Front passenger air bag status light
(P. 1-43)
18. Audio system controls (if so equipped)
(P. 4-23)
19. Ignition switch (P. 5-4)
20. Tilt/telescopic steering wheel controls
(P. 3-13)
21. Traction control system (TCS) off
switch (if so equipped) (P. 2-28)
22. Instrument brightness control (P. 2-24)
23. Trunk opener (P. 3-10)
24. Meters and gauges (if so equipped)
(P. 2-3)
25. Navigation system* (if so equipped)
(P. 4-2)
26. Navigation system* controls
(if so equipped) (P. 4-2)
*: Refer to the separate Navigation System
Owner’s Manual.
See the page number indicated in paren-
theses for operating details.
1. Tachometer
2. Warning/indicator lights
3. Speedometer
4. Engine coolant temperature gauge
5. Fuel gauge6. Odometer/twin trip odometer/trip com-
puter (if so equipped)
LIC0681
METERS AND GAUGES
Instruments and controls2-3
ZREVIEW COPYÐ2006 Altima(l30)
Owners ManualÐUSA_English(nna)
09/08/05Ðdebbie
X
Page 74 of 304

Triple meter (if so equipped):
1. Fuel consumption gauge
2. Engine oil pressure gauge
3. Voltmeter1. Speedometer
2. Odometer/twin trip display
3. Change button
SPEEDOMETER AND ODOMETER
Speedometer
The speedometer indicates vehicle speed in
miles per hour (MPH) and kilometers per hour
(km/h) .
Odometer/Twin trip odometer (if so
equipped)
The odometer/twin trip odometer (if so equipped)
is displayed when the ignition key is in the ON
position.
The odometer records the total distance the ve-
hicle has been driven.
The twin trip odometer (if so equipped) records
the distance of individual trips.
LIC0746LIC0682
2-4Instruments and controls
ZREVIEW COPYÐ2006 Altima(l30)
Owners ManualÐUSA_English(nna)
09/08/05Ðdebbie
X
Page 75 of 304

Changing the display:
For vehicles equipped with trip computer and
without navigation system, pushing the change
button changes the display as follows:
Trip
!Trip!Outside temperature
!Distance to Empty!Average economy!
Average speed!Elapsed time!Trip
For additional information, refer to “Trip com-
puter” later in this section.For vehicles equipped with trip computer and
navigation system, pushing the change button
changes the display as follows:
Trip
!Trip!Outside temperature
!Trip
For vehicles with navigation system, refer to
“How to use the ’trip’ button” in the “Display
screen, heater, air conditioner and audio sys-
tems” section later in this manual.
Resetting the trip odometer:
Pushing the change button for more than 1 sec-
ond resets the trip odometer to zero.
TRIP COMPUTER (if so equipped)
The display of the trip computer is situated in the
speedometer display. When the ignition is turned
to ON, the display scrolls all the modes of the trip
computer and then shows the mode chosen be-
fore the ignition switch is turned OFF.
Display without navigation system
WIC0601
Display with navigation system
LIC0719
Instruments and controls2-5
ZREVIEW COPYÐ2006 Altima(l30)
Owners ManualÐUSA_English(nna)
09/08/05Ðdebbie
X
Page 76 of 304

When the ignition switch is turned to ON, modes
of the trip computer can be selected by pushing
the trip button on the steering wheel switch for
audio controls or by the trip computer change
button located near the speedometer. The fol-
lowing modes can be selected:
Outside air temperature (ICY-°F or °C)
The outside air temperature is displayed in °F or
°C.
The outside air temperature mode includes a low
temperature warning feature: below 37°F (3°C) ,
the outside air temperature mode is automatically
selected and ICY will illuminate in order to draw
the driver’s attention. Press the trip or changebutton to toggle to the next mode, if desired. The
ICY indicator will remain illuminated as long as
the temperature remains below 39°F (4°C) .
The ambient temperature sensor is located in
front of the radiator. The sensor may be affected
by road or engine heat, wind directions and other
driving conditions. The display may differ from the
actual ambient temperature or the temperature
displayed on various signs or billboards.
Distance to empty (dte—mile or km)
The distance to empty (dte) mode provides you
with an estimation of the distance that can be
driven before refueling. The dte is constantly be-
ing calculated, based on the amount of fuel in the
fuel tank and the actual fuel consumption.
The display is updated every 30 seconds.
The dte mode includes a low range warning
feature: when the fuel level is low, the dte mode is
automatically selected and the digits blink in or-
der to draw the driver’s attention. Press the trip or
change button if you wish to return to the mode
that was selected before the warning occurred.
The dte mark (dte) will remain blinking until the
vehicle is refueled.
When the fuel level drops even lower, the dte
display will change to (----) .NOTE:
cIf the amount of fuel added while the
ignition switch is OFF is small, the dis-
play just before the ignition switch is
turned OFF may continue to be dis-
played.
cWhen driving uphill or rounding curves,
the fuel in the tank shifts, which may
momentarily change the display.
Average fuel consumption (mpg or
l/100km)
The average fuel consumption mode shows the
average fuel consumption since the last reset.
Resetting is done by pressing the trip or change
button for more than approximately 1 second.
The display is updated every 30 seconds. At
about the first 1/3 miles (500 m) after a reset, the
display shows (----) .
Average speed (mph or km/h)
The average speed mode shows the average
vehicle speed since last reset. Resetting is done
by pressing the trip or change button for more
than approximately 1 second. The display is up-
dated every 30 seconds. The first 30 seconds
after a reset, the display shows (----) .
LIC0683
2-6Instruments and controls
ZREVIEW COPYÐ2006 Altima(l30)
Owners ManualÐUSA_English(nna)
09/08/05Ðdebbie
X
Page 78 of 304

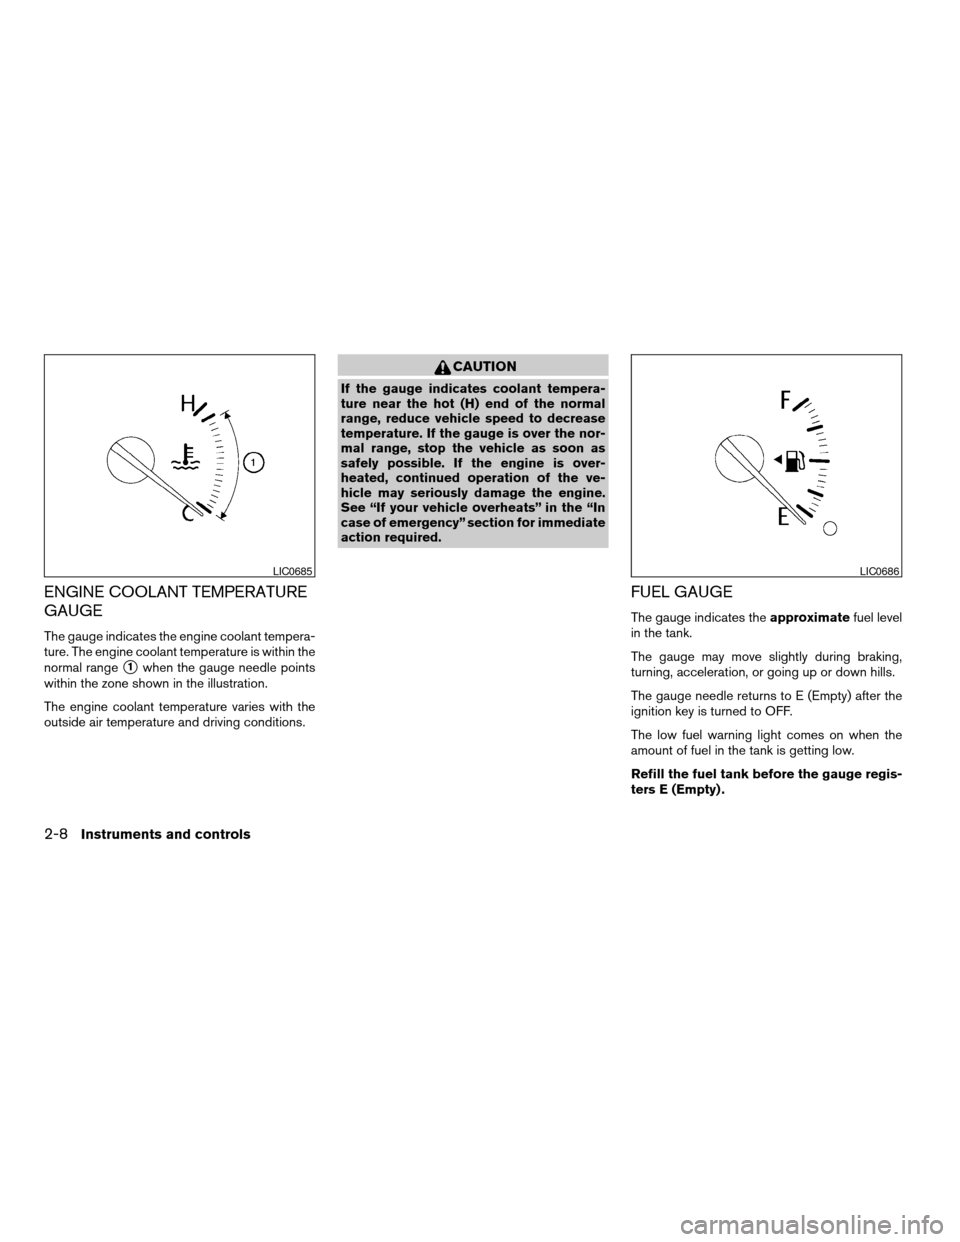
ENGINE COOLANT TEMPERATURE
GAUGE
The gauge indicates the engine coolant tempera-
ture. The engine coolant temperature is within the
normal range
s1when the gauge needle points
within the zone shown in the illustration.
The engine coolant temperature varies with the
outside air temperature and driving conditions.
CAUTION
If the gauge indicates coolant tempera-
ture near the hot (H) end of the normal
range, reduce vehicle speed to decrease
temperature. If the gauge is over the nor-
mal range, stop the vehicle as soon as
safely possible. If the engine is over-
heated, continued operation of the ve-
hicle may seriously damage the engine.
See “If your vehicle overheats” in the “In
case of emergency” section for immediate
action required.
FUEL GAUGE
The gauge indicates theapproximatefuel level
in the tank.
The gauge may move slightly during braking,
turning, acceleration, or going up or down hills.
The gauge needle returns to E (Empty) after the
ignition key is turned to OFF.
The low fuel warning light comes on when the
amount of fuel in the tank is getting low.
Refill the fuel tank before the gauge regis-
ters E (Empty) .
LIC0685LIC0686
2-8Instruments and controls
ZREVIEW COPYÐ2006 Altima(l30)
Owners ManualÐUSA_English(nna)
09/08/05Ðdebbie
X
Page 80 of 304

VOLTMETER (if so equipped)
When the ignition key is turned to the ON posi-
tion, the voltmeter indicates the battery voltage.
When the engine is running, it indicates the gen-
erator voltage.
While cranking the engine, the volts drop below
the normal range. If the needle is not in the normal
range (12 - 14.5 volts)
s1while the engine is
running, it may indicate that the charging system
is not functioning properly. Have the system
checked by a NISSAN dealer.
FUEL CONSUMPTION GAUGE (if so
equipped)
This gauge shows the APPROXIMATE fuel con-
sumption while you are driving.
The vehicle speed must be 7 mph (11.2 km/h) or
greater for the gauge to give a reading.
LIC0750
Type A
LIC0751
Type B
LIC0803
2-10Instruments and controls
ZREVIEW COPYÐ2006 Altima(l30)
Owners ManualÐUSA_English(nna)
09/08/05Ðdebbie
X
Page 81 of 304

orAnti-lock brake warning light (if
so equipped)Low windshield washer fluid warning lightFront passenger air bag status light
Automatic transmission check warning light (if
so equipped)Seat belt warning light and chimeHigh beam indicator light (Blue)
orBrake warning lightSupplemental air bag warning lightMalfunction indicator light (MIL)
Charge warning lightTrunk lid open warning lightSlip indicator light (if so equipped)
Door open warning lightAutomatic transmission position indicator light
(A/T models)Traction control system off indicator light (if so
equipped)
Engine oil pressure warning lightCRUISE main switch indicator light (if so
equipped)Turn signal/hazard indicator lights
Low fuel warning lightCruise SET switch indicator light (if so
equipped)
CHECKING BULBS
With all doors closed, apply the parking brake
and turn the ignition key to the ON position
without starting the engine. The following lights
will come on:
,or,,,
The following lights come on briefly and then go
off:
or,,,,
If any light fails to come on, it may indicate
a burned-out bulb or an open circuit in the
electrical system. Have the system repaired
promptly.
WARNING LIGHTS
orAnti-lock brake
warning light (if so
equipped)
If the light comes on while the engine is running,
it may indicate the anti-lock brake system is not
functioning properly. Have the system checked
by a NISSAN dealer.
WARNING/INDICATOR LIGHTS AND
AUDIBLE REMINDERS
Instruments and controls2-11
ZREVIEW COPYÐ2006 Altima(l30)
Owners ManualÐUSA_English(nna)
09/08/05Ðdebbie
X