Page 19 of 64
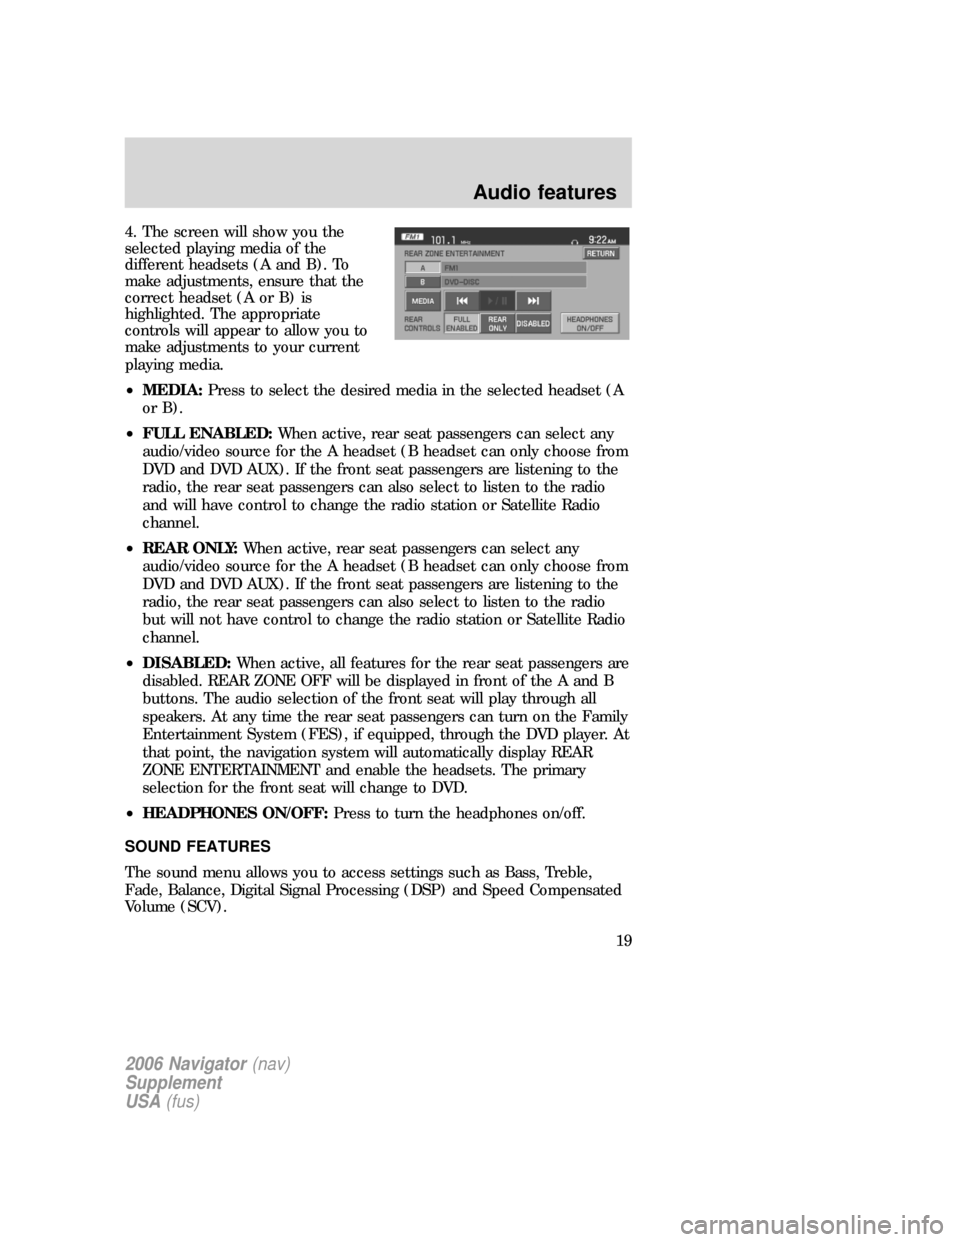
4. The screen will show you the
selected playing media of the
different headsets (A and B). To
make adjustments, ensure that the
correct headset (A or B) is
highlighted. The appropriate
controls will appear to allow you to
make adjustments to your current
playing media.
•MEDIA:Press to select the desired media in the selected headset (A
or B).
•FULL ENABLED:When active, rear seat passengers can select any
audio/video source for the A headset (B headset can only choose from
DVD and DVD AUX). If the front seat passengers are listening to the
radio, the rear seat passengers can also select to listen to the radio
and will have control to change the radio station or Satellite Radio
channel.
•REAR ONLY:When active, rear seat passengers can select any
audio/video source for the A headset (B headset can only choose from
DVD and DVD AUX). If the front seat passengers are listening to the
radio, the rear seat passengers can also select to listen to the radio
but will not have control to change the radio station or Satellite Radio
channel.
•DISABLED:When active, all features for the rear seat passengers are
disabled. REAR ZONE OFF will be displayed in front of the A and B
buttons. The audio selection of the front seat will play through all
speakers. At any time the rear seat passengers can turn on the Family
Entertainment System (FES), if equipped, through the DVD player. At
that point, the navigation system will automatically display REAR
ZONE ENTERTAINMENT and enable the headsets. The primary
selection for the front seat will change to DVD.
•HEADPHONES ON/OFF:Press to turn the headphones on/off.
SOUND FEATURES
The sound menu allows you to access settings such as Bass, Treble,
Fade, Balance, Digital Signal Processing (DSP) and Speed Compensated
Volume (SCV).
2006 Navigator(nav)
Supplement
USA(fus)
Audio features
19
Page 22 of 64
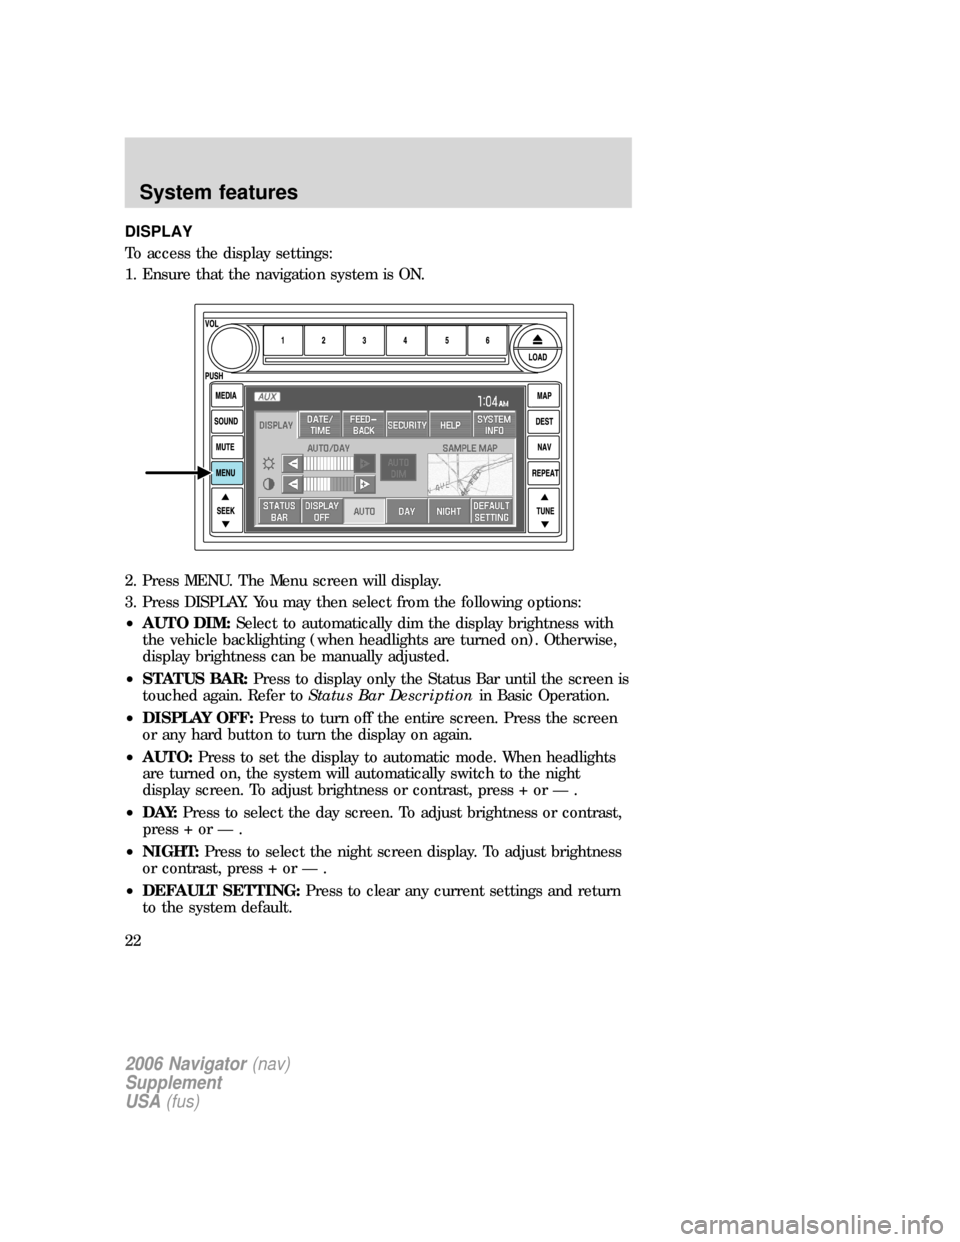
DISPLAY
To access the display settings:
1. Ensure that the navigation system is ON.
2. Press MENU. The Menu screen will display.
3. Press DISPLAY. You may then select from the following options:
•AUTO DIM:Select to automatically dim the display brightness with
the vehicle backlighting (when headlights are turned on). Otherwise,
display brightness can be manually adjusted.
•STATUS BAR:Press to display only the Status Bar until the screen is
touched again. Refer toStatus Bar Descriptionin Basic Operation.
•DISPLAY OFF:Press to turn off the entire screen. Press the screen
or any hard button to turn the display on again.
•AUTO:Press to set the display to automatic mode. When headlights
are turned on, the system will automatically switch to the night
display screen. To adjust brightness or contrast, press + or — .
•D AY:Press to select the day screen. To adjust brightness or contrast,
press + or — .
•NIGHT:Press to select the night screen display. To adjust brightness
or contrast, press + or — .
•DEFAULT SETTING:Press to clear any current settings and return
to the system default.
2006 Navigator(nav)
Supplement
USA(fus)
System features
22
Page 23 of 64
•SAMPLE MAP:Shows you how the map will appear with the current
settings
DATE/TIME
To access the date/time settings:
1. Ensure that the navigation system is ON.
2. Press MENU. The Menu screen will display.
3. Press DATE / TIME. You may then select from the following options:
SHOW CLOCK / SHOW CALENDAR:Press to toggle between CLOCK
and CALENDAR screens. Under the CLOCK screen, the following
buttons will be available:
•CLOCK ON/OFF :Press ON to enable the clock display in the status
bar. Press OFF to disable the clock display in the status bar.
•TIME SET BUTTONS:Press + or – to adjust the hours and minutes.
•24 HOUR FORMAT:If enabled, the system will display military time.
If disabled, the user must select AM or PM.
•DAYLIGHT SAVINGS TIME:Automatically prompts you to adjust
the clock according to the daylight savings calendar.
•SHOW CALENDAR:Press to display the calendar screen.
2006 Navigator(nav)
Supplement
USA(fus)
System features
23
Page 24 of 64
The calendar screen will display the
current month. Press PREV to view
the previous month or NEXT to
view the next month. Under the
CALENDAR screen, the following
buttons are available:
•GO TO TODAY:Press to highlight the current date.
•SHOW CLOCK:Press to return to the clock screen.
FEEDBACK
To access the feedback screen:
1. Ensure that the navigation system is ON.
2. Press MENU. The Menu screen will display.
3. Press FEEDBACK. The feedback screen will appear. In this screen you
have the following options:
FEEDBACK:One must be selected at all times:
•ALL BUTTONS:Press to hear an audible beep every time any button
on the system is pressed.
•TOUCH SCREEN:Press to hear an audible beep when any touch
screen button is pressed.
2006 Navigator(nav)
Supplement
USA(fus)
System features
24
Page 29 of 64
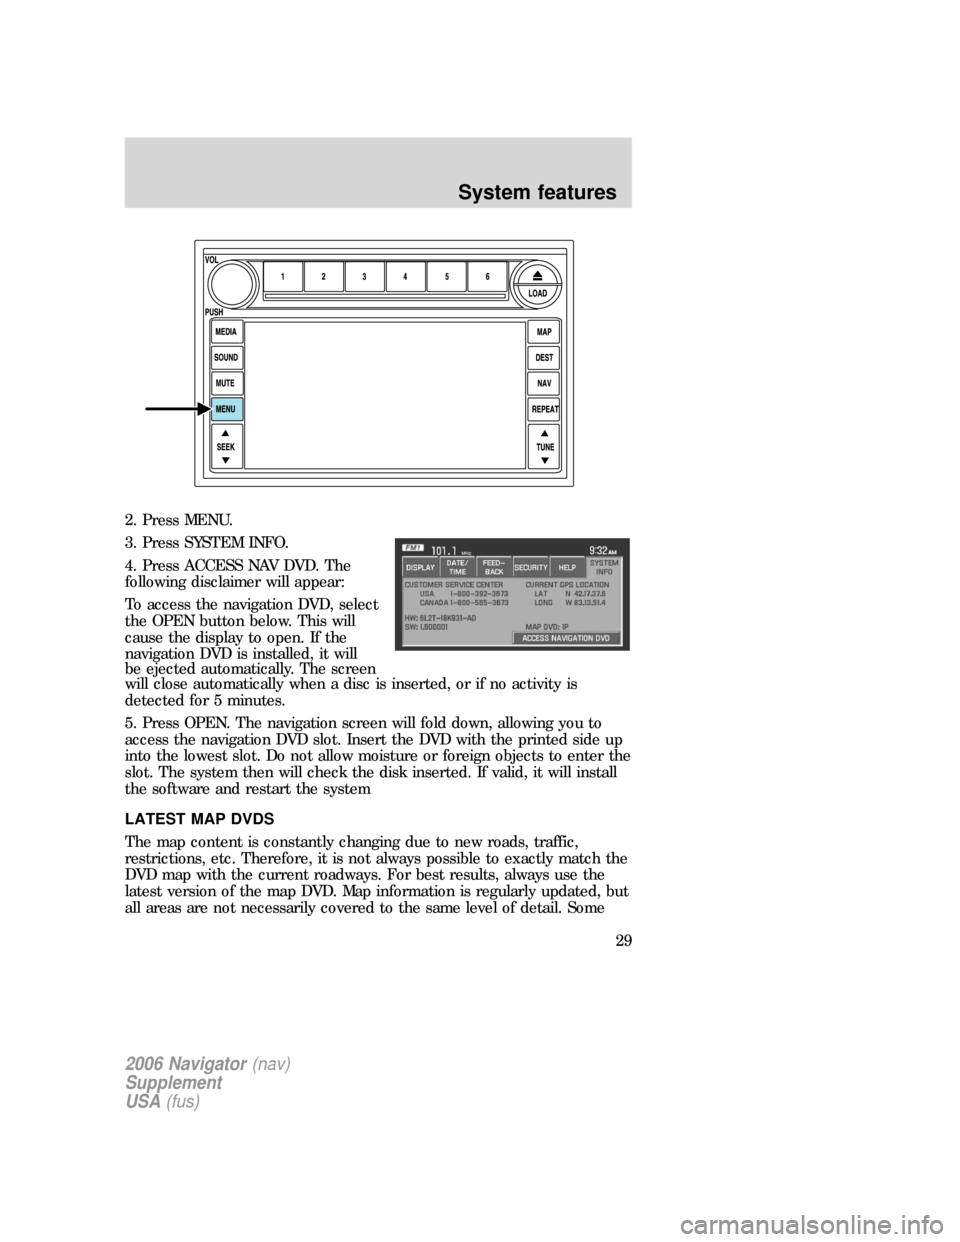
2. Press MENU.
3. Press SYSTEM INFO.
4. Press ACCESS NAV DVD. The
following disclaimer will appear:
To access the navigation DVD, select
the OPEN button below. This will
cause the display to open. If the
navigation DVD is installed, it will
be ejected automatically. The screen
will close automatically when a disc is inserted, or if no activity is
detected for 5 minutes.
5. Press OPEN. The navigation screen will fold down, allowing you to
access the navigation DVD slot. Insert the DVD with the printed side up
into the lowest slot. Do not allow moisture or foreign objects to enter the
slot. The system then will check the disk inserted. If valid, it will install
the software and restart the system
LATEST MAP DVDS
The map content is constantly changing due to new roads, traffic,
restrictions, etc. Therefore, it is not always possible to exactly match the
DVD map with the current roadways. For best results, always use the
latest version of the map DVD. Map information is regularly updated, but
all areas are not necessarily covered to the same level of detail. Some
2006 Navigator(nav)
Supplement
USA(fus)
System features
29
Page 31 of 64
DISCLAIMER
After each ignition cycle, a
disclaimer display will appear. Press
AGREE to the content of the screen
in order to access the navigation
functions. If you do not press
AGREE, you will only have access to
non-navigation functions.
MAP MODE
To enter map mode:
1. Ensure that the system is on.
2. Press MAP. The map screen will display.
When in MAP mode, an icon appears on the upper left side of the
screen; this is a toggle button to change the view of the map displayed.
The following methods exist for orientation of the map:
2006 Navigator(nav)
Supplement
USA(fus)
Navigation features
31
Page 32 of 64
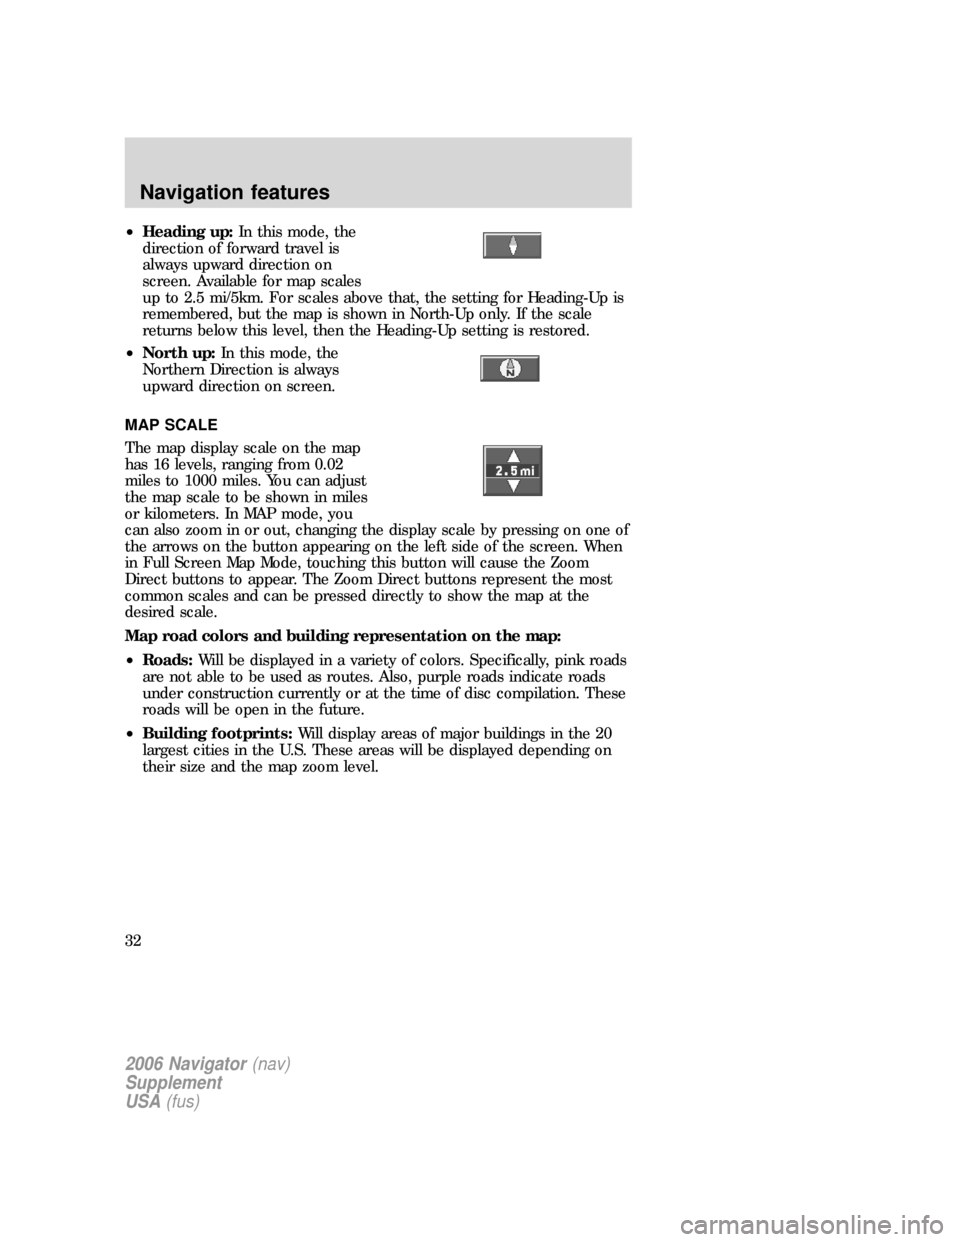
•Heading up:In this mode, the
direction of forward travel is
always upward direction on
screen. Available for map scales
up to 2.5 mi/5km. For scales above that, the setting for Heading-Up is
remembered, but the map is shown in North-Up only. If the scale
returns below this level, then the Heading-Up setting is restored.
•North up:In this mode, the
Northern Direction is always
upward direction on screen.
MAP SCALE
The map display scale on the map
has 16 levels, ranging from 0.02
miles to 1000 miles. You can adjust
the map scale to be shown in miles
or kilometers. In MAP mode, you
can also zoom in or out, changing the display scale by pressing on one of
the arrows on the button appearing on the left side of the screen. When
in Full Screen Map Mode, touching this button will cause the Zoom
Direct buttons to appear. The Zoom Direct buttons represent the most
common scales and can be pressed directly to show the map at the
desired scale.
Map road colors and building representation on the map:
•Roads:Will be displayed in a variety of colors. Specifically, pink roads
are not able to be used as routes. Also, purple roads indicate roads
under construction currently or at the time of disc compilation. These
roads will be open in the future.
•Building footprints:Will display areas of major buildings in the 20
largest cities in the U.S. These areas will be displayed depending on
their size and the map zoom level.
2006 Navigator(nav)
Supplement
USA(fus)
Navigation features
32
Page 33 of 64
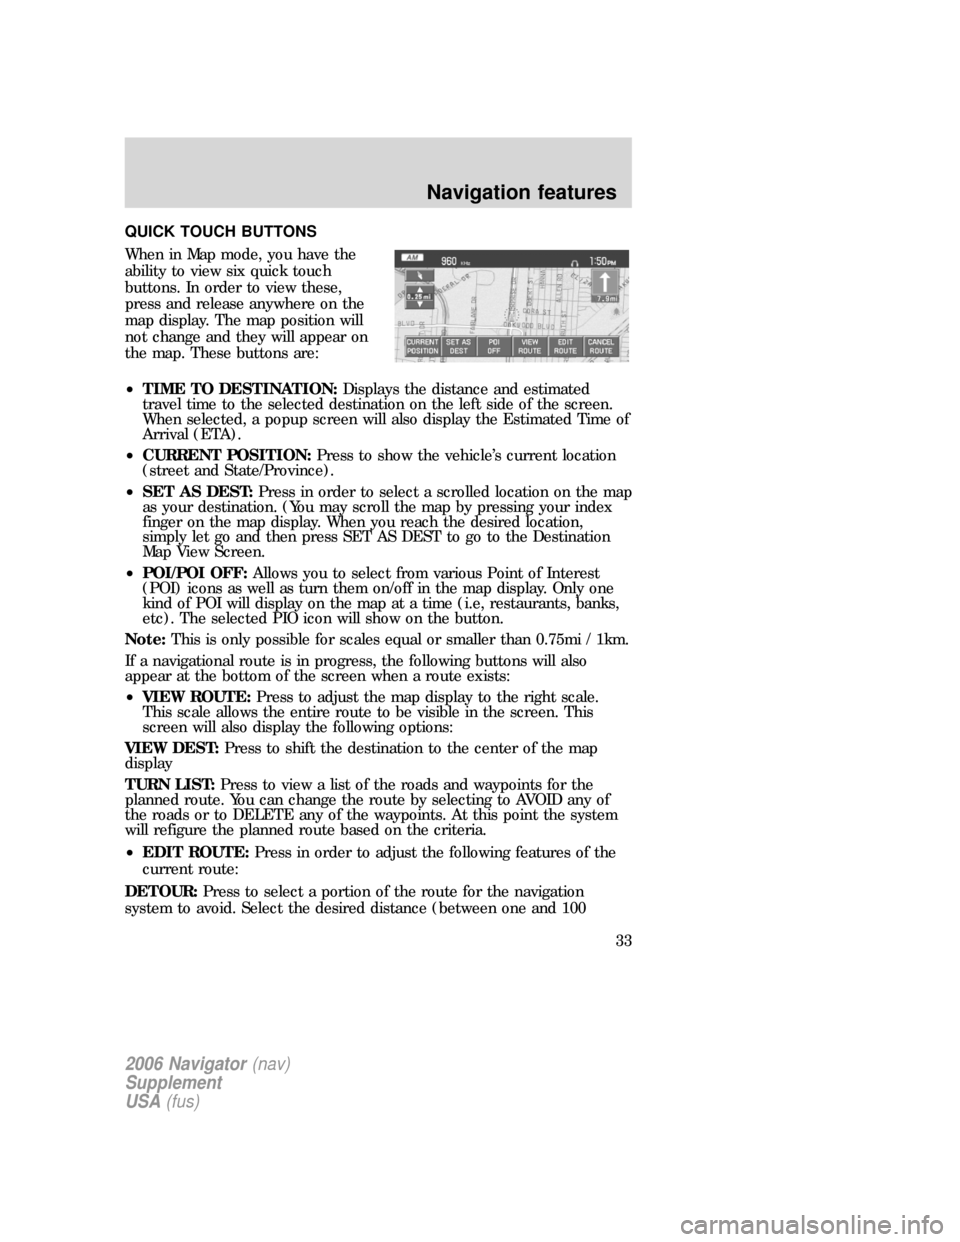
QUICK TOUCH BUTTONS
When in Map mode, you have the
ability to view six quick touch
buttons. In order to view these,
press and release anywhere on the
map display. The map position will
not change and they will appear on
the map. These buttons are:
•TIME TO DESTINATION:Displays the distance and estimated
travel time to the selected destination on the left side of the screen.
When selected, a popup screen will also display the Estimated Time of
Arrival (ETA).
•CURRENT POSITION:Press to show the vehicle’s current location
(street and State/Province).
•SET AS DEST:Press in order to select a scrolled location on the map
as your destination. (You may scroll the map by pressing your index
finger on the map display. When you reach the desired location,
simply let go and then press SET AS DEST to go to the Destination
Map View Screen.
•POI/POI OFF:Allows you to select from various Point of Interest
(POI) icons as well as turn them on/off in the map display. Only one
kind of POI will display on the map at a time (i.e, restaurants, banks,
etc). The selected PIO icon will show on the button.
Note:This is only possible for scales equal or smaller than 0.75mi / 1km.
If a navigational route is in progress, the following buttons will also
appear at the bottom of the screen when a route exists:
•VIEW ROUTE:Press to adjust the map display to the right scale.
This scale allows the entire route to be visible in the screen. This
screen will also display the following options:
VIEW DEST:Press to shift the destination to the center of the map
display
TURN LIST:Press to view a list of the roads and waypoints for the
planned route. You can change the route by selecting to AVOID any of
the roads or to DELETE any of the waypoints. At this point the system
will refigure the planned route based on the criteria.
•EDIT ROUTE:Press in order to adjust the following features of the
current route:
DETOUR:Press to select a portion of the route for the navigation
system to avoid. Select the desired distance (between one and 100
2006 Navigator(nav)
Supplement
USA(fus)
Navigation features
33