2006 MERCEDES-BENZ SPRINTER sensor
[x] Cancel search: sensorPage 2260 of 2305
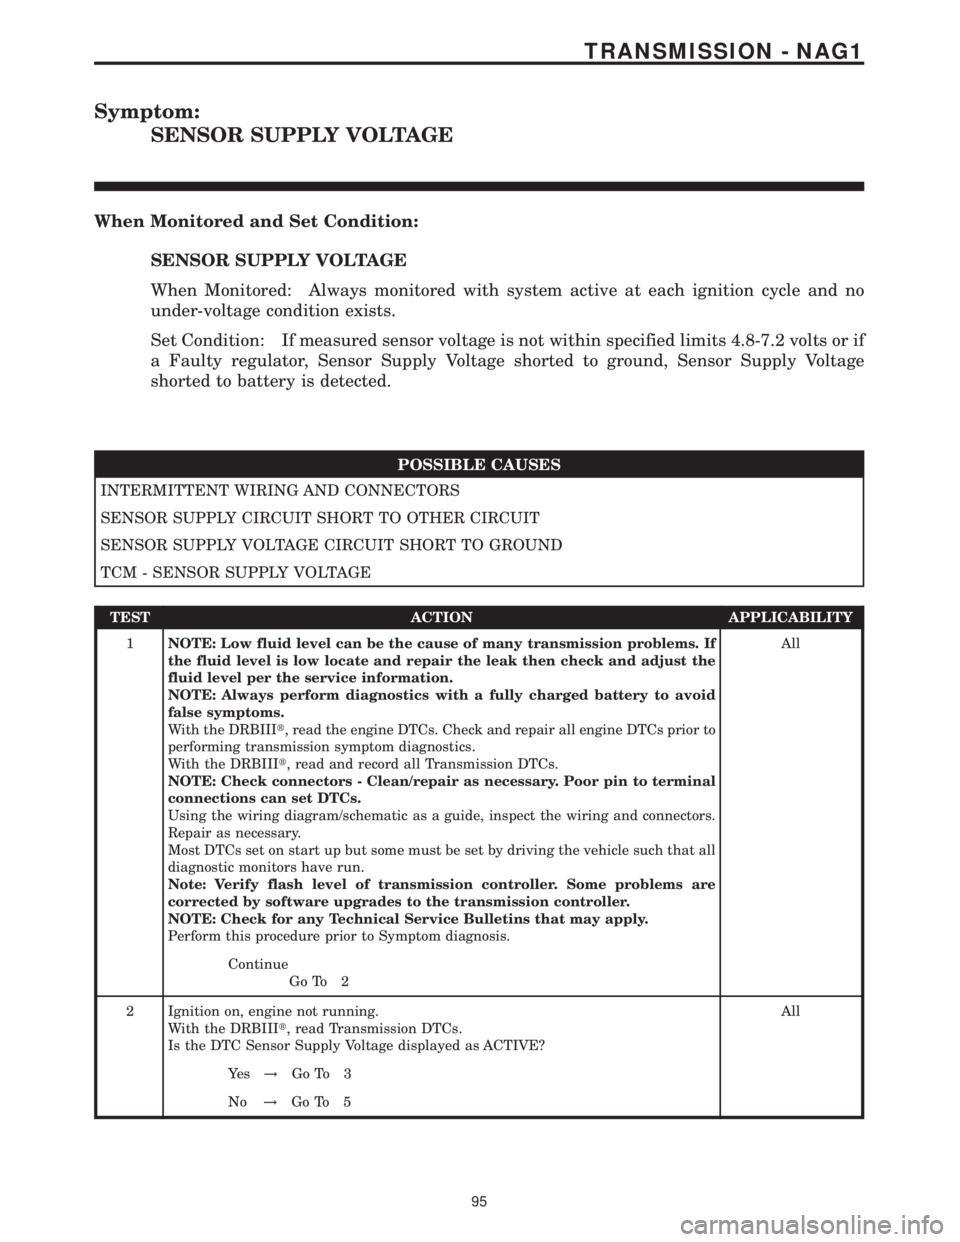
Symptom:
SENSOR SUPPLY VOLTAGE
When Monitored and Set Condition:
SENSOR SUPPLY VOLTAGE
When Monitored: Always monitored with system active at each ignition cycle and no
under-voltage condition exists.
Set Condition: If measured sensor voltage is not within specified limits 4.8-7.2 volts or if
a Faulty regulator, Sensor Supply Voltage shorted to ground, Sensor Supply Voltage
shorted to battery is detected.
POSSIBLE CAUSES
INTERMITTENT WIRING AND CONNECTORS
SENSOR SUPPLY CIRCUIT SHORT TO OTHER CIRCUIT
SENSOR SUPPLY VOLTAGE CIRCUIT SHORT TO GROUND
TCM - SENSOR SUPPLY VOLTAGE
TEST ACTION APPLICABILITY
1NOTE: Low fluid level can be the cause of many transmission problems. If
the fluid level is low locate and repair the leak then check and adjust the
fluid level per the service information.
NOTE: Always perform diagnostics with a fully charged battery to avoid
false symptoms.
With the DRBIIIt, read the engine DTCs. Check and repair all engine DTCs prior to
performing transmission symptom diagnostics.
With the DRBIIIt, read and record all Transmission DTCs.
NOTE: Check connectors - Clean/repair as necessary. Poor pin to terminal
connections can set DTCs.
Using the wiring diagram/schematic as a guide, inspect the wiring and connectors.
Repair as necessary.
Most DTCs set on start up but some must be set by driving the vehicle such that all
diagnostic monitors have run.
Note: Verify flash level of transmission controller. Some problems are
corrected by software upgrades to the transmission controller.
NOTE: Check for any Technical Service Bulletins that may apply.
Perform this procedure prior to Symptom diagnosis.All
Continue
Go To 2
2 Ignition on, engine not running.
With the DRBIIIt, read Transmission DTCs.
Is the DTC Sensor Supply Voltage displayed as ACTIVE?All
Ye s!Go To 3
No!Go To 5
95
TRANSMISSION - NAG1
Page 2261 of 2305
TEST ACTION APPLICABILITY
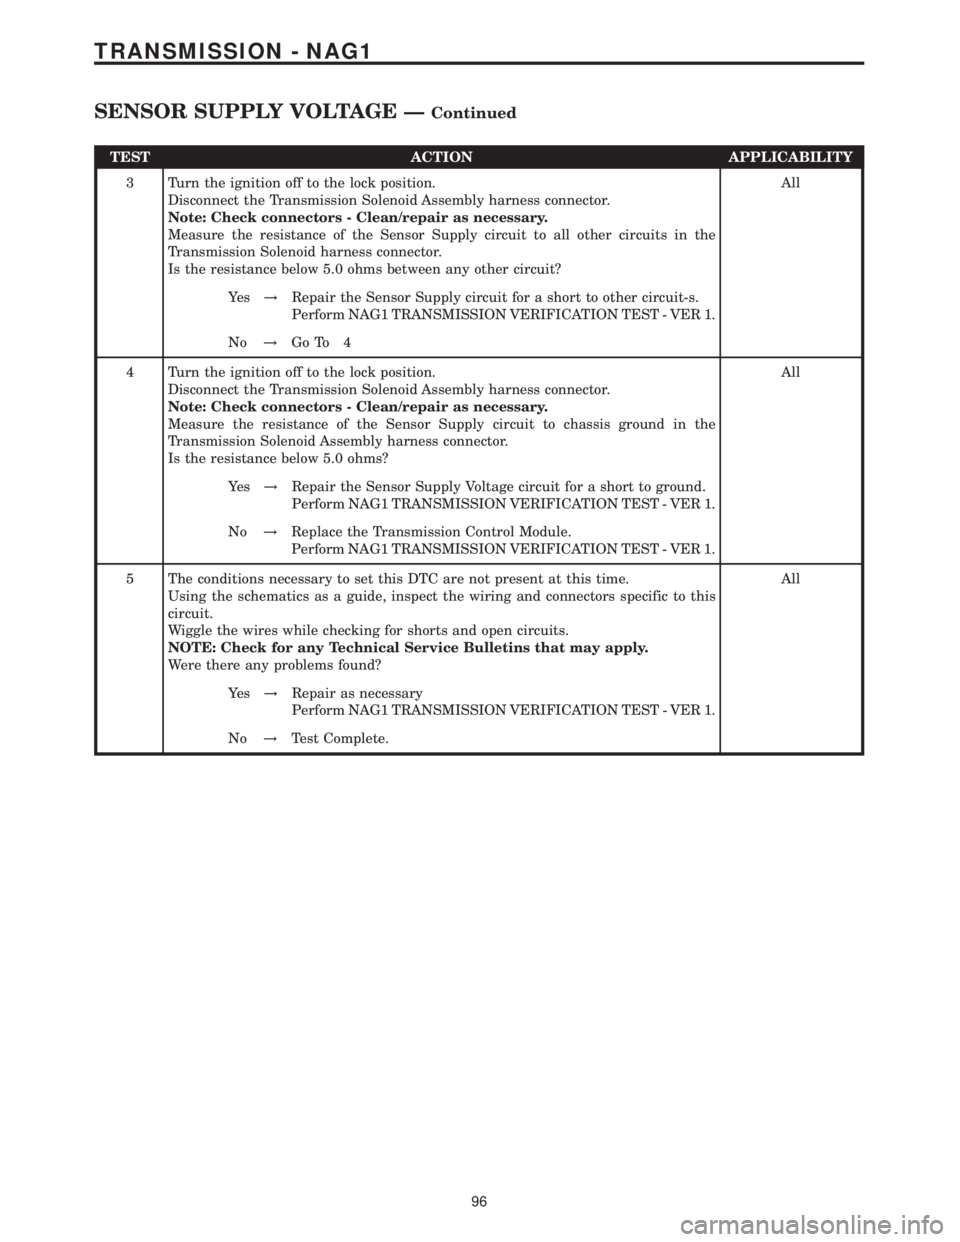
3 Turn the ignition off to the lock position.
Disconnect the Transmission Solenoid Assembly harness connector.
Note: Check connectors - Clean/repair as necessary.
Measure the resistance of the Sensor Supply circuit to all other circuits in the
Transmission Solenoid harness connector.
Is the resistance below 5.0 ohms between any other circuit?All
Ye s!Repair the Sensor Supply circuit for a short to other circuit-s.
Perform NAG1 TRANSMISSION VERIFICATION TEST - VER 1.
No!Go To 4
4 Turn the ignition off to the lock position.
Disconnect the Transmission Solenoid Assembly harness connector.
Note: Check connectors - Clean/repair as necessary.
Measure the resistance of the Sensor Supply circuit to chassis ground in the
Transmission Solenoid Assembly harness connector.
Is the resistance below 5.0 ohms?All
Ye s!Repair the Sensor Supply Voltage circuit for a short to ground.
Perform NAG1 TRANSMISSION VERIFICATION TEST - VER 1.
No!Replace the Transmission Control Module.
Perform NAG1 TRANSMISSION VERIFICATION TEST - VER 1.
5 The conditions necessary to set this DTC are not present at this time.
Using the schematics as a guide, inspect the wiring and connectors specific to this
circuit.
Wiggle the wires while checking for shorts and open circuits.
NOTE: Check for any Technical Service Bulletins that may apply.
Were there any problems found?All
Ye s!Repair as necessary
Perform NAG1 TRANSMISSION VERIFICATION TEST - VER 1.
No!Test Complete.
96
TRANSMISSION - NAG1
SENSOR SUPPLY VOLTAGE ÐContinued
Page 2272 of 2305
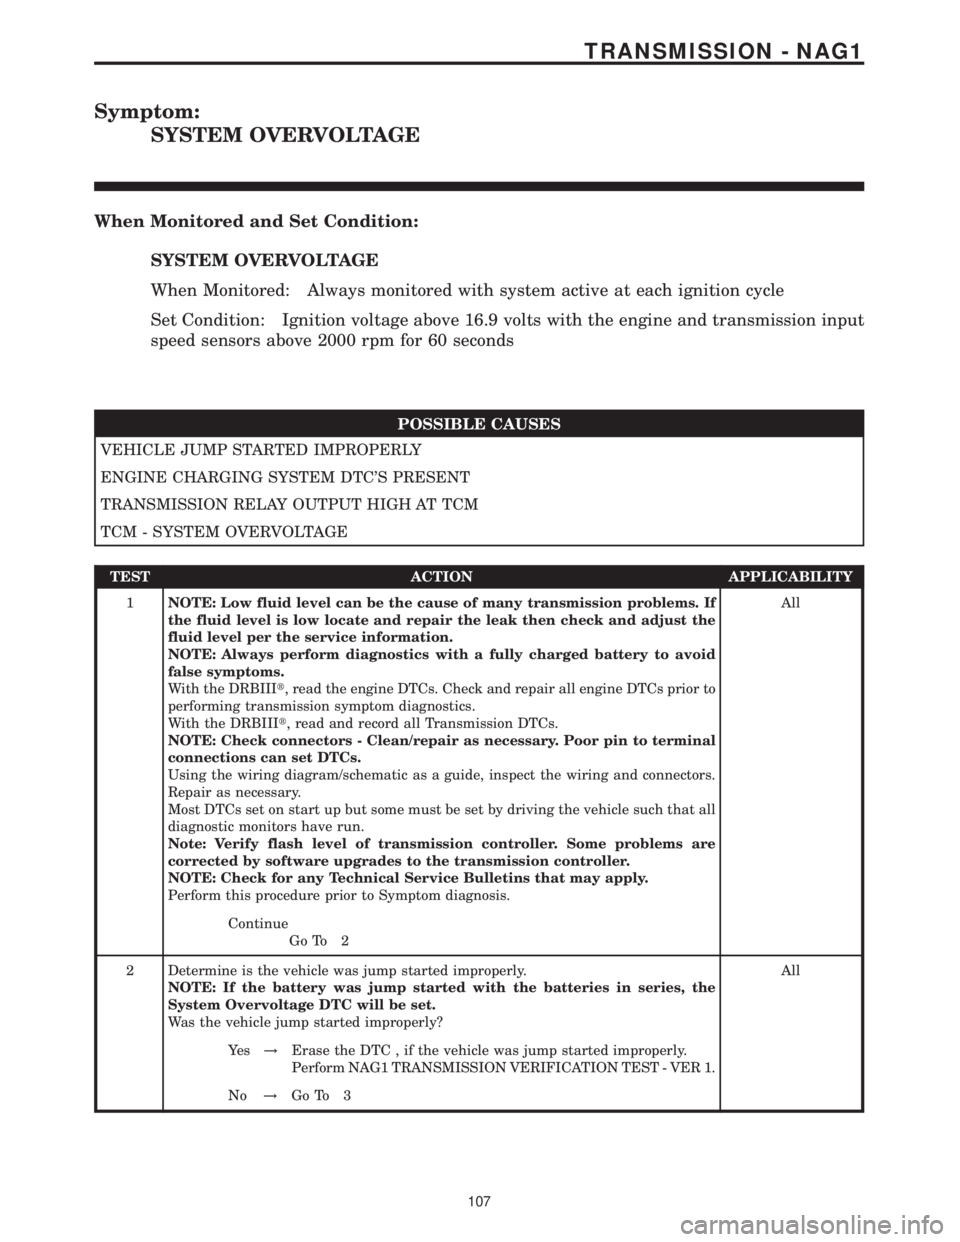
Symptom:
SYSTEM OVERVOLTAGE
When Monitored and Set Condition:
SYSTEM OVERVOLTAGE
When Monitored: Always monitored with system active at each ignition cycle
Set Condition: Ignition voltage above 16.9 volts with the engine and transmission input
speed sensors above 2000 rpm for 60 seconds
POSSIBLE CAUSES
VEHICLE JUMP STARTED IMPROPERLY
ENGINE CHARGING SYSTEM DTC'S PRESENT
TRANSMISSION RELAY OUTPUT HIGH AT TCM
TCM - SYSTEM OVERVOLTAGE
TEST ACTION APPLICABILITY
1NOTE: Low fluid level can be the cause of many transmission problems. If
the fluid level is low locate and repair the leak then check and adjust the
fluid level per the service information.
NOTE: Always perform diagnostics with a fully charged battery to avoid
false symptoms.
With the DRBIIIt, read the engine DTCs. Check and repair all engine DTCs prior to
performing transmission symptom diagnostics.
With the DRBIIIt, read and record all Transmission DTCs.
NOTE: Check connectors - Clean/repair as necessary. Poor pin to terminal
connections can set DTCs.
Using the wiring diagram/schematic as a guide, inspect the wiring and connectors.
Repair as necessary.
Most DTCs set on start up but some must be set by driving the vehicle such that all
diagnostic monitors have run.
Note: Verify flash level of transmission controller. Some problems are
corrected by software upgrades to the transmission controller.
NOTE: Check for any Technical Service Bulletins that may apply.
Perform this procedure prior to Symptom diagnosis.All
Continue
Go To 2
2 Determine is the vehicle was jump started improperly.
NOTE: If the battery was jump started with the batteries in series, the
System Overvoltage DTC will be set.
Was the vehicle jump started improperly?All
Ye s!Erase the DTC , if the vehicle was jump started improperly.
Perform NAG1 TRANSMISSION VERIFICATION TEST - VER 1.
No!Go To 3
107
TRANSMISSION - NAG1
Page 2276 of 2305
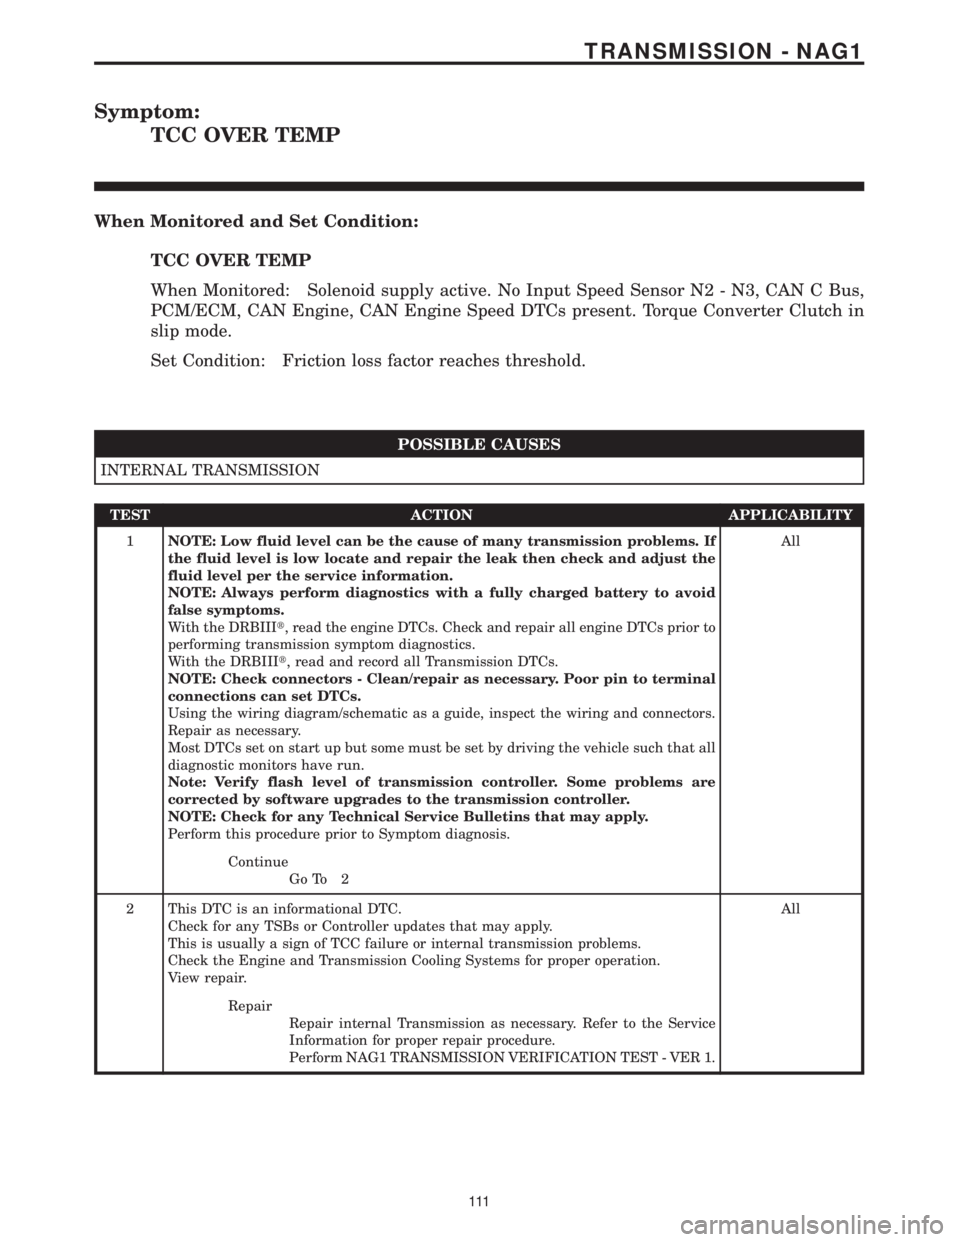
Symptom:
TCC OVER TEMP
When Monitored and Set Condition:
TCC OVER TEMP
When Monitored: Solenoid supply active. No Input Speed Sensor N2 - N3, CAN C Bus,
PCM/ECM, CAN Engine, CAN Engine Speed DTCs present. Torque Converter Clutch in
slip mode.
Set Condition: Friction loss factor reaches threshold.
POSSIBLE CAUSES
INTERNAL TRANSMISSION
TEST ACTION APPLICABILITY
1NOTE: Low fluid level can be the cause of many transmission problems. If
the fluid level is low locate and repair the leak then check and adjust the
fluid level per the service information.
NOTE: Always perform diagnostics with a fully charged battery to avoid
false symptoms.
With the DRBIIIt, read the engine DTCs. Check and repair all engine DTCs prior to
performing transmission symptom diagnostics.
With the DRBIIIt, read and record all Transmission DTCs.
NOTE: Check connectors - Clean/repair as necessary. Poor pin to terminal
connections can set DTCs.
Using the wiring diagram/schematic as a guide, inspect the wiring and connectors.
Repair as necessary.
Most DTCs set on start up but some must be set by driving the vehicle such that all
diagnostic monitors have run.
Note: Verify flash level of transmission controller. Some problems are
corrected by software upgrades to the transmission controller.
NOTE: Check for any Technical Service Bulletins that may apply.
Perform this procedure prior to Symptom diagnosis.All
Continue
Go To 2
2 This DTC is an informational DTC.
Check for any TSBs or Controller updates that may apply.
This is usually a sign of TCC failure or internal transmission problems.
Check the Engine and Transmission Cooling Systems for proper operation.
View repair.All
Repair
Repair internal Transmission as necessary. Refer to the Service
Information for proper repair procedure.
Perform NAG1 TRANSMISSION VERIFICATION TEST - VER 1.
111
TRANSMISSION - NAG1
Page 2280 of 2305
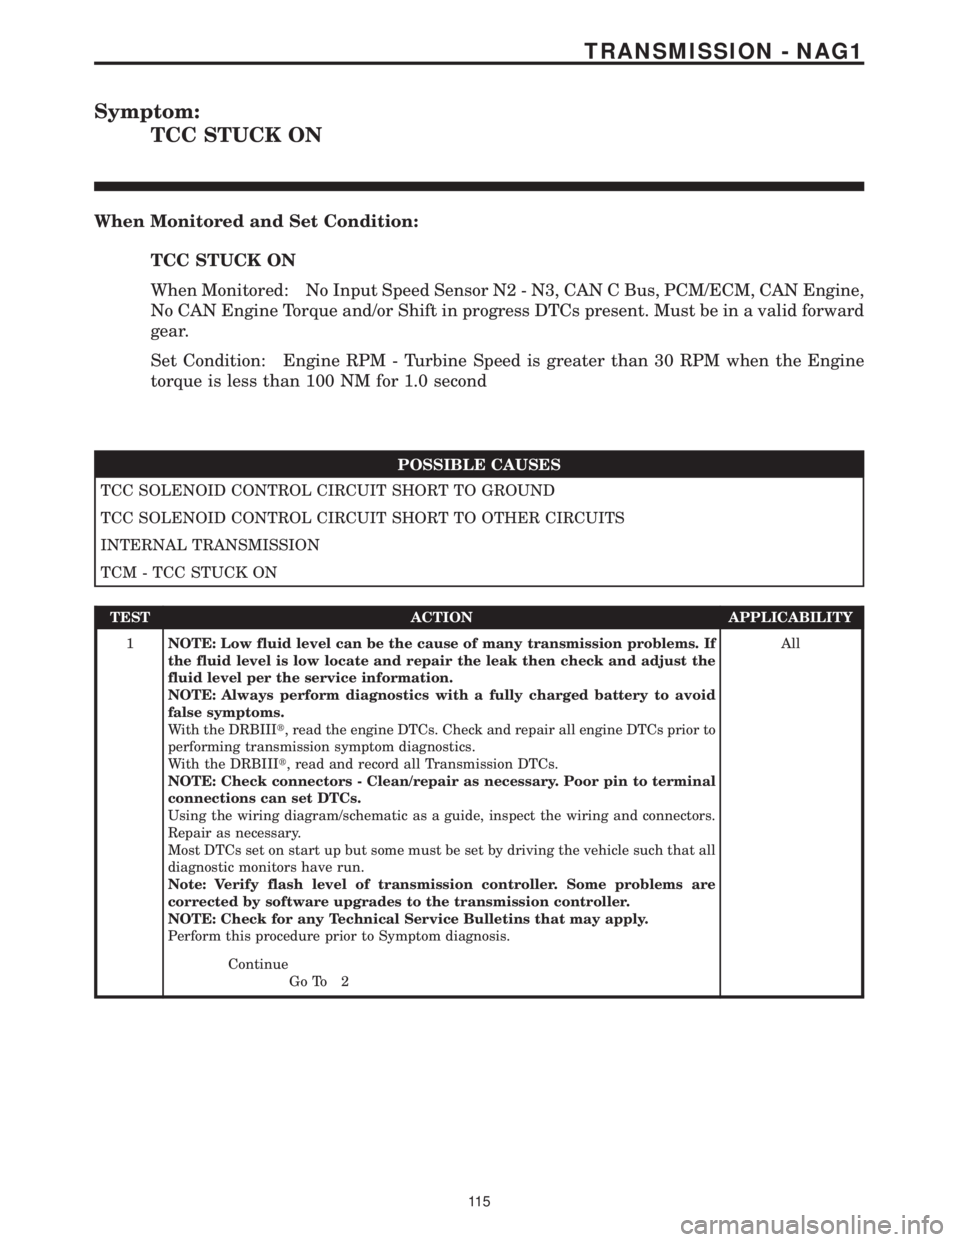
Symptom:
TCC STUCK ON
When Monitored and Set Condition:
TCC STUCK ON
When Monitored: No Input Speed Sensor N2 - N3, CAN C Bus, PCM/ECM, CAN Engine,
No CAN Engine Torque and/or Shift in progress DTCs present. Must be in a valid forward
gear.
Set Condition: Engine RPM - Turbine Speed is greater than 30 RPM when the Engine
torque is less than 100 NM for 1.0 second
POSSIBLE CAUSES
TCC SOLENOID CONTROL CIRCUIT SHORT TO GROUND
TCC SOLENOID CONTROL CIRCUIT SHORT TO OTHER CIRCUITS
INTERNAL TRANSMISSION
TCM - TCC STUCK ON
TEST ACTION APPLICABILITY
1NOTE: Low fluid level can be the cause of many transmission problems. If
the fluid level is low locate and repair the leak then check and adjust the
fluid level per the service information.
NOTE: Always perform diagnostics with a fully charged battery to avoid
false symptoms.
With the DRBIIIt, read the engine DTCs. Check and repair all engine DTCs prior to
performing transmission symptom diagnostics.
With the DRBIIIt, read and record all Transmission DTCs.
NOTE: Check connectors - Clean/repair as necessary. Poor pin to terminal
connections can set DTCs.
Using the wiring diagram/schematic as a guide, inspect the wiring and connectors.
Repair as necessary.
Most DTCs set on start up but some must be set by driving the vehicle such that all
diagnostic monitors have run.
Note: Verify flash level of transmission controller. Some problems are
corrected by software upgrades to the transmission controller.
NOTE: Check for any Technical Service Bulletins that may apply.
Perform this procedure prior to Symptom diagnosis.All
Continue
Go To 2
11 5
TRANSMISSION - NAG1
Page 2282 of 2305
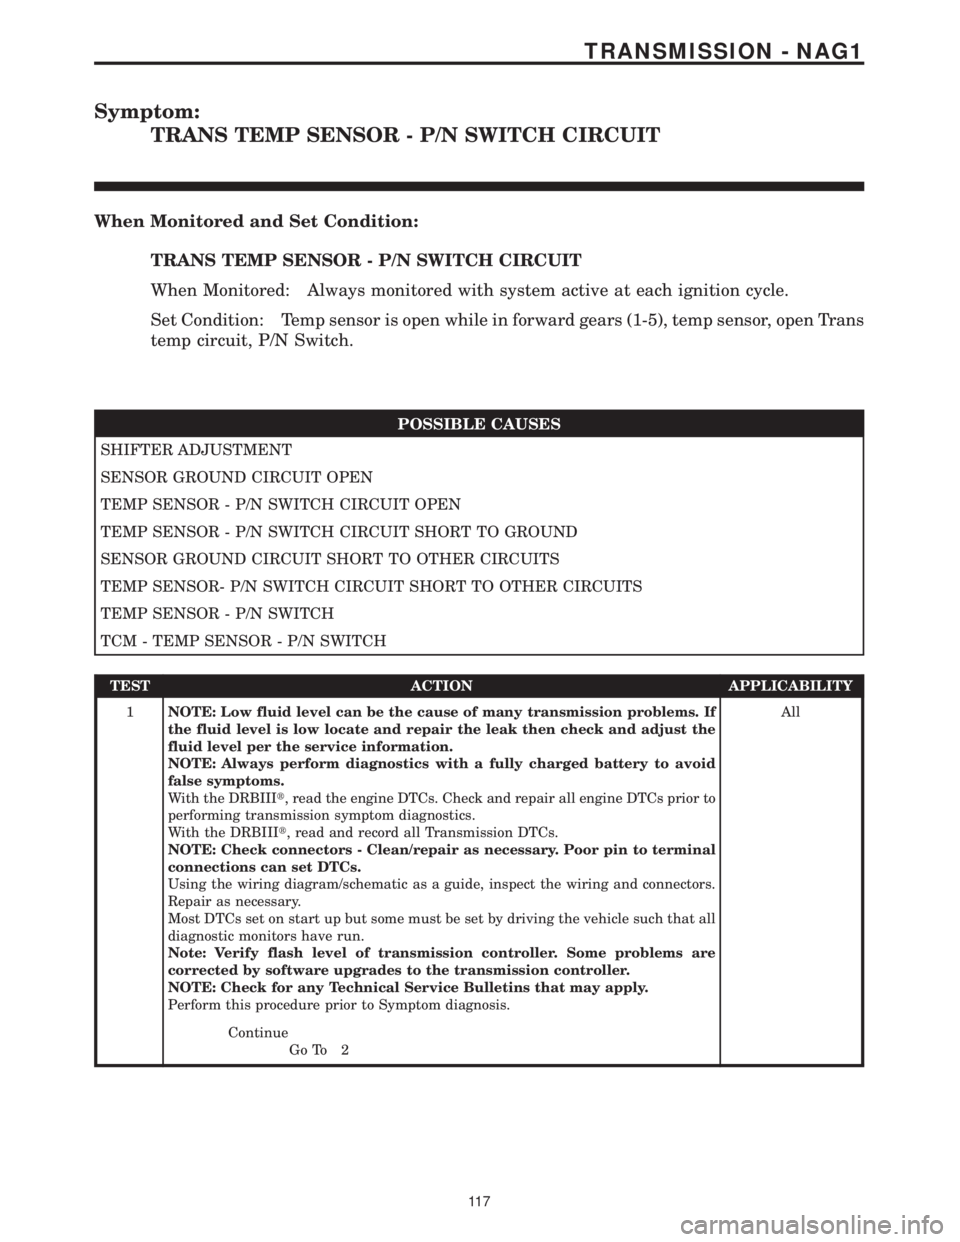
Symptom:
TRANS TEMP SENSOR - P/N SWITCH CIRCUIT
When Monitored and Set Condition:
TRANS TEMP SENSOR - P/N SWITCH CIRCUIT
When Monitored: Always monitored with system active at each ignition cycle.
Set Condition: Temp sensor is open while in forward gears (1-5), temp sensor, open Trans
temp circuit, P/N Switch.
POSSIBLE CAUSES
SHIFTER ADJUSTMENT
SENSOR GROUND CIRCUIT OPEN
TEMP SENSOR - P/N SWITCH CIRCUIT OPEN
TEMP SENSOR - P/N SWITCH CIRCUIT SHORT TO GROUND
SENSOR GROUND CIRCUIT SHORT TO OTHER CIRCUITS
TEMP SENSOR- P/N SWITCH CIRCUIT SHORT TO OTHER CIRCUITS
TEMP SENSOR - P/N SWITCH
TCM - TEMP SENSOR - P/N SWITCH
TEST ACTION APPLICABILITY
1NOTE: Low fluid level can be the cause of many transmission problems. If
the fluid level is low locate and repair the leak then check and adjust the
fluid level per the service information.
NOTE: Always perform diagnostics with a fully charged battery to avoid
false symptoms.
With the DRBIIIt, read the engine DTCs. Check and repair all engine DTCs prior to
performing transmission symptom diagnostics.
With the DRBIIIt, read and record all Transmission DTCs.
NOTE: Check connectors - Clean/repair as necessary. Poor pin to terminal
connections can set DTCs.
Using the wiring diagram/schematic as a guide, inspect the wiring and connectors.
Repair as necessary.
Most DTCs set on start up but some must be set by driving the vehicle such that all
diagnostic monitors have run.
Note: Verify flash level of transmission controller. Some problems are
corrected by software upgrades to the transmission controller.
NOTE: Check for any Technical Service Bulletins that may apply.
Perform this procedure prior to Symptom diagnosis.All
Continue
Go To 2
11 7
TRANSMISSION - NAG1
Page 2283 of 2305
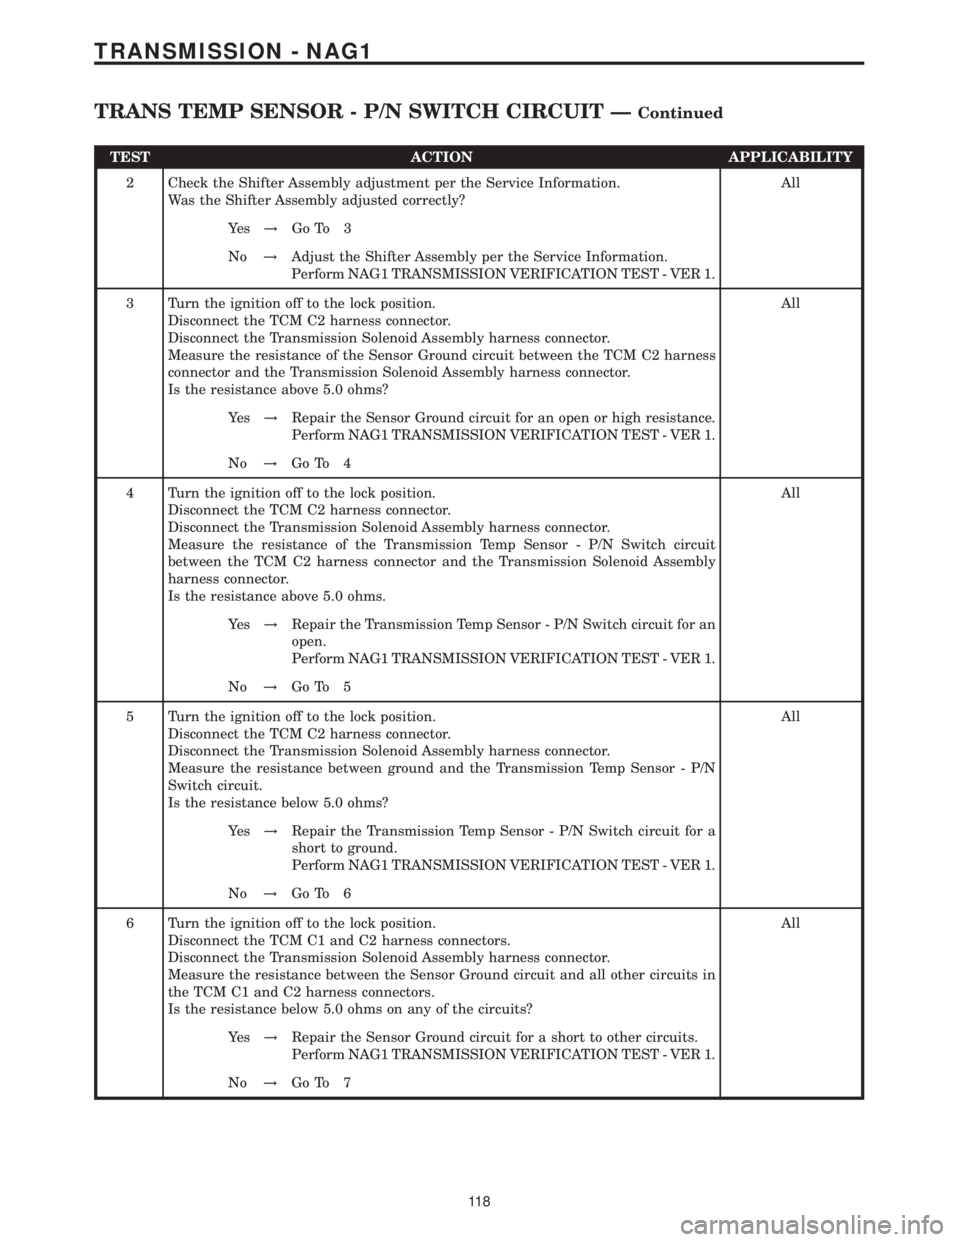
TEST ACTION APPLICABILITY
2 Check the Shifter Assembly adjustment per the Service Information.
Was the Shifter Assembly adjusted correctly?All
Ye s!Go To 3
No!Adjust the Shifter Assembly per the Service Information.
Perform NAG1 TRANSMISSION VERIFICATION TEST - VER 1.
3 Turn the ignition off to the lock position.
Disconnect the TCM C2 harness connector.
Disconnect the Transmission Solenoid Assembly harness connector.
Measure the resistance of the Sensor Ground circuit between the TCM C2 harness
connector and the Transmission Solenoid Assembly harness connector.
Is the resistance above 5.0 ohms?All
Ye s!Repair the Sensor Ground circuit for an open or high resistance.
Perform NAG1 TRANSMISSION VERIFICATION TEST - VER 1.
No!Go To 4
4 Turn the ignition off to the lock position.
Disconnect the TCM C2 harness connector.
Disconnect the Transmission Solenoid Assembly harness connector.
Measure the resistance of the Transmission Temp Sensor - P/N Switch circuit
between the TCM C2 harness connector and the Transmission Solenoid Assembly
harness connector.
Is the resistance above 5.0 ohms.All
Ye s!Repair the Transmission Temp Sensor - P/N Switch circuit for an
open.
Perform NAG1 TRANSMISSION VERIFICATION TEST - VER 1.
No!Go To 5
5 Turn the ignition off to the lock position.
Disconnect the TCM C2 harness connector.
Disconnect the Transmission Solenoid Assembly harness connector.
Measure the resistance between ground and the Transmission Temp Sensor - P/N
Switch circuit.
Is the resistance below 5.0 ohms?All
Ye s!Repair the Transmission Temp Sensor - P/N Switch circuit for a
short to ground.
Perform NAG1 TRANSMISSION VERIFICATION TEST - VER 1.
No!Go To 6
6 Turn the ignition off to the lock position.
Disconnect the TCM C1 and C2 harness connectors.
Disconnect the Transmission Solenoid Assembly harness connector.
Measure the resistance between the Sensor Ground circuit and all other circuits in
the TCM C1 and C2 harness connectors.
Is the resistance below 5.0 ohms on any of the circuits?All
Ye s!Repair the Sensor Ground circuit for a short to other circuits.
Perform NAG1 TRANSMISSION VERIFICATION TEST - VER 1.
No!Go To 7
11 8
TRANSMISSION - NAG1
TRANS TEMP SENSOR - P/N SWITCH CIRCUIT ÐContinued
Page 2284 of 2305
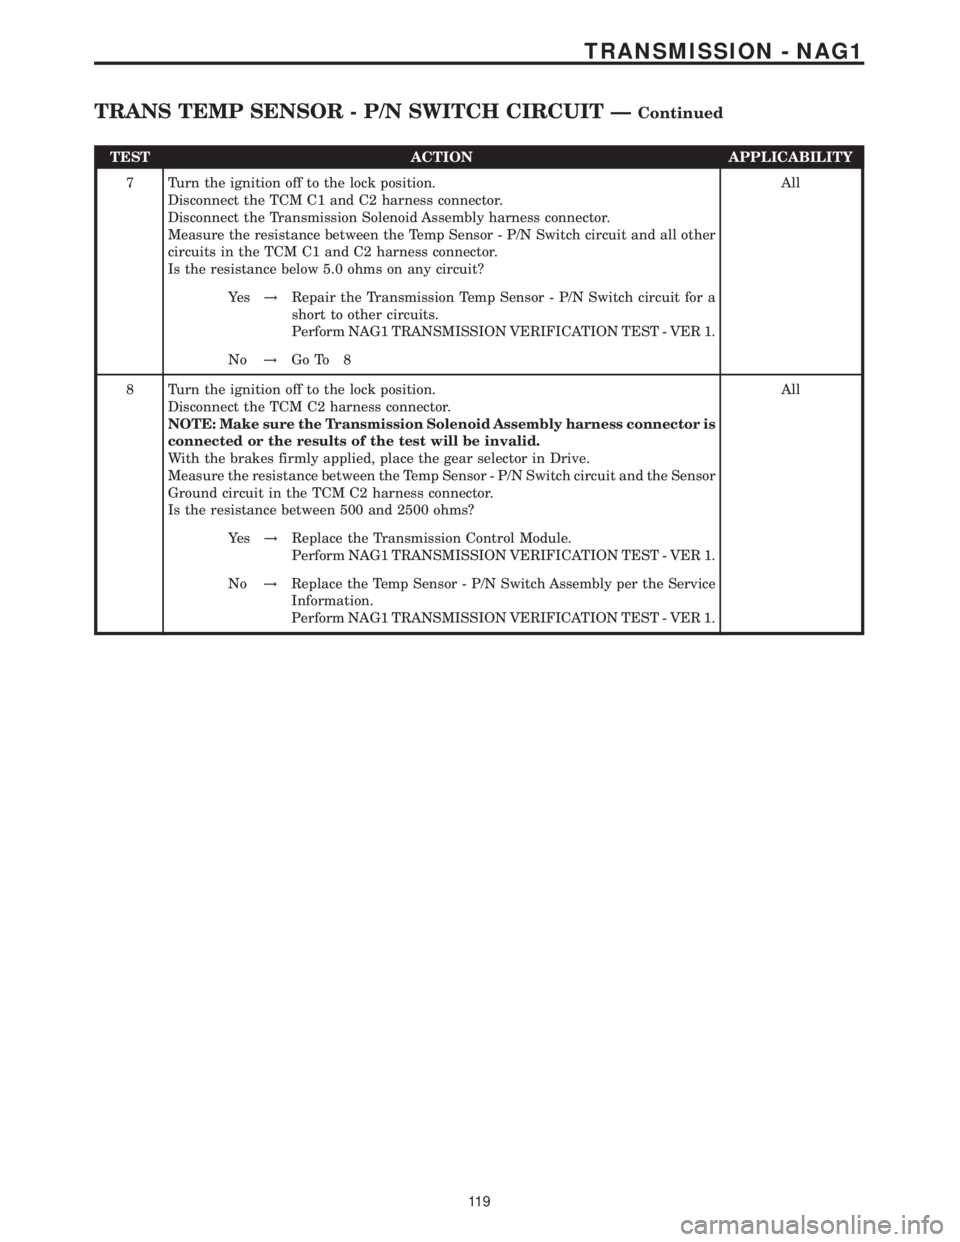
TEST ACTION APPLICABILITY
7 Turn the ignition off to the lock position.
Disconnect the TCM C1 and C2 harness connector.
Disconnect the Transmission Solenoid Assembly harness connector.
Measure the resistance between the Temp Sensor - P/N Switch circuit and all other
circuits in the TCM C1 and C2 harness connector.
Is the resistance below 5.0 ohms on any circuit?All
Ye s!Repair the Transmission Temp Sensor - P/N Switch circuit for a
short to other circuits.
Perform NAG1 TRANSMISSION VERIFICATION TEST - VER 1.
No!Go To 8
8 Turn the ignition off to the lock position.
Disconnect the TCM C2 harness connector.
NOTE: Make sure the Transmission Solenoid Assembly harness connector is
connected or the results of the test will be invalid.
With the brakes firmly applied, place the gear selector in Drive.
Measure the resistance between the Temp Sensor - P/N Switch circuit and the Sensor
Ground circuit in the TCM C2 harness connector.
Is the resistance between 500 and 2500 ohms?All
Ye s!Replace the Transmission Control Module.
Perform NAG1 TRANSMISSION VERIFICATION TEST - VER 1.
No!Replace the Temp Sensor - P/N Switch Assembly per the Service
Information.
Perform NAG1 TRANSMISSION VERIFICATION TEST - VER 1.
11 9
TRANSMISSION - NAG1
TRANS TEMP SENSOR - P/N SWITCH CIRCUIT ÐContinued