Page 87 of 481

86 Safety and SecurityDriving safety systemsWhen you switch off the ESP
®
�
the ESP
® does not stabilize the vehicle
�
the engine output is not limited, which
allows the drive wheels to spin and
thus cut into surfaces for a better grip
�
the traction control will still brake a
spinning wheel
�
the ESP
® continues to operate when
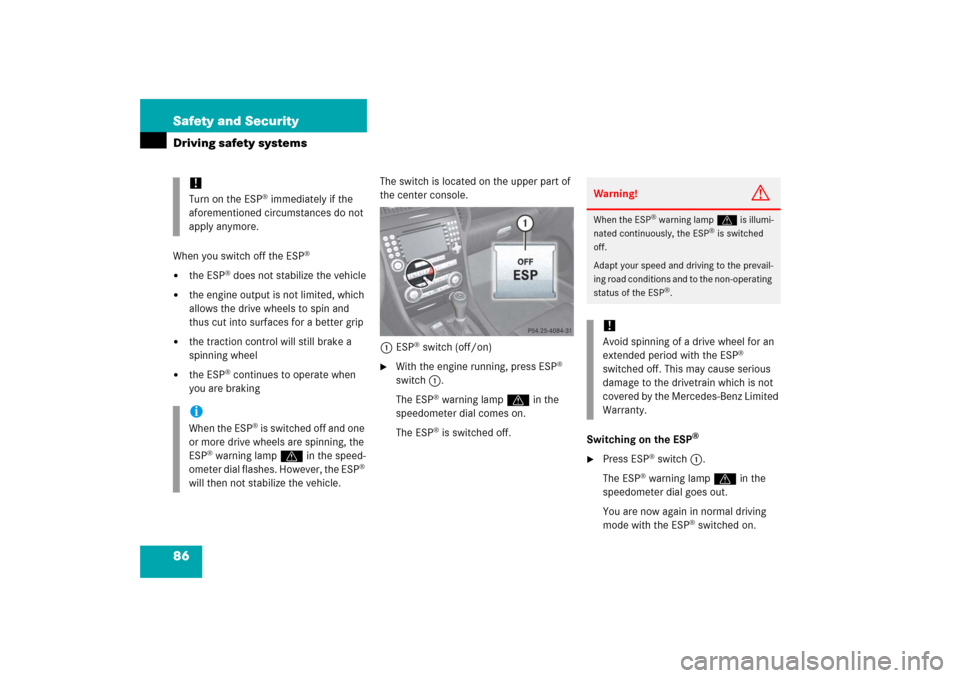
you are brakingThe switch is located on the upper part of
the center console.
1ESP
® switch (off/on)
�
With the engine running, press ESP
®
switch1.
The ESP
® warning lampv in the
speedometer dial comes on.
The ESP® is switched off.
Switching on the ESP
®
�
Press ESP
® switch1.
The ESP
® warning lampv in the
speedometer dial goes out.
You are now again in normal driving
mode with the ESP
® switched on.
!Turn on the ESP
® immediately if the
aforementioned circumstances do not
apply anymore.
iWhen the ESP
® is switched off and one
or more drive wheels are spinning, the
ESP
® warning lampv in the speed-
ometer dial flashes. However, the ESP
®
will then not stabilize the vehicle.
Warning!
G
When the ESP
® warning lampv is illumi-
nated continuously, the ESP
® is switched
off.
Adapt your speed and driving to the prevail-
ing road conditions and to the non-operating
status of the ESP
®.
!Avoid spinning of a drive wheel for an
extended period with the ESP
®
switched off. This may cause serious
damage to the drivetrain which is not
covered by the Mercedes-Benz Limited
Warranty.
Page 94 of 481

93 Controls in detail
Locking and unlocking
iOpening a door causes the windows on
that side of the car to open slightly.
They will return to the up position when
the door is closed.!The side windows will not open or close
if the battery is discharged or the win-
dows are covered with ice. As a result,
you may no longer be able to properly
close the door. Do not attempt to force
the door shut. Doing so may damage
the door or the side window. Correct
the condition that prevents the
windows from operating before
attempting to close the door.
iWithout the antenna on the left rear
side of the vehicle installed, the
SmartKey signaling range is consider-
ably reduced. Hold the SmartKey in
close proximity towards the antenna
base when locking or unlocking the
vehicle.
Warning!
G
When leaving the vehicle, always remove the
SmartKey from the starter switch, take it
with you, and lock the vehicle. Do not leave
children unattended in the vehicle, or with
access to an unlocked vehicle. It is possible
for children to open a locked door from the
inside, which could result in an accident
and/or serious injury.!To prevent possible malfunction, avoid
exposing the SmartKey to high levels of
electromagnetic radiation.
Page 100 of 481

99 Controls in detail
Locking and unlocking
The trunk lid can also be opened from its
inside in an emergency, see “Trunk lid
emergency release” (
�page 100).
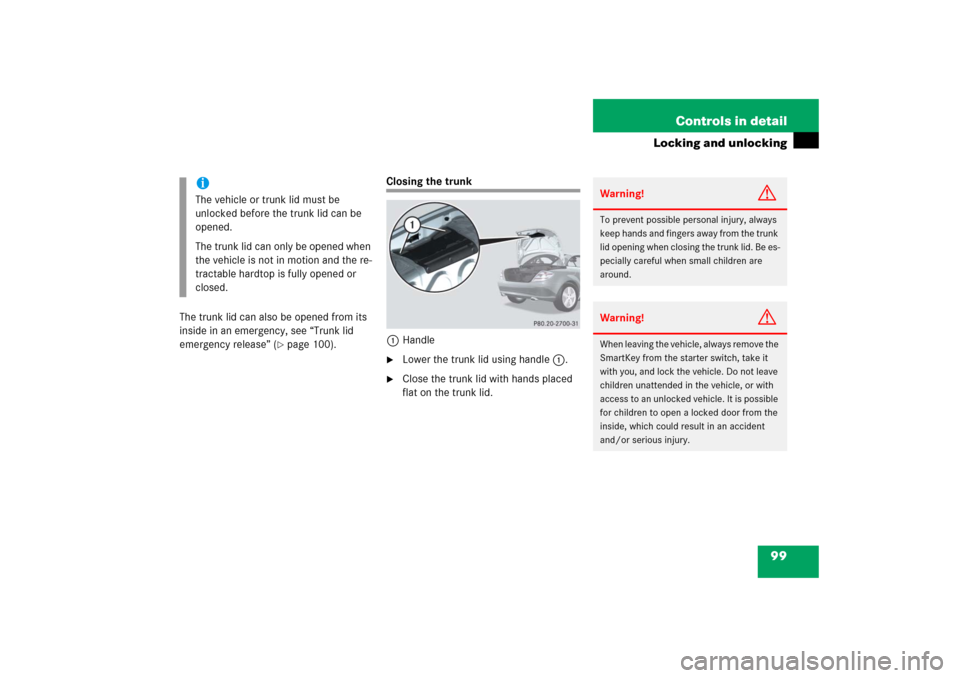
Closing the trunk
1Handle�
Lower the trunk lid using handle1.
�
Close the trunk lid with hands placed
flat on the trunk lid.
iThe vehicle or trunk lid must be
unlocked before the trunk lid can be
opened.
The trunk lid can only be opened when
the vehicle is not in motion and the re-
tractable hardtop is fully opened or
closed.
Warning!
G
To prevent possible personal injury, always
keep hands and fingers away from the trunk
lid opening when closing the trunk lid. Be es-
pecially careful when small children are
around.Warning!
G
When leaving the vehicle, always remove the
SmartKey from the starter switch, take it
with you, and lock the vehicle. Do not leave
children unattended in the vehicle, or with
access to an unlocked vehicle. It is possible
for children to open a locked door from the
inside, which could result in an accident
and/or serious injury.
Page 101 of 481

100 Controls in detailLocking and unlocking
Trunk lid emergency release
The emergency release button is located
on the inside of the trunk lid.
With the emergency release button, the
trunk can be opened from inside the trunk.
1Emergency release button�
Briefly press emergency release
button1.
The trunk lid unlocks and opens
slightly.
�
Push up the trunk lid to fully open.Illumination of the emergency release but-
ton:
�
The button flashes for 30 minutes after
opening the trunk.
�
The button flashes for 60 minutes after
closing the trunk.
Warning!
G
Only drive with the trunk lid closed as,
among other dangers such as blocked visi-
bility, exhaust fumes may enter the vehicle
interior.iDo not place the SmartKey in the open
trunk. You may lock yourself out.iIf the vehicle was previously centrally
locked, the trunk lid will lock automati-
cally when closed. The turn signal
lamps will flash three times to confirm
locking.
iThe emergency release button unlocks
the trunk while the vehicle is standing
still or in motion.iThe emergency release button does
not unlock the trunk if the vehicle bat-
tery is discharged or disconnected.
Page 103 of 481
102 Controls in detailLocking and unlockingLocking and unlocking from the inside
You can lock or unlock the doors and the
trunk from inside using the central locking
switch. This can be useful, for example, if
you want to lock the vehicle before starting
to drive.
The fuel filler flap will not be locked or un-
locked with the central locking or unlock-
ing switch, respectively.The switches are located on the upper part
of the center console.
1Central locking switch
2Central unlocking switch
Warning!
G
When leaving the vehicle, always remove the
SmartKey from the starter switch, take it
with you, and lock the vehicle. Do not leave
children unattended in the vehicle, or with
access to an unlocked vehicle. Unsuper-
vised use of vehicle equipment may cause
an accident and/or serious personal injury.
Page 106 of 481

105 Controls in detailSeats
Switching off seat heating�
Press the desired seat heating switch
repeatedly until all indicator lamps2
on the seat heating switch go out.
AIRSCARF neck-level heating*
The AIRSCARF neck-level heating provides
the area surrounding the occupants’ necks
with a heated air stream flowing from
openings in the head restraints.
The switches are located on the upper part
of the center console.
1AIRSCARF switch (driver’s side shown)
2Indicator lamps
iIf one or more of indicator lamps2 on
the seat heating switch are flashing,
there is insufficient voltage available
since too many electrical consumers
are turned on. The seat heating switch-
es off automatically.
The seat heating will switch back on
again automatically as soon as suffi-
cient voltage is available.
Warning!
G
When switching on the AIRSCARF neck-level
heating, the air streaming from the openings
may be very hot. When in close proximity to
the openings, you could be seriously
burned. To help avoid serious personal
injuries, switch the AIRSCARF to a lower
heating level.
Page 108 of 481

107 Controls in detail
Memory function*
�Memory function*
Prior to operating the vehicle, the driver
should check and adjust the seat height,
seat position fore and aft, and seat back-
rest angle if necessary, to ensure adequate
control, reach and comfort. The head re-
straint should also be adjusted for proper
height. See also the section on air bags for
proper seat positioning (
�page 65).
In addition, adjust the steering wheel to
ensure adequate control, reach, operation
and comfort. Both the interior and exterior
rear view mirrors should be adjusted for
adequate rear vision.
Fasten seat belts. Infants and small chil-
dren should be seated in a properly se-
cured restraint system that complies with
U.S. Federal Motor Vehicle Safety
Standards 213 and 255 and Canadian Mo-
tor Vehicle Safety Standards 213
and 210.2.The following settings are stored when
using the buttons on the outer side of the
respective seat:
Driver and passenger seat:
�
Seat and backrest position
Driver only:
�
Steering wheel position
�
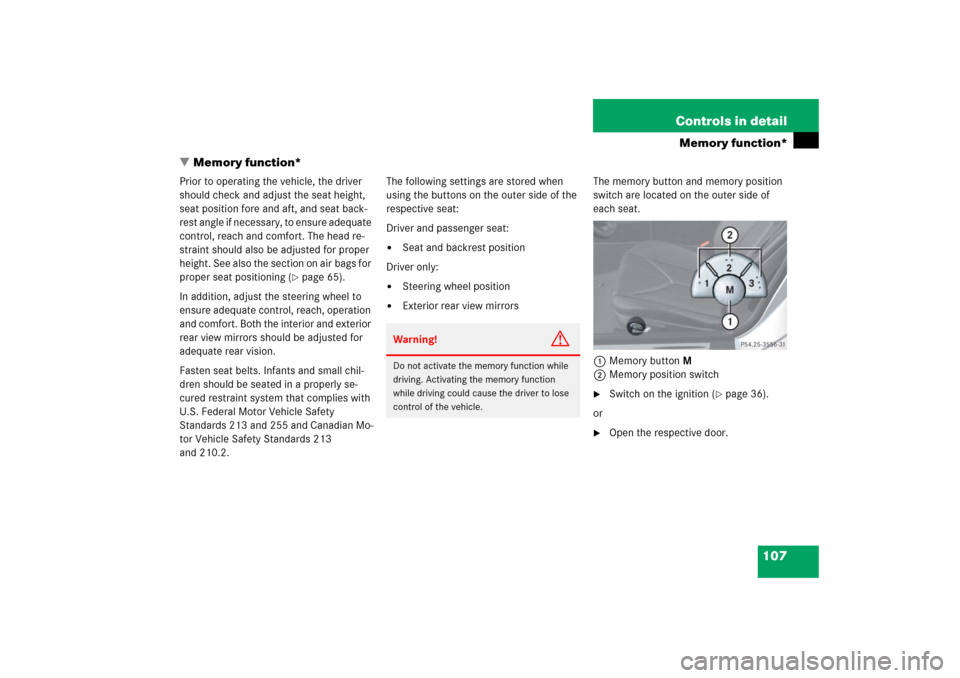
Exterior rear view mirrorsThe memory button and memory position
switch are located on the outer side of
each seat.
1Memory buttonM
2Memory position switch
�
Switch on the ignition (
�page 36).
or
�
Open the respective door.
Warning!
G
Do not activate the memory function while
driving. Activating the memory function
while driving could cause the driver to lose
control of the vehicle.
Page 112 of 481

111 Controls in detail
Lighting
Manual headlamp mode
The low beam headlamps and the parking
lamps can be switched on and off with the
exterior lamp switch.
Automatic headlamp mode
The following lamps switch on and off au-
tomatically depending on the brightness of
the ambient light:�
Low beam headlamps
�
Tail and parking lamps
�
License plate lamps
�
Side marker lamps
�
Turn the exterior lamp switch to
positionU.
With the SmartKey in starter switch
position1 only the parking lamps will
switch on and off automatically.
When the engine is running, the low
beam headlamps, the tail and parking
lamps, the license plate lamps, and the
side marker lamps will switch on and
off automatically.
iWith the SmartKey removed from the
starter switch and the driver’s door
open, a warning sounds if the parking
lamps or low beam headlamps are
switched on.
The message
Turn off lights
appears
in the multifunction display.
Warning!
G
If the exterior lamp switch is set toU�
the headlamps may switch off unexpect-
edly when the system senses bright am-
bient light, for example light from
oncoming traffic.
�
the headlamps will not be automatically
switched on under foggy conditions.
To minimize risk to you and to others, acti-
vate headlamps by turning exterior lamp
switch toB when driving or when traffic
and/or ambient lighting conditions require
you to do so.
In low ambient lighting conditions, only
switch from positionUtoB with the
vehicle at a standstill in a safe location.
Switching fromUtoB will briefly
switch off the headlamps. Doing so while
driving in low ambient lighting conditions
may result in an accident.
The automatic headlamp feature is only an
aid to the driver. The driver is responsible for
the operation of the vehicle's lights at all
times.