Page 44 of 481
43 Getting started
Adjusting
Steering wheel adjustment, electrical*
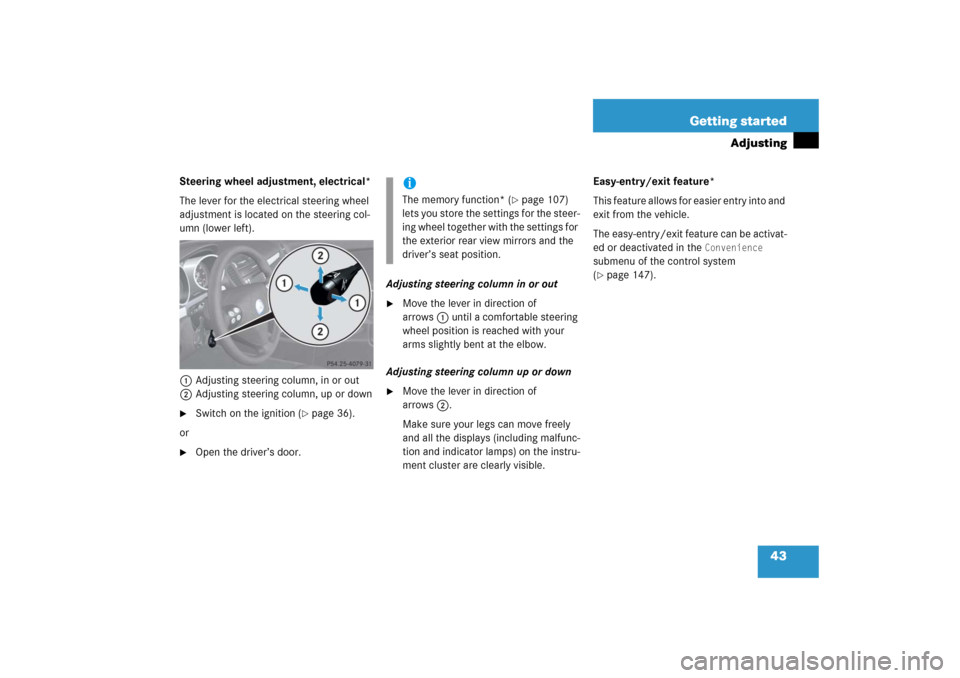
The lever for the electrical steering wheel
adjustment is located on the steering col-
umn (lower left).
1Adjusting steering column, in or out
2Adjusting steering column, up or down�
Switch on the ignition (
�page 36).
or
�
Open the driver’s door.Adjusting steering column in or out
�
Move the lever in direction of
arrows1 until a comfortable steering
wheel position is reached with your
arms slightly bent at the elbow.
Adjusting steering column up or down
�
Move the lever in direction of
arrows2.
Make sure your legs can move freely
and all the displays (including malfunc-
tion and indicator lamps) on the instru-
ment cluster are clearly visible.Easy-entry/exit feature*
This feature allows for easier entry into and
exit from the vehicle.
The easy-entry/exit feature can be activat-
ed or deactivated in the
Convenience
submenu of the control system
(
�page 147).
iThe memory function* (
�page 107)
lets you store the settings for the steer-
ing wheel together with the settings for
the exterior rear view mirrors and the
driver’s seat position.
Page 128 of 481
127 Controls in detail
Control system
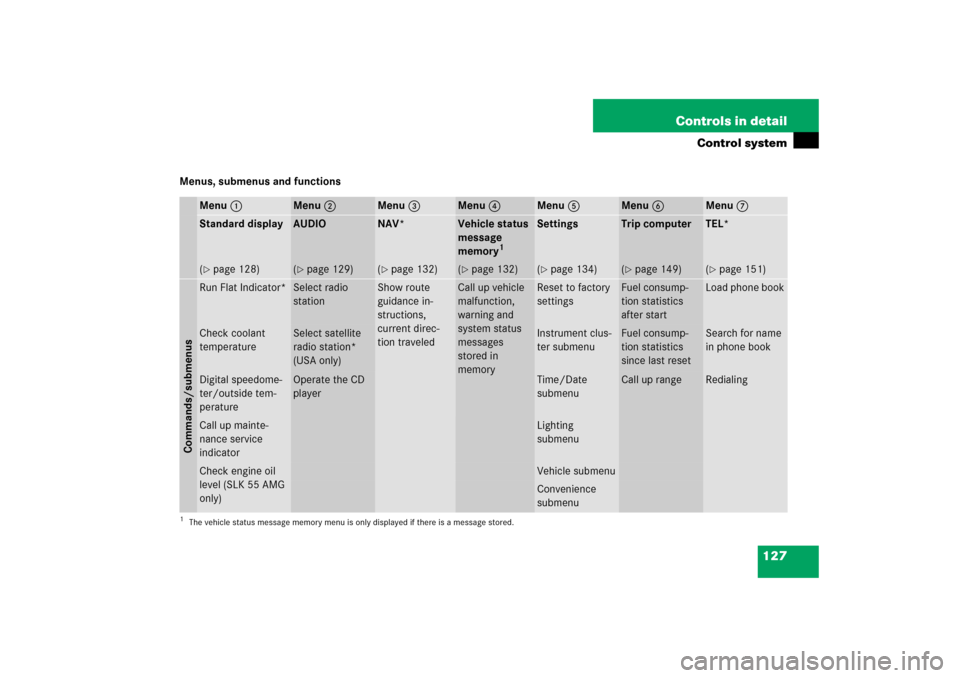
Menus, submenus and functions
Menu1
Menu2
Menu3
Menu4
Menu5
Menu6
Menu7
Standard display
AUDIO
NAV*
Vehicle status
message
memory
1
Settings
Trip computer
TEL*
(�page 128)
(�page 129)
(�page 132)
(�page 132)
(�page 134)
(�page 149)
(�page 151)
Commands/submenusRun Flat Indicator*
Select radio
station
Show route
guidance in-
structions,
current direc-
tion traveled
Call up vehicle
malfunction,
warning and
system status
messages
stored in
memory
Reset to factory
settings
Fuel consump-
tion statistics
after start
Load phone book
Check coolant
temperature
Select satellite
radio station*
(USA only)
Instrument clus-
ter submenu
Fuel consump-
tion statistics
since last reset
Search for name
in phone book
Digital speedome-
ter/outside tem-
perature
Operate the CD
player
Time/Date
submenu
Call up range
Redialing
Call up mainte-
nance service
indicator
Lighting
submenu
Check engine oil
level (SLK 55 AMG
only)
Vehicle submenuConvenience
submenu
1The vehicle status message memory menu is only displayed if there is a message stored.
Page 135 of 481

134 Controls in detailControl systemSettings menu
In the
Settings...
menu are two func-
tions:
�
The function
To reset: Press reset
button for 3 seconds
for resetting all
settings to factory standard.
�
A collection of submenus for perform-
ing individual settings for your vehicle.
�
Press buttonèorÿ repeatedly
until the
Settings...
menu appears in
the multifunction display.The following settings and submenus are
available in the
Settings...
menu:Resetting all settings
You can reset all the functions of all sub-
menus to the factory settings.
�
Press the reset buttonJon the instru-
ment cluster (
�page 24) for approxi-
mately 3 seconds.
The request to press the reset
buttonJonce more to confirm ap-
pears in the multifunction display.
�
Press the reset buttonJagain.
The functions of all submenus will be
reset to the factory settings.
The message
Reset to factory
settings
appears in the multifunction
display.
Function
Page
Resetting all settings
134
Submenus in the Settings menu
135
Instrument cluster submenu
137
Time/date submenu
137
Lighting submenu
143
Vehicle submenu
147
Convenience submenu
147
Page 137 of 481
136 Controls in detailControl systemThe table below shows what settings can
be changed within the various submenus.Detailed instructions on making individual
settings can be found on the following
pages.Instrument cluster
Time/Date
Lighting
Vehicle
Convenience*
(�page 137)
(�page 139)
(�page 143)
(�page 147)
(�page 147)
Selecting digital speed-
ometer display mode
Time synchronization
with head unit*
Daytime running lamp
mode (USA only)
Setting automatic locking
Activating
easy-entry/exit feature*
Selecting language
Setting the time (hours)
Locator lighting
Setting parking position
for exterior rear view
mirror*
Selecting display (speed
display or outside
temperature) for status
indicator
Setting the time
(minutes)
Night security
illumination
Setting the date (month)
Interior lighting delayed
shut-off
Setting the date (day)Setting the date (year)
Page 148 of 481
147 Controls in detail
Control system
Vehicle submenu
Access the
Vehicle
submenu via the
Settings...
menu. Use the
Vehicle
sub-
menu to make general vehicle settings.
The following function is available:
For additional information on central lock-
ing, see “Automatic central locking”
(
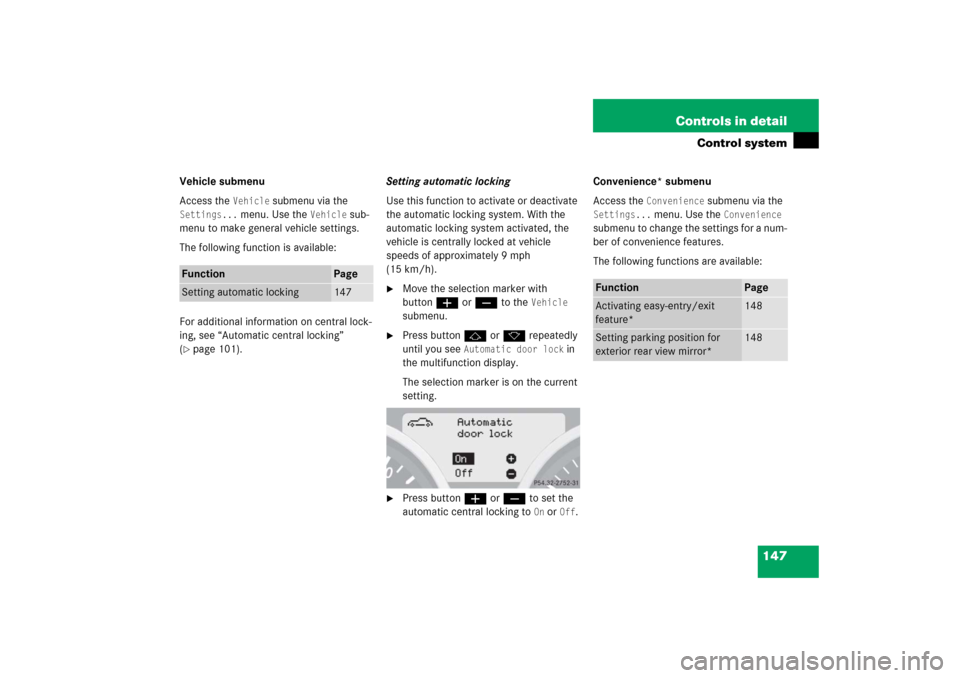
�page 101).Setting automatic locking
Use this function to activate or deactivate
the automatic locking system. With the
automatic locking system activated, the
vehicle is centrally locked at vehicle
speeds of approximately 9 mph
(15 km/h).
�
Move the selection marker with
buttonæorç to the
Vehicle
submenu.
�
Press buttonjork repeatedly
until you see
Automatic door lock
in
the multifunction display.
The selection marker is on the current
setting.
�
Press buttonæorç to set the
automatic central locking to
On or
Off
.Convenience* submenu
Access the
Convenience
submenu via the
Settings...
menu. Use the
Convenience
submenu to change the settings for a num-
ber of convenience features.
The following functions are available:
Function
Page
Setting automatic locking
147
Function
Page
Activating easy-entry/exit
feature*
148
Setting parking position for
exterior rear view mirror*
148
Page 149 of 481
148 Controls in detailControl systemActivating easy-entry/exit feature*
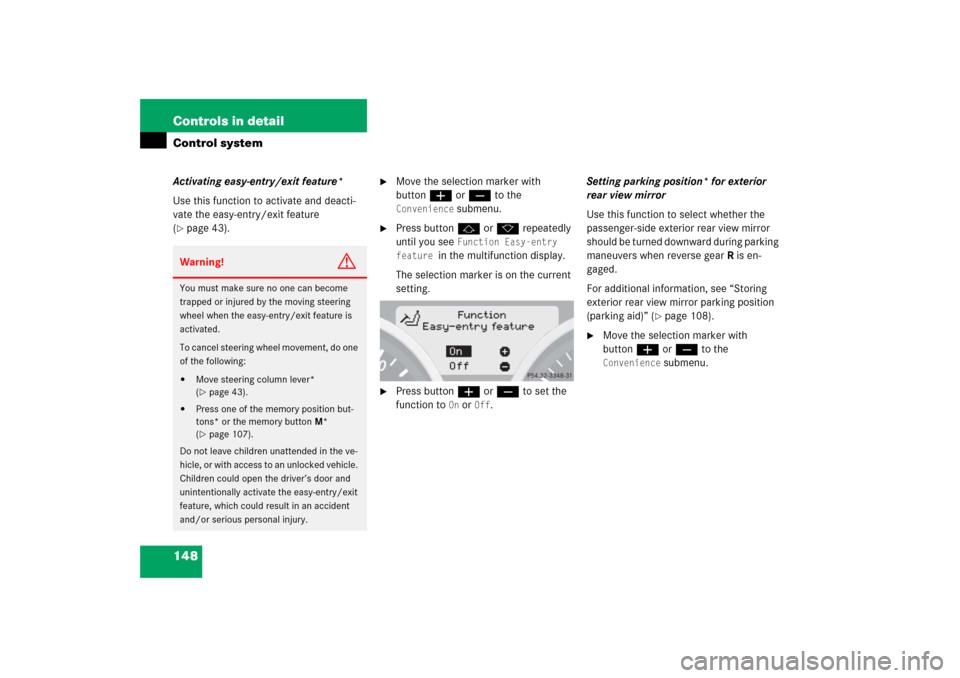
Use this function to activate and deacti-
vate the easy-entry/exit feature
(�page 43).
�
Move the selection marker with
buttonæorç to the Convenience
submenu.
�
Press buttonjork repeatedly
until you see
Function Easy-entry
feature
in the multifunction display.
The selection marker is on the current
setting.
�
Press buttonæorç to set the
function to
On or
Off
.Setting parking position* for exterior
rear view mirror
Use this function to select whether the
passenger-side exterior rear view mirror
should be turned downward during parking
maneuvers when reverse gearR is en-
gaged.
For additional information, see “Storing
exterior rear view mirror parking position
(parking aid)” (
�page 108).
�
Move the selection marker with
buttonæorç to the Convenience
submenu.
Warning!
G
You must make sure no one can become
trapped or injured by the moving steering
wheel when the easy-entry/exit feature is
activated.
To cancel steering wheel movement, do one
of the following:�
Move steering column lever*
(�page 43).
�
Press one of the memory position but-
tons* or the memory buttonM*
(�page 107).
Do not leave children unattended in the ve-
hicle, or with access to an unlocked vehicle.
Children could open the driver’s door and
unintentionally activate the easy-entry/exit
feature, which could result in an accident
and/or serious personal injury.
Page 176 of 481
175 Controls in detail
Good visibility
Activating exterior rear view mirror
parking position*
Follow these steps to activate the mirror
parking position so that the passen-
ger-side exterior rear view mirror will be
turned downward during parking maneu-
vers to the stored position.
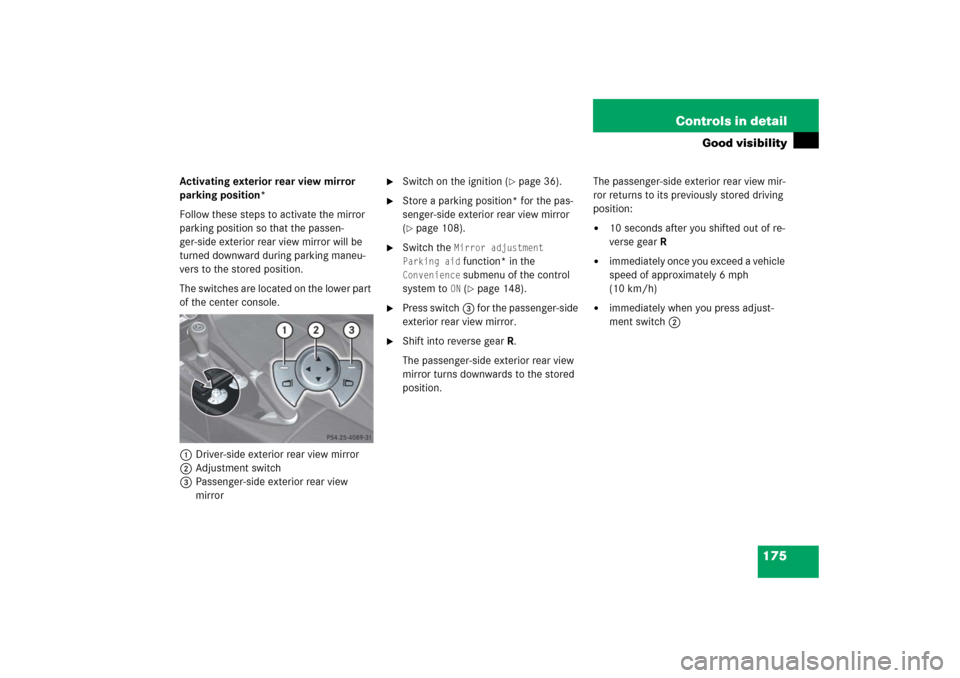
The switches are located on the lower part
of the center console.
1Driver-side exterior rear view mirror
2Adjustment switch
3Passenger-side exterior rear view
mirror
�
Switch on the ignition (
�page 36).
�
Store a parking position* for the pas-
senger-side exterior rear view mirror
(�page 108).
�
Switch the
Mirror adjustment
Parking aid function* in the
Convenience
submenu of the control
system to ON (�page 148).
�
Press switch3 for the passenger-side
exterior rear view mirror.
�
Shift into reverse gearR.
The passenger-side exterior rear view
mirror turns downwards to the stored
position.The passenger-side exterior rear view mir-
ror returns to its previously stored driving
position:
�
10 seconds after you shifted out of re-
verse gearR
�
immediately once you exceed a vehicle
speed of approximately 6 mph
(10 km/h)
�
immediately when you press adjust-
ment switch2
Page 468 of 481

467 Index
Control system 123, 458
AUDIO menu 129
Convenience* submenu 147
Coolant temperature 128
Instrument cluster submenu 137
Lighting submenu 143
Maintenance service indicator 350
Menus 124
Messages in display 368
Multifunction display 123
Multifunction steering wheel 124
NAV* menu 132
Overview (Menus) 126
Overview (Settings submenus) 136
Resetting 134
Settings menu 134
Standard display 128
TEL* menu 151
Time/date submenu 139
Trip computer menu 149
Vehicle status message memory
menu 132
Vehicle submenu 147
Controller Area Network see CAN systemConvenience closing*
Power windows 249
Retractable hardtop 257
Coolant 313
Adding water 306
Anticorrosion/antifreeze 454
Fuels, coolants, lubricants, etc. 453
Technical data 449
Temperature 303
Temperature, checking (Control
system) 128
Corner-illuminating front fog lamps*
(Lighting) 115
Cruise control 260, 458
Display message 370
Cup holder 268
Curb weight 344
Customer Assistance Center see CACD
Date (Control system) 141, 142
Daytime running lamp mode 112
Control system 143
Deep water see Standing water
Defrosting
Rear window 177
Windshield (Automatic climate
control*) 197
Windshield (Climate control) 184
Department of Transportation see DOT
Difficulties with starting 52
Direction of rotation (Tires) 320
Display text see Messages in display
Doors
Control panel, overview 31
Entry lamps 119
Locking/unlocking from outside 95
Opening from inside 97
Unlocking with Tele Aid 280
DOT 344
Drink holder see Cup holder
Drinking and driving 293
Driver’s air bag see Air bags