Page 6 of 481

Contents
Driving tips ................................... 162
Automatic shift program .............. 163
Gear selector lever one-touch
gearshifting .................................. 164
Steering wheel gearshift control
one-touch gearshifting ................. 165
Manual shift program
SLK 55 AMG................................. 169
Emergency operation
(Limp Home Mode) ...................... 172
Good visibility .................................... 173
Headlamp cleaning system* ........ 173
Rear view mirrors ......................... 173
Sun visors .................................... 176
Rear window defroster ................. 177
Climate control .................................. 178
Switching climate control
system on/off .............................. 181
Setting the temperature ............... 181
Adjusting air distribution .............. 182
Adjusting air volume .................... 183
Basic settings............................... 183
Defrosting windshield .................. 184
Air recirculation mode.................. 185
Air conditioning ............................ 187
Residual engine heat utilization.... 188Automatic climate control* ................ 190
Deactivating the climate
control system .............................. 194
Operating the climate control
system in automatic mode............ 194
Setting the temperature................ 195
Adjusting air distribution............... 196
Adjusting air volume ..................... 197
Defrosting windshield ................... 197
Maximum cooling MAX COOL ....... 199
Air recirculation mode .................. 199
Air conditioning............................. 200
Residual heat and ventilation ........ 202
Audio system ...................................... 203
Audio and telephone*, operation .. 203
Operating safety ........................... 203
Operating and display elements.... 204
Button and soft key operation....... 206
Operation ...................................... 206
Radio operation ............................ 209
Introduction to satellite radio*
(USA only) ..................................... 214
CD mode ....................................... 219
GSM network phones ................... 229
TDMA or CDMA network phones .. 236
Emergency calls “911”.................. 243Power windows .................................. 246
Opening and closing the
windows........................................ 246
Synchronizing power windows ...... 251
Retractable hardtop ........................... 252
Opening and closing the
retractable hardtop....................... 252
Wind screen .................................. 259
Driving systems .................................. 260
Cruise control ............................... 260
Loading .............................................. 265
Roof rack ...................................... 265
Useful features ................................... 266
Storage compartments ................. 266
Shelf behind roll bars .................... 268
Cup holder .................................... 268
Ashtray ......................................... 269
Cigarette lighter ............................ 270
Power outlet ................................. 271
Floormat (driver’s side only) ......... 271
Telephone* ................................... 272
Tele Aid ......................................... 273
Garage door opener* .................... 281
Heated steering wheel*
(SLK 280, SLK 350, Canada only) . 288
Page 26 of 481

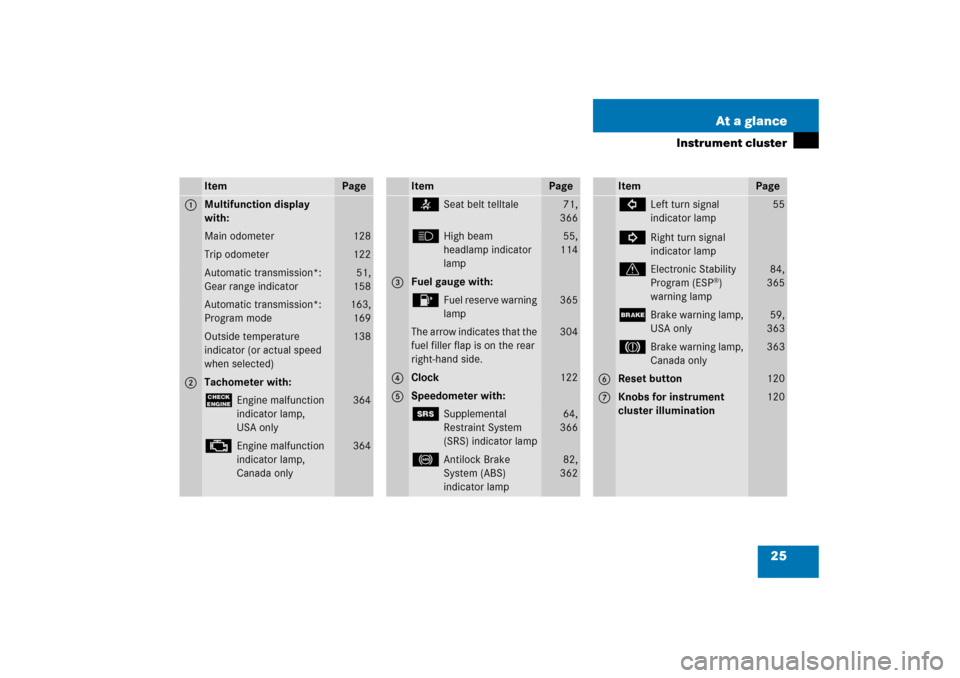
25 At a glance
Instrument cluster
Item
Page
1
Multifunction display
with:Main odometer
128
Trip odometer
122
Automatic transmission*:
Gear range indicator
51,
158
Automatic transmission*:
Program mode
163,
169
Outside temperature
indicator (or actual speed
when selected)
138
2
Tachometer with:?
Engine malfunction
indicator lamp,
USA only
364
±
Engine malfunction
indicator lamp,
Canada only
364
Item
Page
<
Seat belt telltale
71,
366
A
High beam
headlamp indicator
lamp
55,
114
3
Fuel gauge with:4
Fuel reserve warning
lamp
365
The arrow indicates that the
fuel filler flap is on the rear
right-hand side.
304
4
Clock
122
5
Speedometer with:1
Supplemental
Restraint System
(SRS) indicator lamp
64,
366
-
Antilock Brake
System (ABS)
indicator lamp
82,
362
Item
Page
L
Left turn signal
indicator lamp
K
Right turn signal
indicator lamp
55
v
Electronic Stability
Program (ESP
®)
warning lamp
84,
365
;
Brake warning lamp,
USA only
59,
363
3
Brake warning lamp,
Canada only
363
6
Reset button
120
7
Knobs for instrument
cluster illumination
120
Page 27 of 481
26 At a glanceMultifunction steering wheel
Item
Page
1
Multifunction display
120
Operating control system
123
2
Selecting a submenu or set-
ting the volume:
Press buttonæ
up/to increase
ç
down/to decrease
3
Telephone*:
Press buttons
to take a call, or
to dial a call
t
to end a call, or
to reject an incoming
call
Item
Page
4
Moving within a menu:
Press buttonj
for next display
k
for previous display
5
Menu systems:
Press buttonè
for next menu
·
for previous menu
Page 31 of 481
30 At a glanceOverhead control panel
Item
Page
1
Interior lighting on/off
117
2
Interior lighting automatic
control switch
119
3
Right reading lamp on/off
117
4
Tele Aid (emergency call
system) button
273
5
Garage door opener*
281
6
Sensor for auto-dimming
mirrors*
174
7
Interior rear view mirror
45,
173
8
Left reading lamp on/off
119
Page 35 of 481
34 Getting startedThe “Getting started” section provides an
overview of the vehicle’s most basic func-
tions. First-time Mercedes-Benz owners
should pay special attention to the infor-
mation given here.
If you are already familiar with the basic
functions described here, the “Controls in
detail” section (
�page 91) will provide you
with further information. The correspond-
ing page references are located at the end
of each segment.
Unlocking
Unlocking with the SmartKeySmartKey with remote control1‹Lock button
2ŠUnlock button for trunk lid
3ŒUnlock button
4ÂPanic button (
�page 80)
�
Press unlock buttonΠon the
SmartKey.
All turn signal lamps flash once. The
locking knobs in the doors move up.
The anti-theft alarm system is dis-
armed.
�
Get in the vehicle and insert the
SmartKey in the starter switch.
Page 45 of 481

44 Getting startedAdjusting
With the easy-entry/exit feature activated,
the steering wheel will return to its last set
position when you:�
close the driver’s door with the ignition
switched on,
or
�
insert the SmartKey into the starter
switch with the driver’s door closed.With the easy-entry/exit feature activated,
the steering wheel tilts upwards when you:
�
remove the SmartKey from the starter
switch,
or
�
open the driver’s door with the
SmartKey in starter switch
position0or1.
Warning!
G
You must make sure no one can become
trapped or injured by the moving steering
wheel when the easy-entry/exit feature is
activated.
To cancel steering wheel movement, do one
of the following:�
Move steering column lever*
(�page 43).
�
Press one of the memory position but-
tons* or the memory buttonM*
(�page 107).
Do not leave children unattended in the ve-
hicle, or with access to an unlocked vehicle.
Children could open the driver’s door and
unintentionally activate the easy-entry/exit
feature, which could result in an accident
and/or serious personal injury.
iThe last set steering wheel position is
stored when�
the ignition is switched off
�
the position is stored in memory
(�page 107)
iIf the current position for the steering
wheel is in the uppermost tilt position,
the steering wheel will no longer be
able to move upward when the
easy-entry/exit feature is activated.
The adjustment procedure is briefly in-
terrupted when the engine is started.
Page 50 of 481
49 Getting started
Driving
1Loop for seat belt guidance
2Latch plate
3Release button
4Buckle
�
With a smooth motion, pull the belt
from the belt outlet.
�
Place the shoulder portion of the belt
across the top of your shoulder and the
lap portion across your hips.
�
Push latch plate2 into buckle4 until
it engages.
�
If necessary, tighten the lap portion to
a snug fit by pulling shoulder portion
up.
For more information, see “Safety guide-
lines for the seat belt, emergency tension-
ing device and air bag” (
�page 68).Proper use of seat belts
�
Do not twist the seat belt when fasten-
ing.
�
Adjust seat belt so that the shoulder
portion is located as close as possible
to the middle of the shoulder (it should
not touch the neck). Never pass the
shoulder portion of the belt under your
arm.
�
Position the lap belt as low as possible
on your hips (over hip joint) and not
across the abdomen.
�
Place the seat backrest in a nearly up-
right position.
Page 54 of 481

53 Getting started
Driving
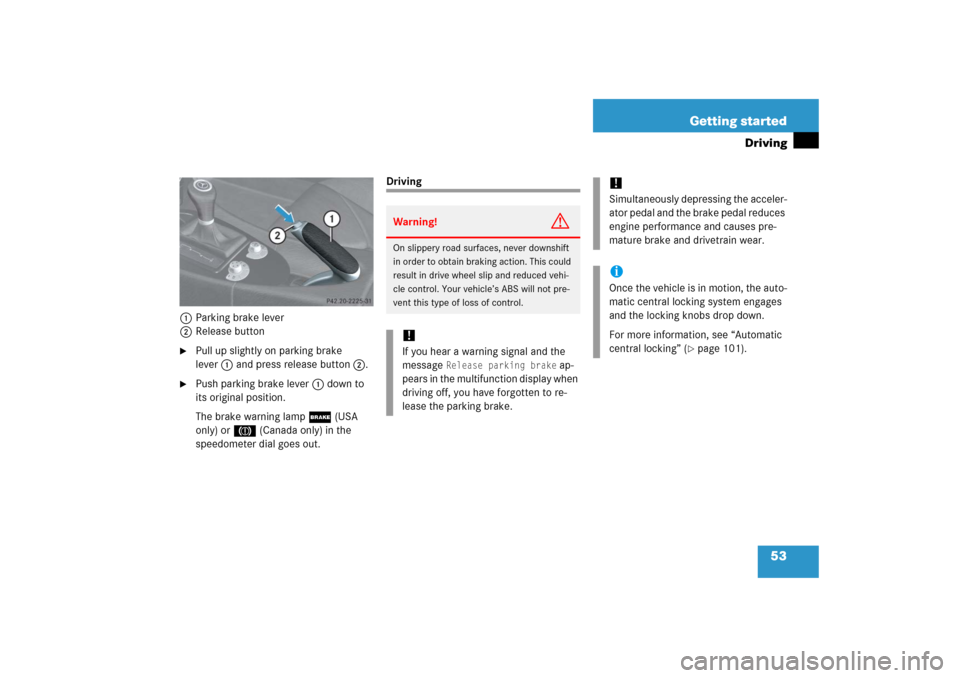
1Parking brake lever
2Release button�
Pull up slightly on parking brake
lever1 and press release button2.
�
Push parking brake lever1 down to
its original position.
The brake warning lamp; (USA
only) or3 (Canada only) in the
speedometer dial goes out.
DrivingWarning!
G
On slippery road surfaces, never downshift
in order to obtain braking action. This could
result in drive wheel slip and reduced vehi-
cle control. Your vehicle’s ABS will not pre-
vent this type of loss of control.!If you hear a warning signal and the
message
Release parking brake
ap-
pears in the multifunction display when
driving off, you have forgotten to re-
lease the parking brake.
!Simultaneously depressing the acceler-
ator pedal and the brake pedal reduces
engine performance and causes pre-
mature brake and drivetrain wear.iOnce the vehicle is in motion, the auto-
matic central locking system engages
and the locking knobs drop down.
For more information, see “Automatic
central locking” (
�page 101).