Page 142 of 481
141 Controls in detail
Control system
Setting the date (month)
This function can be seen in vehicles with
audio system, or in vehicles with
COMAND* and navigation module*, if the
time and date synchronization with head
unit* feature was set to
Off
(�page 139).
�
Move the selection marker with
buttonæorç to the
Time/Date
submenu.
�
Press buttonjork repeatedly
until you see
Set date month
in the
multifunction display.
The selection marker is on the month.
�
Press buttonæorç to set the
month.Setting the date (day)
This function can be seen in vehicles with
audio system, or in vehicles with
COMAND* and navigation module*, if the
time and date synchronization with head
unit* feature was set to
Off
(�page 139).
iVehicles with COMAND*:
For information on setting the time in
COMAND, refer to the separate
COMAND operating instructions.
iVehicles with COMAND*:
For information on setting the time in
COMAND, refer to the separate
COMAND operating instructions.
Page 143 of 481
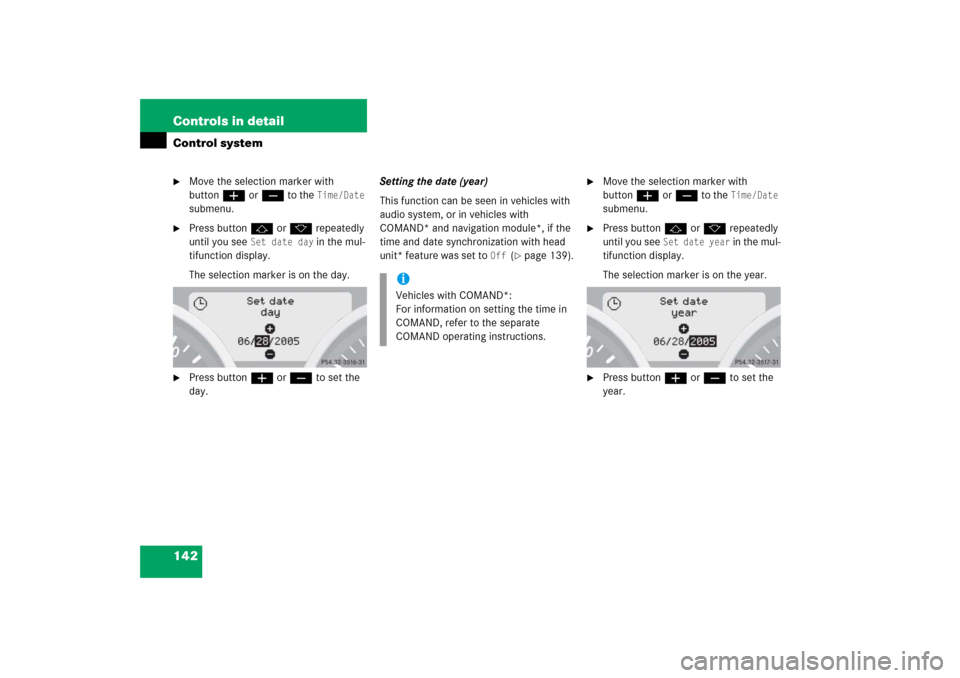
142 Controls in detailControl system�
Move the selection marker with
buttonæorç to the
Time/Date
submenu.
�
Press buttonjork repeatedly
until you see
Set date day
in the mul-
tifunction display.
The selection marker is on the day.
�
Press buttonæorç to set the
day.Setting the date (year)
This function can be seen in vehicles with
audio system, or in vehicles with
COMAND* and navigation module*, if the
time and date synchronization with head
unit* feature was set to
Off
(�page 139).
�
Move the selection marker with
buttonæorç to the
Time/Date
submenu.
�
Press buttonjork repeatedly
until you see
Set date year
in the mul-
tifunction display.
The selection marker is on the year.
�
Press buttonæorç to set the
year.
iVehicles with COMAND*:
For information on setting the time in
COMAND, refer to the separate
COMAND operating instructions.
Page 144 of 481

143 Controls in detail
Control system
Lighting submenu
Access the
Lighting
submenu via the
Settings...
menu. Use the
Lighting
sub-
menu to change the lamp and lighting set-
tings on your vehicle.
The following functions are available:Daytime running lamp mode (USA only)
�
Move the selection marker with
buttonæorç to the
Lighting
submenu.
�
Press buttonjork repeatedly
until you see
Lamp circuit headlamp
mode
in the multifunction display.
The selection marker is on the current
setting.
�
Press buttonæorç to select
manual operation (
manual
) or daytime
running lamp mode (
constant
) activat-
ed.
With daytime running lamp mode activated
and the exterior lamp switch in
positionMorU, the low beam
headlamps are switched on when the en-
gine is running.
In low ambient light conditions the follow-
ing lamps will switch on additionally:
�
Parking lamps
�
Tail lamps
�
License plate lamps
�
Side marker lamps
For more information on the daytime run-
ning lamp mode, see “Lighting”
(
�page 110).
Function
Page
Daytime running lamp mode
(USA only)
143
Locator lighting
144
Night security illumination
145
Interior lighting delayed shut-off
146
iThis function is not available in coun-
tries where the daytime running lamp
mode is mandatory and therefore in a
constant mode.
Page 145 of 481

144 Controls in detailControl system
Locator lighting
With the locator lighting feature activated
and the exterior lamp switch in
positionU, the following lamps will
switch on during darkness when the vehi-
cle is unlocked with the SmartKey:�
Parking lamps
�
Tail lamps
�
License plate lamps
�
Side marker lamps
�
Front fog lamps
The locator lighting switches off when the
driver’s door is opened.
If you do not open a door after unlocking
the vehicle with the SmartKey, the lamps
will switch off automatically after approxi-
mately 40 seconds.
�
Move the selection marker with
buttonæorç to the
Lighting
submenu.
�
Press buttonjork repeatedly
until you see
Function Surround
lighting
in the multifunction display.
The selection marker is on the current
setting.
�
Press buttonæorç to switch
the locator lighting function
On.
�
Turn the exterior lamp switch to
positionU when exiting the vehicle
(�page 55).
The locator lighting feature is
activated.
iFor safety reasons, resetting all the
functions of all submenus to the facto-
ry settings while driving (
�page 134)
will not deactivate the daytime running
lamp mode.
The following message appears in the
multifunction display:
Lighting Cannot be completely
reset to factory settings while
driving
.
Page 150 of 481

149 Controls in detail
Control system
�
Press buttonjork repeatedly
until you see
Mirror adjustment
Parking aid in the multifunction dis-
play.
The selection marker is on the current
setting.
�
Press buttonæorç to set the
function to
On or
Off
.
Trip computer menu
Use the trip computer menu to call up
statistical data on your vehicle.
The following information is available:Fuel consumption statistics after start
�
Press buttonèorÿ repeatedly
until you see the first function of the
trip computer menu.
�
Press buttonjork repeatedly
until you see
After start
in the multi-
function display.
1Statistics called up: since start
2Time elapsed since start
3Average fuel consumption since start
4Average speed since start
5Distance driven since start
Function
Page
Fuel consumption statistics after
start
149
Fuel consumption statistics
since last reset
150
Calling up range (distance to
empty)
151
iWhen you enter the trip computer
menu, you will always see the fuel
consumption statistics after start first.
Page 151 of 481

150 Controls in detailControl system
Fuel consumption since last reset�
Press buttonèorÿ repeatedly
until you see the first function of the
trip computer menu.
�
Press buttonjork repeatedly
until you see
After reset
in the multi-
function display.
1Statistics called up: since last reset
2Time elapsed since last reset
3Average fuel consumption since last
reset
4Average speed since last reset
5Distance driven since last resetResetting fuel consumption statistics
manually
�
Press and hold reset buttonJuntil
the values of the statistics are reset
to
0.
Resetting fuel consumption statistics
automatically
The values of the statistics will be automat-
ically reset to
0 when one of the following
values exceeds:
�
distance: 100 000 miles (100 000 km)
�
elapsed time: 10 000 hours
iAll statistics stored since the last en-
gine start will be reset approximately
four hours after the SmartKey in the
starter switch is turned to position0 or
removed from the starter switch.
Resetting will not occur if you turn the
SmartKey back to position1or2
within this time period.
Page 174 of 481
173 Controls in detail
Good visibility
�Good visibility
For information on the windshield wipers,
see (
�page 56).
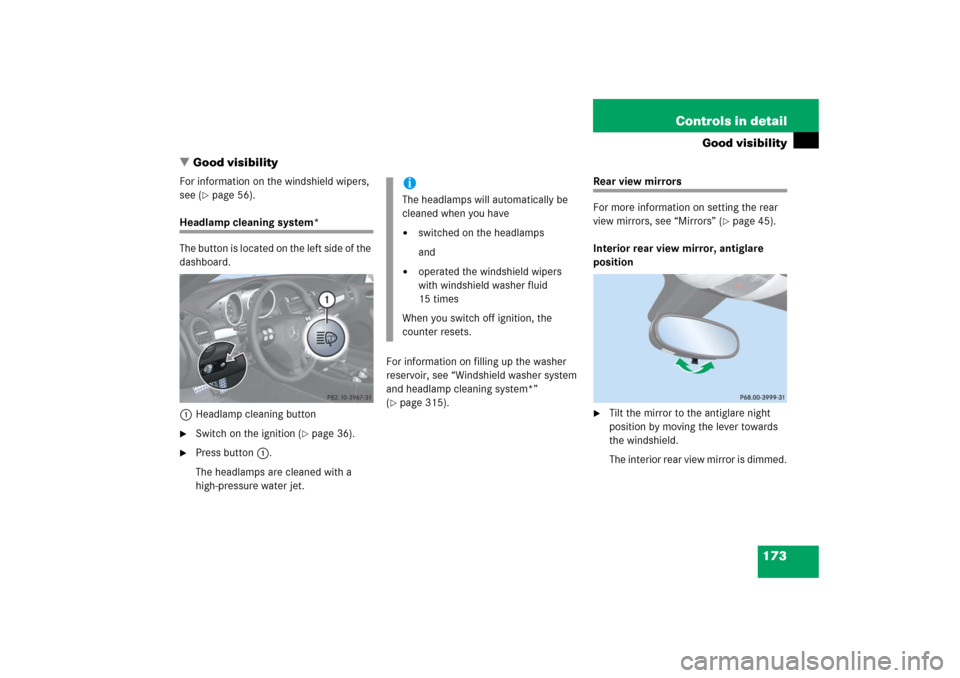
Headlamp cleaning system*
The button is located on the left side of the
dashboard.
1Headlamp cleaning button�
Switch on the ignition (
�page 36).
�
Press button1.
The headlamps are cleaned with a
high-pressure water jet.For information on filling up the washer
reservoir, see “Windshield washer system
and headlamp cleaning system*”
(
�page 315).
Rear view mirrors
For more information on setting the rear
view mirrors, see “Mirrors” (
�page 45).
Interior rear view mirror, antiglare
position
�
Tilt the mirror to the antiglare night
position by moving the lever towards
the windshield.
The interior rear view mirror is dimmed.
iThe headlamps will automatically be
cleaned when you have�
switched on the headlamps
and
�
operated the windshield wipers
with windshield washer fluid
15 times
When you switch off ignition, the
counter resets.
Page 182 of 481
.
�
Set air volume control2 to any speed
(�page 179).
The previous setti")
181 Controls in detail
Climate control
Switching climate control system on/off
Switching on�
Switch on the ignition (
�page 36).
�
Set air volume control2 to any speed
(�page 179).
The previous settings are once again in
effect.
Switching off
�
Set air volume control2 (
�page 179)
to position0.
Setting the temperature
Use temperature controls1 and4
(�page 179) to separately adjust the air
temperature on each side of the passenger
compartment. You should raise or lower
the temperature setting in small incre-
ments, preferably starting at 72°F (22°C).
The climate control will adjust to the set
temperature as fast as possible.Increasing
�
Turn temperature control
1and/or4 (
�page 179) slightly
clockwise.
The climate control system will corre-
spondingly adjust the interior air tem-
perature.
Decreasing
�
Turn temperature control
1and/or4 (
�page 179) slightly
counterclockwise.
The climate control system will corre-
spondingly adjust the interior air tem-
perature.
iWhen the climate control system is
switched off, the outside air supply and
circulation are also switched off. Only
choose this setting for a short time.
Otherwise the windows could fog up.

This function can be seen in vehicles with
audio system, or in vehicles with
COMAND* and navigation module*, if the
time and date sync")