Page 389 of 481
388 Practical hintsWhere will I find...?First aid kit
The first aid kit is stored in a parcel net
behind the driver’s seat.Vehicle tool kit, vehicle jack
The vehicle tool kit is stored in a storage
compartment under the trunk floor.
The following is included:�
Collapsible chock
�
Vehicle jack
�
Protective wrap
�
Alignment bolt
�
Towing eye bolt
�
Wheel wrench
�
Spare fuses
�
Fuse extractor
�
Valve extractor
�
Electric air pump
�
TIREFIT kit*Removing the vehicle tool kit
Vehicles with spare wheel
1Spare wheel
2Vehicle tool kit (under collapsible tire,
together with wheel bolts for spare
wheel with collapsible tire)
3Retaining screw
�
Open the trunk (
�page 98).
�
Lift up trunk floor.
�
Loosen retaining screw3 by turning it
counter-clockwise.
�
Remove spare wheel1.
�
Remove vehicle tool kit2.1Collapsible wheel chock
2Vehicle jack
3Protective wrap
4Alignment bolt
5Towing eye bolt
6Wheel wrench
7Spare fuses, fuse extractor and valve
extractor
8Electric air pump
Page 390 of 481

389 Practical hints
Where will I find...?
Vehicles with TIREFIT*
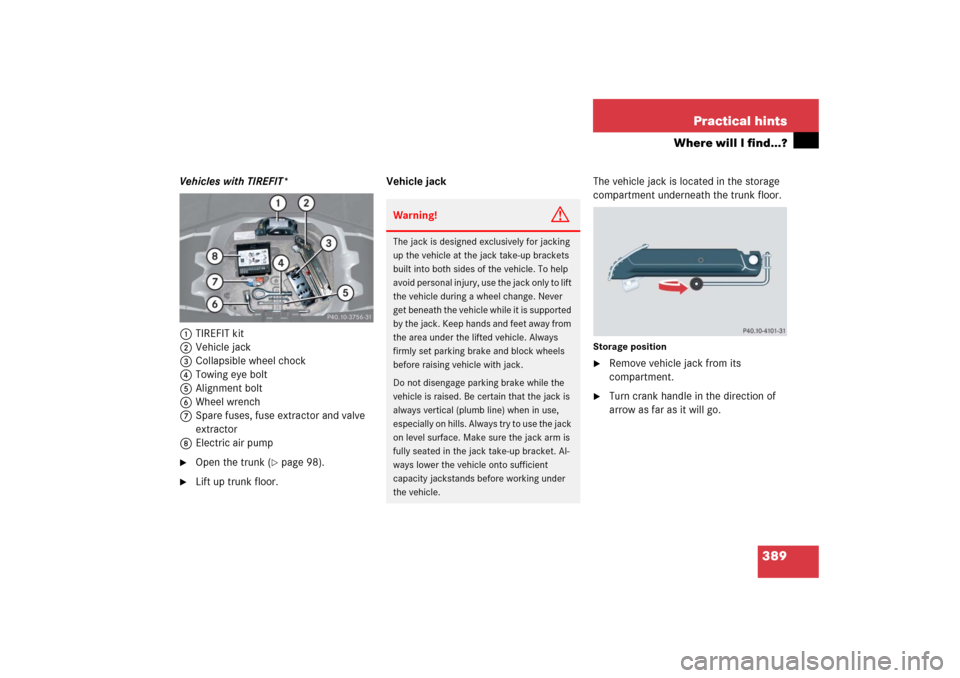
1TIREFIT kit
2Vehicle jack
3Collapsible wheel chock
4Towing eye bolt
5Alignment bolt
6Wheel wrench
7Spare fuses, fuse extractor and valve
extractor
8Electric air pump�
Open the trunk (
�page 98).
�
Lift up trunk floor.Vehicle jackThe vehicle jack is located in the storage
compartment underneath the trunk floor.
Storage position�
Remove vehicle jack from its
compartment.
�
Turn crank handle in the direction of
arrow as far as it will go.
Warning!
G
The jack is designed exclusively for jacking
up the vehicle at the jack take-up brackets
built into both sides of the vehicle. To help
avoid personal injury, use the jack only to lift
the vehicle during a wheel change. Never
get beneath the vehicle while it is supported
by the jack. Keep hands and feet away from
the area under the lifted vehicle. Always
firmly set parking brake and block wheels
before raising vehicle with jack.
Do not disengage parking brake while the
vehicle is raised. Be certain that the jack is
always vertical (plumb line) when in use,
especially on hills. Always try to use the jack
on level surface. Make sure the jack arm is
fully seated in the jack take-up bracket. Al-
ways lower the vehicle onto sufficient
capacity jackstands before working under
the vehicle.
Page 392 of 481

391 Practical hints
Where will I find...?
Spare wheel with collapsible tire
The spare wheel is stored in the storage
compartment underneath the trunk floor.
1Spare wheel, spare wheel bolts
(located under plastic cover on the
outside of spare wheel rim)
2Vehicle tool kit (under collapsible tire)
3Retaining screw�
Loosen retaining screw3by turning it
counterclockwise.
�
Remove spare wheel1.
�
Take off the wheel bolts for spare
wheel1.Storing the spare wheel with
collapsible tire
If you wish to store the spare wheel after
use, carry out the following steps. Other-
wise the spare wheel will not fit the storage
compartment.
�
Unscrew the valve cap from the valve
of the collapsible tire.
�
Take the valve extractor from the vehi-
cle tool kit (
�page 388).
�
Unscrew the valve insert from the valve
and allow the air to escape.
�
Screw the valve insert back into the
valve.
�
Screw the valve cap back on the valve.
�
Pull the protective wrap provided with
the vehicle tool kit over the spare
wheel.
�
Store the spare wheel and the valve ex-
tractor in the storage compartment un-
derneath the trunk floor.
�
Pierce the protective wrap with retain-
ing screw3.
�
Secure the spare wheel by turning re-
taining screw3 clockwise.
!Make sure the collapsible tire is dry
when storing it.iIt may take a few minutes for the col-
lapsible tire to deflate completely.
Page 393 of 481

392 Practical hintsWhere will I find...?
In case of a flat tire, you may temporarily
use the spare wheel with collapsible tire
when observing the following restrictions:�
Do not exceed a vehicle speed of
50 mph (80 km/h).
�
Drive to the nearest tire repair facility
to have the flat tire repaired or
replaced as appropriate.
�
Do not operate vehicle with more than
one spare wheel with collapsible tire
mounted.
For more information, see “Rims and tires”
(
�page 439).
Spare wheel bolts
1Wheel bolt for light alloy rims
2Wheel bolt for spare wheel with
collapsible tire (located under plastic
cover on the outside of spare wheel
rim)
Warning!
G
The dimensions of the spare wheel with col-
lapsible tire are different from those of the
road wheels. As a result, the vehicle han-
dling characteristics change when driving
with a spare wheel with collapsible tire
mounted.
The spare wheel with collapsible tire should
only be used temporarily, and should be re-
placed with a regular road wheel as quickly
as possible.
Page 394 of 481
393 Practical hints
Where will I find...?
!
Wheel bolts2 must be used when
mounting the spare wheel with
collapsible tire. The use of any wheel
bolts other than wheel bolts2 for the
spare wheel with collapsible tire will
physically damage the vehicle’s
brakes. Warning!
G
Make sure to use the original length wheel
bolts when remounting the original wheel
after it has been repaired.
Page 413 of 481

412 Practical hintsFlat tire
�
Visit an authorized Mercedes-Benz
Center as soon as possible to obtain a
new TIREFIT kit.
�
Bring used TIREFIT materials to an
authorized Mercedes-Benz Center for
proper disposal.
�
Replace your TIREFIT container every
4 years. Replacement containers are
available at your authorized
Mercedes-Benz Center.
Mounting the spare wheel
Warning!
G
Follow recommend inflation pressures.
Do not overinflate tires. Overinflating tires
can result in sudden deflation (blowout) be-
cause they are more likely to become punc-
tured or damaged by road debris, potholes,
etc.
Do not underinflate tires. Underinflated tires
wear unevenly, adversely affect handling
and fuel economy, and are more likely to fail
from being overheated.
Do not overload the tires by exceeding the
specified vehicle capacity weight (as indicat-
ed by the label on the pillar in the driver’s
door opening). Overloading the tires can
overheat them, possibly causing a blowout.
Warning!
G
Do not exceed vehicle speed of 50 mph
(80 km/h). A TIREFIT repair is not designed
to operate at higher speeds.
The sticker must be attached on the instru-
ment cluster where it will be easily seen by
the driver.
Vehicle handling characteristics may
change. Adapt your driving accordingly.
Warning!
G
The dimensions of the spare wheel with col-
lapsible tire are different from those of the
road wheels. As a result, the vehicle han-
dling characteristics change when driving
with a spare wheel with collapsible tire
mounted. Adapt your driving style accord-
ingly.
The spare wheel with collapsible tire is for
temporary use only. When driving with spare
wheel with collapsible tire mounted, ensure
proper tire inflation pressure and do not ex-
ceed vehicle speed of 50 mph (80 km/h).
��
Page 414 of 481

413 Practical hints
Flat tire
Preparing the vehicle
Prepare the vehicle as described
(�page 408).
�
Take the collapsible tire, wheel wrench,
wheel bolts, jack, and electric air pump
out of the trunk (
�page 388).Lifting the vehicle
�
Prevent the vehicle from rolling away
by blocking wheels with wheel chocks
(not included) or other sizeable ob-
jects.
One wheel chock is included with the
vehicle tool kit (
�page 388).
When changing wheel on a level surface:
�
Place the wheel chock in front of and
another sizeable object behind the
wheel that is diagonally opposite to the
wheel being changed.
Always try lifting the vehicle using the jack
on a level surface. However, should cir-
cumstances require you to do so on a hill,
place the wheel chock and the other size-
able object as follows:
�
Place the wheel chock and another
sizeable object on the downhill side
blocking both wheels of the axle not
being worked on.
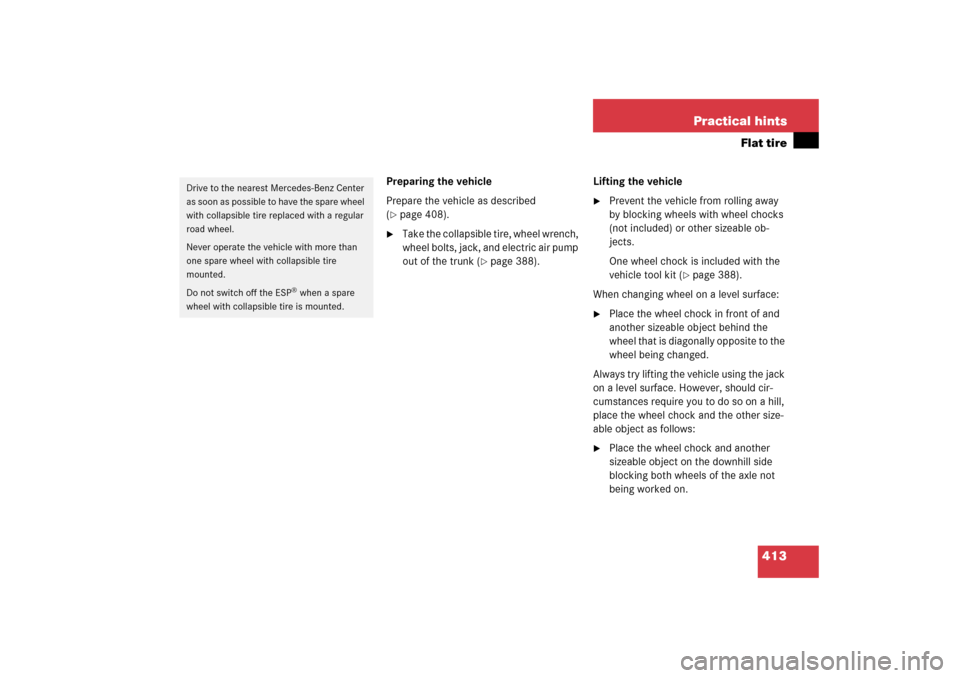
Drive to the nearest Mercedes-Benz Center
as soon as possible to have the spare wheel
with collapsible tire replaced with a regular
road wheel.
Never operate the vehicle with more than
one spare wheel with collapsible tire
mounted.
Do not switch off the ESP
® when a spare
wheel with collapsible tire is mounted.
Page 416 of 481
415 Practical hints
Flat tire
�
Jack up the vehicle until the wheel is a
maximum of 1.2 in (3 cm) from the
ground. Never start engine while
vehicle is raised.Removing the wheel
4Alignment bolt
�
Unscrew the upper-most wheel bolt
and remove.
�
Replace this wheel bolt with alignment
bolt4 supplied in the vehicle tool kit.
�
Remove the remaining bolts.
�
Remove the wheel.Mounting the spare wheel
1Wheel bolt for light alloy rims
2Wheel bolt for spare wheel with
collapsible tire (located under plastic
cover on the outside of spare wheel
rim)
Warning!
G
The jack is intended only for lifting the
vehicle briefly for wheel changes. It is not
suited for performing maintenance work
under the vehicle.�
Never start the engine when the vehicle
is raised.
�
Never lie down under the raised vehicle.
!Do not place wheel bolts in sand or dirt.
This could result in damage to the bolt
and wheel hub threads.