Page 234 of 480
233 Controls in detail
Useful features
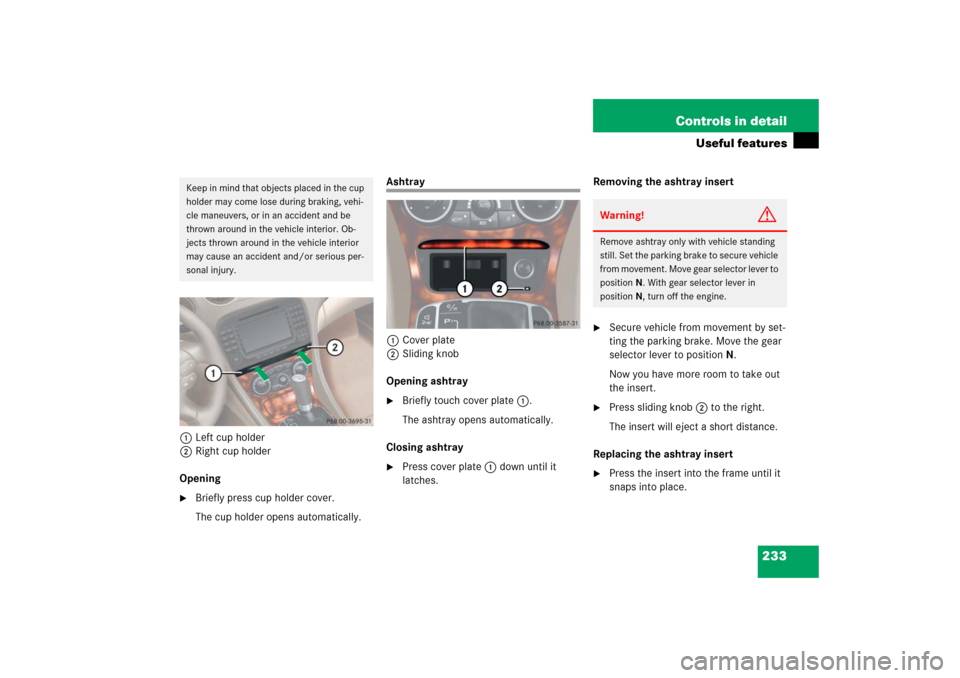
1Left cup holder
2Right cup holder
Opening�
Briefly press cup holder cover.
The cup holder opens automatically.
Ashtray
1Cover plate
2Sliding knob
Opening ashtray�
Briefly touch cover plate1.
The ashtray opens automatically.
Closing ashtray
�
Press cover plate1 down until it
latches.Removing the ashtray insert
�
Secure vehicle from movement by set-
ting the parking brake. Move the gear
selector lever to positionN.
Now you have more room to take out
the insert.
�
Press sliding knob2 to the right.
The insert will eject a short distance.
Replacing the ashtray insert
�
Press the insert into the frame until it
snaps into place.
Keep in mind that objects placed in the cup
holder may come lose during braking, vehi-
cle maneuvers, or in an accident and be
thrown around in the vehicle interior. Ob-
jects thrown around in the vehicle interior
may cause an accident and/or serious per-
sonal injury.
Warning!
G
Remove ashtray only with vehicle standing
still. Set the parking brake to secure vehicle
from movement. Move gear selector lever to
positionN. With gear selector lever in
positionN, turn off the engine.
Page 260 of 480
259 Operation
Driving instructions
To help prevent brake disk corrosion after
driving on wet road surfaces (particularly
salted roads), it is advisable to brake the
vehicle with considerable force prior to
parking. The heat generated serves to dry
the brakes.
If your brake system is normally only sub-
jected to moderate loads, you should occa-
sionally test the effectiveness of the
brakes by applying above-normal braking
pressure at higher speeds. This will also
enhance the grip of the brake pads.
Refer to the description of the Brake Assist
System (BAS) (
�page 84).If the parking brake is released and the
brake warning lamp in the instrument clus-
ter stays on, there is a malfunction in the
electro-hydraulic brake system
(
�page 88) or the brake fluid level in the
reservoir is too low.
Brake pad wear or a leak in the system may
be the reason for low brake fluid in the res-
ervoir.
Have the brake system inspected immedi-
ately.
All checks and service work on the brake
system should be carried out by qualified
technicians only. Contact an authorized
Mercedes-Benz Center.
Only install brake pads and brake fluid rec-
ommended by Mercedes-Benz.
After hard braking, it is advisable to drive
on for some time, rather than to park im-
mediately, so the air stream will cool down
the brakes faster.
Warning!
G
Make sure not to endanger any other road
users when carrying out these braking
maneuvers.
Warning!
G
If other than recommended brake pads are
installed, or other than recommended brake
fluid is used, the braking properties of the
vehicle can be degraded to an extent that
safe braking is substantially impaired. This
could result in an accident.
Be certain to read and observe the warning
notices on brake pad replacement
(�page 89).!When driving down long and steep
grades, relieve the load on the brakes
by shifting into a lower gear to use the
engine’s braking power. This helps pre-
vent overheating of the brakes and re-
duces brake pad wear.
Page 262 of 480
261 Operation
Driving instructions
Parking
Tires
Treadwear indicators (TWI) are required by
law. These indicators are located in six
places on the tread circumference and be-
come visible at a tread depth of approxi-
mately
1/16
in (1.6 mm), at which point
the tire is considered worn and should be
replaced.
Warning!
G
Do not park this vehicle in areas where com-
bustible materials such as grass, hay or
leaves can come into contact with the hot
exhaust system, as these materials could be
ignited and cause a vehicle fire.
To reduce the risk of personal injury as a re-
sult of vehicle movement, before
turning off
the engine and leaving the vehicle always:
�
Keep right foot on brake pedal.
�
Firmly depress parking brake pedal.
�
Move the gear selector lever to
positionP.
�
Slowly release brake pedal.
�
When parked on an incline, turn front
wheels towards the road curb.
�
Turn the SmartKey in the starter switch
to position0 and remove the SmartKey
from the starter switch, or press the
start/stop button (vehicles with
KEYLESS-GO*).
�
Take the SmartKey or the SmartKey with
KEYLESS-GO* and lock vehicle when
leaving.!Set the parking brake whenever park-
ing or leaving the vehicle. In addition,
move gear selector lever to positionP.
When parking on hills, turn front wheels
towards the road curb.
Warning!
G
If you feel a sudden significant vibration or
ride disturbance, or you suspect that possi-
ble damage to your vehicle has occurred,
you should turn on the hazard warning flash-
ers, carefully slow down, and drive with cau-
tion to an area which is a safe distance from
the road.
Inspect the tires and the vehicle underbody
for possible damage. If the vehicle or tires
appear unsafe, have the vehicle towed to
the nearest Mercedes-Benz Center or tire
dealer for repairs.
Page 335 of 480
334 Practical hintsWhat to do if …Problem
Possible cause/consequence
Suggested solution
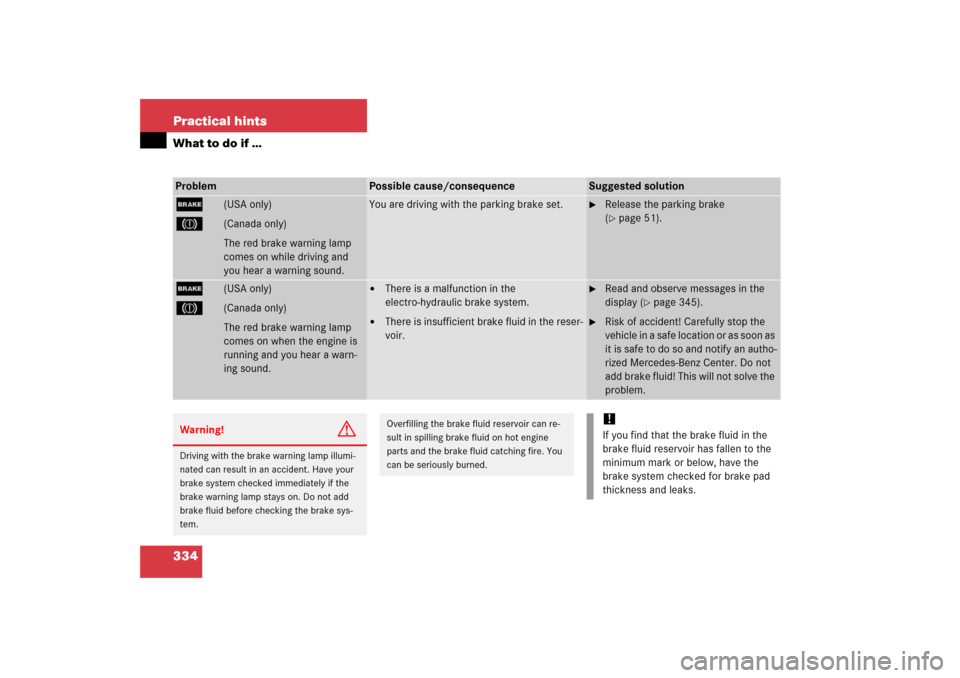
;
(USA only)
3
(Canada only)
The red brake warning lamp
comes on while driving and
you hear a warning sound.
You are driving with the parking brake set.
�
Release the parking brake
(�page 51).
;
(USA only)
3
(Canada only)
The red brake warning lamp
comes on when the engine is
running and you hear a warn-
ing sound.
�
There is a malfunction in the
electro-hydraulic brake system.
�
There is insufficient brake fluid in the reser-
voir.
�
Read and observe messages in the
display (
�page 345).
�
Risk of accident! Carefully stop the
vehicle in a safe location or as soon as
it is safe to do so and notify an autho-
rized Mercedes-Benz Center. Do not
add brake fluid! This will not solve the
problem.
Warning!
G
Driving with the brake warning lamp illumi-
nated can result in an accident. Have your
brake system checked immediately if the
brake warning lamp stays on. Do not add
brake fluid before checking the brake sys-
tem.
Overfilling the brake fluid reservoir can re-
sult in spilling brake fluid on hot engine
parts and the brake fluid catching fire. You
can be seriously burned.
!If you find that the brake fluid in the
brake fluid reservoir has fallen to the
minimum mark or below, have the
brake system checked for brake pad
thickness and leaks.
Page 365 of 480
364 Practical hintsWhat to do if …Left display
Right display
Possible cause/consequence
Possible solution
USA only:;Canada only:3
Service brake
Visit
workshop
There are malfunctions, but the
electro-hydraulic brake system is
operating normally.
�
Visit an authorized Mercedes-Benz Center as
soon as possible.
Brakes overheated
Drive on, but with
even greater care
The brake system is overheated due
to an excessive load on the brakes.
�
Relieve the load on the brake system.
�
Drive more smoothly and think ahead to avoid
unnecessary braking.
�
When driving down steep grades, shift into a
lower gear to use the engine’s braking power
(�page 169).
�
Cautiously continue driving so that the air
stream will cool down the brakes.
USA only:;Canada only:!
Release
parking brake
You are driving with the parking
brake set.
�
Release the parking brake (
�page 59).
Page 392 of 480
391 Practical hints
Replacing bulbs
�Replacing bulbs
Bulbs
Safe vehicle operation depends on proper
exterior lighting and signaling. It is there-
fore essential that all bulbs and lamp as-
semblies are in good working order at all
times.
Correct headlamp adjustment is extremely
important. Have headlamps checked and
readjusted at regular intervals and when a
bulb has been replaced. See an authorized
Mercedes-Benz Center for headlamp ad-
justment.
iIf the headlamps or front fog lamps are
fogged up on the inside as a result of
high humidity, driving the vehicle a dis-
tance with the lights on should clear up
the fogging.
iSubstitute bulbs will be brought into
use when the following lamps malfunc-
tion:�
Turn signal lamps
�
Brake lamps
�
Parking lamps
�
Tail lamps
Observe the messages in the multi-
function display (
�page 345).
Page 393 of 480
392 Practical hintsReplacing bulbsFront lamps Rear lamps
Lamp
Type
1
Additional turn signal
LED
2
Turn signal lamp
1156 NA
3
Low beam
1
1Vehicles with Bi-Xenon* headlamps: Low beam
and high beam use the same D2S-35W lamp. Do
not replace the Xenon and Bi-Xenon* bulbs your-
self. Contact an authorized Mercedes-Benz Center.
D2S-35 W
4
Xenon headlamps:
High beam, high beam
flasher
H7 (55 W)
Bi-Xenon head-
lamps*:
High beam flasher
H7 (55 W)
Parking and standing
lamps
W 5 W
5
Fog lamp, Corner-illu-
minating front fog
lamp*
HB4 (51 W)
6
Side marker lamp
W 5 W
Lamp
Type
7
Rear fog lamp
(driver’s side only);
replacement
P 21 W
1156/32 cp
8
High mounted brake
lamp
LED
9
Backup lamp;
replacement
P 21 W
1156/32 cp
a
Tail, parking and
standing lamp, side
marker lamp
LED
b
Tail, parking and
standing lamp, brake
lamp
LED
c
License plate lamps
C 5 W
d
Turn signal lamp;
replacement
P 21 W
1156/32 cp
Page 394 of 480
393 Practical hints
Replacing bulbs
Notes on bulb replacement�
Only use 12-volt bulbs of the same type
and with the specified watt rating.
�
Switch the lights off before changing a
bulb to prevent short circuits.
�
Always use a clean lint-free cloth when
handling bulbs.
�
Your hands should be dry and free of oil
and grease.
�
If the newly installed bulb does not
come on, visit an authorized
Mercedes-Benz Center.Have the LEDs and bulbs for the following
lamps replaced by an authorized
Mercedes-Benz Center:
�
the additional turn signals in the exteri-
or rear view mirrors
�
the high mounted brake lamp
�
the brake lamps
�
the parking lamps and the side marker
lamps in the tail lamp unit
�
the rear fog lamps
�
the low beam (Xenon or Bi-Xenon*)
lamps
�
the front fog lamps
�
the front side marker lamps
Warning!
G
Bulbs and bulb sockets can be very hot. Al-
low the lamp to cool down before changing
a bulb.
Keep bulbs out of reach of children.
Halogen lamps contain pressurized gas. A
bulb can explode if you:�
touch or move it when hot
�
drop the bulb
�
scratch the bulb
Wear eye and hand protection.
Because of high voltage in Xenon lamps, it is
dangerous to replace the bulb or repair the
lamp and its components. We recommend
that you have such work done by a qualified
technician.
iHave the headlamp adjustment
checked regularly.