Page 306 of 480
.
N")
305 Operation
Tires and wheels
In addition to tire load rating, special load
information may be molded into the tire
sidewall following the letter designating
the tire speed rating1 (
�page 304).
No specification given: absence of any text
(like in above example) indicates a
standard load (SL) tire.
XL or Extra Load: designates an extra load
(or reinforced) tire.
Light Load: designates a light load tire.
C, D, E: designates load range associated
with the maximum load a tire can carry at
a specified pressure.
DOT, Tire Identification Number (TIN)
U.S. tire regulations require each new tire
manufacturer or tire retreader to mold a
TIN into or onto a sidewall of each tire
produced.
The TIN is a unique identifier which facili-
tates efforts by tire manufactures to notify
purchasers in recall situations or other
safety matters concerning tires and gives
purchasers the means to easily identify
such tires.
The TIN is comprised of “Manufacturer’s
identification mark”, “Tire size”, “Tire type
code” and “Date of manufacture”.1DOT
2Manufacturer’s identification mark
3Tire size
4Tire type code (at the option of the tire
manufacturer)
5Date of manufacture
iFor illustration purposes only. Actual
data on tires are specific to each vehi-
cle and may vary from data shown in
above illustration.
Page 325 of 480

324 OperationVehicle careHand-wash
Do not use hot water or wash your vehicle
in direct sunlight. �
Only use a mild car wash detergent,
such as Mercedes-Benz approved Car
Shampoo.
�
Thoroughly spray the vehicle with a dif-
fused jet of water.
Direct only a very weak spray towards
the ventilation intake.
�
Use plenty of water and rinse the
sponge and chamois frequently.
�
Rinse with clean water and thoroughly
dry with a chamois.
Do not allow cleaning agents to dry on
the finish.Automatic car wash
You can have your car washed in an auto-
matic car wash from the start. Automatic
car washes without brushes are prefera-
ble.
If the vehicle is very dirty, prewash it be-
fore running it through the automatic car
wash.
!Due to the width of the vehicle, fold in
exterior rear view mirrors prior to run-
ning the vehicle through an automatic
car wash to prevent damage to the
mirrors.
Make sure that the windshield wiper
switch is set to0 (
�page 54). Other-
wise, the rain sensor could activate and
cause the wipers to move unintention-
ally. This may lead to vehicle damage.
iAfter running the vehicle through an au-
tomatic car wash, wipe any wax off of
the windshield (
�page 327). This will
prevent smears and reduce wiping
noise which can be caused by residual
wax on the windshield.
When leaving the car wash, make sure
that the mirrors are folded out. Other-
wise they may vibrate.
Page 330 of 480

329 Operation
Vehicle care
Light alloy wheels
If possible, clean wheels once a week.�
Use Mercedes-Benz approved Wheel
Care, a soft bristle brush and a strong
spray of water for cleaning the light al-
loy wheels.Instrument cluster and cup holders
�
Use a gentle dishwashing detergent or
mild detergent for delicate fabrics as a
washing solution.
�
Wipe with a cloth moistened in a luke-
warm solution.
Hard plastic trim items
�
Use Mercedes-Benz approved Interior
Care, a soft, lint-free cloth and apply
with light pressure.
!Only use acid-free cleaning materials.
Acid may cause corrosion or damage
the clear coat.
!The vehicle should not be parked for an
extended period of time immediately
after it has been cleaned, especially not
after the wheel rims have been cleaned
with wheel rim cleaner. Wheel rim
cleaners can lead to increased corro-
sion of the brake disks and brake pads.
Therefore, the vehicle’s brake system
should always be warmed-up before it
is parked after cleaning.
When applying Mercedes-Benz ap-
proved Tire Care and Mercedes-Benz
approved Wheel Care products, take
care not to spray them on the brake
disks.
!To prevent scratches, do not use scour-
ing agents.!To prevent scratches, do not use scour-
ing agents.
Page 331 of 480

330 OperationVehicle careSteering wheel and gear selector lever�
Wipe with a damp cloth and dry thor-
oughly or clean with Mercedes-Benz
approved Leather Care.
Carpets
�
Use Mercedes-Benz approved Carpet
and Fabric Care for cleaning the car-
pets.
Headliner
�
Use a soft bristle brush or a dry-sham-
poo cleaner in case of excessive dirt.
Seat belts
�
Only use clear, lukewarm water and
soap.Upholstery
Using aftermarket seat covers or wearing
clothing that have the tendency to give off
coloring (e.g. when wet, etc.) may cause
the upholstery to become permanently dis-
colored. By lining the seats with a proper
intermediate cover, contact-discoloration
will be prevented.Leather upholstery
�
Wipe leather upholstery with a damp
cloth and dry thoroughly or clean with
Mercedes-Benz approved Leather
Care.
Exercise particular care when cleaning per-
forated leather as its underside should not
become wet.
Wood trims
�
Dampen cloth using water and use
damp cloth to clean wood trims in your
vehicle.
Do not use solvents like tar remover or
wheel cleaner nor polishes or waxes as
these may be abrasive.
!The webbing must not be treated with
chemical cleaning agents. Do not dry
the webbing at temperatures above
176°F (80°C) or in direct sunlight.
Warning!
G
Do not bleach or dye seat belts as this may
severely weaken them. In a crash they may
not be able to provide adequate protection.
Page 339 of 480
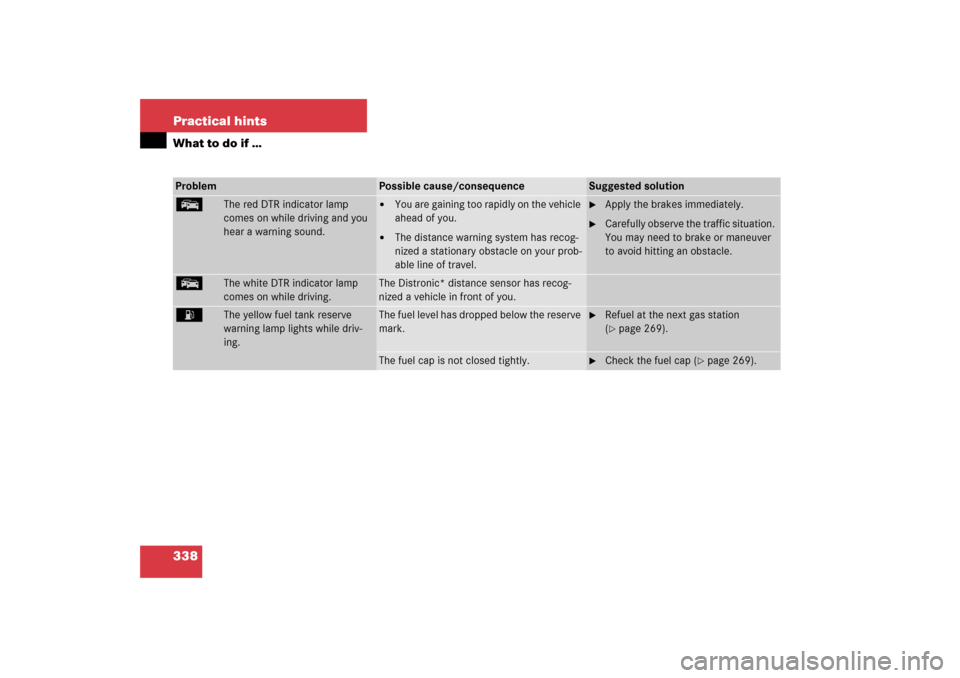
338 Practical hintsWhat to do if …Problem
Possible cause/consequence
Suggested solution
E
The red DTR indicator lamp
comes on while driving and you
hear a warning sound.
�
You are gaining too rapidly on the vehicle
ahead of you.
�
The distance warning system has recog-
nized a stationary obstacle on your prob-
able line of travel.
�
Apply the brakes immediately.
�
Carefully observe the traffic situation.
You may need to brake or maneuver
to avoid hitting an obstacle.
E
The white DTR indicator lamp
comes on while driving.
The Distronic* distance sensor has recog-
nized a vehicle in front of you.
A
The yellow fuel tank reserve
warning lamp lights while driv-
ing.
The fuel level has dropped below the reserve
mark.
�
Refuel at the next gas station
(�page 269).
The fuel cap is not closed tightly.
�
Check the fuel cap (
�page 269).
Page 376 of 480

375 Practical hints
What to do if …
Left display
Right display
Possible cause/consequence
Possible solution
.
Brake lamp
Right
Substitute
bulb on
The right brake lamp is malfunction-
ing. A substitute bulb has been
brought into use.
�
Visit an authorized Mercedes-Benz Center as
soon as possible.
Brake lamp
!
Drive to
workshop!
Brake lamp illumination is delayed
or lamp is permanently on.
�
Visit an authorized Mercedes-Benz Center as
soon as possible.
Front foglamp
Left
The left front fog lamp is malfunc-
tioning.
�
Replace the bulb as soon as possible.
Front foglamp
Right
The right front fog lamp is malfunc-
tioning.
�
Replace the bulb as soon as possible.
High beam
Left
The left high beam lamp is malfunc-
tioning.
�
Replace the bulb as soon as possible.
High beam
Right
The right high beam lamp is mal-
functioning.
�
Replace the bulb as soon as possible.
Left turn signal
Mirror
The left turn signal in the side mirror
is malfunctioning. This message will
only appear if all light emitting di-
odes have stopped working.
�
Have the LEDs replaced as soon as possible.
Page 377 of 480

376 Practical hintsWhat to do if …Left display
Right display
Possible cause/consequence
Possible solution
.
License plate
lamp, L
The left license plate lamp is mal-
functioning.
�
Replace the bulb as soon as possible.
License plate
lamp, R
The right license plate lamp is mal-
functioning.
�
Replace the bulb as soon as possible.
Light sensor
Drive to
workshop!
The light sensor is malfunctioning.
The headlamps switch on automati-
cally.
�
In the control system, set lamp operation to
manual (
�page 152).
�
Switch on headlamps using the exterior lamp
switch.
�
Visit an authorized Mercedes-Benz Center as
soon as possible.
Low beam
Left
The left low beam lamp is malfunc-
tioning.
Halogen headlamp:�
Replace the bulb as soon as possible.
Bi-Xenon* headlamp:
�
Visit an authorized Mercedes-Benz Center as
soon as possible.
Low beam
Right
The right low beam lamp is malfunc-
tioning.
Halogen headlamp:�
Replace the bulb as soon as possible.
Bi-Xenon* headlamp:
�
Visit an authorized Mercedes-Benz Center as
soon as possible.
Page 379 of 480

378 Practical hintsWhat to do if …Left display
Right display
Possible cause/consequence
Possible solution
.
Right turn signal
Mirror
The right turn signal in the side mir-
ror is malfunctioning. This message
will only appear if all light emitting
diodes have stopped working.
�
Have the LEDs replaced as soon as possible.
Tail lamp
Left
Substitute
bulb on
The left tail lamp is malfunctioning.
A substitute bulb has been brought
into use.
�
Visit an authorized Mercedes-Benz Center as
soon as possible.
Tail lamp
Right
Substitute
bulb on
The right tail lamp is malfunction-
ing. A substitute bulb has been
brought into use.
�
Visit an authorized Mercedes-Benz Center as
soon as possible.
Turn off
lamps
You have removed the SmartKey
from the starter switch and opened
the driver’s door or removed the
SmartKey with KEYLESS-GO* from
the vehicle and left the headlamps
on.
�
Turn the exterior lamp switch toM.
Turn signal
Rear left
Substitute
bulb on
The left rear turn signal lamp is mal-
functioning. A substitute bulb has
been brought into use.
�
Replace the bulb as soon as possible.