Page 117 of 480

116 Controls in detailSeatsLumbar support
You can adjust the contour of the seat’s
lumbar support to help enhance support to
your spine.
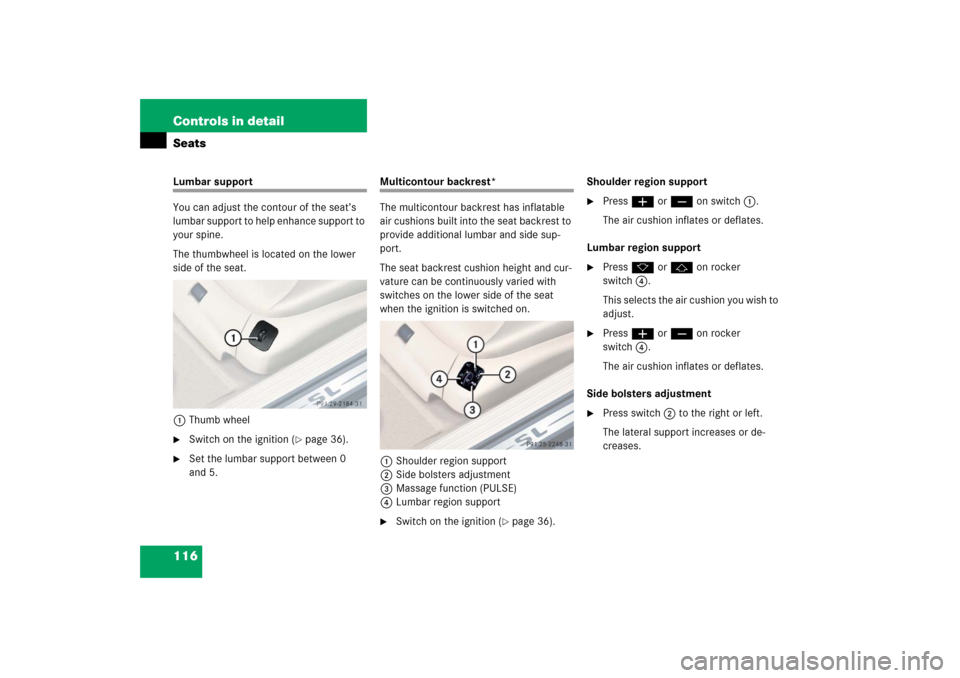
The thumbwheel is located on the lower
side of the seat.
1Thumb wheel�
Switch on the ignition (
�page 36).
�
Set the lumbar support between 0
and 5.
Multicontour backrest*
The multicontour backrest has inflatable
air cushions built into the seat backrest to
provide additional lumbar and side sup-
port.
The seat backrest cushion height and cur-
vature can be continuously varied with
switches on the lower side of the seat
when the ignition is switched on.
1Shoulder region support
2Side bolsters adjustment
3Massage function (PULSE)
4Lumbar region support�
Switch on the ignition (
�page 36).Shoulder region support
�
Press æ or ç on switch1.
The air cushion inflates or deflates.
Lumbar region support
�
Press k or j on rocker
switch4.
This selects the air cushion you wish to
adjust.
�
Press æ or ç on rocker
switch4.
The air cushion inflates or deflates.
Side bolsters adjustment
�
Press switch2 to the right or left.
The lateral support increases or de-
creases.
Page 118 of 480
117 Controls in detailSeats
Massage function (PULSE)
You can reduce muscle tension during long
trips by periodically using the massage
function. �
Press button3.
The indicator lamp on button3 comes
on. The air cushions in the lumbar re-
gion inflate and deflate rhythmically.
Seat heating
Vehicles without seat ventilation*
The switch is located on the door.
1Normal heating
2Rapid heating�
Switch on the ignition (
�page 36).Switching on seat heating
�
Press lower switch position1.
A red indicator lamp on the switch
comes on.
Switching off seat heating
�
Press lower switch position1 once
more.
iThe massage function switches off au-
tomatically after approximately
8 minutes. The indicator lamp goes
out.
iThe seat heating will be switched off
automatically after approximately
30 minutes.
Page 119 of 480
118 Controls in detailSeatsSwitching on rapid seat heating�
Press upper switch position2.
Both red indicator lamps on the switch
come on. Switching off rapid seat heating
�
Press upper switch position2 again. Vehicles with seat ventilation*
The switch is located on the door. The red
indicator lamps on the switch indicate the
selected heating level:
1Seat heating switch
�
Switch on the ignition (
�page 36).
iThe system switches to normal heating
mode after approximately 5 minutes.
Only the right-hand indicator lamp re-
mains lit.
iIf one or both of the lamps on the seat
heating switch are flashing, there is in-
sufficient voltage available since too
many electrical consumers are turned
on. The seat heating switches off auto-
matically.
The seat heating will switch back on
again automatically as soon as suffi-
cient voltage is available.
Leveloff
No indicator lamp on
1
One indicator lamp on
2
Two indicator lamps on
Page 121 of 480
120 Controls in detailSeatsSeat ventilation*
The switch is located on the door. The blue
indicator lamps on the switch indicate the
selected ventilation level:
1Seat ventilation switch
�
Switch on the ignition (
�page 36).Switching on seat ventilation
�
Press switch1.
Three blue indicator lamps on the
switch come on.
�
Continue pressing switch 1 until the
desired seat ventilation level is
reached.
Switching off seat ventilation
�
Press switch1 repeatedly until all in-
dicator lamps go out.
Level3
Three indicator lamps on
(highest level)
2
Two indicator lamps on
1
One indicator lamp on
(lowest level)
off
No indicator lamp on
iIf one or all of the lamps on the seat
ventilation switch are flashing, there is
insufficient voltage available since too
many electrical consumers are turned
on. The seat ventilation switches off au-
tomatically.
The seat ventilation will switch back on
again automatically as soon as suffi-
cient voltage is available.
Page 122 of 480

121 Controls in detail
Memory function
�Memory function
Prior to operating the vehicle, the driver
should check and adjust the seat height,
seat position fore and aft, and seat back-
rest angle if necessary, to ensure adequate
control, reach and comfort. The head re-
straint should also be adjusted for proper
height. See also the section on airbags
(�page 65) for proper seat positioning.
In addition, adjust the steering wheel to
ensure adequate control, reach, operation
and comfort. Both the interior and exterior
rear view mirrors should be adjusted for
adequate rear vision.
Fasten seat belts. Infants and small chil-
dren should be seated in a properly se-
cured restraint system that complies with
U.S. Federal Motor Vehicle Safety Stan-
dard 213 and Canadian Motor Vehicle
Safety Standard 213.With the memory switch you can store up
to three different settings.
The following settings are stored when us-
ing the buttons on the driver’s door:
�
Driver’s seat and backrest position
�
Steering wheel position
�
Driver’s side exterior rear view mirror
position
�
Passenger side exterior rear view mir-
ror position
The following settings are stored when us-
ing the buttons on the passenger door:
�
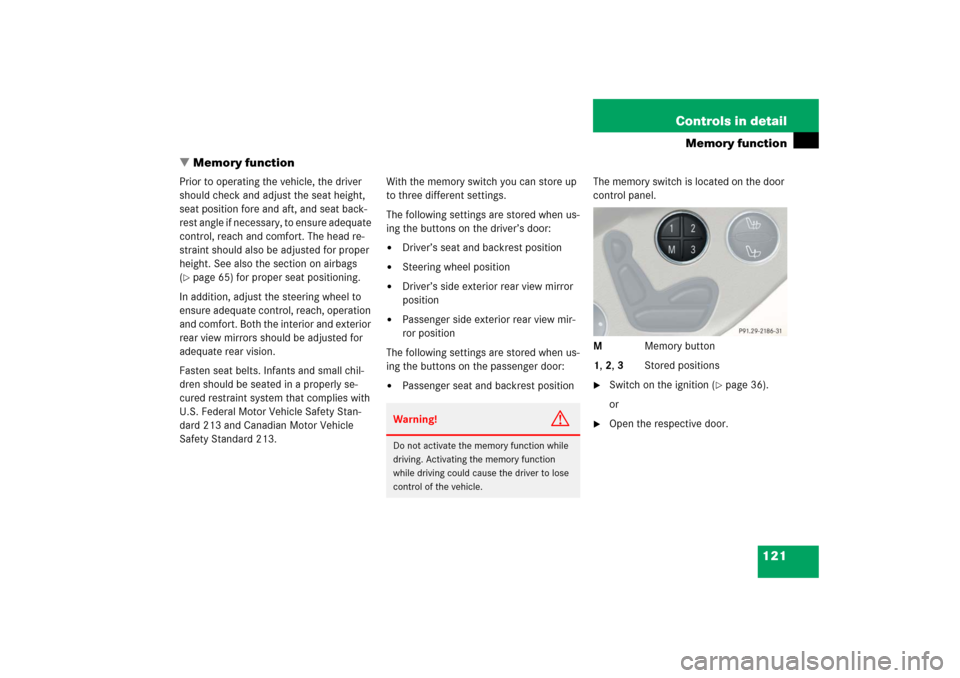
Passenger seat and backrest positionThe memory switch is located on the door
control panel.
M Memory button
1, 2, 3 Stored positions
�
Switch on the ignition (
�page 36).
or
�
Open the respective door.
Warning!
G
Do not activate the memory function while
driving. Activating the memory function
while driving could cause the driver to lose
control of the vehicle.
Page 131 of 480

130 Controls in detailLightingSwitching on the hazard warning
flasher�
Press hazard warning flasher
switch1.
All turn signals are flashing.
Switching off the hazard warning
flasher
�
Press hazard warning flasher switch1
again.
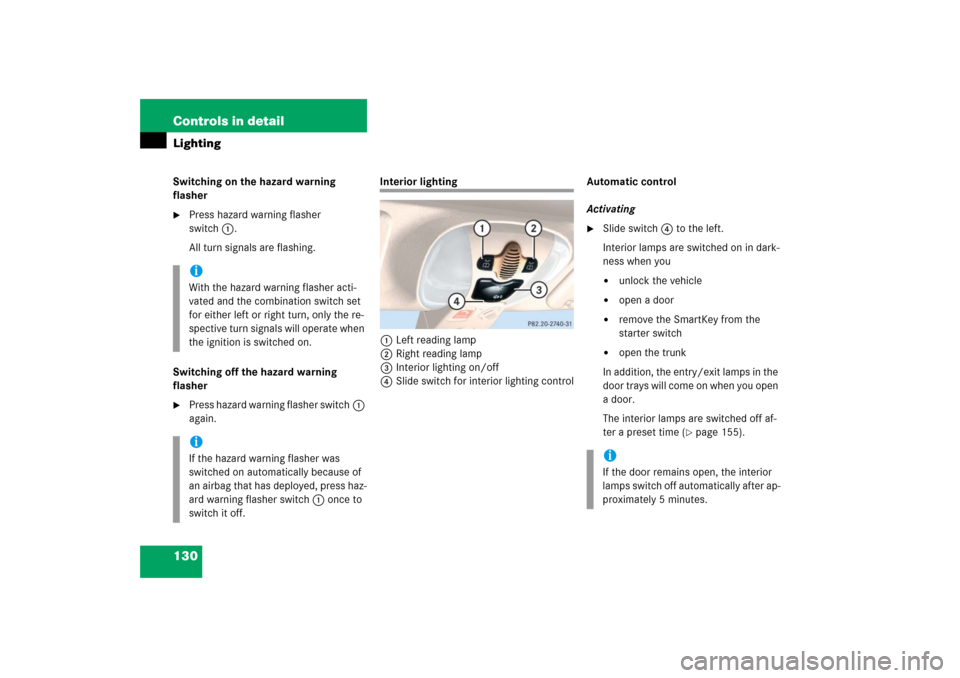
Interior lighting
1Left reading lamp
2Right reading lamp
3Interior lighting on/off
4Slide switch for interior lighting controlAutomatic control
Activating
�
Slide switch4 to the left.
Interior lamps are switched on in dark-
ness when you �
unlock the vehicle
�
open a door
�
remove the SmartKey from the
starter switch
�
open the trunk
In addition, the entry/exit lamps in the
door trays will come on when you open
a door.
The interior lamps are switched off af-
ter a preset time (
�page 155).
iWith the hazard warning flasher acti-
vated and the combination switch set
for either left or right turn, only the re-
spective turn signals will operate when
the ignition is switched on.iIf the hazard warning flasher was
switched on automatically because of
an airbag that has deployed, press haz-
ard warning flasher switch 1 once to
switch it off.
iIf the door remains open, the interior
lamps switch off automatically after ap-
proximately 5 minutes.
Page 133 of 480

132 Controls in detailInstrument clusterFor a full view illustration of the instrument
cluster, see “Instrument cluster”
(�page 24).
The instrument cluster is activated when
you
�
open a door
�
switch on the ignition
�
press the reset button (
�page 24)
�
switch on the exterior lamps
Opening a door will activate the instrument
cluster only for about 30 seconds.
You can change the instrument cluster set-
tings in the Instrument cluster submenu of
the control system (
�page 149).
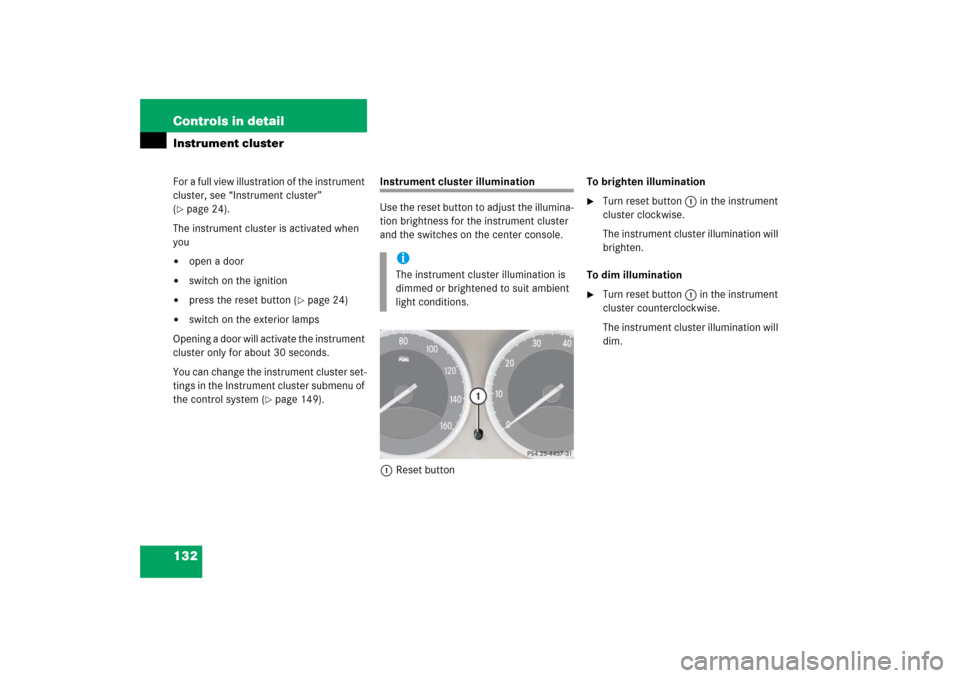
Instrument cluster illumination
Use the reset button to adjust the illumina-
tion brightness for the instrument cluster
and the switches on the center console.
1Reset buttonTo brighten illumination
�
Turn reset button 1 in the instrument
cluster clockwise.
The instrument cluster illumination will
brighten.
To dim illumination
�
Turn reset button 1 in the instrument
cluster counterclockwise.
The instrument cluster illumination will
dim.
iThe instrument cluster illumination is
dimmed or brightened to suit ambient
light conditions.
Page 178 of 480

177 Controls in detail
Good visibility
�Good visibility
For information on windshield wiper opera-
tion, see “Windshield wipers” (
�page 54).
Headlamp cleaning system
The button is located on the left side of the
dashboard.
1Headlamp washer button�
Switch on the ignition (
�page 36).
�
Press button1.
The headlamps are cleaned with a
high-pressure water jet.
For information on filling up the washer flu-
id reservoir, see “Windshield washer sys-
tem and headlamp cleaning system”
(
�page 280).
Rear view mirrors
For information on setting the rear view
mirrors, see “Mirrors” (
�page 44).
Auto-dimming rear view mirror
The reflection brightness of the exterior
rear view mirror on the driver’s side and
the interior rear view mirror will respond
automatically to glare when
�
the ignition is switched on
and
�
incoming light from headlamps falls on
the sensor in the interior rear view mir-
ror.
The interior rear view mirror will not react if
�
reverse gear is engaged
�
the interior lighting is switched on
iThe headlamps will automatically be
cleaned when you have�
switched on the headlamps
and
�
operated the windshield wipers
with windshield washer fluid
fifteen times
When you switch off the ignition, the
counter resets.