Page 237 of 481

236 Controls in detailDriving systemsFront sensorsRear sensors Minimum distance
If the system detects an obstacle in this
range, all the distance warning segments
illuminate and you hear a warning signal. If
the obstacle is closer than the minimum
distance, the actual distance may no long-
er be indicated by the system.
Warning indicators
Visual signals indicate to the driver the rel-
ative distance between the sensors and an
obstacle. The warning indicators for the
front area are located above the left air
vents and center air vents in the dash-
board. The warning indicator for the rear
area is integrated in the rear trim.Center
approx. 40 in (100 cm)
Corners
approx. 24 in (60 cm)
Center
approx. 48 in (120 cm)
Corners
approx. 32 in (80 cm)
!During parking maneuvers, pay special
attention to objects located above or
below the height of the sensors (e.g.
street curbs, painted posts, or trailer
hitches etc.). The Parktronic system
will not detect such objects at close
range and damage to your vehicle or
the object may result.
Ultrasonic signals from outside sourc-
es (e.g. truck air brakes, car wash, or
jackhammers) may impair the opera-
tion of the Parktronic system.
Center
approx. 8 in (20 cm)
Corners
approx. 6 in (15 cm)
Page 238 of 481

237 Controls in detail
Driving systems
1Left side of the vehicle
1Right side of the vehicleEach warning indicator is divided into six
yellow and two red distance segments for
either side of the vehicle. The Parktronic
system is ready when the border around
the indicator is illuminated.
The position of the gear selector lever de-
termines which warning indicators will be
activated.As your vehicle approaches an object, one
or more distance segments will illuminate,
depending on the distance. When the
eighth distance segment illuminates, you
have reached the minimum distance.
�
Front area: An intermittent acoustic
warning will sound as the first red dis-
tance segment illuminates and a con-
stant acoustic warning lasting a
maximum of two seconds will sound for
the second red distance segment. The
signal is canceled when the gear selec-
tor lever is placed in position P.
�
Rear area: An intermittent acoustic
warning will sound as the first red dis-
tance segment illuminates and a con-
stant acoustic warning lasting a
maximum of two seconds will sound for
the second red distance segment. The
signal is canceled when the gear selec-
tor lever is placed in position D orP.
Gear selector
lever position
Warning indicator
D
Front area activated
R or N
Front and rear area
activated
P
Neither activated
Page 239 of 481

238 Controls in detailDriving systemsSwitching the Parktronic system
on/off
The Parktronic system can be switched off
manually.
The Parktronic button is located in the up-
per part of the front center console.
1Indicator lamp
2Parktronic buttonSwitching off the Parktronic system
�
Press button 2.
Indicator lamp 1 comes on.
Switching on the Parktronic system
�
Press button 2 again.
Indicator lamp 1 goes out.
Parktronic system malfunction
If only the red distance segments illumi-
nate and an acoustic warning sounds,
there is a malfunction in the Parktronic
system. The Parktronic system will auto-
matically switch off after 20 seconds and
the indicator lamp in the Parktronic switch
comes on.
�
Have the Parktronic system checked
by an authorized Mercedes-Benz Cen-
ter as soon as possible.
If only the red distance segments illumi-
nate and no acoustic warning sounds, the
Parktronic system sensors are dirty or
there is an interference from other radio or
ultrasonic signals. The Parktronic system
will automatically switch off after 20 sec-
onds and the indicator lamp in the Park-
tronic switch comes on.
�
Switch off the ignition (
�page 34).
�
Clean Parktronic system sensors
(�page 335).
�
Switch on the ignition.
or
�
Check Parktronic system operation at
another location to rule out interfer-
ence from outside radio or ultrasonic
signals.
iThe Parktronic system is automatically
switched on when the ignition is
switched on (
�page 34).
Page 240 of 481
239 Controls in detail
Loading
�Loading
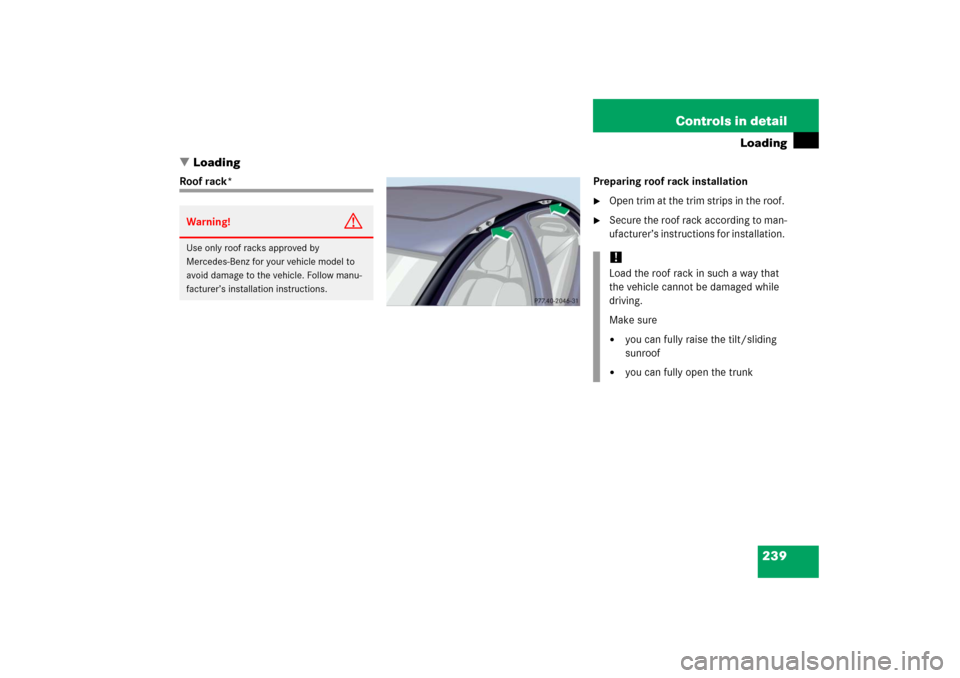
Roof rack* Preparing roof rack installation
�
Open trim at the trim strips in the roof.
�
Secure the roof rack according to man-
ufacturer’s instructions for installation.
Warning!
G
Use only roof racks approved by
Mercedes-Benz for your vehicle model to
avoid damage to the vehicle. Follow manu-
facturer’s installation instructions.
!Load the roof rack in such a way that
the vehicle cannot be damaged while
driving.
Make sure�
you can fully raise the tilt/sliding
sunroof
�
you can fully open the trunk
Page 241 of 481

240 Controls in detailLoadingLoading instructions
The total load weight including vehicle oc-
cupants and luggage/cargo should not ex-
ceed the load limit or vehicle capacity
weight as indicated on the corresponding
placard located on the driver’s door B-pillar
(�page 300).
Cargo tie-down hooks
Six hooks are located in the trunk.�
Carefully secure cargo by applying
even load on all hooks with rope of suf-
ficient strength to hold down the cargo.
Warning!
G
Always fasten items being carried as secure-
ly as possible.
In an accident, during hard braking or sud-
den maneuvers, loose items will be thrown
around inside the vehicle and can cause in-
jury to vehicle occupants unless the items
are securely fastened in the vehicle.
To help avoid personal injury during a colli-
sion or sudden maneuver, exercise care
when transporting cargo. Put luggage or car-
go in the trunk if possible. Do not pile lug-
gage or cargo higher than the seat backs.
Do not place anything on the rear-window
shelf.
Never drive vehicle with trunk open. Deadly
carbon monoxide (CO) gases may enter ve-
hicle interior resulting in unconsciousness
and death.
Page 242 of 481
241 Controls in detail
Useful features
�Useful features
Vanity mirrors
Vanity mirror in the sun visor
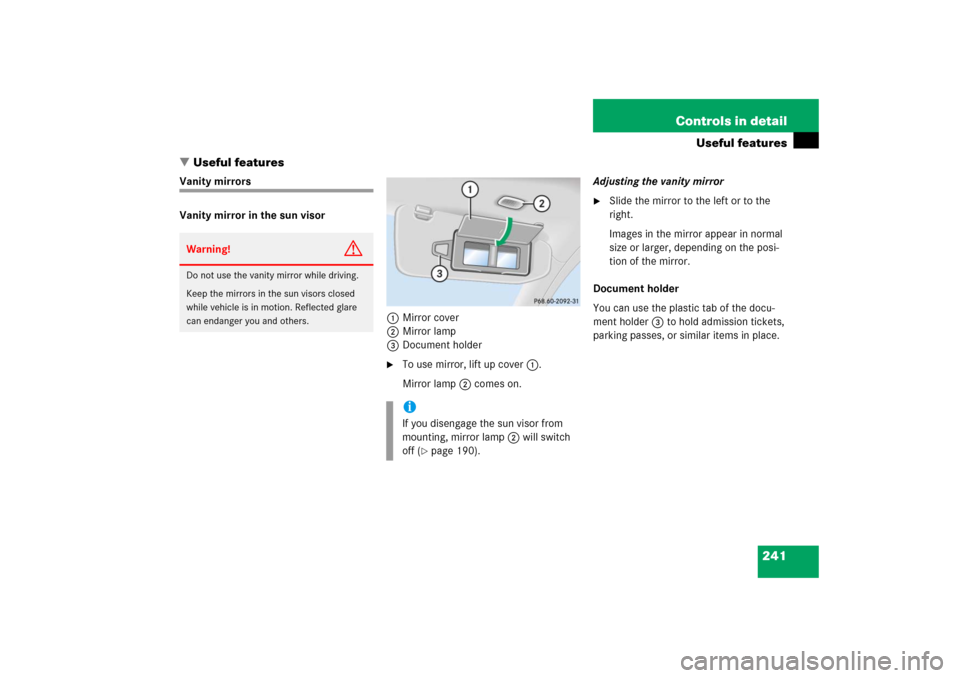
1Mirror cover
2Mirror lamp
3Document holder
�
To use mirror, lift up cover1.
Mirror lamp2 comes on.Adjusting the vanity mirror
�
Slide the mirror to the left or to the
right.
Images in the mirror appear in normal
size or larger, depending on the posi-
tion of the mirror.
Document holder
You can use the plastic tab of the docu-
ment holder3 to hold admission tickets,
parking passes, or similar items in place.
Warning!
G
Do not use the vanity mirror while driving.
Keep the mirrors in the sun visors closed
while vehicle is in motion. Reflected glare
can endanger you and others.
iIf you disengage the sun visor from
mounting, mirror lamp2 will switch
off (
�page 190).
Page 243 of 481

242 Controls in detailUseful featuresVanity mirror in the rear
The vanity mirrors are located in the roof
lining for the rear seat passengers.
Opening the vanity mirror�
Press the cover of the vanity mirror.
The vanity mirror folds down and the
mirror lamp comes on.
Closing the vanity mirror
�
Push the vanity mirror up until it engag-
es in place.
Storage compartmentsGlove box
1Unlocked
2Locked
3Glove box lid release
Locking the glove box
�
Insert mechanical key (
�page 388)
into the glove box lock.
�
Turn the mechanical key to
position2.
!Before tilting a front seat backrest from
the reclined position to an upright posi-
tion, close the respective vanity mirror
in the rear. Otherwise the vanity mirror
may get damaged.Warning!
G
To help avoid personal injury during a colli-
sion or sudden maneuver, exercise care
when storing objects in the vehicle. Put lug-
gage or cargo in the trunk if possible. Do not
pile luggage or cargo higher than the seat
backs.
Luggage nets cannot secure hard or heavy
objects.
Keep compartment lids closed. This will help
to prevent stored objects from being thrown
about and injuring vehicle occupants during
an accident.
Page 248 of 481
247 Controls in detail
Useful features
Storage compartments under the front
seats
1Lid
2Buttons
Opening�
Press buttons2 together and fold
lid1 down.
Closing
�
Close lid1 until both buttons2 of
lock engage.Parcel net in front passenger footwell
A small convenience parcel net is located
in the front passenger footwell. It is for
small and light items, such as road maps,
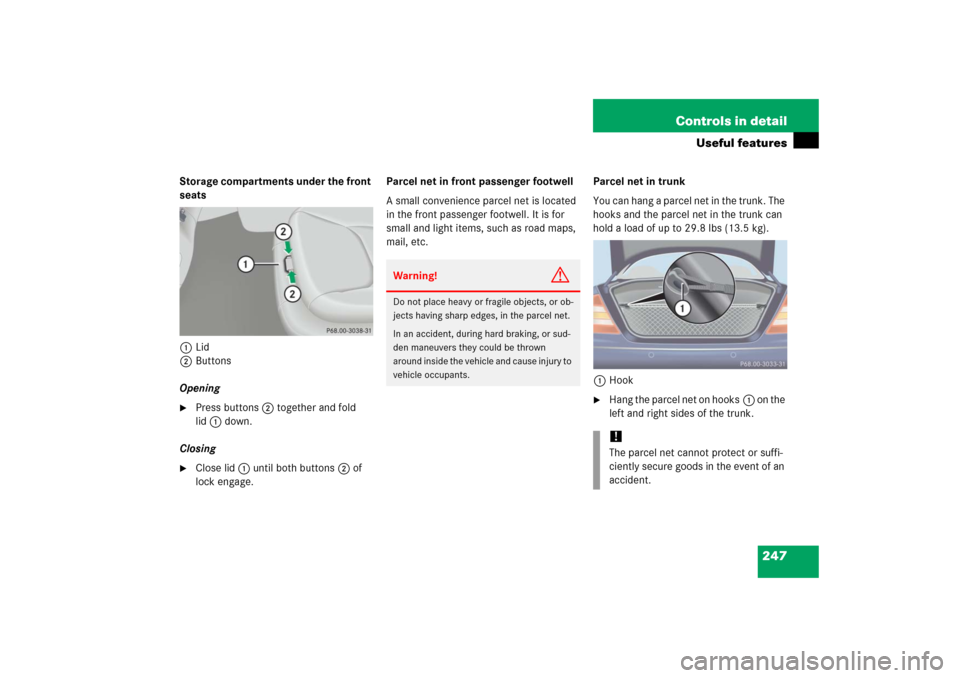
mail, etc.Parcel net in trunk
You can hang a parcel net in the trunk. The
hooks and the parcel net in the trunk can
hold a load of up to 29.8 lbs (13.5 kg).
1Hook
�
Hang the parcel net on hooks1 on the
left and right sides of the trunk.
Warning!
G
Do not place heavy or fragile objects, or ob-
jects having sharp edges, in the parcel net.
In an accident, during hard braking, or sud-
den maneuvers they could be thrown
around inside the vehicle and cause injury to
vehicle occupants.
!The parcel net cannot protect or suffi-
ciently secure goods in the event of an
accident.