Page 229 of 481
, especially at times of snow
and ice or heavy rain. In such")
228 Controls in detailDriving systemsThe most likely cause for a malfunctioning
system is a dirty sensor (located behind
the hood grille), especially at times of snow
and ice or heavy rain. In such a case, Dis-
tronic will switch off, and the message:DISTRONIC
CURRENTLY UNAVAILABLE
SEE OPERATORS MANUALappears in the multifunction display.
For cleaning and care of the Distronic sen-
sor, see “Cleaning the Distronic* system
sensor cover” (
�page 335).Turns and bends
In turns or bends, Distronic may not detect
a moving vehicle in front, or it may detect
one too soon. This may cause your vehicle
to brake late or unexpectedly.Offset driving
A vehicle traveling in your lane but offset
from your direct line of travel may not be
detected by Distronic. There will be insuffi-
cient distance to the vehicle ahead.
iIf the message:DISTRONIC
CURRENTLY UNAVAILABLE
SEE OPERATORS MANUALdisappears during driving and the last
speed stored flashes for approximately
five seconds, the dirt (e.g. slush) has
dissolved; Distronic is again operation-
al.
Page 231 of 481

230 Controls in detailDriving systems1Indicator lamps
2Damping button�
Start the engine.
�
Press the damping button2 until the
desired suspension style is set.�
If both indicator lamps are out, you
have chosen the automatic mode
for soft damping. The message:AIRMATIC
CONVENIENCEfor Comfort suspension tuning ap-
pears in the multifunction display.
�
If one indicator lamp is on, the con-
trol system supports a primarily dy-
namic style of driving. The
message:AIRMATIC
SPORTS 1for Sporty 1 suspension tuning ap-
pears in the multifunction display.
�
If both indicator lamps are on, the
system is set for a dynamic style of
driving. The message:AIRMATIC
SPORTS 2for Sporty 2 suspension tuning ap-
pears in the multifunction display.Vehicle level control with Airmatic
Your vehicle automatically adjusts its ride
height to:
�
reduce fuel consumption
�
increase vehicle safety
The vehicle chassis ride height is raised or
lowered according to the selected level
setting and to the vehicle speed:
�
With increasing speed, ride height is re-
duced by up to approximately 0.8 in
(20 mm).
�
With decreasing speed, the ride height
is again raised to the selected vehicle
level.
iThe selected suspension style is stored
in memory, even after the SmartKey is
removed from the starter switch.
iThese height adjustments are so small
that you may not notice any change.
Page 232 of 481

231 Controls in detail
Driving systems
The following vehicle level settings can be
selected when the vehicle is stationary:
Select the “Raised” level setting only when
required by current driving conditions.
Otherwise:�
Fuel consumption may increase.
�
Handling may be impaired.The switch with the indicator lamps is lo-
cated on the upper part of the front center
console.
1Indicator lamp
2Vehicle level control switch
�
Start the engine.
�
Briefly press switch2 to change from
one level setting to the other.
The message:AIRMATIC
VEHICLE RISING appears in the multifunction display
when changing from normal level to
raised level.The indicator lamp is then lit. The dis-
play switches off when the vehicle is
raised.
�
Press switch2 again to lower the ve-
hicle. The indicator lamp is off.
The selected vehicle level setting remains
stored in memory even if the engine is
turned off and restarted except when you
�
exceed a speed of 75 mph (120 km/h)
or
�
maintain a speed of between 50 mph
(80 km/h) and 75 mph (120 km/h) for
more than 5 minutes
The vehicle then lowers to regular level.
The message:
AIRMATIC
LEVELING CANCELLEDappears in the multifunction display and
the indicator lamp is off. The display
switches off when the vehicle is raised.
LevelNormal
For driving on normal roads.
The indicator lamp is off.
Raised
For driving on rough roads or
with snow chains.The indica-
tor lamp is on.
Warning!
G
To help avoid personal injury, keep hands
and feet away from wheel housing area, and
stay away from under the vehicle when low-
ering the vehicle chassis.
Page 233 of 481
*
The ABC system automatically selects the
optimum suspension tuning and ride
height for your vehicle.
Suspension tuning
The suspension")
232 Controls in detailDriving systemsActive Body Control (ABC)*
The ABC system automatically selects the
optimum suspension tuning and ride
height for your vehicle.
Suspension tuning
The suspension tuning is set according to:�
your driving style
�
road surface conditions
�
the vehicle loading
�
your choice of suspension style
You can set following suspension style:
�
regular (convenience)
�
sportyThe ABC button with the indicator lamps is
located on the upper part of the front cen-
ter console.
1Indicator lamp
2ABC button
�
Start the engine.
Suspension for sporty driving style
The setting for sporty driving is selected
when indicator lamp1 is illuminated.
�
Press button2.
Indicator lamp1 comes on.The message:
ACTIVE BODY CONTROL
ABC
SPORTSappears in the multifunction display for
a short time.
Suspension for regular driving style
The setting for regular driving is selected
when indicator lamp1 is off.
�
Press button2.
Indicator lamp1 goes out.
The message:ACTIVE BODY CONTROL
ABC
CONVENIENCEappears in the multifunction display for
a short time.
iThe selected setting is stored, even if
the engine is turned off.
Page 235 of 481
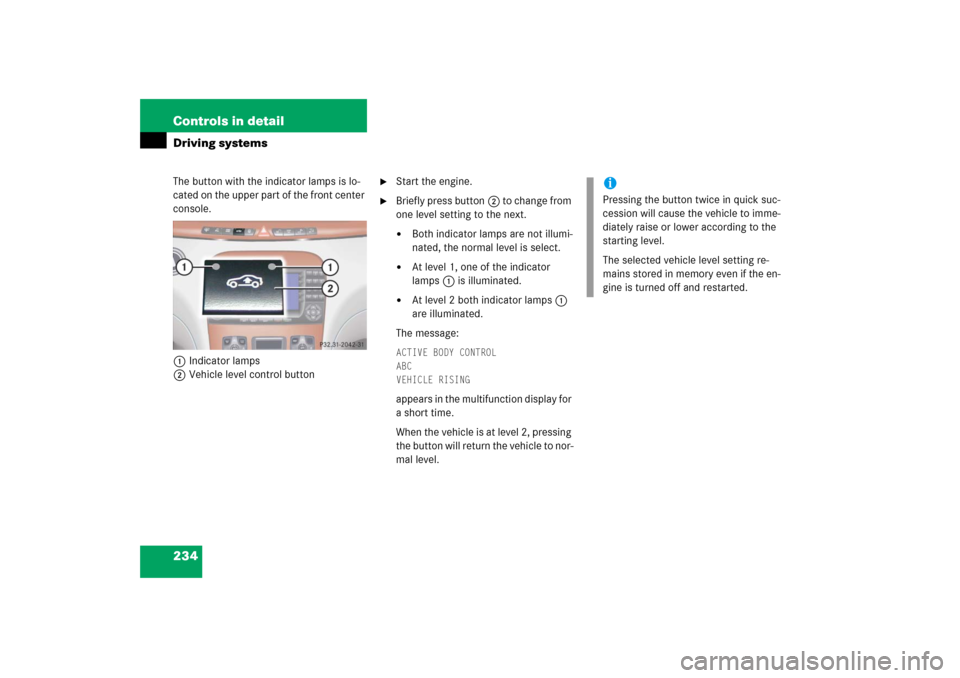
234 Controls in detailDriving systemsThe button with the indicator lamps is lo-
cated on the upper part of the front center
console.
1Indicator lamps
2Vehicle level control button
�
Start the engine.
�
Briefly press button2 to change from
one level setting to the next. �
Both indicator lamps are not illumi-
nated, the normal level is select.
�
At level 1, one of the indicator
lamps1 is illuminated.
�
At level 2 both indicator lamps1
are illuminated.
The message:
ACTIVE BODY CONTROL
ABC
VEHICLE RISINGappears in the multifunction display for
a short time.
When the vehicle is at level 2, pressing
the button will return the vehicle to nor-
mal level.
iPressing the button twice in quick suc-
cession will cause the vehicle to imme-
diately raise or lower according to the
starting level.
The selected vehicle level setting re-
mains stored in memory even if the en-
gine is turned off and restarted.
Page 256 of 481

255 Controls in detail
Useful features
System self-check
Initially, after switching on the ignition,
malfunctions are detected and indicated
(the indicator lamps in the SOS button, the
Roadside Assistance button• and the
Information button¡ stay on longer
than ten seconds or do not come on). The
message:TELE AID MALFUNCTION
DRIVE TO WORKSHOPappears for approximately ten seconds in
the multifunction display.Emergency calls
An emergency call is initiated
automatically following an accident in
which the emergency tensioning devices
(ETDs) or air bags deploy.
An emergency call can also be initiated
manually by opening the cover next to the
interior rear view mirror labeled SOS, then
briefly pressing the button located under
the cover. See (
�page 256) for
instructions on initiating an emergency call
manually.
Once the emergency call is in progress, the
indicator lamp in the SOS button will begin
to flash. The message:
CONNECTING CALL
appears in the multifunction display and
the audio system is muted. When the con-
nection is established, the message:
CALL
CONNECTED
appears in the multifunction
display. All information relevant to the
emergency, such as the location of the ve-
hicle (determined by the GPS satellite loca-
tion system), vehicle model, identification
number and color are generated.
iThe Tele Aid system utilizes the cellular
network for communication and the
GPS (Global Positioning System) satel-
lites for vehicle location. If either of
these signals are unavailable, the Tele
Aid system may not function and if this
occurs, assistance must be summoned
by other means.
Warning!
G
If the indicator lamps in the SOS button, in
the Roadside Assistance button
•
and/or in the Information button
¡
do
not come on during the system self-check,
or if any of these indicators remain illuminat-
ed continuously in red and/or the message:
TELE AID MALFUNCTION
DRIVE TO WORKSHOPis displayed in the multifunction display af-
ter the system self-check, a malfunction in
the system has been detected.
If a malfunction is indicated as outlined
above, the system may not operate as ex-
pected. Have the system checked at the
nearest Mercedes-Benz Center as soon as
possible.
Page 257 of 481

256 Controls in detailUseful featuresA voice connection between the Response
Center and the occupants of the vehicle
will be established automatically soon af-
ter the emergency call has been initiated.
The Response Center will attempt to deter-
mine more precisely the nature of the acci-
dent provided they can speak to an
occupant of the vehicle.
The Tele Aid system is available if�
it has been activated and is operation-
al. Activation requires a subscription
for monitoring services, connection,
and cellular air time
�
the relevant cellular phone network
and GPS signals are available and pass
the information on to the Response
CenterInitiating an emergency call manually
1SOS button
2Cover
�
Briefly press on the cover2.
The cover will open.
�
Press SOS button1 briefly.
The indicator lamp in SOS button1
will flash until the emergency call is
concluded.
iLocation of the vehicle on a map is only
possible if the vehicle is able to receive
signals from the GPS satellite network
and pass the information on to the Re-
sponse Center.
Warning!
G
If the indicator lamp in the SOS button is
flashing continuously and there was no
voice connection to the Response Center
established, then the Tele Aid system could
not initiate an emergency call (e.g. the rele-
vant cellular phone network is not available).
The message:
CALL FAILED
appears in the
multifunction display for approximately
ten seconds.
Should this occur, assistance must be sum-
moned by other means.
Page 258 of 481

257 Controls in detail
Useful features
�
Wait for a voice connection to the
Response Center.
�
Close cover2 after the emergency
call is concluded.Roadside Assistance button• and
Information button¡
The Roadside Assistance button• and
the Information button¡ are located in
the storage compartment below the front
armrest (
�page 244).
1Information button¡
2Roadside Assistance button•Roadside Assistance button•
�
Press and hold the button • (for
longer than two seconds).
A call to a Mercedes-Benz Roadside As-
sistance dispatcher will be initiated.
The button will flash while the call is in
progress. The message:
CONNECTING
CALL
will appear in the multifunction
display and the audio system is muted.
When the connection is established, the
message: CALL CONNECTED
appears in the
multifunction display. The Tele Aid system
will transmit data generating the vehicle
identification number, model, color and lo-
cation (subject to availability of cellular
and GPS signals).
Warning!
G
If you feel at any way in jeopardy when in the
vehicle (e.g. smoke or fire in the vehicle, ve-
hicle in a dangerous road location), please
do not wait for voice contact after you have
pressed the emergency button. Carefully
leave the vehicle and move to a safe loca-
tion. The Response Center will automatically
contact local emergency officials with the
vehicle’s approximate location if they re-
ceive an automatic SOS signal and cannot
make voice contact with the vehicle occu-
pants.