Page 117 of 481
116 Controls in detailSeatsRemoving and installing front seat head restraints
For information on head restraint adjust-
ment, see “Seats” (
�page 37).Front seat head restraints
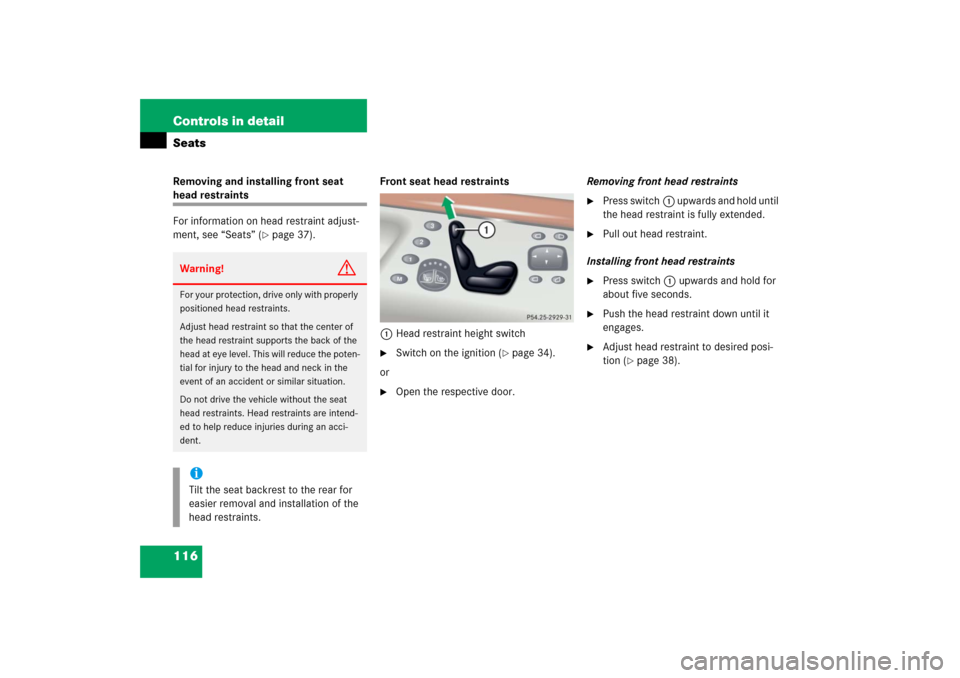
1Head restraint height switch
�
Switch on the ignition (
�page 34).
or
�
Open the respective door.Removing front head restraints
�
Press switch1 upwards and hold until
the head restraint is fully extended.
�
Pull out head restraint.
Installing front head restraints
�
Press switch1 upwards and hold for
about five seconds.
�
Push the head restraint down until it
engages.
�
Adjust head restraint to desired posi-
tion (
�page 38).
Warning!
G
For your protection, drive only with properly
positioned head restraints.
Adjust head restraint so that the center of
the head restraint supports the back of the
head at eye level. This will reduce the poten-
tial for injury to the head and neck in the
event of an accident or similar situation.
Do not drive the vehicle without the seat
head restraints. Head restraints are intend-
ed to help reduce injuries during an acci-
dent.iTilt the seat backrest to the rear for
easier removal and installation of the
head restraints.
Page 118 of 481
117 Controls in detailSeats
Rear seats
Power seat bench*
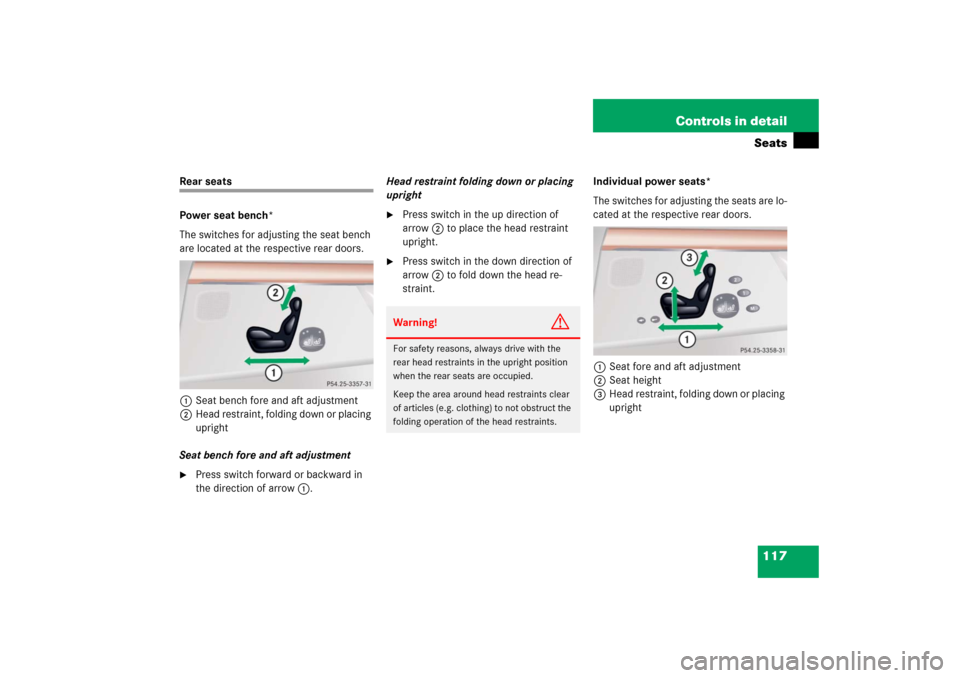
The switches for adjusting the seat bench
are located at the respective rear doors.
1Seat bench fore and aft adjustment
2Head restraint, folding down or placing
upright
Seat bench fore and aft adjustment�
Press switch forward or backward in
the direction of arrow1.Head restraint folding down or placing
upright
�
Press switch in the up direction of
arrow2 to place the head restraint
upright.
�
Press switch in the down direction of
arrow2 to fold down the head re-
straint.Individual power seats*
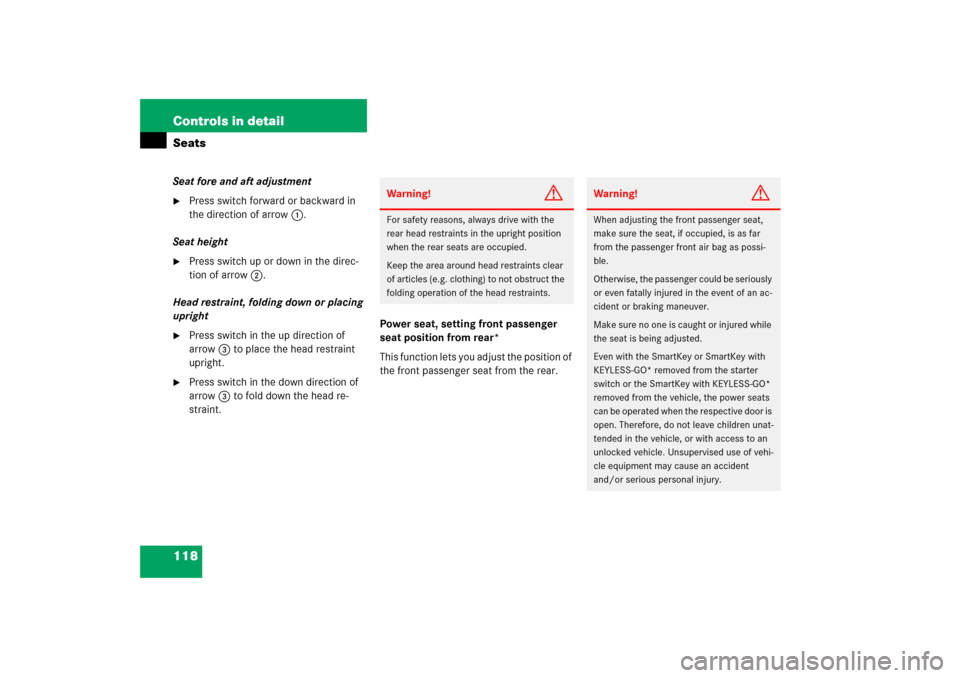
The switches for adjusting the seats are lo-
cated at the respective rear doors.
1Seat fore and aft adjustment
2Seat height
3Head restraint, folding down or placing
uprightWarning!
G
For safety reasons, always drive with the
rear head restraints in the upright position
when the rear seats are occupied.
Keep the area around head restraints clear
of articles (e.g. clothing) to not obstruct the
folding operation of the head restraints.
Page 119 of 481
118 Controls in detailSeatsSeat fore and aft adjustment�
Press switch forward or backward in
the direction of arrow1.
Seat height
�
Press switch up or down in the direc-
tion of arrow2.
Head restraint, folding down or placing
upright
�
Press switch in the up direction of
arrow3 to place the head restraint
upright.
�
Press switch in the down direction of
arrow3 to fold down the head re-
straint.Power seat, setting front passenger
seat position from rear*
This function lets you adjust the position of
the front passenger seat from the rear.
Warning!
G
For safety reasons, always drive with the
rear head restraints in the upright position
when the rear seats are occupied.
Keep the area around head restraints clear
of articles (e.g. clothing) to not obstruct the
folding operation of the head restraints.
Warning!
G
When adjusting the front passenger seat,
make sure the seat, if occupied, is as far
from the passenger front air bag as possi-
ble.
Otherwise, the passenger could be seriously
or even fatally injured in the event of an ac-
cident or braking maneuver.
Make sure no one is caught or injured while
the seat is being adjusted.
Even with the SmartKey or SmartKey with
KEYLESS-GO* removed from the starter
switch or the SmartKey with KEYLESS-GO*
removed from the vehicle, the power seats
can be operated when the respective door is
open. Therefore, do not leave children unat-
tended in the vehicle, or with access to an
unlocked vehicle. Unsupervised use of vehi-
cle equipment may cause an accident
and/or serious personal injury.
Page 120 of 481
119 Controls in detailSeats
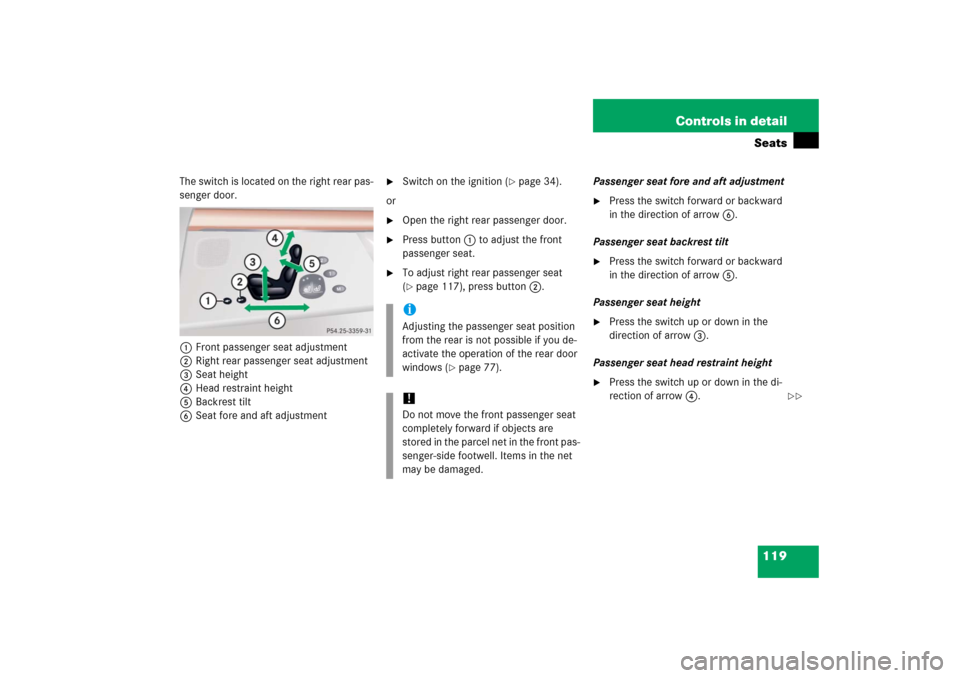
The switch is located on the right rear pas-
senger door.
1Front passenger seat adjustment
2Right rear passenger seat adjustment
3Seat height
4Head restraint height
5Backrest tilt
6Seat fore and aft adjustment
�
Switch on the ignition (
�page 34).
or
�
Open the right rear passenger door.
�
Press button1 to adjust the front
passenger seat.
�
To adjust right rear passenger seat
(�page 117), press button2.Passenger seat fore and aft adjustment
�
Press the switch forward or backward
in the direction of arrow6.
Passenger seat backrest tilt
�
Press the switch forward or backward
in the direction of arrow5.
Passenger seat height
�
Press the switch up or down in the
direction of arrow3.
Passenger seat head restraint height
�
Press the switch up or down in the di-
rection of arrow4.
iAdjusting the passenger seat position
from the rear is not possible if you de-
activate the operation of the rear door
windows (
�page 77).
!Do not move the front passenger seat
completely forward if objects are
stored in the parcel net in the front pas-
senger-side footwell. Items in the net
may be damaged.
��
Page 122 of 481
121 Controls in detailSeats
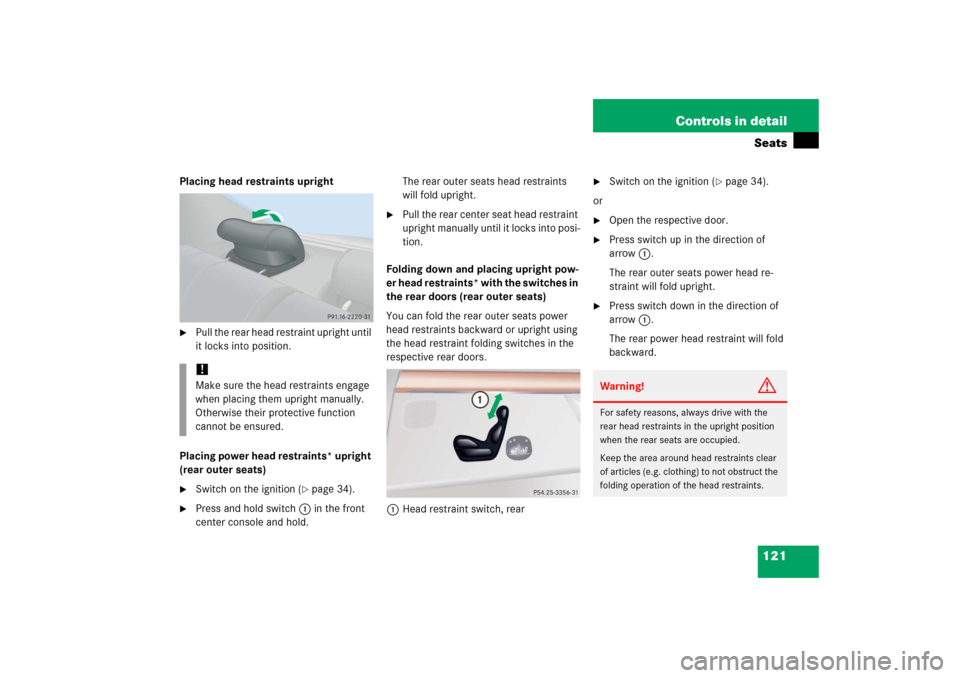
Placing head restraints upright�
Pull the rear head restraint upright until
it locks into position.
Placing power head restraints* upright
(rear outer seats)
�
Switch on the ignition (
�page 34).
�
Press and hold switch1 in the front
center console and hold.The rear outer seats head restraints
will fold upright.
�
Pull the rear center seat head restraint
upright manually until it locks into posi-
tion.
Folding down and placing upright pow-
er head restraints* with the switches in
the rear doors (rear outer seats)
You can fold the rear outer seats power
head restraints backward or upright using
the head restraint folding switches in the
respective rear doors.
1Head restraint switch, rear
�
Switch on the ignition (
�page 34).
or
�
Open the respective door.
�
Press switch up in the direction of
arrow1.
The rear outer seats power head re-
straint will fold upright.
�
Press switch down in the direction of
arrow1.
The rear power head restraint will fold
backward.
!Make sure the head restraints engage
when placing them upright manually.
Otherwise their protective function
cannot be ensured.
Warning!
G
For safety reasons, always drive with the
rear head restraints in the upright position
when the rear seats are occupied.
Keep the area around head restraints clear
of articles (e.g. clothing) to not obstruct the
folding operation of the head restraints.
Page 126 of 481
125 Controls in detailSeats
Seat heating*
Vehicles without seat ventilation*
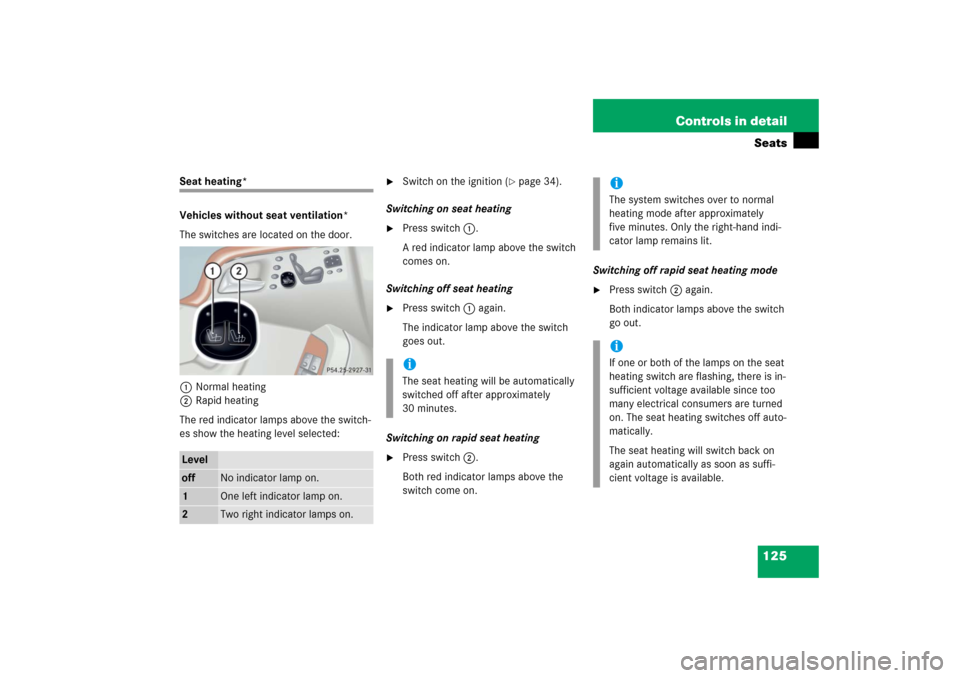
The switches are located on the door.
1Normal heating
2Rapid heating
The red indicator lamps above the switch-
es show the heating level selected:
�
Switch on the ignition (
�page 34).
Switching on seat heating
�
Press switch1.
A red indicator lamp above the switch
comes on.
Switching off seat heating
�
Press switch1 again.
The indicator lamp above the switch
goes out.
Switching on rapid seat heating
�
Press switch2.
Both red indicator lamps above the
switch come on. Switching off rapid seat heating mode
�
Press switch2 again.
Both indicator lamps above the switch
go out.
Leveloff
No indicator lamp on.
1
One left indicator lamp on.
2
Two right indicator lamps on.
iThe seat heating will be automatically
switched off after approximately
30 minutes.
iThe system switches over to normal
heating mode after approximately
five minutes. Only the right-hand indi-
cator lamp remains lit. iIf one or both of the lamps on the seat
heating switch are flashing, there is in-
sufficient voltage available since too
many electrical consumers are turned
on. The seat heating switches off auto-
matically.
The seat heating will switch back on
again automatically as soon as suffi-
cient voltage is available.
Page 127 of 481
126 Controls in detailSeatsVehicles with seat ventilation*
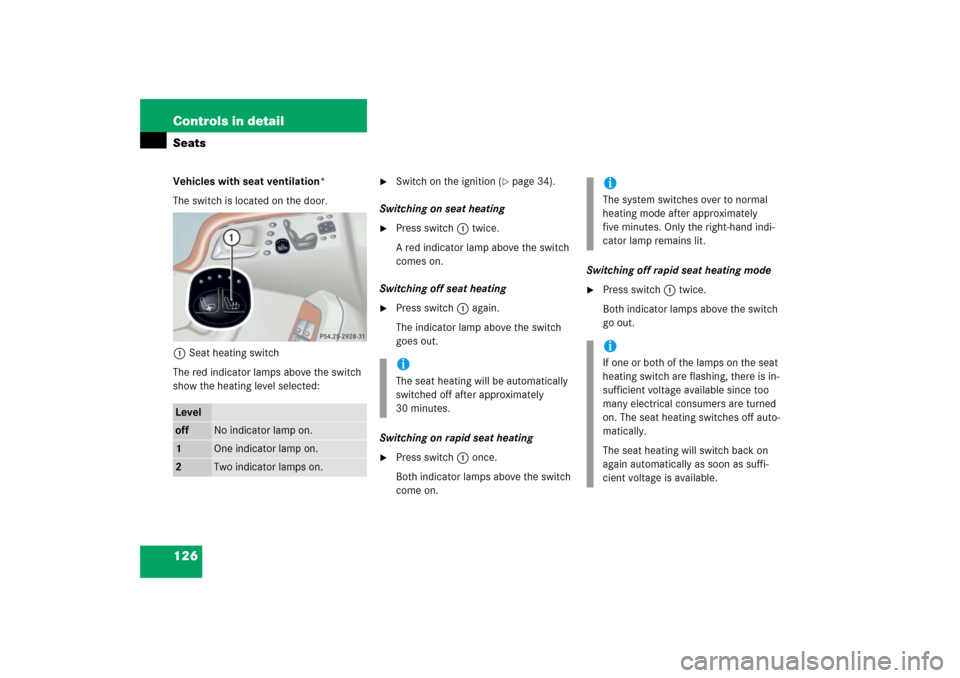
The switch is located on the door.
1Seat heating switch
The red indicator lamps above the switch
show the heating level selected:
�
Switch on the ignition (
�page 34).
Switching on seat heating
�
Press switch1 twice.
A red indicator lamp above the switch
comes on.
Switching off seat heating
�
Press switch1 again.
The indicator lamp above the switch
goes out.
Switching on rapid seat heating
�
Press switch1 once.
Both indicator lamps above the switch
come on. Switching off rapid seat heating mode
�
Press switch1 twice.
Both indicator lamps above the switch
go out.
Leveloff
No indicator lamp on.
1
One indicator lamp on.
2
Two indicator lamps on.
iThe seat heating will be automatically
switched off after approximately
30 minutes.
iThe system switches over to normal
heating mode after approximately
five minutes. Only the right-hand indi-
cator lamp remains lit. iIf one or both of the lamps on the seat
heating switch are flashing, there is in-
sufficient voltage available since too
many electrical consumers are turned
on. The seat heating switches off auto-
matically.
The seat heating will switch back on
again automatically as soon as suffi-
cient voltage is available.
Page 128 of 481
127 Controls in detailSeats
Seat ventilation*
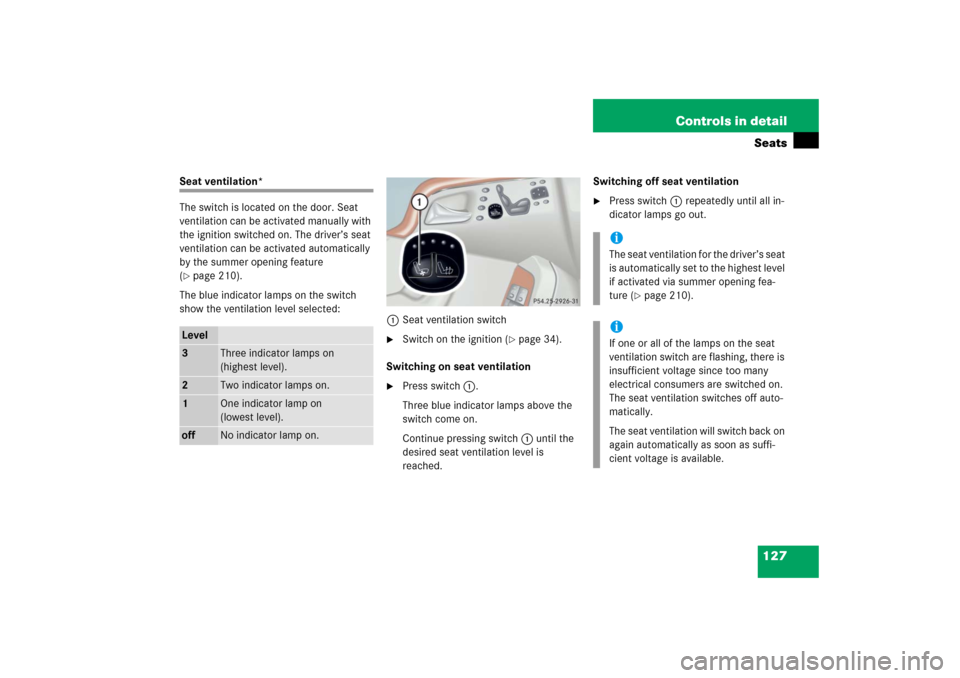
The switch is located on the door. Seat
ventilation can be activated manually with
the ignition switched on. The driver’s seat
ventilation can be activated automatically
by the summer opening feature
(�page 210).
The blue indicator lamps on the switch
show the ventilation level selected:
1Seat ventilation switch
�
Switch on the ignition (
�page 34).
Switching on seat ventilation
�
Press switch1.
Three blue indicator lamps above the
switch come on.
Continue pressing switch1 until the
desired seat ventilation level is
reached.Switching off seat ventilation
�
Press switch1 repeatedly until all in-
dicator lamps go out.
Level3
Three indicator lamps on
(highest level).
2
Two indicator lamps on.
1
One indicator lamp on
(lowest level).
off
No indicator lamp on.
iThe seat ventilation for the driver’s seat
is automatically set to the highest level
if activated via summer opening fea-
ture (
�page 210).
iIf one or all of the lamps on the seat
ventilation switch are flashing, there is
insufficient voltage since too many
electrical consumers are switched on.
The seat ventilation switches off auto-
matically.
The seat ventilation will switch back on
again automatically as soon as suffi-
cient voltage is available.