Page 244 of 481
243 Controls in detail
Useful features
Unlocking the glove box�
Insert mechanical key (
�page 388)
into the glove box lock.
�
Turn the mechanical key to
position1.
Opening the glove box
�
Press glove box lid release3.
The glove box lid opens downward.
Closing the glove box
�
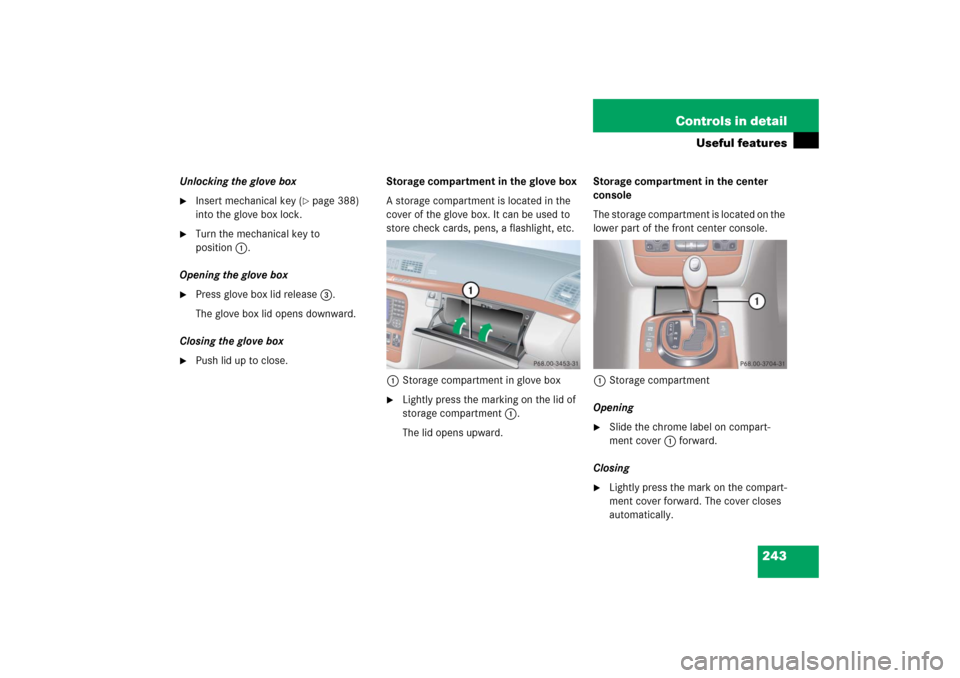
Push lid up to close.Storage compartment in the glove box
A storage compartment is located in the
cover of the glove box. It can be used to
store check cards, pens, a flashlight, etc.
1Storage compartment in glove box
�
Lightly press the marking on the lid of
storage compartment1.
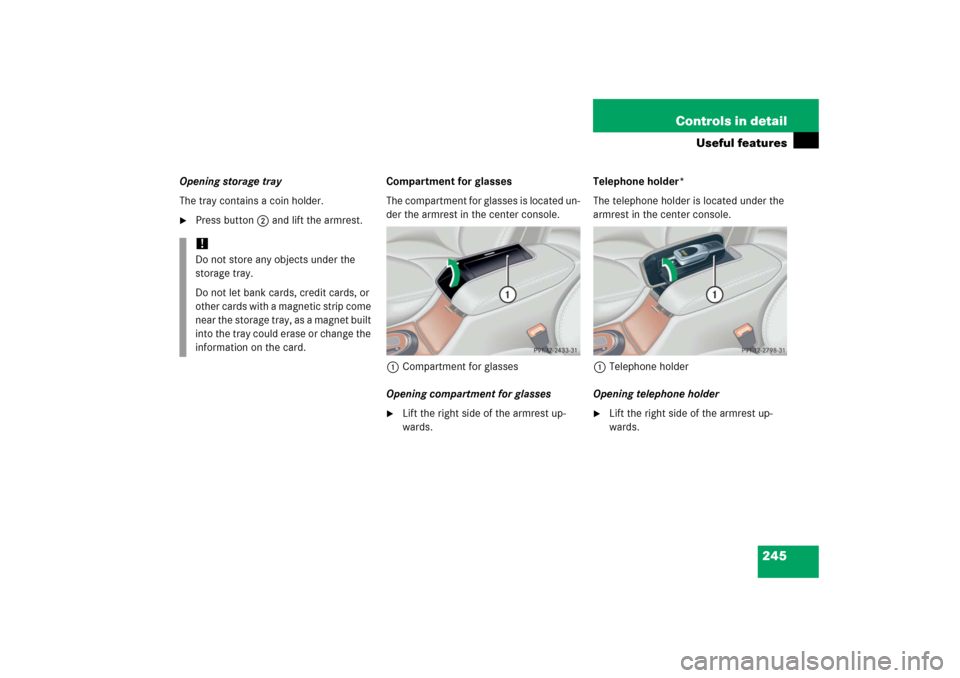
The lid opens upward.Storage compartment in the center
console
The storage compartment is located on the
lower part of the front center console.
1Storage compartment
Opening
�
Slide the chrome label on compart-
ment cover 1 forward.
Closing
�
Lightly press the mark on the compart-
ment cover forward. The cover closes
automatically.
Page 246 of 481
245 Controls in detail
Useful features
Opening storage tray
The tray contains a coin holder.�
Press button2 and lift the armrest.Compartment for glasses
The compartment for glasses is located un-
der the armrest in the center console.
1Compartment for glasses
Opening compartment for glasses
�
Lift the right side of the armrest up-
wards.Telephone holder*
The telephone holder is located under the
armrest in the center console.
1Telephone holder
Opening telephone holder
�
Lift the right side of the armrest up-
wards.
!Do not store any objects under the
storage tray.
Do not let bank cards, credit cards, or
other cards with a magnetic strip come
near the storage tray, as a magnet built
into the tray could erase or change the
information on the card.
Page 250 of 481
249 Controls in detail
Useful features
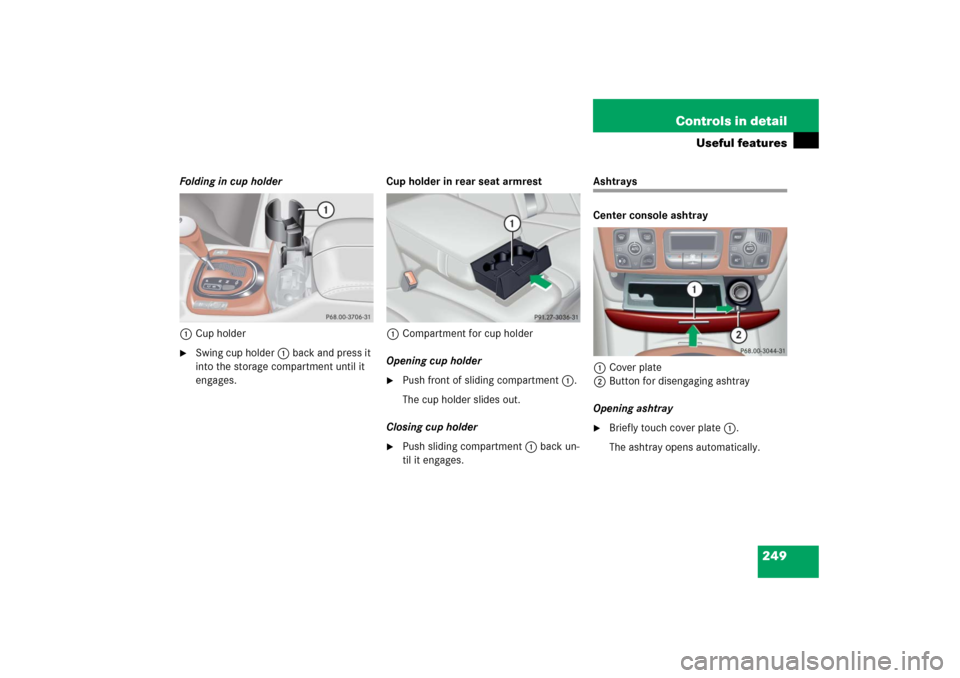
Folding in cup holder
1Cup holder�
Swing cup holder1 back and press it
into the storage compartment until it
engages.Cup holder in rear seat armrest
1Compartment for cup holder
Opening cup holder
�
Push front of sliding compartment1.
The cup holder slides out.
Closing cup holder
�
Push sliding compartment1 back un-
til it engages.
Ashtrays
Center console ashtray
1Cover plate
2Button for disengaging ashtray
Opening ashtray�
Briefly touch cover plate1.
The ashtray opens automatically.
Page 251 of 481

250 Controls in detailUseful featuresRemoving ashtray insert�
Secure vehicle from movement by set-
ting the parking brake. Move the gear
selector lever to positionN.
Now you have more room to take out
the insert.
�
Push sliding button2 to the right.
The ashtray is disengaged and slides
out a short way.
�
Remove insert from ashtray frame.
Reinstalling the ashtray insert
�
Install insert by pushing it back into the
frame until it engages.Rear door ashtray
Opening ashtray
�
Lightly touch the back of the ashtray.
Removing ashtray insert
�
Pull the ashtray back slightly and re-
move the insert (see arrows).
Reinstalling the ashtray insert
�
Position the insert and press down
while sliding forward.
Cigarette lighters
Center console lighter
Warning!
G
Remove front ashtray only with vehicle
standing still. Set the parking brake to se-
cure vehicle from movement. Move gear se-
lector lever to positionN. With gear selector
lever in positionN turn off the engine.
Warning!
G
Never touch the heating element or sides of
the lighter; they are extremely hot. Hold the
knob only.
When leaving the vehicle, always remove the
SmartKey or SmartKey with KEYLESS-GO*
from the starter switch, take it with you, and
lock the vehicle. Do not leave children unat-
tended in the vehicle, or with access to an
unlocked vehicle. Unsupervised use of vehi-
cle equipment may cause an accident
and/or serious personal injury.
Page 252 of 481
.
�
Push in cigarette lighter1.
The lighter will pop out automatically
when hot.Rear door")
251 Controls in detail
Useful features
1Center console cigarette lighter�
Switch on the ignition (
�page 34).
�
Push in cigarette lighter1.
The lighter will pop out automatically
when hot.Rear door lighter
1Rear door lighters
�
Switch on the ignition (
�page 34).
�
Lightly touch the back of the ashtray to
open it (
�page 250).
�
Push in cigarette lighter1.
The lighter will pop out automatically
when hot.
iThe lighter socket can be used to ac-
commodate electrical accessories up
to a maximum 180 W.
Warning!
G
Never touch the heating element or sides of
the lighter; they are extremely hot. Hold the
knob only.
To avoid possible injury to children sitting in
the rear seat, deactivate the operation of
the rear door windows, see (
�page 77). De-
activation of the rear windows also deacti-
vates the lighters.
When leaving the vehicle, always remove the
SmartKey or SmartKey with KEYLESS-GO*
from the starter switch, take it with you, and
lock the vehicle. Do not leave children unat-
tended in the vehicle, or with access to an
unlocked vehicle. Unsupervised use of vehi-
cle equipment may cause an accident
and/or serious personal injury.
iOperation of the rear door lighters is
only possible, if the override switch
(�page 77) is deactivated.
Page 349 of 481

348 Practical hintsWhat to do if …?Lamp in center consoleLamp
Problem
Possible cause
Suggested solution
5
8
The indicator lamp comes
on.
A BabySmart
TM1
child seat is installed
on the front passenger seat. Therefore
the passenger front air bag is switched
off.
1BabySmart
TM is a trademark of Siemens Automotive Corp.
The indicator lamp comes
on if there is no
BabySmart
TM child seat
installed on the front pas-
senger seat.
The system is malfunctioning.
�
Have the system checked as soon as
possible by an authorized Mercedes-Benz
Center.
The indicator lamp does
not come on with a
BabySmart
TM child seat
properly installed on the
front passenger seat.
The system is malfunctioning.
�
Make sure there is nothing between seat
cushion and child seat and check
installation of the child seat.
�
If the front passenger front air bag off
indicator lamp remains out, have the
system checked as soon as possible by an
authorized Mercedes-Benz Center.
�
Do not use the BabySmart
TM restraint to
transport children on the front passenger
seat until the system has been repaired.
Page 390 of 481
 is required to open the trunk lid.
The trunk lid lock is located next to the
ha")
389 Practical hints
Unlocking/locking in an emergency
Unlocking the trunk
A minimum height clearance of 6 ft.
(1.85 m) is required to open the trunk lid.
The trunk lid lock is located next to the
handle above the rear license plate recess.
1Unlocking and opening�
Insert the mechanical key into the
trunk lid lock until it stops.
�
Turn the mechanical key counterclock-
wise to position1.
The trunk opens.
�
Turn the mechanical key back and re-
move it from the trunk lid lock.
Locking the vehicle
If you cannot lock the vehicle with the
SmartKey or the SmartKey with
KEYLESS-GO*, do the following:�
Close the front passenger door, the
rear doors and the trunk lid.
�
Press the central locking switch in the
center console (
�page 113).
�
Check to see whether the locking
knobs on the doors have moved down.
�
If necessary, push them down manual-
ly.
Except for the driver’s door, the vehicle
should now be locked.
1Locking
�
Remove the mechanical key out of the
SmartKey (
�page 388).
�
Insert the mechanical key into the driv-
er’s door lock until it stops.
�
Turn the mechanical key clockwise to
position1.
The driver’s door is locked.
!The trunk lid swings open upwards au-
tomatically. Always make sure that
there is sufficient overhead clearance.
Page 444 of 481

Active, computer-controlled system
that hydraulically adjusts the suspen-
sion at all four wheels in response to
various driving situations.
ABS
(A
n")
443 Technical terms
ABC
(A
ctive B
ody C
ontrol)
Active, computer-controlled system
that hydraulically adjusts the suspen-
sion at all four wheels in response to
various driving situations.
ABS
(A
ntilock B
rake S
ystem)
Prevents the wheels from locking up
during braking so that the vehicle can
continue to be steered.
Accessory weight
(
�page 323)
ADS
(Adaptive D
amping S
ystem)
Automatically adapts the optimum sus-
pension damping to prevailing driving
conditions.Airmatic
Automatically selects the optimum sus-
pension tuning and ride height for your
vehicle. Airmatic consists of two com-
ponents:
�
Adaptive Damping System
�
Vehicle level control
Air pressure
(
�page 323)
Alignment bolt
Metal pin with thread. The centering
pin is an aid used when changing a tire
to align the wheel with the wheel hub.
Aspect ratio
(�page 323)BabySmart
TM1
air bag deactivation
system
This system detects if a special system
compatible child restraint seat is in-
stalled on the front passenger seat. The
system will automatically deactivate
the passenger front air bag when such
a seat is properly installed
(the58indicator lamp in the
center console comes on).
BabySmart
TM
compatible child seats
Special restraint system for children.
The sensor system for the front pas-
senger seat prevents deployment of
the passenger front air bag if a
BabySmartTM compatible child seat is
installed. See an authorized
Mercedes-Benz Center for availability.
Bar
(
�page 323)
1BabySmart
TM is a trademark of Siemens Automo-
tive Corp.