Page 139 of 561
138 Controls in detailSeatsSeat backrest tilt (second-row seats)
The handles for adjusting the seats are
located on the rear of each seat base.
1Adjustment handle�
While seated, pull handle 1 in direc-
tion of arrow to resistance point and
hold it there.
�
To move seat backrest back, lean light-
ly against backrest.
�
To move seat backrest forward, lean
forward with handle 1 pulled and held
at resistance point.
The seat backrest will move forward
against your back.
�
Release handle 1 when the seat back-
rest has reached the desired position.
To make sure the seat backrest has en-
gaged, lean firmly against the backrest.Seat backrest tilt (third-row seats)
The handles for adjusting the seats are
located on the outer side of each seat
backrest.
1Adjustment handle
�
While seated, pull handle 1 in direc-
tion of arrow and hold it there.
Page 140 of 561
139 Controls in detailSeats
�
To move seat backrest back, lean
lightly against backrest.
�
To move seat backrest forward, lean
forward with handle 1 pulled.
The seat backrest will move forward
against your back.
�
Release handle 1 when the seat back-
rest has reached the desired position.
To make sure the seat backrest has en-
gaged, lean firmly against the backrest.Head restraint height
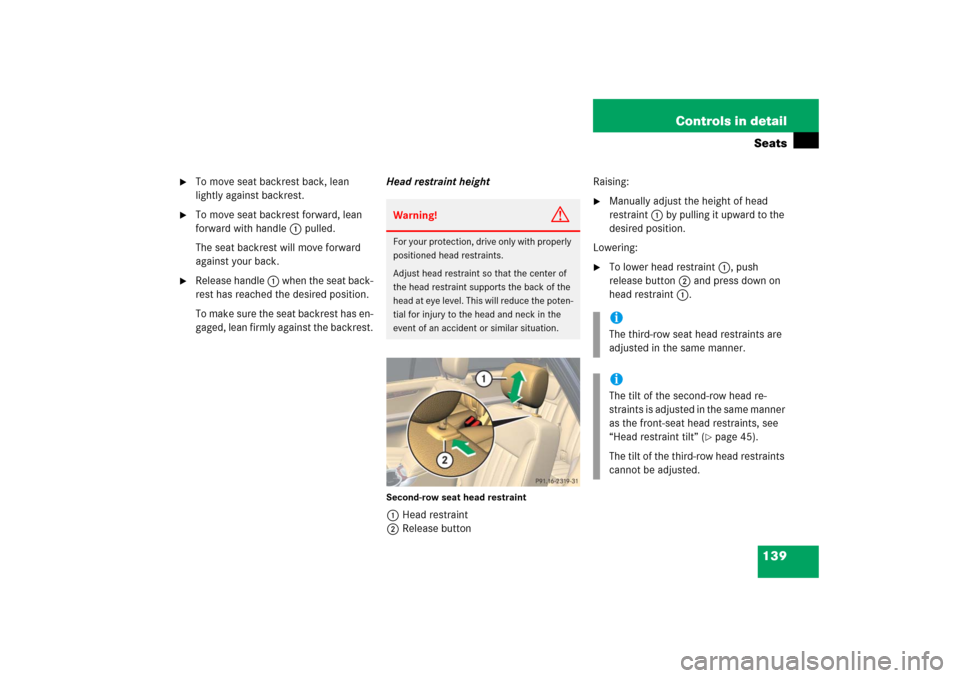
Second-row seat head restraint1Head restraint
2Release buttonRaising:
�
Manually adjust the height of head
restraint 1 by pulling it upward to the
desired position.
Lowering:
�
To lower head restraint 1, push
release button2 and press down on
head restraint 1.
Warning!
G
For your protection, drive only with properly
positioned head restraints.
Adjust head restraint so that the center of
the head restraint supports the back of the
head at eye level. This will reduce the poten-
tial for injury to the head and neck in the
event of an accident or similar situation.
iThe third-row seat head restraints are
adjusted in the same manner.iThe tilt of the second-row head re-
straints is adjusted in the same manner
as the front-seat head restraints, see
“Head restraint tilt” (
�page 45).
The tilt of the third-row head restraints
cannot be adjusted.
Page 141 of 561
140 Controls in detailSeatsHead restraintsRemoving head restraints
Seat position for head restraint removal�
When removing the head restraint of a
second-row seat, adjust the seat to the
rear as far as possible (
�page 137)
and fold the seat backrest
(
�page 134) forward.1Head restraint
2Release button
�
To remove head restraint 1, pull head
restraint 1 to its highest position.
�
Push release button2 and pull out
head restraint.
Warning!
G
For your protection, drive only with properly
positioned head restraints.
Adjust head restraint so that the center of
the head restraint supports the back of the
head at eye level. This will reduce the poten-
tial for injury to the head and neck in the
event of an accident or similar situation.
Do not drive the vehicle without the seat
head restraints installed when the rear seats
are occupied. Head restraints are intended
to help reduce injuries during an accident.
Page 142 of 561
141 Controls in detailSeats
Installing head restraints�
Insert head restraint 1 into openings
on the seat backrest.
�
Push head restraint 1 down until it au-
dibly engages.
�
Push release button2 and adjust
head restraint 1 to the desired posi-
tion (
�page 139).Armrests
The second-row seat armrests can be fold-
ed up, when loading for example, and ad-
justed.
Folding up
�
Move the armrest into a vertical posi-
tion until it engages.
Adjusting
�
With the armrest folded up, disengage
the armrest by pushing it towards the
rear slightly.
�
Fold the armrest down to the lowest
and then to the desired position until it
engages.
�
To readjust the armrest to a higher
position, move armrest up to the
desired position until it engages.
Seat heating*
Front-seat heating
The switches for front-seat heating are lo-
cated in the center console. The red indica-
tor lamps in the switch come on to show
which heating level you have selected.
iOn the second-row seats, the guide bar
with the detent must be on the left.
iIf you wish to readjust the armrest to a
lower position, you must first fold up
the armrest again and repeat the steps
above.
Page 143 of 561
142 Controls in detailSeats
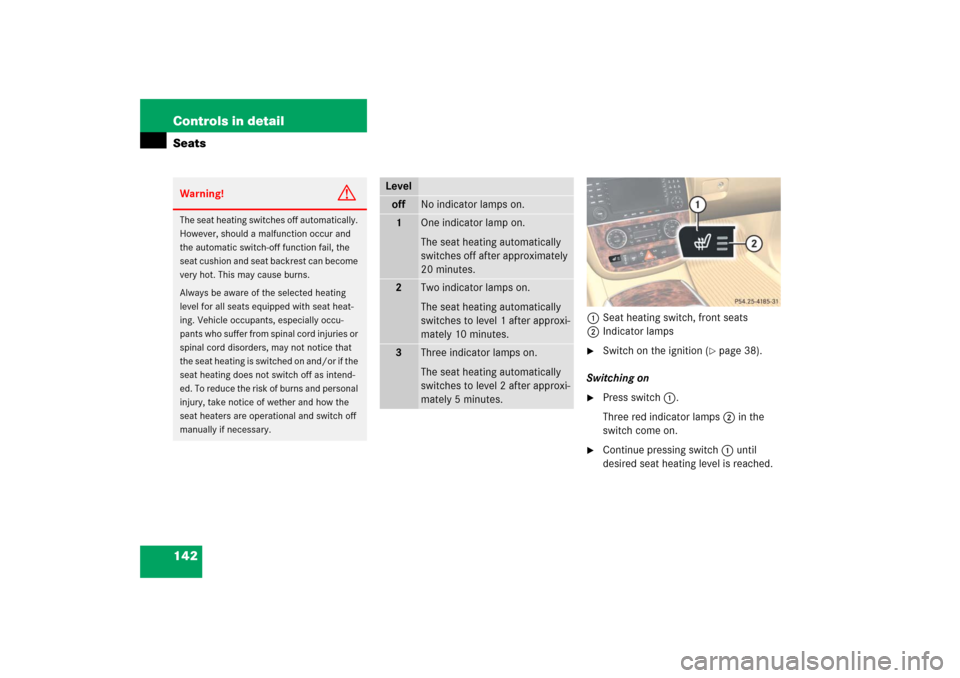
1Seat heating switch, front seats
2Indicator lamps�
Switch on the ignition (
�page 38).
Switching on
�
Press switch1.
Three red indicator lamps2 in the
switch come on.
�
Continue pressing switch1 until
desired seat heating level is reached.
Warning!
G
The seat heating switches off automatically.
However, should a malfunction occur and
the automatic switch-off function fail, the
seat cushion and seat backrest can become
very hot. This may cause burns.
Always be aware of the selected heating
level for all seats equipped with seat heat-
ing. Vehicle occupants, especially occu-
pants who suffer from spinal cord injuries or
spinal cord disorders, may not notice that
the seat heating is switched on and/or if the
seat heating does not switch off as intend-
ed. To reduce the risk of burns and personal
injury, take notice of wether and how the
seat heaters are operational and switch off
manually if necessary.
Leveloff
No indicator lamps on.
1
One indicator lamp on.
The seat heating automatically
switches off after approximately
20 minutes.
2
Two indicator lamps on.
The seat heating automatically
switches to level 1 after approxi-
mately 10 minutes.
3
Three indicator lamps on.
The seat heating automatically
switches to level 2 after approxi-
mately 5 minutes.
Page 144 of 561
143 Controls in detailSeats
Switching off�
Press switch1 repeatedly until all
indicator lamps2 go out.Second-row seat heating
The switches for the second-row seats are
located in the rear center console.
1Seat heating switch
2Indicator lamps
�
Operate the seat heating for the
second-row seats as described in
“Front-seat heating” (
�page 141).
iIf one or more of the indicator
lamps2 on seat heating switch 1 are
flashing, there is insufficient voltage
due to too many electrical consumers
being switched on. The seat heating
switches off automatically.
The seat heating will switch back on
again automatically as soon as
sufficient voltage is available.
Page 146 of 561
145 Controls in detail
Memory function*
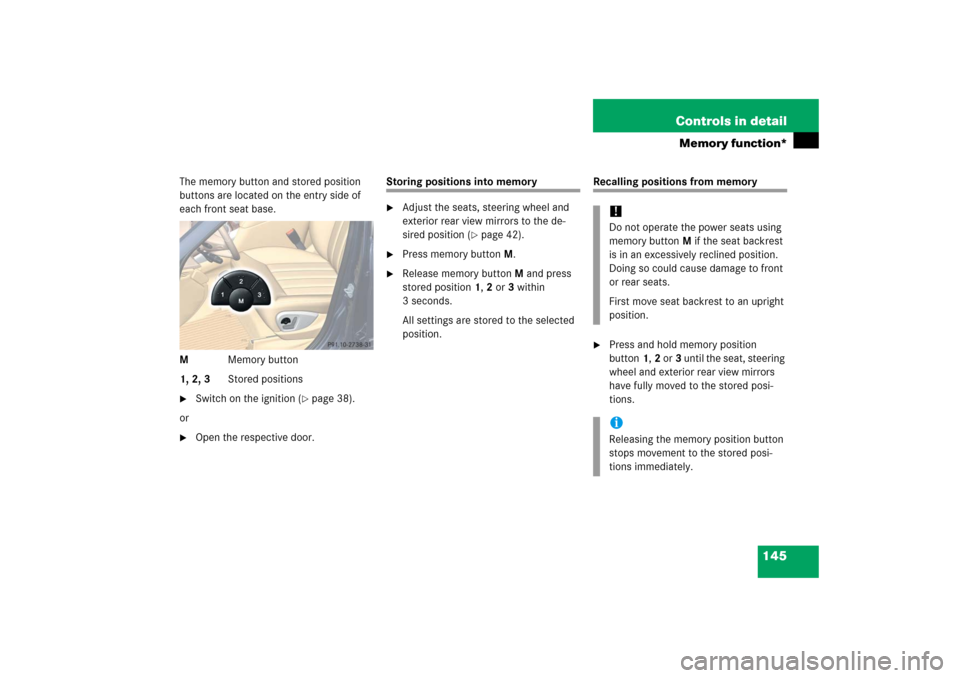
The memory button and stored position
buttons are located on the entry side of
each front seat base.
MMemory button
1, 2, 3Stored positions�
Switch on the ignition (
�page 38).
or
�
Open the respective door.
Storing positions into memory�
Adjust the seats, steering wheel and
exterior rear view mirrors to the de-
sired position (
�page 42).
�
Press memory buttonM.
�
Release memory button M and press
stored position 1, 2 or 3 within
3 seconds.
All settings are stored to the selected
position.
Recalling positions from memory�
Press and hold memory position
button1,2 or3 until the seat, steering
wheel and exterior rear view mirrors
have fully moved to the stored posi-
tions.!Do not operate the power seats using
memory button M if the seat backrest
is in an excessively reclined position.
Doing so could cause damage to front
or rear seats.
First move seat backrest to an upright
position.iReleasing the memory position button
stops movement to the stored posi-
tions immediately.
Page 249 of 561
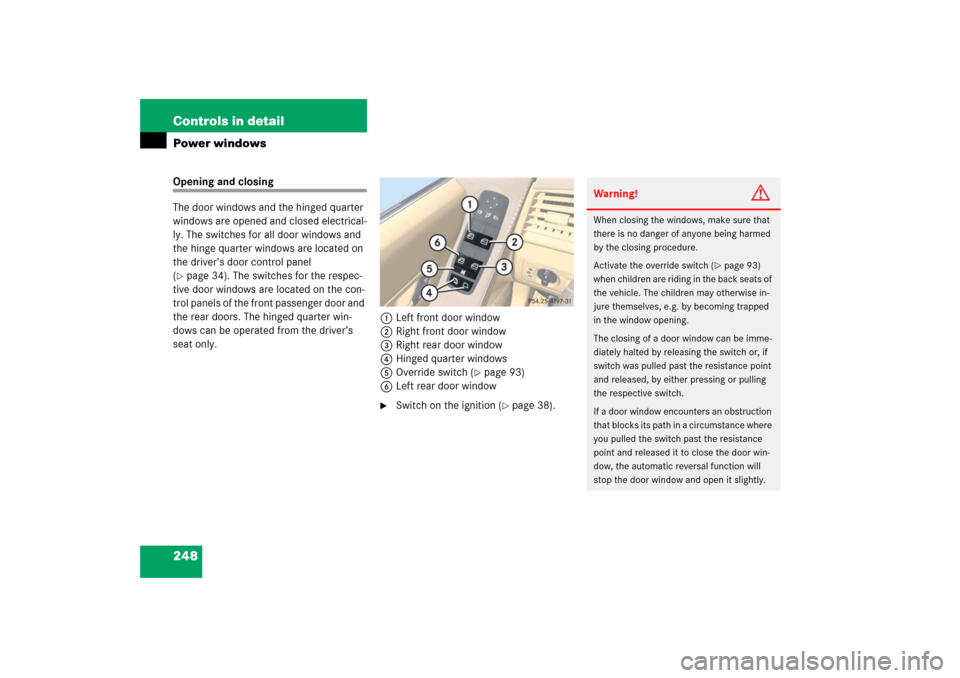
248 Controls in detailPower windowsOpening and closing
The door windows and the hinged quarter
windows are opened and closed electrical-
ly. The switches for all door windows and
the hinge quarter windows are located on
the driver’s door control panel
(�page 34). The switches for the respec-
tive door windows are located on the con-
trol panels of the front passenger door and
the rear doors. The hinged quarter win-
dows can be operated from the driver’s
seat only.1Left front door window
2Right front door window
3Right rear door window
4Hinged quarter windows
5Override switch (
�page 93)
6Left rear door window
�
Switch on the ignition (
�page 38).
Warning!
G
When closing the windows, make sure that
there is no danger of anyone being harmed
by the closing procedure.
Activate the override switch (
�page 93)
when children are riding in the back seats of
the vehicle. The children may otherwise in-
jure themselves, e.g. by becoming trapped
in the window opening.
The closing of a door window can be imme-
diately halted by releasing the switch or, if
switch was pulled past the resistance point
and released, by either pressing or pulling
the respective switch.
If a door window encounters an obstruction
that blocks its path in a circumstance where
you pulled the switch past the resistance
point and released it to close the door win-
dow, the automatic reversal function will
stop the door window and open it slightly.