Page 407 of 561
406 Practical hintsWhat to do if …Problem
Possible cause/conse-
quence
Suggested solution
;
(USA only)
3
(Canada only)
-
v
The red brake warning lamp
comes on while driving. In
addition, the yellow ABS mal-
function indicator lamp, and
the yellow ESP
® warning lamp
come on and a warning will
sound.
A malfunction in the Electronic
Brake Proportioning
(�page 102) was detected.
�
Have the system checked at an autho-
rized Mercedes-Benz Light Truck
Center as soon as possible.
Failure to follow these instructions
increases the risk of an accident.
Page 419 of 561
418 Practical hintsWhat to do if …Text messagesDisplay message
Possible cause/consequence
Possible solution
ABS
Malfunction
Visit workshop
The ABS has detected a malfunction
and has switched off.
The ESP
® and the BAS are also deac-
tivated.
The brake system is still functioning
normally but without the ABS avail-
able.
�
Continue driving with added caution.
Wheels may lock during hard braking,
reducing steering capability.
�
Have the system checked at an authorized
Mercedes-Benz Light Truck Center as soon
as possible.
Failure to follow these instructions increases
the risk of an accident.
Display malfunction
Visit workshop
The ABS or the ABS display is mal-
functioning.
�
Continue driving with added caution.
Wheels may lock during hard braking,
reducing steering capability
�
Have the system checked at an authorized
Mercedes-Benz Light Truck Center as soon
as possible.
Failure to follow these instructions increases
the risk of an accident.
Page 420 of 561
419 Practical hints
What to do if …
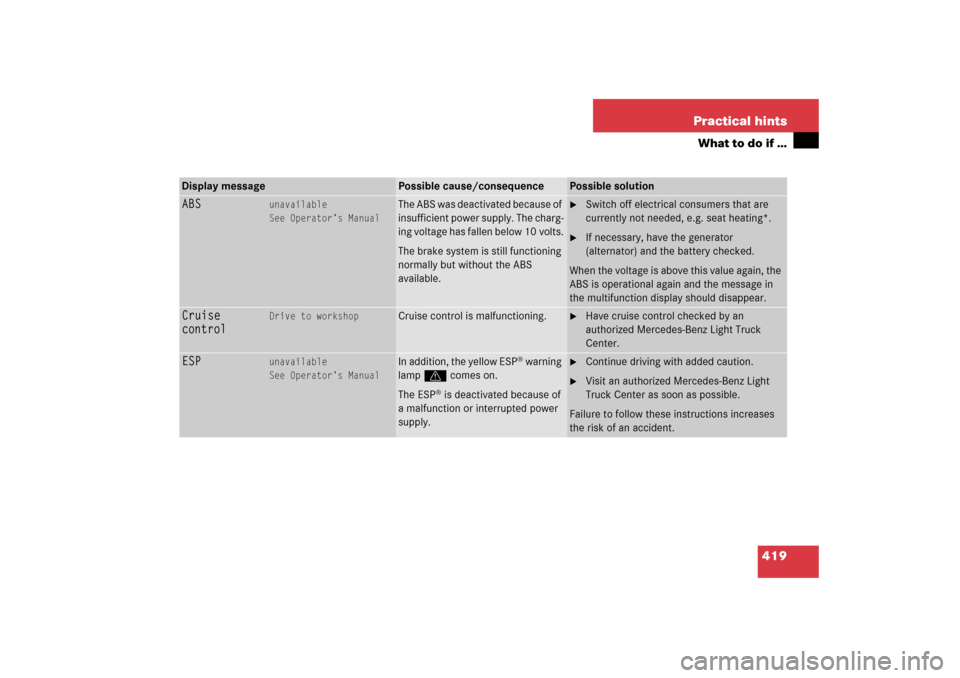
Display message
Possible cause/consequence
Possible solution
ABS
unavailable
See Operator’s Manual
The ABS was deactivated because of
insufficient power supply. The charg-
ing voltage has fallen below 10 volts.
The brake system is still functioning
normally but without the ABS
available.
�
Switch off electrical consumers that are
currently not needed, e.g. seat heating*.
�
If necessary, have the generator
(alternator) and the battery checked.
When the voltage is above this value again, the
ABS is operational again and the message in
the multifunction display should disappear.
Cruise
control
Drive to workshop
Cruise control is malfunctioning.
�
Have cruise control checked by an
authorized Mercedes-Benz Light Truck
Center.
ESP
unavailable
See Operator’s Manual
In addition, the yellow ESP
® warning
lampv comes on.
The ESP
® is deactivated because of
a malfunction or interrupted power
supply.
�
Continue driving with added caution.
�
Visit an authorized Mercedes-Benz Light
Truck Center as soon as possible.
Failure to follow these instructions increases
the risk of an accident.
Page 421 of 561
420 Practical hintsWhat to do if …Display message
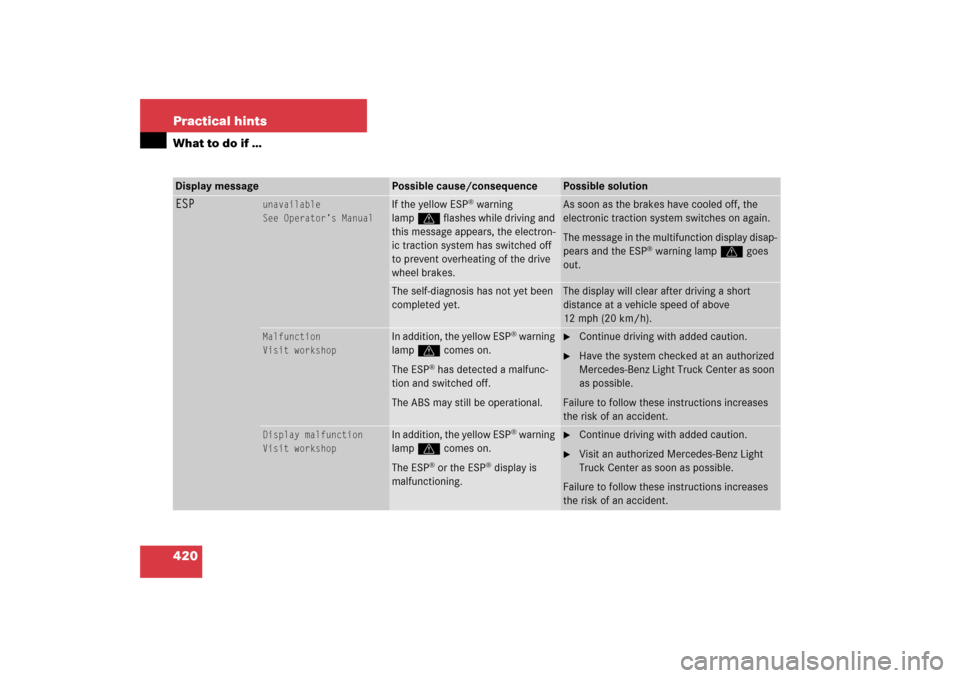
Possible cause/consequence
Possible solution
ESP
unavailable
See Operator’s Manual
If the yellow ESP
® warning
lampv flashes while driving and
this message appears, the electron-
ic traction system has switched off
to prevent overheating of the drive
wheel brakes.
As soon as the brakes have cooled off, the
electronic traction system switches on again.
The message in the multifunction display disap-
pears and the ESP
® warning lampv goes
out.
The self-diagnosis has not yet been
completed yet.
The display will clear after driving a short
distance at a vehicle speed of above
12 mph (20 km/h).
Malfunction
Visit workshop
In addition, the yellow ESP
® warning
lampv comes on.
The ESP
® has detected a malfunc-
tion and switched off.
The ABS may still be operational.
�
Continue driving with added caution.
�
Have the system checked at an authorized
Mercedes-Benz Light Truck Center as soon
as possible.
Failure to follow these instructions increases
the risk of an accident.
Display malfunction
Visit workshop
In addition, the yellow ESP
® warning
lampv comes on.
The ESP
® or the ESP
® display is
malfunctioning.
�
Continue driving with added caution.
�
Visit an authorized Mercedes-Benz Light
Truck Center as soon as possible.
Failure to follow these instructions increases
the risk of an accident.
Page 458 of 561
457 Practical hints
Where will I find ...?
Setting up the collapsible wheel chock
The collapsible wheel chock serves to ad-
ditionally secure the vehicle, e.g. while
changing the wheel.
1Tilt the plate upward
2Fold the lower plate outward
3Insert the plate
�
Tilt both plates upward1.
�
Fold the lower plate outward2.
�
Guide the tabs of the lower plate all the
way into the openings of base plate3.
Spare wheel
Your vehicle is equipped with a spare
wheel with collapsible tire. The spare
wheel is located underneath the cargo
compartment floor.Warning!
G
The dimensions of the spare wheel are dif-
ferent from those of the road wheels. As a
result, the vehicle handling characteristics
change when driving with a spare wheel
mounted.
The spare wheel should only be used tempo-
rarily, and should be replaced with a regular
road wheel as quickly as possible.
Page 476 of 561
475 Practical hints
Replacing wiper blades
�Replacing wiper blades
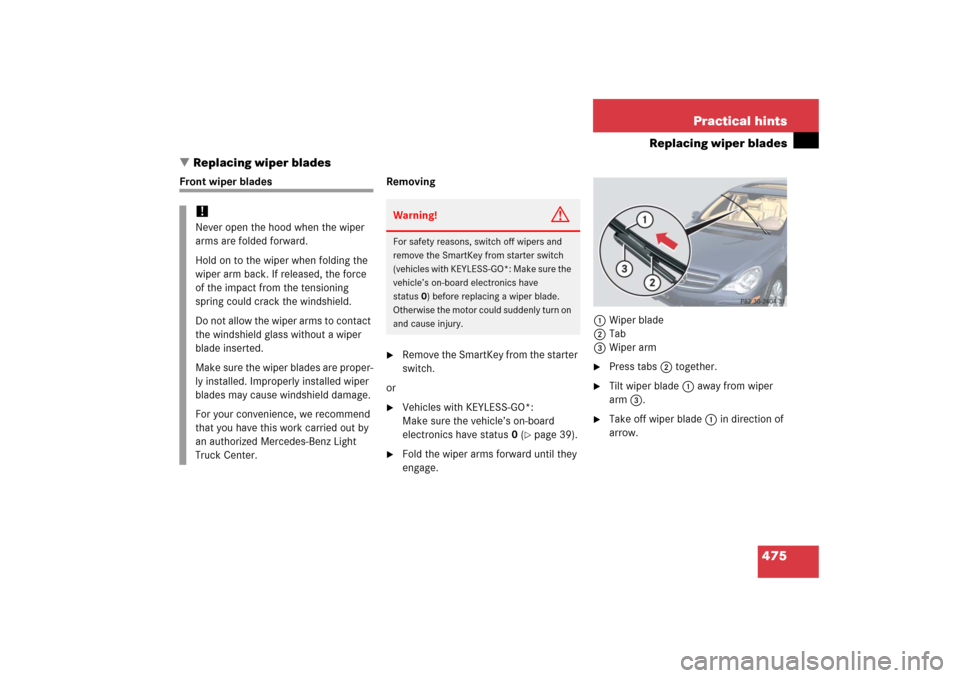
Front wiper blades Removing
�
Remove the SmartKey from the starter
switch.
or
�
Vehicles with KEYLESS-GO*:
Make sure the vehicle’s on-board
electronics have status0 (
�page 39).
�
Fold the wiper arms forward until they
engage.1Wiper blade
2Tab
3Wiper arm
�
Press tabs2 together.
�
Tilt wiper blade 1 away from wiper
arm 3.
�
Take off wiper blade 1 in direction of
arrow.
!Never open the hood when the wiper
arms are folded forward.
Hold on to the wiper when folding the
wiper arm back. If released, the force
of the impact from the tensioning
spring could crack the windshield.
Do not allow the wiper arms to contact
the windshield glass without a wiper
blade inserted.
Make sure the wiper blades are proper-
ly installed. Improperly installed wiper
blades may cause windshield damage.
For your convenience, we recommend
that you have this work carried out by
an authorized Mercedes-Benz Light
Truck Center.
Warning!
G
For safety reasons, switch off wipers and
remove the SmartKey from starter switch
(vehicles with KEYLESS-GO*: Make sure the
vehicle’s on-board electronics have
status0) before replacing a wiper blade.
Otherwise the motor could suddenly turn on
and cause injury.
Page 477 of 561
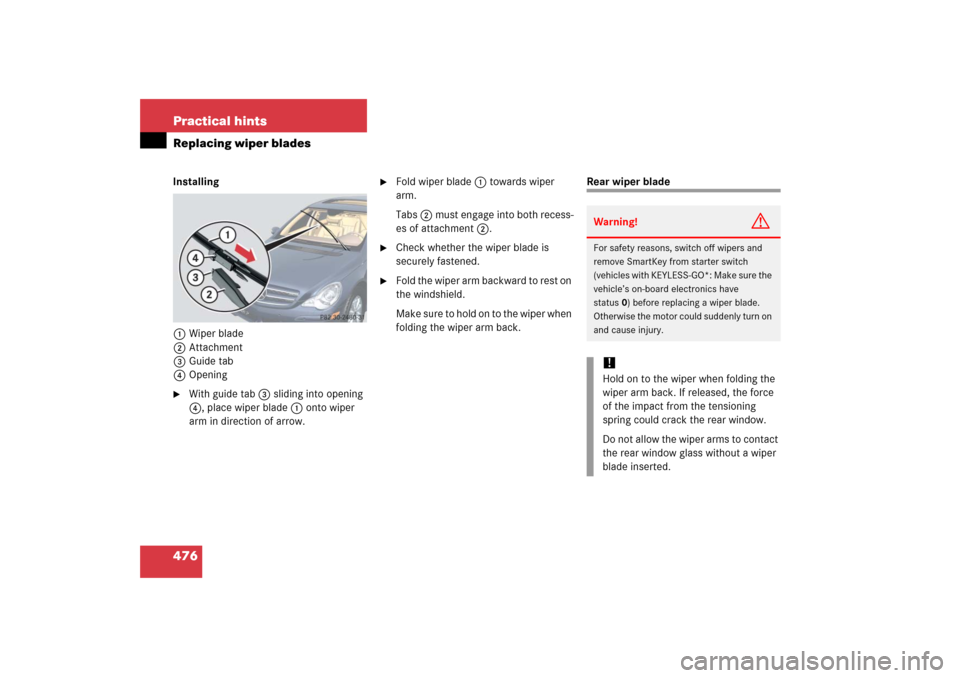
476 Practical hintsReplacing wiper bladesInstalling
1Wiper blade
2Attachment
3Guide tab
4Opening�
With guide tab 3 sliding into opening
4, place wiper blade 1 onto wiper
arm in direction of arrow.
�
Fold wiper blade 1 towards wiper
arm.
Tabs 2 must engage into both recess-
es of attachment 2.
�
Check whether the wiper blade is
securely fastened.
�
Fold the wiper arm backward to rest on
the windshield.
Make sure to hold on to the wiper when
folding the wiper arm back.
Rear wiper bladeWarning!
G
For safety reasons, switch off wipers and
remove SmartKey from starter switch
(vehicles with KEYLESS-GO*: Make sure the
vehicle’s on-board electronics have
status0) before replacing a wiper blade.
Otherwise the motor could suddenly turn on
and cause injury.!Hold on to the wiper when folding the
wiper arm back. If released, the force
of the impact from the tensioning
spring could crack the rear window.
Do not allow the wiper arms to contact
the rear window glass without a wiper
blade inserted.
Page 515 of 561
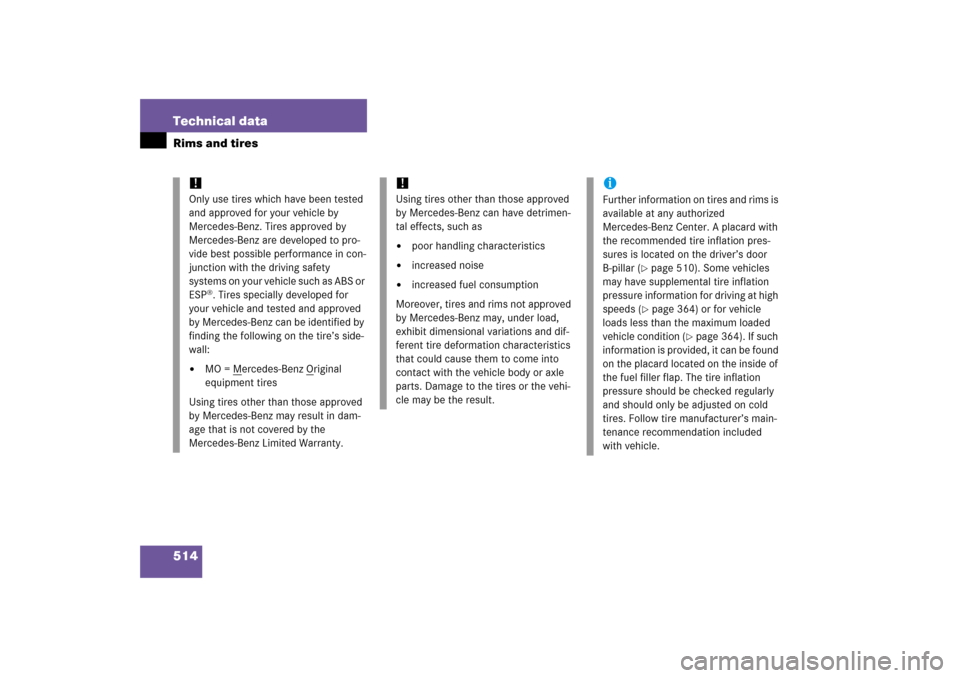
514 Technical dataRims and tires
!
Only use tires which have been tested
and approved for your vehicle by
Mercedes-Benz. Tires approved by
Mercedes-Benz are developed to pro-
vide best possible performance in con-
junction with the driving safety
systems on your vehicle such as ABS or
ESP
®. Tires specially developed for
your vehicle and tested and approved
by Mercedes-Benz can be identified by
finding the following on the tire’s side-
wall:
�
MO = M
ercedes-Benz O
riginal
equipment tires
Using tires other than those approved
by Mercedes-Benz may result in dam-
age that is not covered by the
Mercedes-Benz Limited Warranty.
!Using tires other than those approved
by Mercedes-Benz can have detrimen-
tal effects, such as�
poor handling characteristics
�
increased noise
�
increased fuel consumption
Moreover, tires and rims not approved
by Mercedes-Benz may, under load,
exhibit dimensional variations and dif-
ferent tire deformation characteristics
that could cause them to come into
contact with the vehicle body or axle
parts. Damage to the tires or the vehi-
cle may be the result.
iFurther information on tires and rims is
available at any authorized
Mercedes-Benz Center. A placard with
the recommended tire inflation pres-
sures is located on the driver’s door
B-pillar (
�page 510). Some vehicles
may have supplemental tire inflation
pressure information for driving at high
speeds (�page 364) or for vehicle
loads less than the maximum loaded
vehicle condition (
�page 364). If such
information is provided, it can be found
on the placard located on the inside of
the fuel filler flap. The tire inflation
pressure should be checked regularly
and should only be adjusted on cold
tires. Follow tire manufacturer’s main-
tenance recommendation included
with vehicle.