Page 45 of 561
44 Getting startedAdjustingSeat height�
Press the switch up or down in the
direction of arrow3.
Seat cushion tilt
�
Press the switch up or down in
direction of arrow2 until your upper
legs are lightly supported.
Seat backrest tilt
�
Press the switch forward or backward
in direction of arrow4 until your arms
are slightly angled when holding the
steering wheel.Head restraint heightVehicles with memory function*:
�
Press switch (
�p a g e 4 3 ) u p o r d o w n i n
direction of arrow 1.
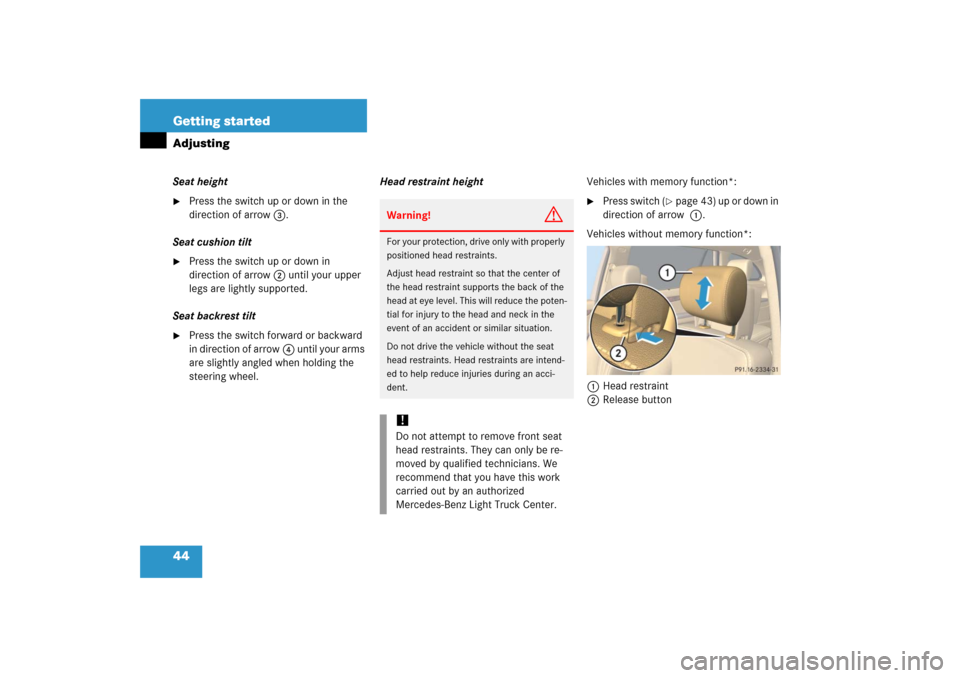
Vehicles without memory function*:
1Head restraint
2Release button
Warning!
G
For your protection, drive only with properly
positioned head restraints.
Adjust head restraint so that the center of
the head restraint supports the back of the
head at eye level. This will reduce the poten-
tial for injury to the head and neck in the
event of an accident or similar situation.
Do not drive the vehicle without the seat
head restraints. Head restraints are intend-
ed to help reduce injuries during an acci-
dent.!Do not attempt to remove front seat
head restraints. They can only be re-
moved by qualified technicians. We
recommend that you have this work
carried out by an authorized
Mercedes-Benz Light Truck Center.
Page 46 of 561
45 Getting started
Adjusting
Raising:�
Manually adjust the height of head
restraint 1 by pulling it upward.
If head restraint 1 is fully retracted,
push release button 2 in direction of
arrow and pull head restraint 1 up-
ward.
Lowering:
�
To lower head restraint 1, push
release button 2 in direction of arrow
and press down on head restraint 1.Head restraint tilt
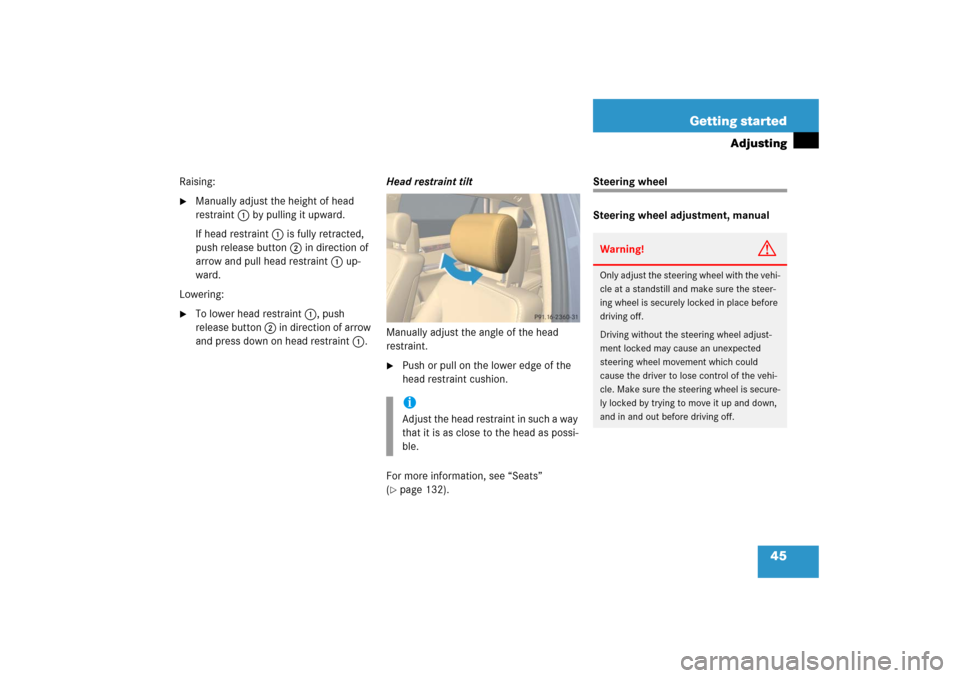
Manually adjust the angle of the head
restraint.
�
Push or pull on the lower edge of the
head restraint cushion.
For more information, see “Seats”
(
�page 132).
Steering wheel
Steering wheel adjustment, manual
iAdjust the head restraint in such a way
that it is as close to the head as possi-
ble.
Warning!
G
Only adjust the steering wheel with the vehi-
cle at a standstill and make sure the steer-
ing wheel is securely locked in place before
driving off.
Driving without the steering wheel adjust-
ment locked may cause an unexpected
steering wheel movement which could
cause the driver to lose control of the vehi-
cle. Make sure the steering wheel is secure-
ly locked by trying to move it up and down,
and in and out before driving off.
Page 47 of 561
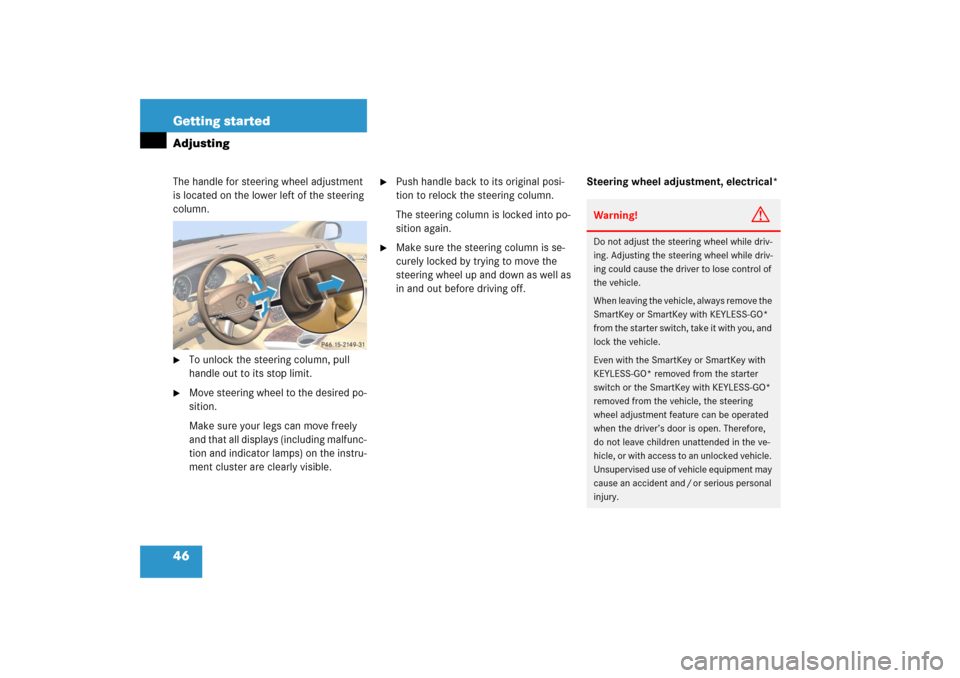
46 Getting startedAdjustingThe handle for steering wheel adjustment
is located on the lower left of the steering
column.�
To unlock the steering column, pull
handle out to its stop limit.
�
Move steering wheel to the desired po-
sition.
Make sure your legs can move freely
and that all displays (including malfunc-
tion and indicator lamps) on the instru-
ment cluster are clearly visible.
�
Push handle back to its original posi-
tion to relock the steering column.
The steering column is locked into po-
sition again.
�
Make sure the steering column is se-
curely locked by trying to move the
steering wheel up and down as well as
in and out before driving off.Steering wheel adjustment, electrical*
Warning!
G
Do not adjust the steering wheel while driv-
ing. Adjusting the steering wheel while driv-
ing could cause the driver to lose control of
the vehicle.
When leaving the vehicle, always remove the
SmartKey or SmartKey with KEYLESS-GO*
from the starter switch, take it with you, and
lock the vehicle.
Even with the SmartKey or SmartKey with
KEYLESS-GO* removed from the starter
switch or the SmartKey with KEYLESS-GO*
removed from the vehicle, the steering
wheel adjustment feature can be operated
when the driver’s door is open. Therefore,
do not leave children unattended in the ve-
hicle, or with access to an unlocked vehicle.
Unsupervised use of vehicle equipment may
cause an accident and / or serious personal
injury.
Page 48 of 561
47 Getting started
Adjusting
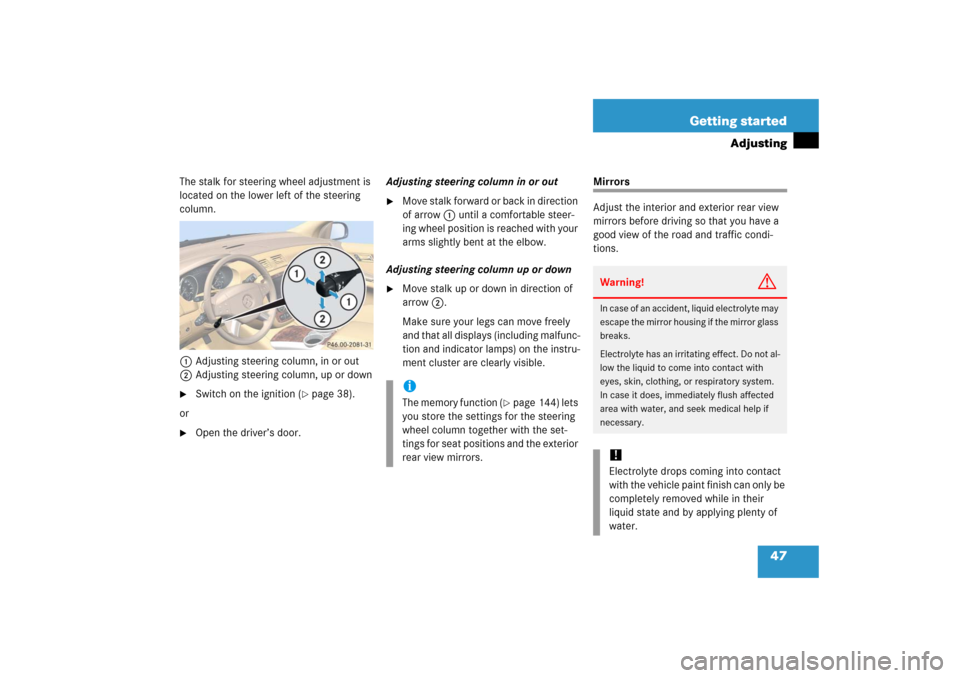
The stalk for steering wheel adjustment is
located on the lower left of the steering
column.
1Adjusting steering column, in or out
2Adjusting steering column, up or down�
Switch on the ignition (
�page 38).
or
�
Open the driver’s door.Adjusting steering column in or out
�
Move stalk forward or back in direction
of arrow1 until a comfortable steer-
ing wheel position is reached with your
arms slightly bent at the elbow.
Adjusting steering column up or down
�
Move stalk up or down in direction of
arrow2.
Make sure your legs can move freely
and that all displays (including malfunc-
tion and indicator lamps) on the instru-
ment cluster are clearly visible.
Mirrors
Adjust the interior and exterior rear view
mirrors before driving so that you have a
good view of the road and traffic condi-
tions.
iThe memory function (
�page 144) lets
you store the settings for the steering
wheel column together with the set-
tings for seat positions and the exterior
rear view mirrors.
Warning!
G
In case of an accident, liquid electrolyte may
escape the mirror housing if the mirror glass
breaks.
Electrolyte has an irritating effect. Do not al-
low the liquid to come into contact with
eyes, skin, clothing, or respiratory system.
In case it does, immediately flush affected
area with water, and seek medical help if
necessary.!Electrolyte drops coming into contact
with the vehicle paint finish can only be
completely removed while in their
liquid state and by applying plenty of
water.
Page 50 of 561
49 Getting started
Adjusting
For more information, see “Rear view mir-
rors” (
�page 208) and “Storing exterior
rear view mirror parking position”
(
�page 146).
!If an exterior rear view mirror was forc-
ibly pushed forward (hit from the rear)
or forcibly pushed rearward (hit from
the front), reposition it by applying firm
pressure until it snaps into place. The
mirror housing is then properly posi-
tioned and you can adjust the mirror in
the usual manner.!Vehicles with power folding exterior
rear view mirrors*:
If an exterior rear view mirror housing
is forcibly pushed forward (hit from the
rear) or forcibly pushed rearward (hit
from the front) press button1 to fold
mirrors in, then press button1 again
to fold mirrors out. Do not force mirrors
by hand as this may damage the adjust-
ment mechanism.
The mirror housing is then properly po-
sitioned and you can adjust the mirror
in the usual manner.
iThe memory function* (
�page 144)
lets you store the settings for the exte-
rior rear view mirrors together with the
setting for the steering wheel column
and the seat positions.
At low ambient temperatures, the
exterior rear view mirrors will be heat-
ed automatically.
Page 59 of 561
58 Getting startedDrivingSwitching on headlamps
For more information on headlamps, see
“Lighting” (
�page 147).
Low beam headlamps
The exterior lamp switch is located on the
dashboard to the left of the steering wheel.
Exterior lamp switch1 Off
2Low beam headlamps on�
Turn the exterior lamp switch to
positionB.
The low beam headlamps come on.High beam
The combination switch is located on the
left of the steering column.
Combination switch1High beam
2High beam flasher�
Push the combination switch in direc-
tion of arrow1.
The high beam headlamp indicator
lampA in the instrument cluster
comes on (
�page 24).
For more information on headlamps, see
“Combination switch” (
�page 151).
Turn signals
The combination switch is located on the
left of the steering column.Combination switch1Turn signals, right
2Turn signals, left�
Press combination switch in direction
of arrow1 or2.
The corresponding turn signal indicator
lampLorK in the instrument
cluster flashes.
Page 60 of 561
59 Getting started
Driving
The combination switch resets automati-
cally after major steering wheel move-
ment.
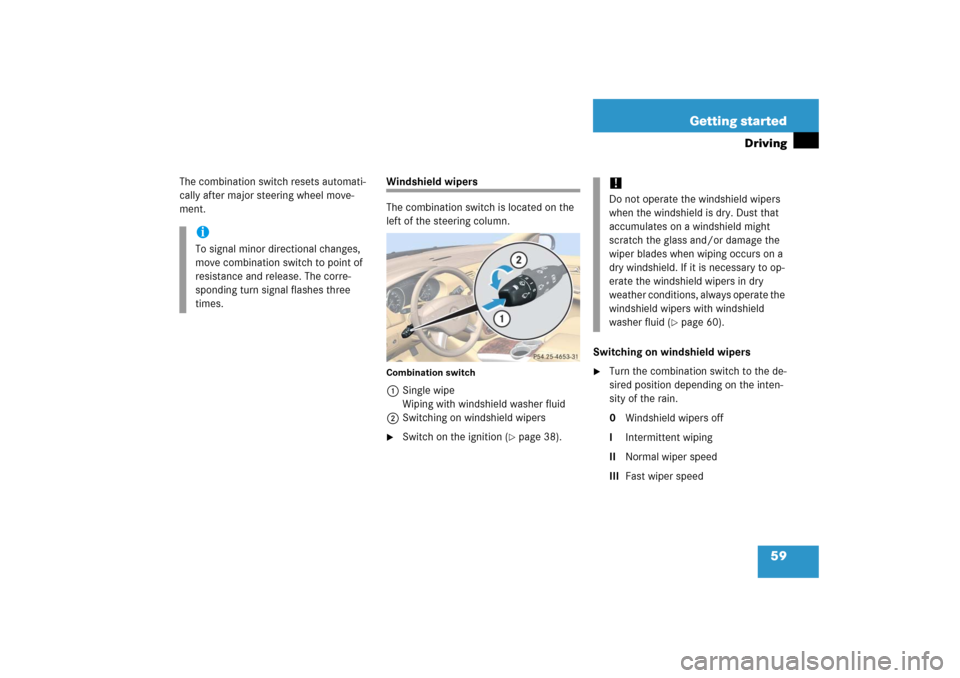
Windshield wipers
The combination switch is located on the
left of the steering column.Combination switch1Single wipe
Wiping with windshield washer fluid
2Switching on windshield wipers�
Switch on the ignition (
�page 38).Switching on windshield wipers
�
Turn the combination switch to the de-
sired position depending on the inten-
sity of the rain.
0Windshield wipers off
IIntermittent wiping
IINormal wiper speed
IIIFast wiper speed
iTo signal minor directional changes,
move combination switch to point of
resistance and release. The corre-
sponding turn signal flashes three
times.
!Do not operate the windshield wipers
when the windshield is dry. Dust that
accumulates on a windshield might
scratch the glass and/or damage the
wiper blades when wiping occurs on a
dry windshield. If it is necessary to op-
erate the windshield wipers in dry
weather conditions, always operate the
windshield wipers with windshield
washer fluid (
�page 60).
Page 62 of 561
61 Getting started
Driving
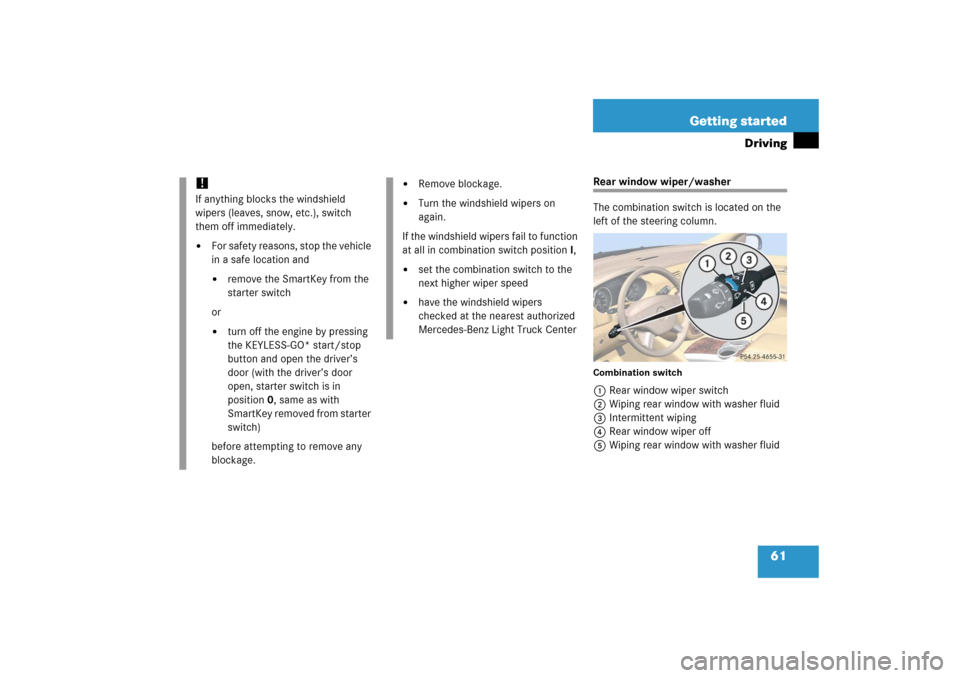
Rear window wiper/washer
The combination switch is located on the
left of the steering column.Combination switch1Rear window wiper switch
2Wiping rear window with washer fluid
3Intermittent wiping
4Rear window wiper off
5Wiping rear window with washer fluid
!If anything blocks the windshield
wipers (leaves, snow, etc.), switch
them off immediately.�
For safety reasons, stop the vehicle
in a safe location and�
remove the SmartKey from the
starter switch
or
�
turn off the engine by pressing
the KEYLESS-GO* start/stop
button and open the driver’s
door (with the driver’s door
open, starter switch is in
position0, same as with
SmartKey removed from starter
switch)
before attempting to remove any
blockage.
�
Remove blockage.
�
Turn the windshield wipers on
again.
If the windshield wipers fail to function
at all in combination switch positionI,
�
set the combination switch to the
next higher wiper speed
�
have the windshield wipers
checked at the nearest authorized
Mercedes-Benz Light Truck Center