Page 259 of 561

258 Controls in detailPower tilt/sliding sunroof*Synchronizing
The tilt/sliding sunroof must be
synchronized�
after the battery has been
disconnected or discharged
�
after the tilt/sliding sunroof has been
closed manually (
�page 462)
�
after a malfunction
�
if the tilt/sliding sunroof does not open
smoothly
�
Remove the fuse securing the
tilt/sliding sunroof from the fuse box
(�page 503).
�
Reinsert the fuse in the main box.
�
Switch on the ignition (
�page 38).
�
Press and hold the sunroof switch in
the direction of arrow3 (
�page 255)
until the tilt/sliding sunroof is fully
raised at the rear.
�
Hold the sunroof switch in the direction
of arrow3 for approximately
1 second.
�
Open the tilt/sliding sunroof using the
Express-open feature (
�page 257).
If the tilt/sliding sunroof opens com-
pletely, it is synchronized.
If the tilt/sliding sunroof does not open
completely:
�
Repeat the above steps.
iFor information on which fuse box con-
tains the fuse for the power tilt/sliding
sunroof, see the fuse chart provided
with the vehicle tool kit (
�page 455).
Page 264 of 561
 and
remove the SmartKey from the starter
switch.
Vehicles with KEYLESS-GO*:
�
Switch off the")
263 Controls in detail
Panorama roof with power tilt/sliding panel*
�
Switch off the ignition (
�page 38) and
remove the SmartKey from the starter
switch.
Vehicles with KEYLESS-GO*:
�
Switch off the ignition (
�page 39).
�
Open the driver’s door (this puts the
starter switch in position 0, same as
with the SmartKey removed from the
starter switch). The driver’s door then
can be closed again.
�
Remove the fuse securing the
tilt/sliding panel from the fuse box
(�page 504).
�
Reinsert the fuse in the fuse box.
�
Switch on the ignition (
�page 38).
�
Push and hold the roof panel switch in
direction of arrow2 (
�page 260) un-
til the roller sunblinds are fully closed.
�
Keep holding the roof panel switch in
direction of arrow2 (
�page 260) for
approximately 1 second.
�
Pull and hold the roof panel switch in
direction of arrow1 (
�page 260) un-
til the roller sunblinds are fully opened.
�
Keep holding the roof panel switch in
direction of arrow1 (
�page 260) for
approximately 1 second.
�
Press and hold the roof panel switch in
direction of arrow3 (
�page 260) un-
til the tilt/sliding panel is fully raised at
the rear.
�
Push and hold the roof panel switch in
direction of arrow2 (
�page 260) un-
til the tilt/sliding panel is fully closed.
�
Keep holding the roof panel switch in
direction of arrow2 (
�page 260) for
approximately 1 second.
�
Open the tilt/sliding panel using the
Express-open feature (
�page 262).
If the tilt/sliding panel opens com-
pletely, the roof is synchronized.
If the tilt/sliding sunroof does not open
completely:
�
Repeat the above steps.
iFor information on which fuse box con-
tains the fuse for the power tilt/sliding
panel, see the fuse chart provided with
the vehicle tool kit (
�page 455).
Page 455 of 561
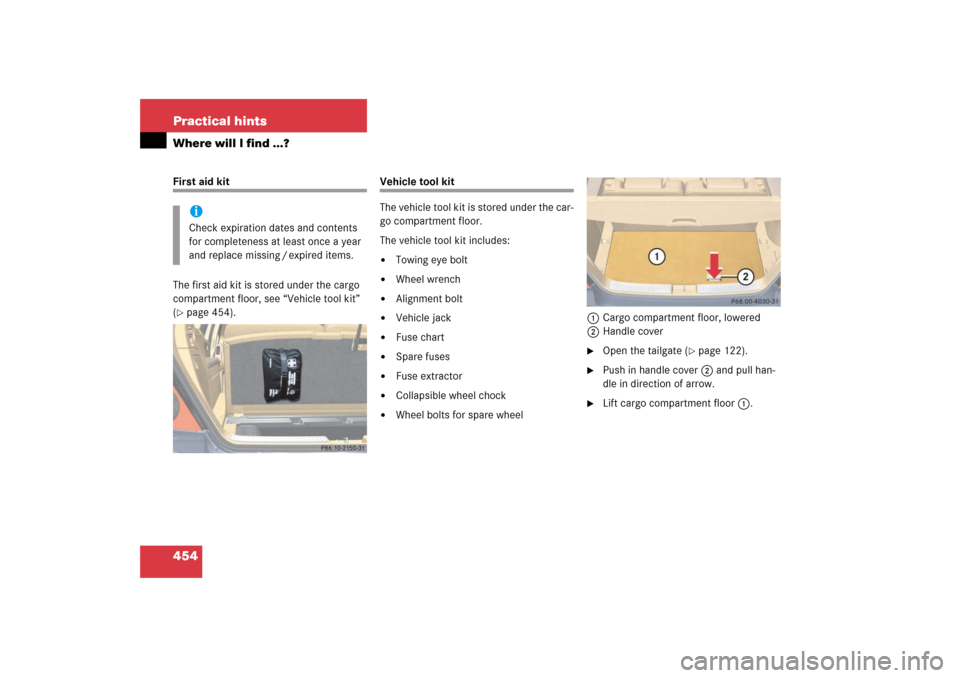
454 Practical hintsWhere will I find ...?First aid kit
The first aid kit is stored under the cargo
compartment floor, see “Vehicle tool kit”
(�page 454).
Vehicle tool kit
The vehicle tool kit is stored under the car-
go compartment floor.
The vehicle tool kit includes:�
Towing eye bolt
�
Wheel wrench
�
Alignment bolt
�
Vehicle jack
�
Fuse chart
�
Spare fuses
�
Fuse extractor
�
Collapsible wheel chock
�
Wheel bolts for spare wheel1Cargo compartment floor, lowered
2Handle cover
�
Open the tailgate (
�page 122).
�
Push in handle cover2 and pull han-
dle in direction of arrow.
�
Lift cargo compartment floor 1.
iCheck expiration dates and contents
for completeness at least once a year
and replace missing / expired items.
Page 456 of 561
455 Practical hints
Where will I find ...?
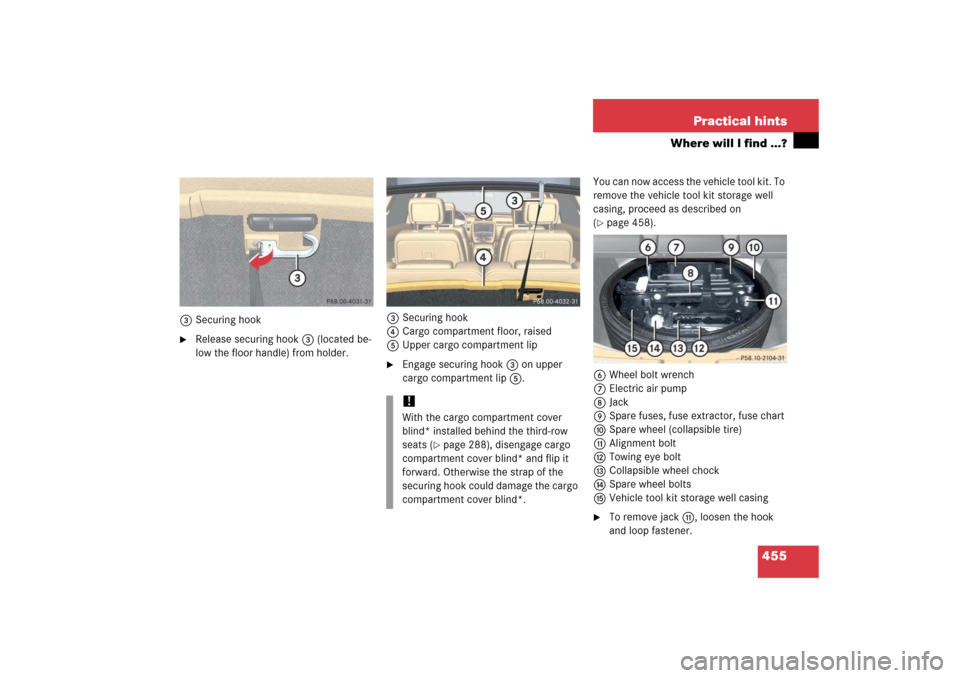
3Securing hook�
Release securing hook 3 (located be-
low the floor handle) from holder.3Securing hook
4Cargo compartment floor, raised
5Upper cargo compartment lip
�
Engage securing hook 3 on upper
cargo compartment lip 5.You can now access the vehicle tool kit. To
remove the vehicle tool kit storage well
casing, proceed as described on
(
�page 458).
6Wheel bolt wrench
7Electric air pump
8Jack
9Spare fuses, fuse extractor, fuse chart
aSpare wheel (collapsible tire)
bAlignment bolt
cTowing eye bolt
dCollapsible wheel chock
eSpare wheel bolts
fVehicle tool kit storage well casing
�
To remove jackb, loosen the hook
and loop fastener.
!With the cargo compartment cover
blind* installed behind the third-row
seats (
�page 288), disengage cargo
compartment cover blind* and flip it
forward. Otherwise the strap of the
securing hook could damage the cargo
compartment cover blind*.
Page 504 of 561

503 Practical hintsFuses
�Fuses
The electrical fuses in your vehicle serve to
stop the supply of electricity to a device
that is malfunctioning. This helps to
prevent damage to the other vehicle
electronics. If a fuse is blown, the compo-
nents and systems secured by that fuse
will stop operating.
The following aids are available to help you
change fuses. They are included with the
vehicle tool kit (
�page 455):
�
Fuse chart
The fuse chart explains the fuse alloca-
tion and fuse amperages.
�
Spare fuses
�
Fuse extractor
Warning!
G
Only use fuses approved for Mercedes-Benz
with the specified amperage for the system
in question. Otherwise, a short circuit could
result and cause a fire.
!Only install fuses that have been tested
and approved by Mercedes-Benz and
that have the specified amperage
rating. Otherwise, electrical parts or
systems could be damaged.
Never attempt to repair or bridge a
blown fuse. Have the cause determined
and remedied by an authorized
Mercedes-Benz Light Truck Center.