Page 424 of 539
423 Practical hints
What to do if …
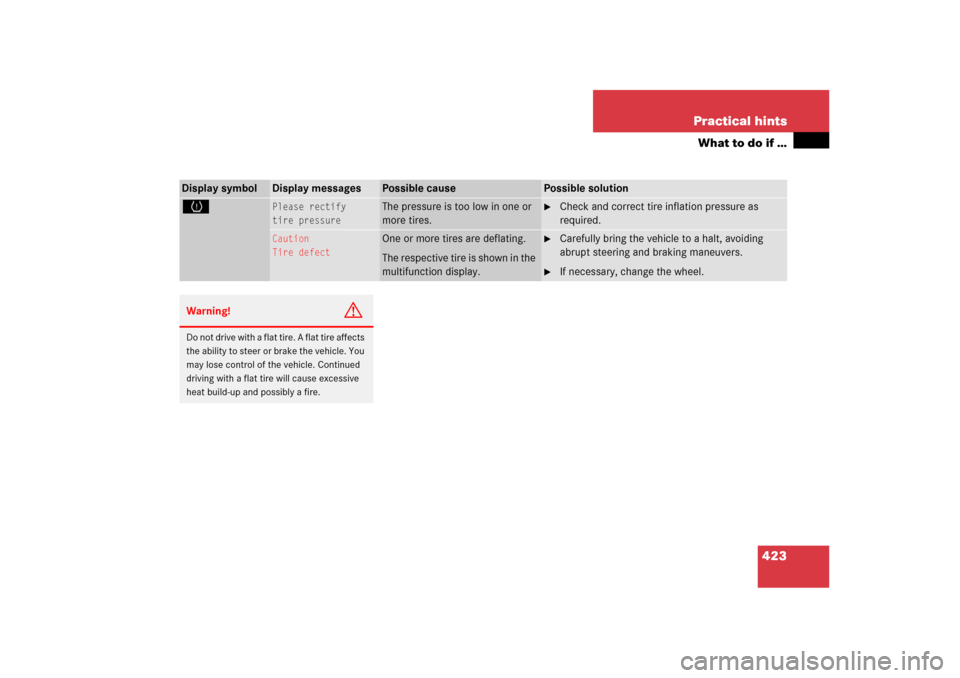
Display symbol
Display messages
Possible cause
Possible solution
H
Please rectify
tire pressure
The pressure is too low in one or
more tires.
�
Check and correct tire inflation pressure as
required.
Caution
Tire defect
One or more tires are deflating.
The respective tire is shown in the
multifunction display.
�
Carefully bring the vehicle to a halt, avoiding
abrupt steering and braking maneuvers.
�
If necessary, change the wheel.
Warning!
G
Do not drive with a flat tire. A flat tire affects
the ability to steer or brake the vehicle. You
may lose control of the vehicle. Continued
driving with a flat tire will cause excessive
heat build-up and possibly a fire.
Page 425 of 539
424 Practical hintsWhat to do if …Display symbol
Display messages
Possible cause
Possible solution
H
Check tires
The tire pressure in one or more tires is
already below the minimum value.
The respective tire is shown in the
multifunction display.
�
Carefully bring the vehicle to a halt,
avoiding abrupt steering and braking
maneuvers.
�
Check and adjust tire pressure as
required.
�
If necessary, change the wheel.
Warning!
G
Do not drive with a flat tire. A flat tire affects
the ability to steer or brake the vehicle.
You may lose control of the vehicle. Contin-
ued driving with a flat tire will cause exces-
sive heat build-up and possibly a fire.
Page 435 of 539
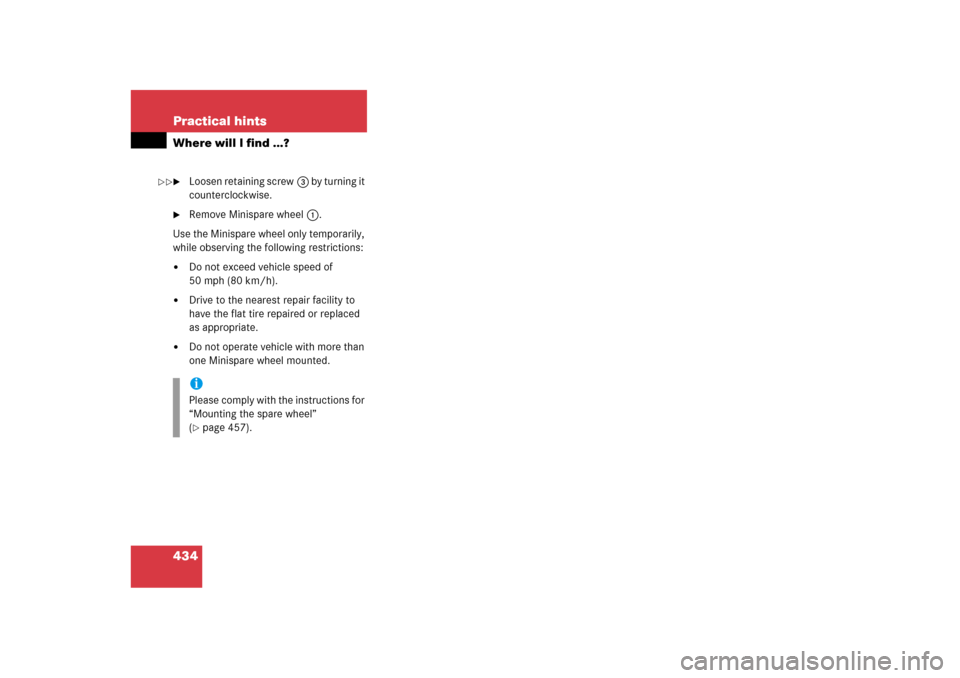
434 Practical hintsWhere will I find ...?�
Loosen retaining screw3 by turning it
counterclockwise.
�
Remove Minispare wheel1.
Use the Minispare wheel only temporarily,
while observing the following restrictions:
�
Do not exceed vehicle speed of
50 mph (80 km/h).
�
Drive to the nearest repair facility to
have the flat tire repaired or replaced
as appropriate.
�
Do not operate vehicle with more than
one Minispare wheel mounted.iPlease comply with the instructions for
“Mounting the spare wheel”
(�page 457).
��
Page 457 of 539

456 Practical hintsFlat tire
Preparing the vehicle�
Park the vehicle as far as possible from
moving traffic on a hard surface.
�
Turn on the hazard warning flashers.
�
Turn the steering wheel so that the
front wheels are in a straight ahead po-
sition.
�
Set the parking brake.
�
Shift automatic transmission to park
positionP.
Vehicles with Air suspension package*:
�
Do not open or close a door or tailgate
while mounting the spare wheel.
Vehicles with SmartKey:
�
Turn off the engine (
�page 34).
�
Remove the SmartKey from the starter
switch.Vehicles with KEYLESS-GO*:
�
Turn off the engine by pressing the
KEYLESS-GO* button once
(�page 63).
�
Open the driver’s door (this puts the
starter switch in position0, same as
with the SmartKey removed from the
starter switch). The driver’s door then
can be closed again.
�
Have any passenger exit the vehicle at
a safe distance from the roadway.
Warning!
G
The dimensions of the Minispare wheel are
different from those of the road wheels. As
a result, the vehicle handling characteristics
change when driving with a mounted
Minispare wheel. Adapt your driving style
accordingly.
The Minispare wheel is for temporary use
only. When driving with a Minispare wheel
mounted, ensure proper tire pressure and
do not exceed a vehicle speed of
50 mph (80 km/h).
Drive to the nearest Mercedes-Benz Light
Truck Center as soon as possible to have the
Minispare wheel replaced with a regular
road wheel.
Never operate the vehicle with more than
one spare wheel mounted.
Do not switch off the ESP
® when a
Minispare wheel is mounted.
iOpen doors only when conditions are
safe to do so.
Page 458 of 539
.
�
Take the wheel wrench, the collapsible
wheel chock, and the vehicle jack")
457 Practical hints
Flat tire
Mounting the spare wheel
Preparing the vehicle�
Prepare the vehicle as described
(�page 456).
�
Take the wheel wrench, the collapsible
wheel chock, and the vehicle jack out
of the cargo compartment
(�page 430).
�
Take the Minispare wheel out of the
cargo compartment (
�page 433).Lifting the vehicle
�
Prevent the vehicle from rolling away
by blocking wheels with wheel chocks
or other sizable objects.
A collapsible wheel chock is included
with the vehicle tool kit (
�page 430).
For information on setting up the col-
lapsible wheel chock, see
(
�page 432).
When changing wheel on a level surface:
�
Place one wheel chock in front of and
another sizeable object behind the
wheel that is diagonally opposite to the
wheel being changed.
Always try lifting the vehicle using the jack
on a level surface. However, should
circumstances require you to do so on a
hill, place the wheel chock and other size-
able object as follows:
�
Place the wheel chock and another
sizable object on the downhill side
blocking both wheels of the axle not
being worked on.
!Vehicles with factory-mounted
running-boards*:
Your vehicle is equipped with a scis-
sors-type jack (located under the cargo
compartment floor) designed for use
with factory-mounted running boards.
Only use this jack when jacking up ve-
hicles with factory-mounted running
boards as otherwise the vehicle’s
underbody can be damaged. See sepa-
rate instructions for scissors-type jack.
Warning!
G
The jack is designed exclusively for jacking
up the vehicle at the jack take-up brackets
built into both sides of the vehicle. To help
avoid personal injury, use the jack only to lift
the vehicle during a wheel change. Never
get beneath the vehicle while it is supported
by the jack. Keep hands and feet away from
the area under the lifted vehicle. Always
firmly set parking brake and block wheels
before raising vehicle with jack.
Do not disengage parking brake while the
vehicle is raised. Be certain that the jack is
always vertical (plumb line) when in use, es-
pecially on hills. Always try to use the jack
on level surface. Make sure that the jack
arm is fully seated in the jack take-up brack-
et. Always lower the vehicle onto sufficient
capacity jackstands before working under
the vehicle.
Page 459 of 539
.
The jack take-up brackets are located di-
rectly behind")
458 Practical hintsFlat tire�
On wheel to be changed, loosen but do
not yet remove the wheel bolts
(approximately one full turn with
wrench).
The jack take-up brackets are located di-
rectly behind the front wheel housings and
in front of the rear wheel housings.1Take-up bracket
2Jack
�
Place jack2 on firm ground.
�
Position jack2 under the take-up
bracket1 so that it is always vertical
(plumb-line) as seen from the side,
even if the vehicle is parked on an in-
cline.
�
Jack up the vehicle until the wheel is a
maximum of 1.2 in (3 cm) from the
ground. Never start engine while vehi-
cle is raised.
!Do not position the jack on the body of
the vehicle, as this may cause damage
to the vehicle.
!Vehicles with factory-mounted
running-boards*:
Your vehicle is equipped with a scis-
sors-type jack (located under the cargo
compartment floor) designed for use
with factory-mounted running boards.
Only use this jack when jacking up ve-
hicles with factory-mounted running
boards as otherwise the vehicle’s
underbody can be damaged. See sepa-
rate instructions for scissors-type jack.
Page 460 of 539
.")
459 Practical hints
Flat tire
Removing the wheel
1Alignment bolt�
Unscrew upper-most wheel bolt and
remove it.
�
Replace this wheel bolt with alignment
bolt1 supplied with the tool kit
(�page 430).
�
Remove the remaining bolts.
�
Remove the wheel.Mounting the new wheel
1Wheel bolt for 18" and 19" light alloy
rims*
2Wheel bolt for 17" light alloy rims or
Minispare wheel (located in vehicle tool
kit (
�page 431))
Warning!
G
The jack is intended only for lifting the
vehicle briefly for wheel changes. It is not
suited for performing maintenance work
under the vehicle.�
Never start the engine when the vehicle
is raised.
�
Never lie down under the raised vehicle.
!Do not place wheel bolts in sand or dirt.
This could result in damage to the bolts
and wheel hub threads.
!Wheel bolts2 must be used when
mounting 17" light alloy rims or the
Minispare wheel. The use of any wheel
bolts other than wheel bolts2 for
17" light alloy rims or the Minispare
wheel will physically damage the vehi-
cle’s brakes.
��
Page 461 of 539

460 Practical hintsFlat tire�
Clean contact surfaces of wheel and
wheel hub.
�
Guide spare wheel onto the alignment
bolt and push it on the wheel hub.
�
Insert wheel bolts and tighten them
slightly.
�
Unscrew the alignment bolt.
�
Insert the remaining wheel bolt and
tighten it slightly.Lowering the vehicle
�
Lower vehicle by turning crank coun-
terclockwise until vehicle is resting ful-
ly on its own weight.
�
Remove the jack.
!To avoid paint damage, place wheel flat
against hub and hold it there while
installing first wheel bolt.Warning!
G
Always replace wheel bolts that are
damaged or rusted.
Never apply oil or grease to wheel bolts.
Damaged wheel hub threads should be
repaired immediately. Do not continue to
drive under these circumstances! Contact
an authorized Mercedes-Benz Light Truck
Center or call Roadside Assistance.
Incorrect wheel bolts or improperly tight-
ened wheel bolts can cause the wheel to
come off. This could cause an accident.
Make sure to use the correct wheel bolts.
Warning!
G
Use only genuine equipment
Mercedes-Benz wheel bolts. Other wheel
bolts may come loose.
Do not tighten the wheel bolts when the ve-
hicle is raised. Otherwise the vehicle could
fall off the jack.
��