Page 42 of 539
41 Getting started
Adjusting
Lowering:�
To lower the head restraint, push
release button1 in direction of arrow
and press down on the head restraint.
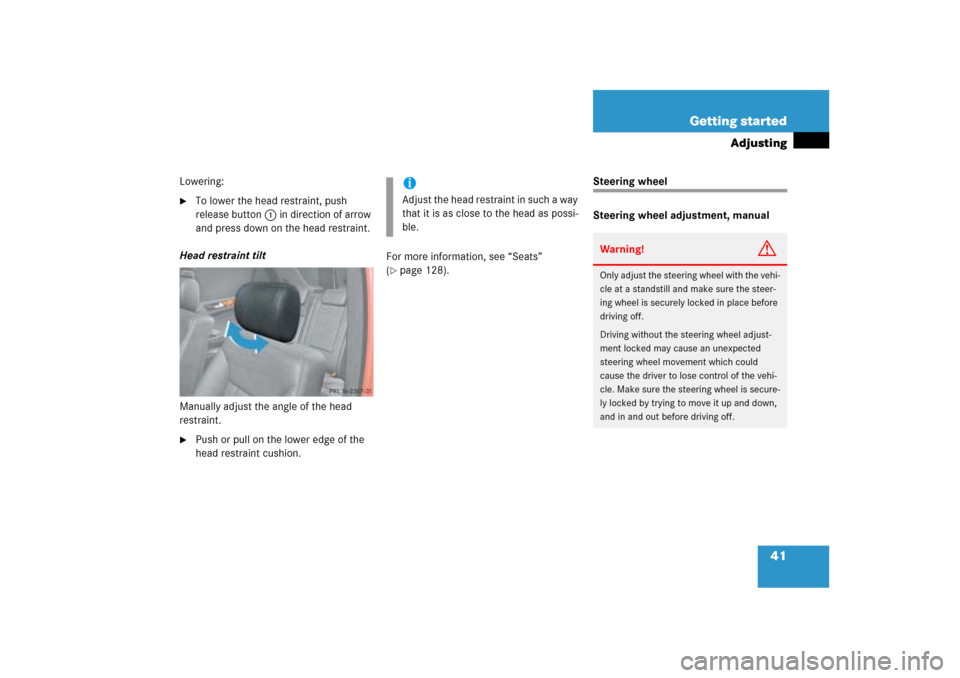
Head restraint tilt
Manually adjust the angle of the head
restraint.
�
Push or pull on the lower edge of the
head restraint cushion.For more information, see “Seats”
(
�page 128).
Steering wheel
Steering wheel adjustment, manual
iAdjust the head restraint in such a way
that it is as close to the head as possi-
ble.
Warning!
G
Only adjust the steering wheel with the vehi-
cle at a standstill and make sure the steer-
ing wheel is securely locked in place before
driving off.
Driving without the steering wheel adjust-
ment locked may cause an unexpected
steering wheel movement which could
cause the driver to lose control of the vehi-
cle. Make sure the steering wheel is secure-
ly locked by trying to move it up and down,
and in and out before driving off.
Page 43 of 539

42 Getting startedAdjustingThe adjustment handle for manual steering
wheel adjustment is located under the
steering column.�
To unlock the steering column, pull
handle out to its stop limit.
�
Move steering wheel to the desired
position.
Make sure your legs can move freely
and that all the displays (including
malfunction and indicator lamps) on
the instrument cluster are clearly
visible.
�
Push handle back to its original posi-
tion to relock the steering column.
The steering column is once again
locked into position.
�
Make sure the steering column is se-
curely locked by trying to move the
steering wheel up and down, in and out
before driving off.Steering wheel adjustment, electrical*!Do not drive the vehicle until you have
properly locked the steering column.
Warning!
G
Do not adjust the steering wheel while driv-
ing. Adjusting the steering wheel while driv-
ing could cause the driver to lose control of
the vehicle.
When leaving the vehicle, always remove the
SmartKey or SmartKey with KEYLESS-GO*
from the starter switch, take it with you, and
lock the vehicle.
Even with the SmartKey or SmartKey with
KEYLESS-GO* removed from the starter
switch or the SmartKey with KEYLESS-GO*
removed from the vehicle, the steering
wheel adjustment feature can be operated
when the driver’s door is open. Therefore,
do not leave children unattended in the ve-
hicle, or with access to an unlocked vehicle.
Unsupervised use of vehicle equipment may
cause an accident and/or serious personal
injury.
Page 44 of 539
.
1Adjusting steering column, in or out
2Adjusting steering column, up or down�
Swit")
43 Getting started
Adjusting
The stalk for steering wheel adjustment is
located on the steering column (lower left).
1Adjusting steering column, in or out
2Adjusting steering column, up or down�
Switch on the ignition (
�page 34).
or
�
Open the driver’s door.Adjusting steering column in or out
�
Move stalk forward or back in the direc-
tion of arrow1 until a comfortable
steering wheel position is reached with
your arms slightly bent at the elbow.
Adjusting steering column up or down
�
Move stalk up or down in the direction
of arrow2.
Make sure your legs can move freely
and that all the displays (including
malfunction and indicator lamps) on
the instrument cluster are clearly
visible.
Mirrors
Adjust the interior and exterior rear view
mirrors before driving so that you have a
good view of the road and traffic condi-
tions.
iThe memory function* (
�page 135)
lets you store the setting for the seat
position together with the setting for
the steering wheel and the exterior rear
view mirrors.
Warning!
G
In case of an accident, liquid electrolyte may
escape the mirror housing if the mirror glass
breaks.
Electrolyte has an irritating effect. Do not al-
low the liquid to come into contact with
eyes, skin, clothing, or respiratory system.
In case it does, immediately flush affected
area with water, and seek medical help if
necessary.!Electrolyte drops coming into contact
with the vehicle paint finish can only be
completely removed while in their
liquid state and by applying plenty of
water.
Page 45 of 539
.
Exterior rear view mirrorsThe bu")
44 Getting startedAdjustingInterior rear view mirror�
Manually adjust the interior rear view
mirror.
For more information, see “Rear view mir-
rors” (
�page 194).
Exterior rear view mirrorsThe buttons are located on the driver’s
door.
1Driver’s side exterior rear view mirror
button
2Adjustment button
3Passenger-side exterior rear view mir-
ror button
�
Switch on the ignition (
�page 34).
�
Press button1 for the driver’s side ex-
terior rear view mirror or button3 for
the passenger-side exterior rear view
mirror.
The indicator lamp on the respective
button comes on for
approximately 15 seconds.
�
Push adjustment button2 up, down,
left, or right according to the desired
setting.
Warning!
G
Exercise care when using the
passenger-side exterior rear view mirror.
The mirror surface is convex (outwardly
curved surface for a wider field of view). Ob-
jects in mirror are closer than they appear.
Check your interior rear view mirror or
glance over your shoulder before changing
lanes.
iIf you do not make adjustments to the
selected exterior rear view mirror
within 15 seconds, the indicator lamp
goes out. You then will have to select
the desired exterior rear view mirror
again before any adjustments can be
made. Adjustments can only be made
with the indicator lamp for the respec-
tive exterior rear view mirror button
illuminated.iThe memory function* (
�page 135)
lets you store the setting for the seat
position together with the setting for
the steering wheel and the exterior rear
view mirrors.
At low ambient temperatures, the
mirrors will be heated automatically.
Page 55 of 539
54 Getting startedDrivingSwitching on headlamps
For more information on headlamps, see
“Lighting” (
�page 138).
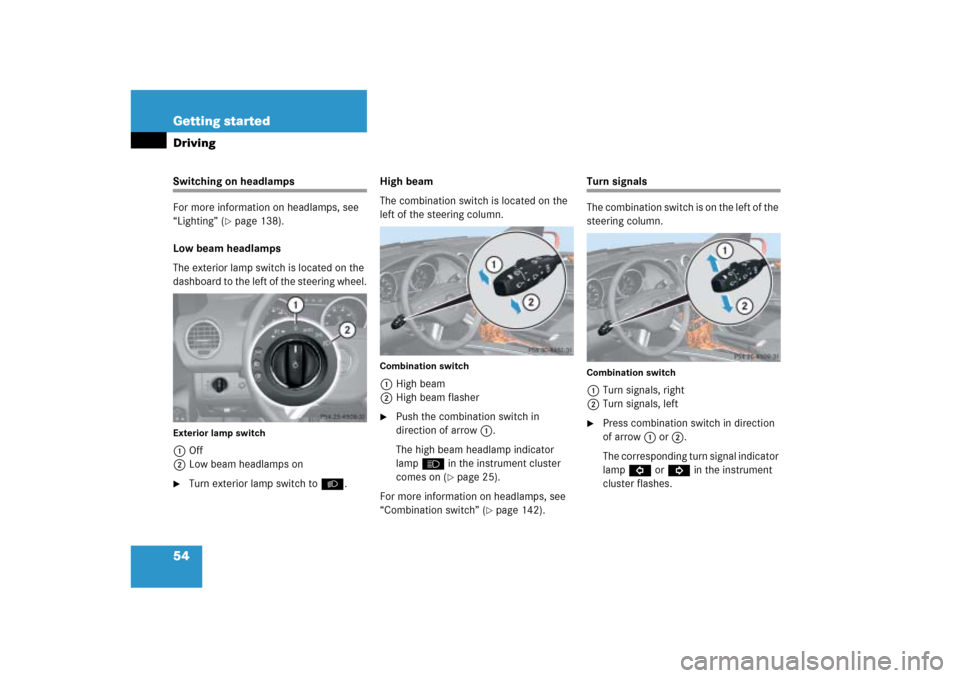
Low beam headlamps
The exterior lamp switch is located on the
dashboard to the left of the steering wheel.
Exterior lamp switch1Off
2Low beam headlamps on�
Turn exterior lamp switch toB.High beam
The combination switch is located on the
left of the steering column.
Combination switch1High beam
2High beam flasher�
Push the combination switch in
direction of arrow1.
The high beam headlamp indicator
lampA in the instrument cluster
comes on (
�page 25).
For more information on headlamps, see
“Combination switch” (
�page 142).
Turn signals
The combination switch is on the left of the
steering column.Combination switch1Turn signals, right
2Turn signals, left�
Press combination switch in direction
of arrow1 or2.
The corresponding turn signal indicator
lampL orK in the instrument
cluster flashes.
Page 56 of 539
55 Getting started
Driving
The combination switch resets automati-
cally after major steering wheel move-
ments.
Windshield wipers
The combination switch is located on the
left of the steering column.Combination switch1Single wipe
Wiping with windshield washer fluid
2Switching on windshield wipers�
Switch on the ignition (
�page 34).Switching on windshield wipers
�
Turn the combination switch to the
desired position depending on the in-
tensity of the rain.
0Windshield wipers off
IIntermittent wiping
IINormal wiper speed
IIIFast wiper speed
iTo signal minor directional changes,
move combination switch to point of
resistance and release. The turn signal
flashes three times.
iVehicles with rain sensor*:
Intermittent wiping interval is depen-
dent on wetness of windshield. Pauses
between wipes are automatically con-
trolled by the rain sensor.
Page 61 of 539

60 Getting startedParking and lockingYou have now completed your first drive.
You have properly stopped and parked
your vehicle. End your drive as follows.Warning!
G
With the engine not running, there is no
power assistance for the brake and the
steering system. In this case, it is important
to keep in mind that a considerably higher
degree of effort is necessary to brake and
steer the vehicle.
Warning!
G
Do not park this vehicle in areas where com-
bustible materials such as grass, hay or
leaves can come into contact with the hot
exhaust system, as these materials could be
ignited and cause a vehicle fire.
To reduce the risk of personal injury as a re-
sult of vehicle movement, before turning off
the engine and leaving the vehicle always:�
Keep right foot on brake pedal.
�
Firmly depress parking brake pedal.
�
Shift the automatic transmission to
positionP.
�
Slowly release brake pedal.
�
When parked on an incline, turn front
wheel towards the road curb.
�
Turn the SmartKey to starter switch
position0 and remove, or press
start/stop button (vehicles with
KEYLESS-GO*).
�
Take the SmartKey or the SmartKey with
KEYLESS-GO* and lock vehicle when
leaving.
Page 69 of 539

68 Safety and SecurityOccupant safetyWarning!
G
To reduce the risk of injury when the front
air bags inflate, it is very important for the
driver and front passenger to always be in a
properly seated position and to wear their
respective seat belt.
For maximum protection in the event of a
collision always be in normal seated position
with your back against the backrest. Fasten
your seat belt and make sure that it is prop-
erly positioned on your body (
�page 46).
Since the air bag inflates with considerable
speed and force, a proper seating and hands
on steering wheel position will help to keep
you at a safe distance from the air bag.
Occupants who are unbelted, out of position
or too close to the air bag can be seriously
injured or killed by an air bag as it inflates
with great force in the blink of an eye:
�
Sit properly belted in a nearly upright
position with your back against the seat
backrest.
�
Adjust the driver’s seat as far as possi-
ble rearward, still permitting proper op-
eration of vehicle controls. The distance
from the center of the driver’s breast-
bone to the center of the air bag cover
on the steering wheel must be at least
ten inches (25 cm) or more. You should
be able to accomplish this by a combina-
tion of adjustments to the seat and
steering wheel. If you have any prob-
lems, please see an authorized
Mercedes-Benz Light Truck Center.
�
Do not lean your head or chest close to
the steering wheel or dashboard.
�
Keep hands on the outside of steering
wheel rim. Placing hands and arms in-
side the rim can increase the risk and
potential severity of hand/arm injury
when driver’s front air bag inflates.
�
Adjust the front passenger seat as far as
possible rearward from the dashboard
when the seat is occupied.
�
Occupants, especially children, should
never place their bodies or lean their
heads in the area of the door where the
side impact air bag inflates. This could
result in serious injuries or death should
the air bag be triggered. Always sit near-
ly upright, properly use the seat belts
and use an appropriately sized infant or
toddler restraint or booster seat recom-
mended for the size and weight of the
child.
Failure to follow these instructions can
result in severe injuries to you or other
occupants.
If you sell your vehicle, it is important that
you make the buyer aware of this safety
information. Be sure to give the buyer this
Operator’s Manual.