Page 192 of 539

191 Controls in detail
Automatic transmission
Rocking the vehicle
Rocking the vehicle by shifting betweenD
andR can help free a vehicle stuck in mud
or snow. The engine control system of this
vehicle electronically limits shifting
betweenD andR to very low speeds
(i.e. approx. 2 mph). To shift betweenD
andR, move the gear selector lever past
the resistance point up or down.
Hill start assist system
On uphill grades, the hill start assist
system maintains the pressure in the
brake system for approximately
one second after you have released the
brake pedal. Therefore, you can start off
smoothly without the vehicle moving im-
mediately after releasing the brake pedal.
The hill start assist system is inactive�
on driving downhill
�
in positionN
�
with the parking brake setWorking on the vehicle
Towing a trailer
If you tow a trailer, note the following
points:�
Manually shift to a lower gear range
(�page 187) if the transmission hunts
between gears on inclines.
A lower gear range and reduction of
speed reduces the chance to overload
or overheat the engine.
For more information on trailer towing, see
the “Operation” section (
�page 314).
Warning!
G
The hill start assist system is not designed
to function as a parking brake and does not
prevent the vehicle from moving when
parked on an incline.
Always set the parking brake in addition to
shifting to park position
P.
iIf the ESP
® has switched off due to a
malfunction, the hill start assist system
is also unavailable.
Warning!
G
When working on the vehicle, set the
parking brake and shift to park positionP.
Otherwise the vehicle could roll away.
Page 193 of 539
192 Controls in detailAutomatic transmissionEmergency operation (Limp Home Mode)
If vehicle acceleration worsens or the
transmission no longer shifts, the trans-
mission is most likely operating in limp
home (emergency operation) mode. In this
mode only second gear and reverse gear
can be activated.�
Stop the vehicle.
�
Shift to park positionP.
�
Turn off the engine.
�
Wait at least ten seconds before
restarting.
�
Restart the engine.
�
Shift to drive positionD (for second
gear) or reverse gearR.
�
Have the transmission checked at an
authorized Mercedes-Benz Light Truck
Center as soon as possible.
Page 241 of 539

240 Controls in detailDriving systems
Canceling cruise control
There are several ways to cancel the cruise
control:�
Step on the brake pedal.
The cruise control is canceled. The last
speed set is stored for later use.
or
�
Briefly push the cruise control lever in
direction of arrow3 (
�page 239).
The cruise control is canceled. The last
speed set is stored for later use.
iOn uphill grades, the cruise control
may not be able to maintain the set
speed. Once the grade eases, the set
speed will be resumed.
On downhill grades, the cruise control
maintains the set speed with braking
from the vehicle’s braking system. In
addition, on longer downhill grades the
automatic transmission will automati-
cally downshift.
iThe last stored speed is canceled when
you turn off the engine.
iThe cruise control switches off auto-
matically when�
you step on the brake pedal
�
you depress the parking brake
pedal
The cruise control also switches off au-
tomatically when
�
the vehicle speed is below 20 mph
(30 km/h)
�
the ESP
® is in operation or
switched off with the ESP
® switch
(
�page 97)
�
you set the automatic transmission
toN while driving
An acoustic warning sounds and the
message
Cruise control OFF
appears
in the multifunction display.
Page 242 of 539

241 Controls in detail
Driving systems
Setting a higher speed
You can increase the speed in two stages.
Adjustment in 1 mph (Canada: 1 km/h)
increments�
Lift the cruise control lever to the resis-
tance point in direction of arrow1
(�page 239) and hold it up until the
desired speed is reached.
�
Release the cruise control lever.
The new speed is set.Adjustment in 5 mph
(Canada: 10 km/h) increments
!Setting the automatic transmission
toN while driving cancels the cruise
control. However, the automatic trans-
mission should not be set toN while
driving except to coast when the vehi-
cle is in danger of skidding (e.g. on icy
roads).iDepressing the accelerator pedal does
not deactivate the cruise control. After
brief acceleration (e.g. for passing), the
cruise control will resume the last
speed set.
iThe set value is increased in 1 mph
(Canada: 1 km/h) increments each
time you lift the cruise control lever to
the resistance point.
Warning!
G
You can increase the vehicle speed in 5 mph
(Canada 10 km/h) increments. When using
this feature, keep in mind that it may take a
brief moment until the vehicle has reached
the set speed.
Increase the vehicle speed to a value that
the prevailing road conditions permit. Other-
wise, sudden and unexpected acceleration
of the vehicle could cause an accident
and/or serious injury to you and others.iThe set value is increased in 5 mph
(Canada: 10 km/h) increments each
time you lift the cruise control lever
past the resistance point.
Page 249 of 539

248 Controls in detailDriving systems�
Release the cruise control lever.
The new speed is set.
Each time the set speed is changed, DSR
will appear in the multifunction dis-
play and the newly set speed is shown.
Off-road driving program
The off-road driving program is designed to
assist the driver when driving off-road in
terrain and crossing water. The off-road
driving program adjusts the engine power
and shifting of the automatic transmission
to be more suitable for the off-road use of
the vehicle. In addition, the ABS, ESP
®,
and 4-ETS designed for off-road use are
automatically activated.
In the following situations you should
switch to the Off-road driving program:
�
during off-road driving
�
when crossing water
�
when towing up or down on steep
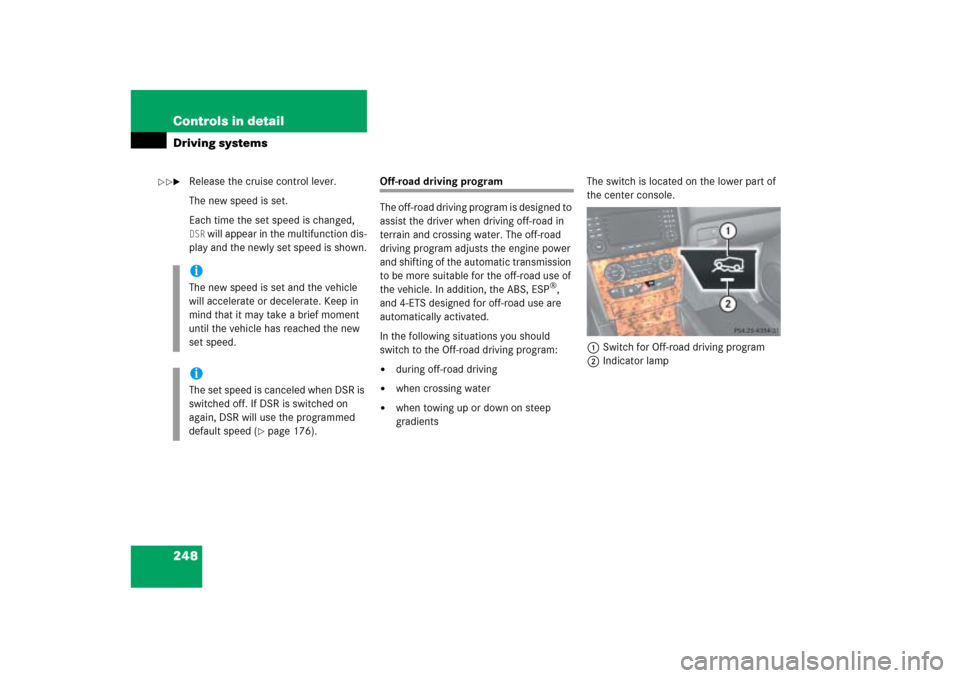
gradientsThe switch is located on the lower part of
the center console.
1Switch for Off-road driving program
2Indicator lamp
iThe new speed is set and the vehicle
will accelerate or decelerate. Keep in
mind that it may take a brief moment
until the vehicle has reached the new
set speed.iThe set speed is canceled when DSR is
switched off. If DSR is switched on
again, DSR will use the programmed
default speed (
�page 176).
��
Page 256 of 539

255 Controls in detail
Driving systems
The Parktronic system is an electronic
parking aid and designed to assist the
driver during parking maneuvers. It visually
and audibly indicates the relative distance
between the vehicle and an obstacle.
The Parktronic system is automatically
activated when you switch on the ignition,
release the parking brake, and set the
automatic transmission toD,R, orN.
The Parktronic system deactivates at
speeds over approximately 11 mph
(18 km/h). At lower speeds the Parktronic
system turns on again.
The Parktronic system also deactivates
when you set the automatic transmission
toP or depress the parking brake pedal.The Parktronic system monitors the sur-
roundings of your vehicle with six sensors
in the front bumper and four sensors in the
rear bumper.
1Sensors in the front bumper
Range of the sensors
To function properly, the sensors must be
free of dirt, ice, snow and slush. Clean the
sensors regularly, being careful not to
scratch or damaging the sensors, see
“Cleaning the Parktronic* system sensors”
(
�page 377).
Warning!
G
Make sure no persons or animals are in the
area in which you are maneuvering. You
could otherwise injure them.
Page 257 of 539

256 Controls in detailDriving systemsFront sensors
Rear sensorsMinimum distance
If the system detects an obstacle in this
range, all the distance warning segments
illuminate and you hear a warning signal. If
the obstacle is closer than the minimum
distance, the actual distance may no long-
er be indicated by the system.
Warning indicators
Visual signals indicate to the driver the rel-
ative distance between the sensors and an
obstacle. The warning indicator for the
front area is located above the center air
vents in the dashboard. The warning indi-
cator for the rear area is located in the rear
passenger compartment in the roof dome.
Front area warning indicator1Left side of the vehicle
2Right side of the vehicle
3Readiness indicators
Each warning indicator is divided into five
yellow and two red segments for either
side of the vehicle. The Parktronic system
is operational when the readiness
indicators3 are illuminated.
The position of the automatic transmission
determines which warning indicator will be
activated.
Center
approx. 40 in (100 cm)
Corners
approx. 24 in (60 cm)
Center
approx. 48 in (120 cm)
Corners
approx. 32 in (80 cm)
!During parking maneuvers, pay special
attention to objects located above or
below the height of the sensors (e.g.
planters or trailer hitches). The
Parktronic system will not detect such
objects at close range and damage to
your vehicle or the object may result.
Ultrasonic signals from outside sourc-
es (e.g. working jackhammers, car
wash or the air brakes of trucks) may
impair the operation of the Parktronic
system.
Center
approx. 8 in (20 cm)
Corners
approx. 6 in (15 cm)
Page 302 of 539

301 Operation
Driving instructions
After hard braking, it is advisable to drive
on for some time, rather than immediately
park, so that the air stream will cool down
the brakes faster.Driving off
Apply the brakes to test them briefly after
driving off. Perform this procedure only
when the road is clear of other traffic.
Warm up the engine smoothly. Do not
place full load on the engine until the oper-
ating temperature has been reached.When starting off on a slippery surface, do
not allow a drive wheel to spin for an
extended period with the ESP
® switched
off. Doing so may cause serious damage to
the drivetrain which is not covered by the
Mercedes-Benz Limited Warranty.
Parking
!When driving down long and steep
grades, relieve the load on the brakes
by shifting into a lower gear to use the
engine’s braking power. This helps
prevent overheating of the brakes and
reduces brake pad wear.
!Simultaneously depressing the
accelerator pedal and applying the
brake reduces engine performance and
causes premature brake and drivetrain
wear.!Set the parking brake whenever park-
ing or leaving the vehicle. In addition,
move gear selector lever to positionP.
When parking on hills, always turn front
wheels towards the curb.
Warning!
G
To reduce the risk of personal injury, or
damage to the vehicle powertrain, as a
result of vehicle/ trailer movement, before
turning off the engine and leaving the vehi-
cle always:�
Keep right foot on brake pedal.
�
Firmly depress parking brake pedal.
�
Shift the automatic transmission to
positionP.
�
Slowly release brake pedal and let vehi-
cle and trailer roll into chocks until
stopped.
�
When parked on an incline, turn front
wheel towards the road curb.
�
Have a second person place wheel
chocks on downhill side of left and right
trailer wheels.
��