Page 240 of 417

239 Operation
At the gas station
�At the gas station
Refueling
The fuel filler flap is located on the
right-hand side of the vehicle towards the
rear.
Locking/unlocking the vehicle with the re-
mote control automatically locks/unlocks
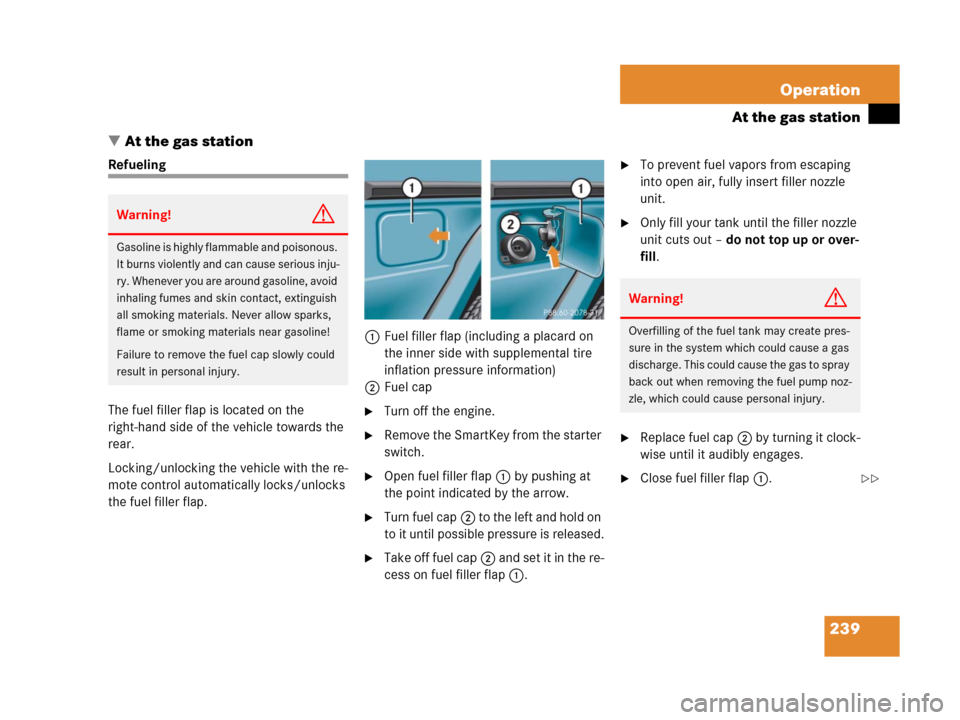
the fuel filler flap.1Fuel filler flap (including a placard on
the inner side with supplemental tire
inflation pressure information)
2Fuel cap
�Turn off the engine.
�Remove the SmartKey from the starter
switch.
�Open fuel filler flap1 by pushing at
the point indicated by the arrow.
�Turn fuel cap2 to the left and hold on
to it until possible pressure is released.
�Take off fuel cap2 and set it in the re-
cess on fuel filler flap1.
�To prevent fuel vapors from escaping
into open air, fully insert filler nozzle
unit.
�Only fill your tank until the filler nozzle
unit cuts out – do not top up or over-
fill.
�Replace fuel cap2 by turning it clock-
wise until it audibly engages.
�Close fuel filler flap1.
Warning!G
Gasoline is highly flammable and poisonous.
It burns violently and can cause serious inju-
ry. Whenever you are around gasoline, avoid
inhaling fumes and skin contact, extinguish
all smoking materials. Never allow sparks,
flame or smoking materials near gasoline!
Failure to remove the fuel cap slowly could
result in personal injury.
Warning!G
Overfilling of the fuel tank may create pres-
sure in the system which could cause a gas
discharge. This could cause the gas to spray
back out when removing the fuel pump noz-
zle, which could cause personal injury.
��
Page 241 of 417
240 Operation
At the gas station
Check regularly and before a long trip
G 500
1Coolant
2Brake fluid
!
The fuel filler cap is tethered to the fuel
filler neck. Do not drop the cap. It could
damage the vehicle paint finish.
When refueling the vehicle, make cer-
tain that no gasoline comes into con-
tact with plastic tail lamp to prevent
damaging the lens.
i
Use only premium unleaded gasoline
with a minimum Posted Octane Rating
of 91 (average of 96 RON / 86 MON).
Information on gasoline quality can
normally be found on the fuel pump.
More information on gasoline can be
found in the Factory Approved Service
Products pamphlet.
i
Leaving the engine running and the fuel
cap open can cause the ? malfunc-
tion indicator lamp (USA only) or the
± malfunction indicator lamp
(Canada only) to illuminate.
See also “Practical hints” section
(
�page 294).
��
Page 353 of 417

352 Practical hints
Flat tire
Lowering the vehicle
�Using the pump handle, open the low-
ering screw on the jack approximately
one turn (
�page 350).
The vehicle is resting fully on its own
weight.
�Remove the jack.
After use, disassemble pump handle
(
�page 350) and store jack in the des-
ignated storage compartment
(
�page 324).
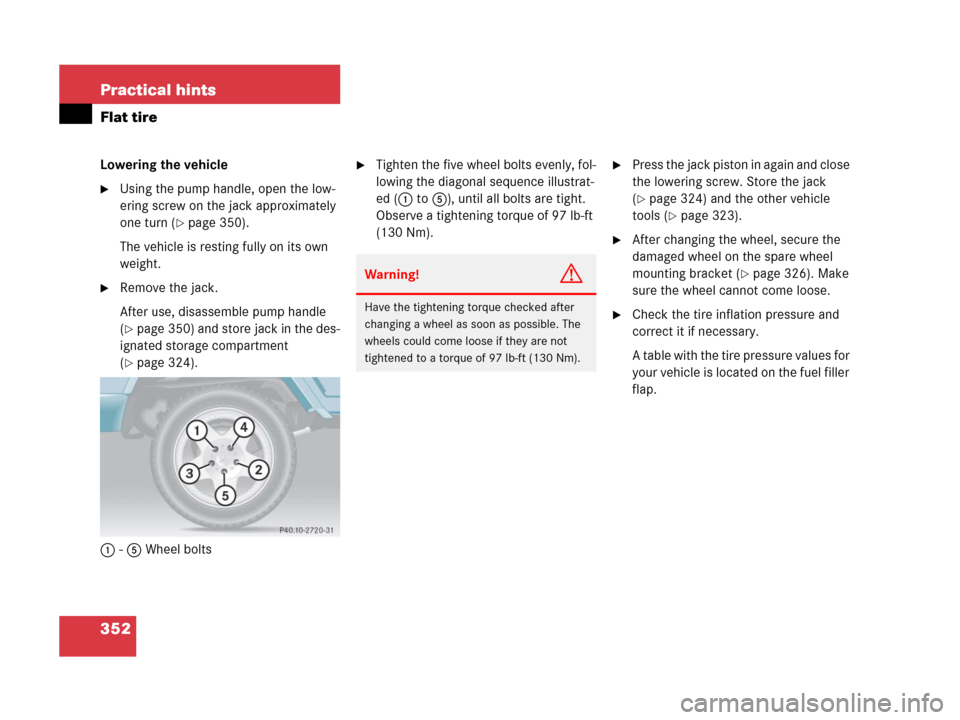
1-5 Wheel bolts
�Tighten the five wheel bolts evenly, fol-
lowing the diagonal sequence illustrat-
ed (1 to 5), until all bolts are tight.
Observe a tightening torque of 97 lb-ft
(130 Nm).�Press the jack piston in again and close
the lowering screw. Store the jack
(
�page 324) and the other vehicle
tools (
�page 323).
�After changing the wheel, secure the
damaged wheel on the spare wheel
mounting bracket (
�page 326). Make
sure the wheel cannot come loose.
�Check the tire inflation pressure and
correct it if necessary.
A table with the tire pressure values for
your vehicle is located on the fuel filler
flap.
Warning!G
Have the tightening torque checked after
changing a wheel as soon as possible. The
wheels could come loose if they are not
tightened to a torque of 97 lb-ft (130 Nm).