Page 87 of 521

86 Safety and SecurityOccupant safetySelf-test Occupant Classification Sys-
tem
After turning the SmartKey in the starter
switch to position1 or2 or pressing the
KEYLESS-GO* start/stop button once or
twice, the 75 indicator lamp1
located in the center console illuminates. If
an adult occupant is properly sitting on the
front passenger seat and the system sens-
es the occupant as being an adult, the
75 indicator lamp will illuminate
and go out after approximately 6 seconds.
If the seat is not occupied and the system
senses the front passenger seat as being
empty, the 75 indicator lamp will
illuminate and not go out. For more information, see the “Practical
hints” section (
�page 393).Installation of infant and child restraint
systems
This vehicle is equipped with tether an-
chorages for a top tether strap at each of
the rear seating positions.
Not foldable rear seat backrest
1Cover
�
Remove cover1 from anchorage ring.
�
Guide tether strap between head re-
straint and top of the seat back.
Warning!
G
If the indicator lamp should not illuminate,
the system is not functioning. You must see
an authorized Mercedes-Benz Center before
seating any child on the front passenger
seat.Warning!
G
Never place anything between seat cushion
and child seat (e.g. pillow), since it reduces
the effectiveness of the Occupant Classifi-
cation System. The bottom of the child seat
must make full contact with the passenger
seat cushion. An incorrectly mounted child
seat could cause injuries to the child in case
of an accident, instead of increasing protec-
tion for the child.
Follow the manufacturer’s instructions for
installation of child seats.
Page 90 of 521

89 Safety and Security
Occupant safety
Blocking of rear door window operation
1Override switch
2Indicator lamp�
Press override switch1.
Indicator lamp2 comes on. The rear
door windows can no longer be operat-
ed using the switches located in the
rear doors.
!Make sure the seat belt for the center
seat can operate freely with a child
seat installed.iNon-LATCH type child seats may also
be used and can be installed using the
vehicle’s seat belt system (
�page 78).
Install child seat according to the man-
ufacturer’s instructions.
Warning!
G
Children too big for a toddler restraint must
ride in seats using regular seat belts. Posi-
tion shoulder belt across chest and shoul-
der, not face or neck. A booster seat may be
necessary to achieve proper belt positioning
for children over 41 lbs until they reach a
height where a lap/shoulder belt fits proper-
ly without a booster.
Install child seat according to manufactur-
er’s instructions.
T h e c h i l d s e a t m u s t b e f i r m l y a t t a c h e d i n t h e
right and left side anchors2.
An incorrectly mounted child seat may come
loose during an accident which could result
in serious injury or death to the child.
Damaged or impact damaged child seats or
child seat mounting fittings must be re-
placed.
Do not leave children unattended in the ve-
hicle, even if the children are secured in a
child restraint system.
!Operation of the rear door windows
with the switches located on the door
control panel of the driver’s door is still
possible.
Page 93 of 521

92 Safety and SecurityDriving safety systemsIn this section you will find information on
the following driving safety systems:�
ABS (A
ntilock B
rake S
ystem)
�
BAS (B
rake A
ssist S
ystem)
�
ESP
® (E
lectronic S
tability P
rogram)
�
Electrohydraulic brake system
�
4MATIC (Four Wheel Electronic
Traction System)
ABS
The Antilock Brake System (ABS) regulates
the brake pressure so that the wheels do
not lock during braking. This allows you to
maintain the ability to steer your vehicle.
The ABS is functional above a speed of ap-
proximately 5 mph (8 km/h) independent
of road surface conditions.
On slippery road surfaces, the ABS will re-
spond even to light brake pressure.
The - indicator lamp in the instrument
cluster comes on when you switch on the
ignition. It goes out when the engine is run-
ning.
iIn winter operation, the maximum ef-
fectiveness of the ABS, the BAS, the
ESP
®, electrohydraulic brake system
and 4MATIC is only achieved with win-
ter tires (
�page 358), or snow chains
as required.
Warning!
G
The following factors increase the risk of ac-
cidents:�
Excessive speed, especially in turns
�
Wet and slippery road surfaces
�
Following another vehicle too closely
The ABS, BAS, ESP
®, electrohydraulic brake
system and 4MATIC cannot reduce this risk.
Always adjust your driving style to the pre-
vailing road and weather conditions.
Warning!
G
Do not pump the brake pedal. Use firm,
steady brake pedal pressure instead. Pump-
ing the brake pedal defeats the purpose of
the ABS and significantly reduces braking
effectiveness.
Page 103 of 521

102 Safety and SecurityAnti-theft systemsThe alarm system will also be triggered
when�
someone attempts to raise the vehicle
�
the vehicle is opened using the
mechanical key
�
someone opens a door from the inside
�
someone opens the trunk with the
emergency release buttonArming the alarm system
The indicator lamp located in the central
locking switch in the center console.
1Indicator lamp
�
Lock the vehicle with the SmartKey or
KEYLESS-GO*.
The turn signal lamps flash three times
to indicate that the alarm system is
armed. The indicator lamp1 begins to
flash after approximately 30 seconds
after arming the alarm system.
iIf the alarm stays on for more than
30 seconds, a call to the Response
Center is initiated automatically by the
Tele Aid system* (
�page 286) provid-
ed Tele Aid service was subscribed to
and properly activated, and that neces-
sary cellular service and GPS coverage
are available.
iIf the turn signal lamps do not flash
three times, one of the following ele-
ments may not be properly closed:�
a door
�
the trunk
�
the hood
Close the respective element and lock
the vehicle again.
Page 105 of 521

104 Safety and SecurityAnti-theft systemsDisarming tow-away alarm
To prevent triggering the tow-away alarm
feature, switch off the tow-away alarm be-
fore towing the vehicle, or when parking on
a surface subject to movement, such as a
ferry or auto train.
The button is located on the overhead con-
trol panel.
1Tow-away alarm off button�
Switch off the ignition and remove the
SmartKey from the starter switch.
�
Press button1.
The indicator lamp in the button1
comes on briefly.
�
Exit and lock the vehicle with the
SmartKey or (vehicles with
KEYLESS-GO*) the lock button at each
door handle.Canceling tow-away alarm
With the SmartKey
�
Insert the SmartKey in the starter
switch.
or
�
Press button Œ or ‹ on the
SmartKey.
With KEYLESS-GO*
�
Pull an outside door handle.
The SmartKey with KEYLESS-GO must
be within 3 ft (1 m) of the vehicle.
or
�
Press the KEYLESS-GO* start/stop
button (
�page 38).
The SmartKey with KEYLESS-GO must
be inside the vehicle.
iYou cannot disarm the tow-away alarm
when the ignition is switched on.
iWhen you unlock the vehicle, the
tow-away protection disarms automati-
cally.
The tow-away alarm remains disarmed
until you lock the vehicle again.
Page 121 of 521

120 Controls in detailLocking and unlockingOpening the trunk
Opening the trunk from the outside
A minimum height clearance of 5.90 ft
(1.80 m) is required to open the trunk lid.
The handle is located above the rear li-
cense plate recess.
In vehicles without KEYLESS-GO*: The ve-
hicle must be unlocked.�
Pull on the handle.
The trunk opens.Opening the trunk from the inside
You can open the trunk from the inside if
the vehicle is stationary.
A minimum height clearance of 5.90 ft
(1.80 m) is required to open the trunk lid.
The switch is located on the driver’s door.
1Remote trunk switch with indicator
lamp
!The trunk lid swings open upwards au-
tomatically. Always make sure there is
sufficient overhead clearance.iIf the trunk does not open, it is still
locked separately (
�page 128).
iThe trunk can also be opened using
button Š on the SmartKey or
SmartKey with KEYLESS-GO* or from
its inside in an emergency, see “Trunk
emergency release” (
�page 127).
iIf the vehicle was previously centrally
locked, the trunk will lock automatical-
ly after closing it.
To confirm locking all turn signal lamps
flash three times.
Page 122 of 521

121 Controls in detail
Locking and unlocking
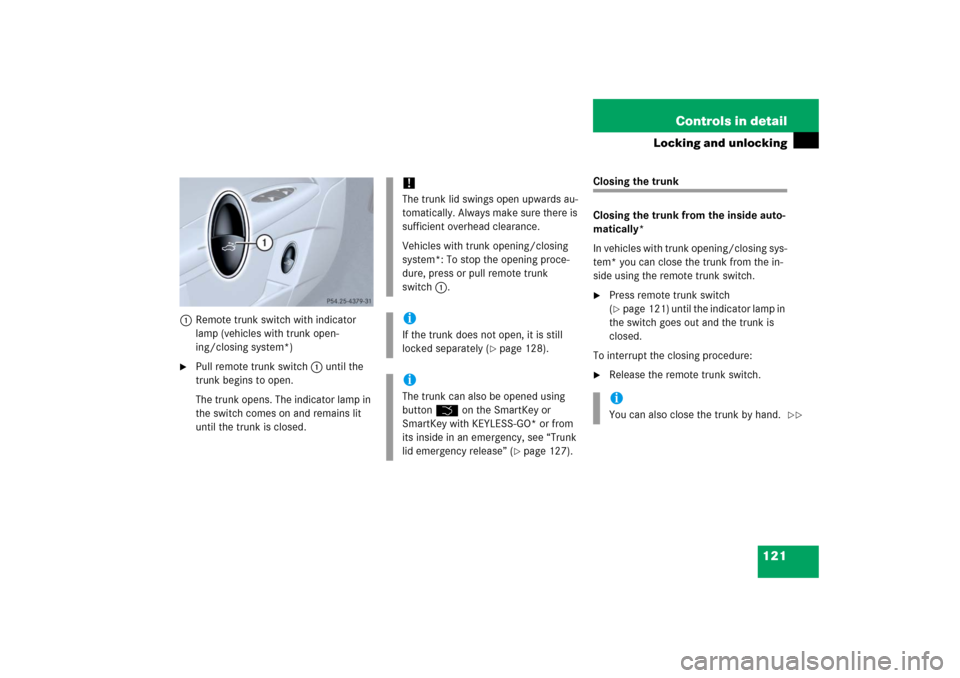
1Remote trunk switch with indicator
lamp (vehicles with trunk open-
ing/closing system*)�
Pull remote trunk switch1 until the
trunk begins to open.
The trunk opens. The indicator lamp in
the switch comes on and remains lit
until the trunk is closed.
Closing the trunk
Closing the trunk from the inside auto-
matically*
In vehicles with trunk opening/closing sys-
tem* you can close the trunk from the in-
side using the remote trunk switch.�
Press remote trunk switch
(�page 121) until the indicator lamp in
the switch goes out and the trunk is
closed.
To interrupt the closing procedure:
�
Release the remote trunk switch.
!The trunk lid swings open upwards au-
tomatically. Always make sure there is
sufficient overhead clearance.
Vehicles with trunk opening/closing
system*: To stop the opening proce-
dure, press or pull remote trunk
switch1.iIf the trunk does not open, it is still
locked separately (
�page 128).
iThe trunk can also be opened using
button Š on the SmartKey or
SmartKey with KEYLESS-GO* or from
its inside in an emergency, see “Trunk
lid emergency release” (
�page 127).
iYou can also close the trunk by hand.
��
Page 136 of 521

135 Controls in detailSeats
Drive-dynamic features
Activating�
Press button4 (
�page 134).
The indicator lamp on the button
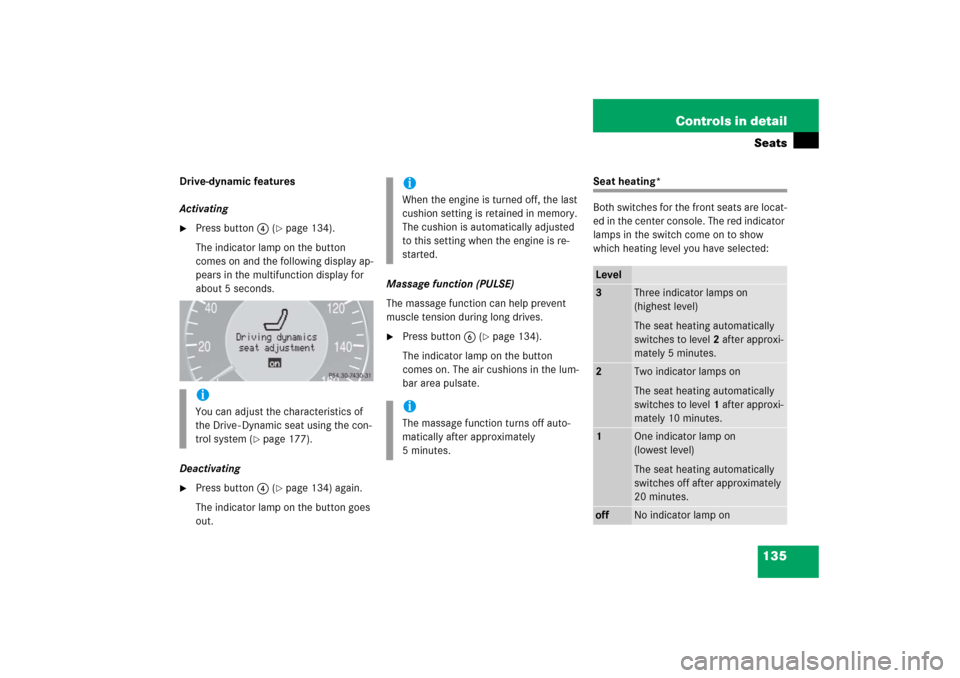
comes on and the following display ap-
pears in the multifunction display for
about 5 seconds.
Deactivating
�
Press button4 (
�page 134) again.
The indicator lamp on the button goes
out.Massage function (PULSE)
The massage function can help prevent
muscle tension during long drives.
�
Press button6 (
�page 134).
The indicator lamp on the button
comes on. The air cushions in the lum-
bar area pulsate.
Seat heating*
Both switches for the front seats are locat-
ed in the center console. The red indicator
lamps in the switch come on to show
which heating level you have selected:
iYou can adjust the characteristics of
the Drive - Dynamic seat using the con-
trol system (
�page 177).
iWhen the engine is turned off, the last
cushion setting is retained in memory.
The cushion is automatically adjusted
to this setting when the engine is re-
started.iThe massage function turns off auto-
matically after approximately
5 minutes.
Level3
Three indicator lamps on
(highest level)
The seat heating automatically
switches to level2 after approxi-
mately 5 minutes.
2
Two indicator lamps on
The seat heating automatically
switches to level1 after approxi-
mately 10 minutes.
1
One indicator lamp on
(lowest level)
The seat heating automatically
switches off after approximately
20 minutes.
off
No indicator lamp on