Page 117 of 521
 or lock button at
trunk lid (�page 117).
�
All turn signal lamps flash three
times")
116 Controls in detailLocking and unlockingGlobal locking�
Press lock button on an outside door
handle (
�page 64) or lock button at
trunk lid (�page 117).
�
All turn signal lamps flash three
times.
�
An acoustic signal sounds three
times (if equipped and feature acti-
vated).
�
The locking knobs in the doors
move down.
�
The anti-theft alarm system is
armed.
Restoring to factory setting
�
Press and hold buttonsŒ and‹
simultaneously for about 6 seconds un-
til battery check lamp5 (
�page 111)
flashes twice.Checking the batteries
�
Press button‹ orŒ.
Battery check lamp5 (
�page 111)
comes on briefly to indicate that the
SmartKey batteries are in order.
!If you can no longer lock or unlock the
vehicle with the SmartKey with
KEYLESS-GO, then the batteries in the
SmartKey are discharged, the
SmartKey with KEYLESS-GO is mal-
functioning or the vehicle battery is
drained.�
Check the batteries in the
SmartKey with KEYLESS-GO
(�page 116) and replace them if
necessary (
�page 431).
�
Use the mechanical key to unlock
the driver’s door (
�page 426) and
the trunk (
�page 427).
�
Use the mechanical key to lock the
driver’s door (
�page 426) and the
trunk (
�page 128).
�
Have the vehicle battery checked
by an authorized Mercedes-Benz
Center.
If the SmartKey with KEYLESS-GO is
malfunctioning, contact an authorized
Mercedes-Benz Center.
!If battery check lamp5 does not
come on briefly during check, then the
SmartKey batteries are discharged.
Replace the batteries (
�page 431).
You can obtain the required batteries
at any authorized Mercedes-Benz
Center.
iIf the batteries are checked within sig-
nal range of the vehicle, pressing the
button‹ orŒ will lock or unlock
the vehicle accordingly.
Page 119 of 521
 is required to open the trunk")
118 Controls in detailLocking and unlockingUnlocking and opening the trunk
You can unlock and open the trunk sepa-
rately.
A minimum height clearance of 5.90 ft
(1.80 m) is required to open the trunk lid.
The handle is located in the rear license
plate recess.�
Pull on the handle
or
�
Press and hold buttonŠ until the
trunk lid unlocks and begins to open.Loss of the SmartKey with KEYLESS-GO
If you lose your SmartKey with
KEYLESS-GO, you should do the following:
�
Have the SmartKey with KEYLESS-GO
deactivated by an authorized
Mercedes-Benz Center.
�
Report the loss immediately to your car
insurance company.
�
Have the mechanical lock replaced if
necessary.
Your authorized Mercedes-Benz Center
will be glad to supply you with a replace-
ment.
!The trunk lid swings open upwards au-
tomatically. Always make sure there is
sufficient overhead clearance.
Vehicles with trunk opening/closing
system*: to stop the opening proce-
dure, press buttonŠ. The trunk lid
stops moving.iIf the trunk does not open, it is still
locked separately (
�page 128).
iIf the vehicle was previously centrally
locked with KEYLESS-GO, the trunk will
lock automatically after closing it.
To confirm locking all turn signal lamps
flash three times.
Page 139 of 521

138 Controls in detailMemory functionPrior to operating the vehicle, the driver
should check and adjust the seat height,
seat position fore and aft, and seat back-
rest angle if necessary, to ensure adequate
control, reach and comfort. The head re-
straint should also be adjusted for proper
height. See also the section on air bags
(�page 67) for more information on prop-
er seat positioning.
In addition, adjust the steering wheel to
ensure adequate control, reach, operation
and comfort. Both the interior and exterior
rear view mirrors should be adjusted for
adequate rear vision.
Fasten seat belts. Infants and small chil-
dren should be seated in a properly se-
cured restraint system that complies with
U.S. Federal Motor Vehicle Safety Stan-
dards 213 and 225 and Canadian Motor
Vehicle Safety Standards 213 and 210.2.The following settings are stored when us-
ing the buttons on the driver’s door:
�
Driver’s seat, backrest, head restraint
position and settings for multicontour
seat
�
Steering wheel position
�
Exterior rear view mirror positions
The following settings are stored when us-
ing the buttons on the front passenger
door:
�
Front passenger seat, backrest, head
restraint position and settings for mul-
ticontour seat
Warning!
G
Do not activate the memory function while
driving. Activating the memory function
while driving could cause the driver to lose
control of the vehicle.
Page 140 of 521
139 Controls in detail
Memory function
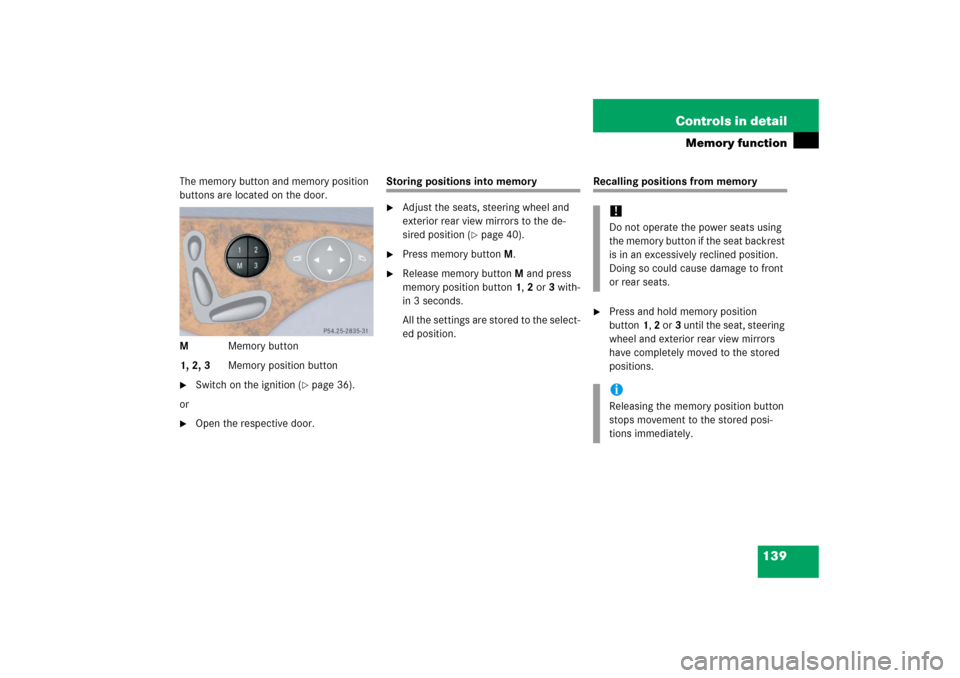
The memory button and memory position
buttons are located on the door.
MMemory button
1, 2, 3Memory position button�
Switch on the ignition (
�page 36).
or
�
Open the respective door.
Storing positions into memory�
Adjust the seats, steering wheel and
exterior rear view mirrors to the de-
sired position (
�page 40).
�
Press memory buttonM.
�
Release memory buttonM and press
memory position button 1, 2 or 3 with-
in 3 seconds.
All the settings are stored to the select-
ed position.
Recalling positions from memory�
Press and hold memory position
button1, 2 or3 until the seat, steering
wheel and exterior rear view mirrors
have completely moved to the stored
positions.!Do not operate the power seats using
the memory button if the seat backrest
is in an excessively reclined position.
Doing so could cause damage to front
or rear seats.iReleasing the memory position button
stops movement to the stored posi-
tions immediately.
Page 155 of 521
 are controlled by the buttons
on the mu")
154 Controls in detailControl systemMultifunction steering wheel
The displays in the multifunction display
and the settings in the control system
(�page 153) are controlled by the buttons
on the multifunction steering wheel.
Pressing any of the buttons on the multi-
function steering wheel will alter what is
shown in the multifunction display.
The information available in the multifunc-
tion display is arranged in menus, each
containing a number of functions or sub-
menus.
The individual functions are then found
within the relevant menu (radio or CD op-
erations under
AUDIO
, for example). These
functions serve to call up relevant informa-
tion or to customize the settings for your
vehicle.
1
Multifunction display in the
speedometerOperating the control system
2
Selecting the submenu or setting
the volume:
Press buttonæup/to increaseçdown/to decrease
3
Telephone*:
Press buttonsto take a call
to dial a calltto end a call
to reject an incoming call
4
Menu systems:
Press buttonèfor next menuÿfor previous menu
5
Moving within a menu:
Press buttonjfor next displaykfor previous display
Page 182 of 521

181 Controls in detail
Control system
Answering a call
When your telephone is ready to receive
calls, you can answer a call at any time. In
the multifunction display you will then see
the message:�
Press buttons.
You have answered the call. In the mul-
tifunction display you see the length of
the call.Ending a call
�
Press buttont.
You have ended the call. In the multi-
function display you will again see the
standby message.
Dialing a number from the phone book
If your telephone is ready to receive calls,
you may select and dial a number from the
phone book at any time.
�
Press buttonÿ orè repeatedly
until you see the
Tel
menu in the mul-
tifunction display.
�
Press buttonj ork.
The control system reads the phone
book which is stored in the telephone.
This may take up to 30 seconds. In the
multifunction display you will see the
message
Please wait
.
When the message
Please wait
disap-
pears, the phone book has been load-
ed.
�
Press buttonj ork repeatedly
until the desired name appears in the
multifunction display.
The stored names are displayed in as-
cending or descending alphabetical or-
der.
iIf you do not wish to accept a call,
press buttont.
iIf you press and hold buttonj
ork for longer than 1 second, the
system scrolls rapidly through the list
of names until you release the button
again.
Cancel the quick search mode by
pressing buttont.
��
Page 183 of 521
182 Controls in detailControl system�
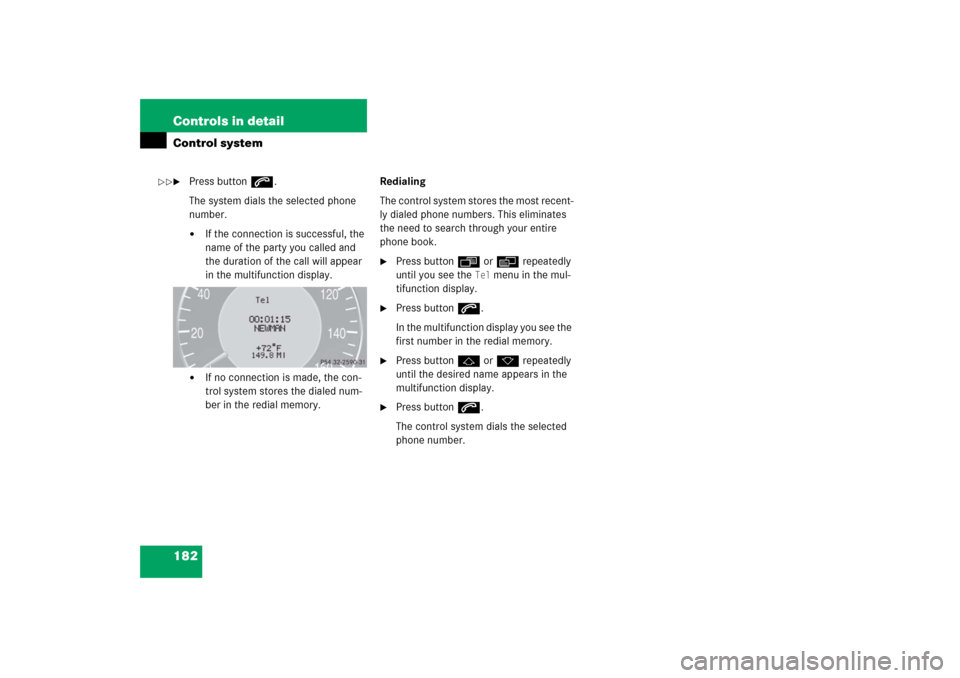
Press buttons.
The system dials the selected phone
number.�
If the connection is successful, the
name of the party you called and
the duration of the call will appear
in the multifunction display.
�
If no connection is made, the con-
trol system stores the dialed num-
ber in the redial memory.Redialing
The control system stores the most recent-
ly dialed phone numbers. This eliminates
the need to search through your entire
phone book.
�
Press buttonÿ orè repeatedly
until you see the
Tel
menu in the mul-
tifunction display.
�
Press buttons.
In the multifunction display you see the
first number in the redial memory.
�
Press buttonj ork repeatedly
until the desired name appears in the
multifunction display.
�
Press buttons.
The control system dials the selected
phone number.
��
Page 192 of 521

191 Controls in detail
Automatic transmission
Steering wheel gearshift control one-touch gearshifting E 55 AMG
The steering wheel gearshift control pro-
vides an alternative method for changing
the gears manually and limiting or extend-
ing the gear range for automatic shifting
with the gear selector lever in positionD
and driving in the automatic program
modeC orS.The steering wheel gearshift buttons are
located to the left and right of the steering
wheel.
1Left button: downshift
2Right button: upshift
iFor information on using the steering
wheel gearshift control in manual pro-
gram modeM (E 55 AMG only), see
“Manual shift program” (
�page 193).
iTo avoid overrevving the engine when
downshifting with steering wheel
gearshift buttons, the transmission will
not shift to a lower gear if the engine’s
max. speed would be exceeded.
!Allow engine to warm up under low
load use. Do not place full load on the
engine until the operating temperature
has been reached.
Shift into reverse gearR or parking
positionP only when the vehicle is
stopped.
Avoid spinning of a drive wheel for an
extended period when driving off on
slippery road surfaces. This may cause
serious damage to the drivetrain which
is not covered by the Mercedes-Benz
Limited Warranty.
iYou cannot shift with the steering
wheel gearshift buttons when the gear
selector lever is in positionP,N orR.
The last selected program
mode (CorS) is switched on when the
engine is restarted in the automatic
program mode.