Page 270 of 521
.
�
Insert storage box from behind into
cargo compartment with the opening
pointing in direct")
269 Controls in detail
Loading
Installing the storage box�
Fold rear seat backrests forward
(�page 260).
�
Insert storage box from behind into
cargo compartment with the opening
pointing in direction of travel.
�
Press locking hooks of storage box into
the space between the rear seat back-
rest and the cargo compartment.
�
Fold rear seat backrest to the rear
(�page 261).
Loading the storage box
�
Fold rear seat backrests forward
(�page 260).
�
Fill storage box with cargo through the
opening on the front side.
�
Fold rear seat backrest to the rear
(�page 261).
Removing the storage box
�
Fold rear seat backrests forward
(�page 260).
�
Slide locking hooks of storage box for-
ward out of the retainers.
�
Pull storage box to the rear and remove
it from cargo compartment.
�
Fold rear seat backrest to the rear
(�page 261).
Twin roller blind
The twin roller blind contains a cargo net
and a cargo compartment cover.
It is located on the seat backrest of the
rear bench seat.
Cargo net
iThe storage box is additionally held in
place from above by the twin roller
blind.
iThe storage box in the cargo compart-
ment is covered by the rear bench seat
and can hold a maximum of 44 lbs
(20 kg) cargo.
Warning!
G
The cargo net cannot hold back heavy loads.
The transported load should therefore al-
ways be tied down.
Objects which are insufficiently secured
could otherwise injure you if they are thrown
around in the event of an accident, during
hard braking or steering maneuvers.
Page 273 of 521

272 Controls in detailUseful featuresStorage compartments Glove box
1Glove box lid release
2Compartment for mobile
phone/glasses
Opening the glove box
�
Push glove box lid release1.
The glove box lid opens downward.
Closing the glove box
�
Push glove box lid up to close.Storage compartment in the center
console (no CD changer* installed)
1Opening/closing button
�
Press button1 to open.
The control panel swings out upward
and the storage compartment extends
out.
�
Press button1 to close.
Warning!
G
To help avoid personal injury during a colli-
sion or sudden maneuver, exercise care
when storing objects in the vehicle. Put lug-
gage or cargo in the cargo compartment if
possible. Do not pile luggage or cargo higher
than the seat backs.
Luggage nets cannot secure hard or heavy
objects.
Keep compartment lids closed. This will help
to prevent stored objects from being thrown
around and injuring vehicle occupants dur-
ing an accident.
iClose the compartment for glasses2
first before closing the glove box.
iNever place any medications in the
storage compartment. If there is a pow-
er failure, the storage compartment
cannot be opened.
Page 274 of 521
273 Controls in detail
Useful features
Storage compartment in the rear cen-
ter console�
Briefly press the top of the compart-
ment.
It extends automatically.Ruffled storage bags
Ruffled storage bags are located on the
back of the front seats.
Warning!
G
Do not place objects with a combined
weight of more than 4.4 lbs (2 kg) into the
ruffled storage bag. Otherwise, the Occu-
pant Classification System OCS (
�page 81)
may not be able to properly approximate the
occupant weight category.
The ruffled storage bag is intended for stor-
ing light-weight items only.
Heavy objects, objects with sharp edges or
fragile objects may not be transported in the
ruffled storage bag. In an accident, during
hard braking, or sudden maneuvers, they
could be thrown around inside the vehicle
and cause injury to vehicle occupants.
The ruffled storage bag cannot protect
transported goods in the event of an acci-
dent.
Page 275 of 521

274 Controls in detailUseful featuresParcel net in front passenger footwell
A small convenience parcel net is located
in the front passenger footwell. It is for
small and light items, such as road maps,
mail, etc.
Cup holders
Warning!
G
The parcel net is intended for storing
light-weight items only.
Heavy objects, objects with sharp edges or
fragile objects may not be transported in the
parcel net. In an accident, during hard brak-
ing, or sudden maneuvers, they could be
thrown around inside the vehicle and cause
injury to vehicle occupants.
The parcel net cannot protect transported
goods in the event of an accident.
Warning!
G
In order to help prevent spilling liquids on
vehicle occupants and/or vehicle equip-
ment, only use containers that fit into the
cup holder. Use lids on open containers and
do not fill containers to a height where the
contents, especially hot liquids, could spill
during braking, vehicle maneuvers, or in an
accident. Liquids spilled on vehicle occu-
pants may cause serious personal injury.
Liquids spilled on vehicle equipment may
cause damage not covered by the
Mercedes-Benz Limited Warranty.
When not in use, keep the cup holder
closed. An open cup holder may cause injury
to you or others when contacted during
braking, vehicle maneuvers, or in an acci-
dent.
Page 278 of 521
277 Controls in detail
Useful features
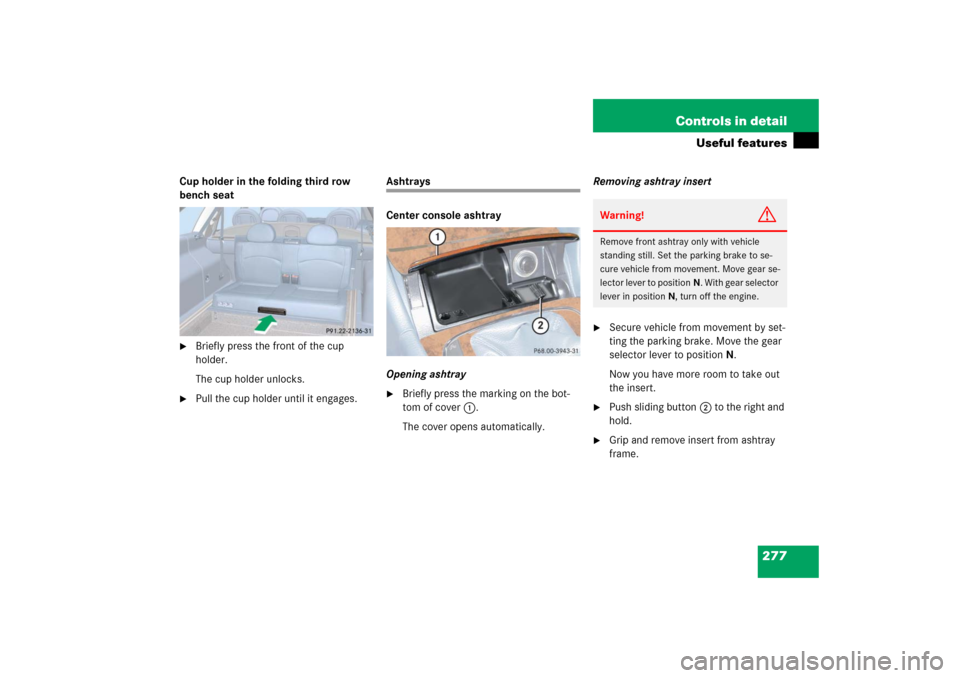
Cup holder in the folding third row
bench seat�
Briefly press the front of the cup
holder.
The cup holder unlocks.
�
Pull the cup holder until it engages.
Ashtrays
Center console ashtray
Opening ashtray�
Briefly press the marking on the bot-
tom of cover1.
The cover opens automatically.Removing ashtray insert
�
Secure vehicle from movement by set-
ting the parking brake. Move the gear
selector lever to positionN.
Now you have more room to take out
the insert.
�
Push sliding button2 to the right and
hold.
�
Grip and remove insert from ashtray
frame.Warning!
G
Remove front ashtray only with vehicle
standing still. Set the parking brake to se-
cure vehicle from movement. Move gear se-
lector lever to positionN. With gear selector
lever in positionN, turn off the engine.
Page 279 of 521
278 Controls in detailUseful featuresReinstalling ashtray insert�
Install insert by pushing it back into
frame until it engages again.
Rear seat ashtray
Opening rear seat ashtray
�
Briefly press the top of the ashtray.
The cover opens automatically.
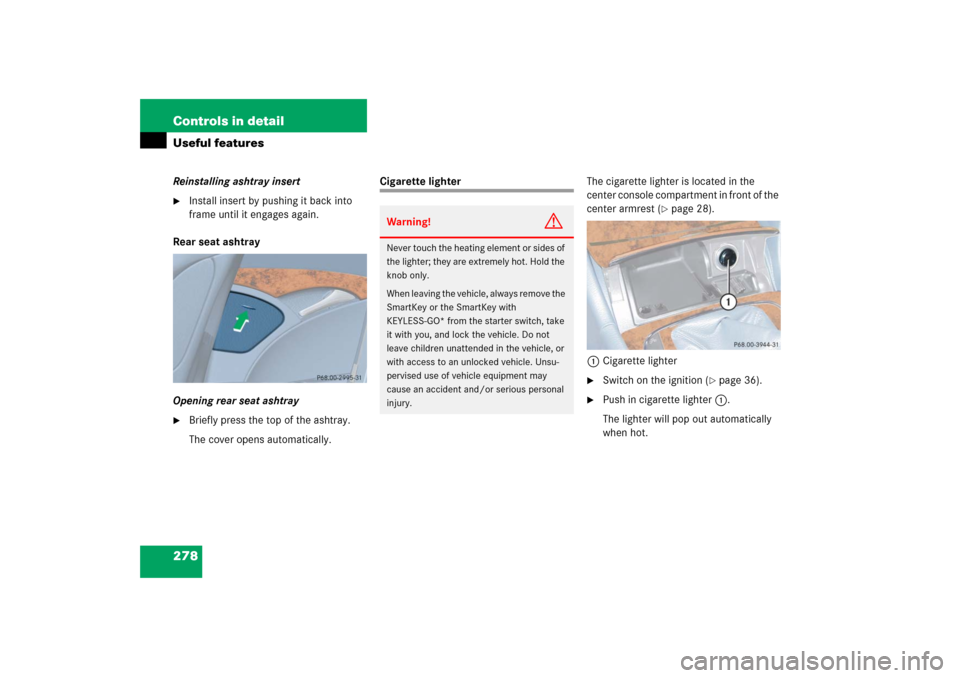
Cigarette lighterThe cigarette lighter is located in the
center console compartment in front of the
center armrest (
�page 28).
1Cigarette lighter
�
Switch on the ignition (
�page 36).
�
Push in cigarette lighter1.
The lighter will pop out automatically
when hot.
Warning!
G
Never touch the heating element or sides of
the lighter; they are extremely hot. Hold the
knob only.
When leaving the vehicle, always remove the
SmartKey or the SmartKey with
KEYLESS-GO* from the starter switch, take
it with you, and lock the vehicle. Do not
leave children unattended in the vehicle, or
with access to an unlocked vehicle. Unsu-
pervised use of vehicle equipment may
cause an accident and/or serious personal
injury.
Page 282 of 521

281 Controls in detail
Useful features
Removing�
Pull floormat off of retainer pins1.
�
Remove the floormat.
Installing
�
Lay down the floormat.
�
Press the floormat eyelets2 onto re-
tainer pins1.
Telephone*
Radio transmitters, such as a portable tele-
phone or a citizens band unit, should only
be used inside the vehicle if they are con-
nected to an antenna that is installed on
the outside of the vehicle.
The external antenna must be approved by
Mercedes-Benz. Please contact an autho-
rized Mercedes-Benz Center for informa-
tion on the installation of an approved
external antenna. Refer to the radio trans-
mitter operation instructions regarding use
of an external antenna.
Warning!
G
Whenever you are using floormats, make
sure there is enough clearance and that the
floormats are securely fastened.
Floormats should always be securely fas-
tened using eyelets2 and retainer pins1.
Before driving off, check that the floormats
are securely in place and adjust them if nec-
essary. A loose floormat could slip and
hinder proper functioning of the pedals.
Warning!
G
Never operate radio transmitters equipped
with a built-in or attached antenna (i.e. with-
out being connected to an external antenna)
from inside the vehicle while the engine is
running. Doing so could lead to a malfunc-
tion of the vehicle’s electronic system, pos-
sibly resulting in an accident and/or serious
personal injury.
Warning!
G
Please do not forget that your primary re-
sponsibility is to drive the vehicle. A driver’s
attention to the road must always be
his /her primary focus when driving. For
your safety and the safety of others, we rec-
ommend that you pull over to a safe location
and stop before placing or taking a tele-
phone call.
If you choose to use the telephone
1 while
driving, please use the hands-free device
and only use the telephone when road,
weather and traffic conditions permit. Some
jurisdictions prohibit the driver from using a
cellular telephone while driving a vehicle.
Only operate the COMAND (Cockpit Man-
agement and Data System) if road, weather
and traffic conditions permit.
1Observe all legal requirements.
��
Page 284 of 521

283 Controls in detail
Useful features
�
To activate, press the SOS button, the
Roadside Assistance button• or
the Information button¡, depend-
ing on the type of response required.
System self-check
Initially, after switching on the ignition,
malfunctions are detected and indicated
(the indicator lamps in the SOS button, the
Roadside Assistance button• and the
Information button¡ stay on longer
than 10 seconds or do not come on). The
message
Tele Aid malfunction Drive to
workshop appears in the multifunction dis-
play.
iThe SOS button is located above the in-
terior rear view mirror.
The Roadside Assistance button•
and the Information button¡ are
located below the center armrest cov-
er.
iThe Tele Aid system utilizes the cellular
network for communication and the
GPS (Global Positioning System) satel-
lites for vehicle location. If either of
these signals are unavailable, the
Tele Aid system may not function and if
this occurs, assistance must be sum-
moned by other means.
Warning!
G
If the indicator lamps in the SOS button, in
the Roadside Assistance button and/or in
the Information button remain illuminated
constantly in red and/or the message Tele Aid malfunction Drive to
workshop
is displayed in the multifunction
display after the system self-check, a mal-
function in the system has been detected.
If a malfunction is indicated as outlined
above, the system may not operate as ex-
pected. Have the system checked at the
nearest Mercedes-Benz Center as soon as
possible.