Page 119 of 473
118 Controls in detail
Lighting
Rear fog lamp (driver’s side only)
�Switch on the front fog lamps
(
�page 117).
�Pull out the exterior lamp switch to
second stop.
The rear fog lamp is switched on.
The yellow indicator lamp† in the
exterior lamp switch comes on
(
�page 114).
�Push in the exterior lamp switch to first
stop.
The rear fog lamp switches off.
The yellow indicator lamp† in the
exterior lamp switch goes out.
The front fog lamps remain lit.
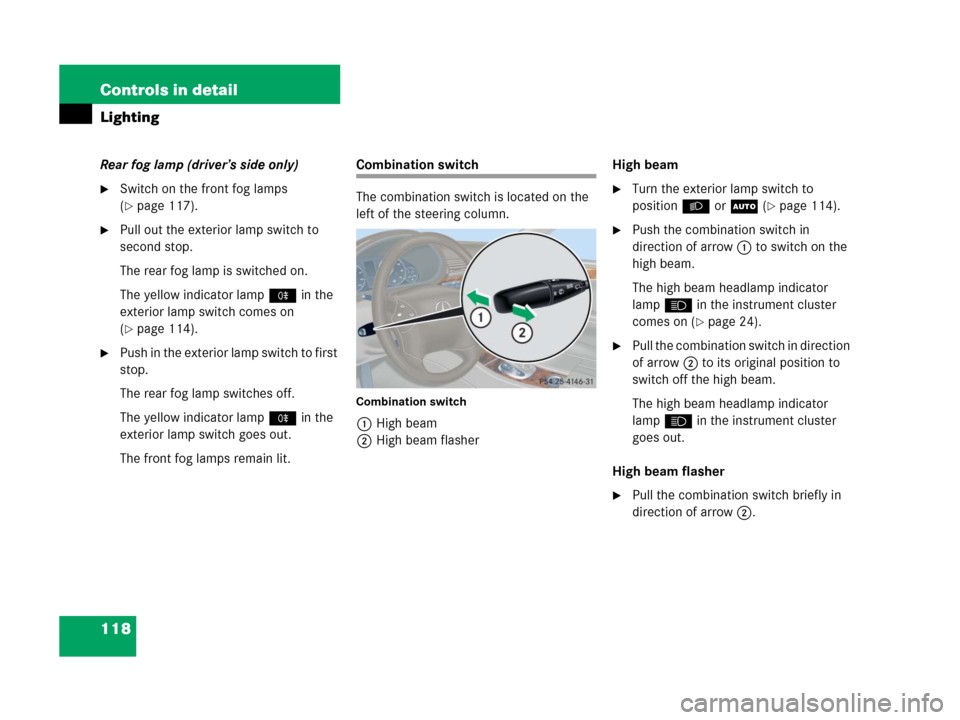
Combination switch
The combination switch is located on the
left of the steering column.
Combination switch
1High beam
2High beam flasherHigh beam
�Turn the exterior lamp switch to
positionB orU (
�page 114).
�Push the combination switch in
direction of arrow1 to switch on the
high beam.
The high beam headlamp indicator
lampA in the instrument cluster
comes on (
�page 24).
�Pull the combination switch in direction
of arrow2 to its original position to
switch off the high beam.
The high beam headlamp indicator
lampA in the instrument cluster
goes out.
High beam flasher
�Pull the combination switch briefly in
direction of arrow2.
Page 122 of 473
121 Controls in detail
Lighting
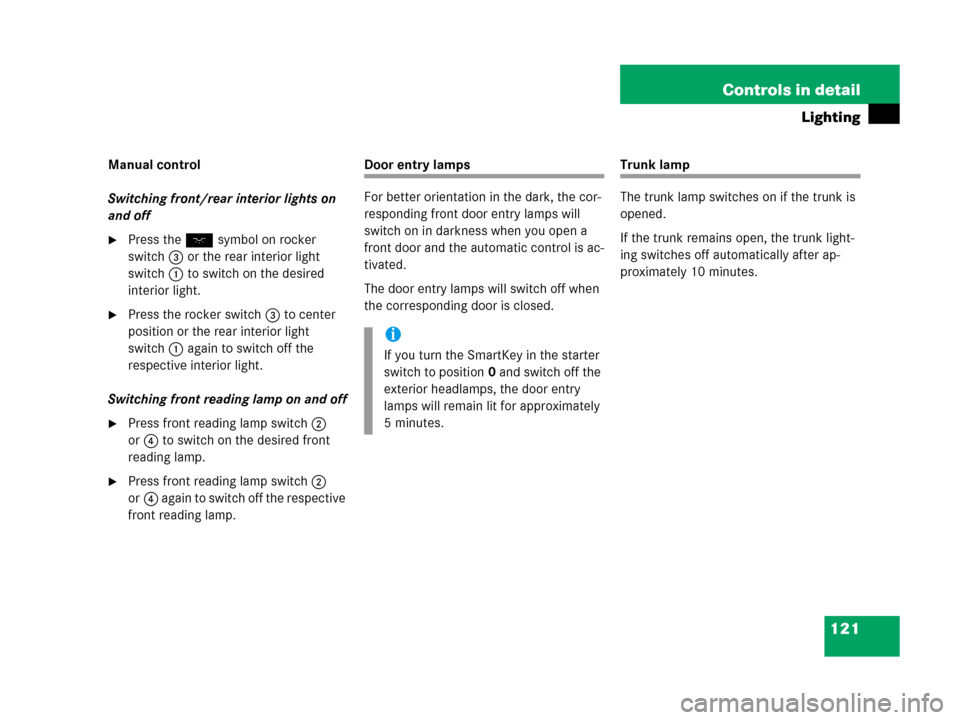
Manual control
Switching front/rear interior lights on
and off
�Press theW symbol on rocker
switch3 or the rear interior light
switch1 to switch on the desired
interior light.
�Press the rocker switch3 to center
position or the rear interior light
switch1 again to switch off the
respective interior light.
Switching front reading lamp on and off
�Press front reading lamp switch2
or4 to switch on the desired front
reading lamp.
�Press front reading lamp switch2
or4 again to switch off the respective
front reading lamp.
Door entry lamps
For better orientation in the dark, the cor-
responding front door entry lamps will
switch on in darkness when you open a
front door and the automatic control is ac-
tivated.
The door entry lamps will switch off when
the corresponding door is closed.Trunk lamp
The trunk lamp switches on if the trunk is
opened.
If the trunk remains open, the trunk light-
ing switches off automatically after ap-
proximately 10 minutes.
i
If you turn the SmartKey in the starter
switch to position0 and switch off the
exterior headlamps, the door entry
lamps will remain lit for approximately
5 minutes.
Page 146 of 473
145 Controls in detail
Control system
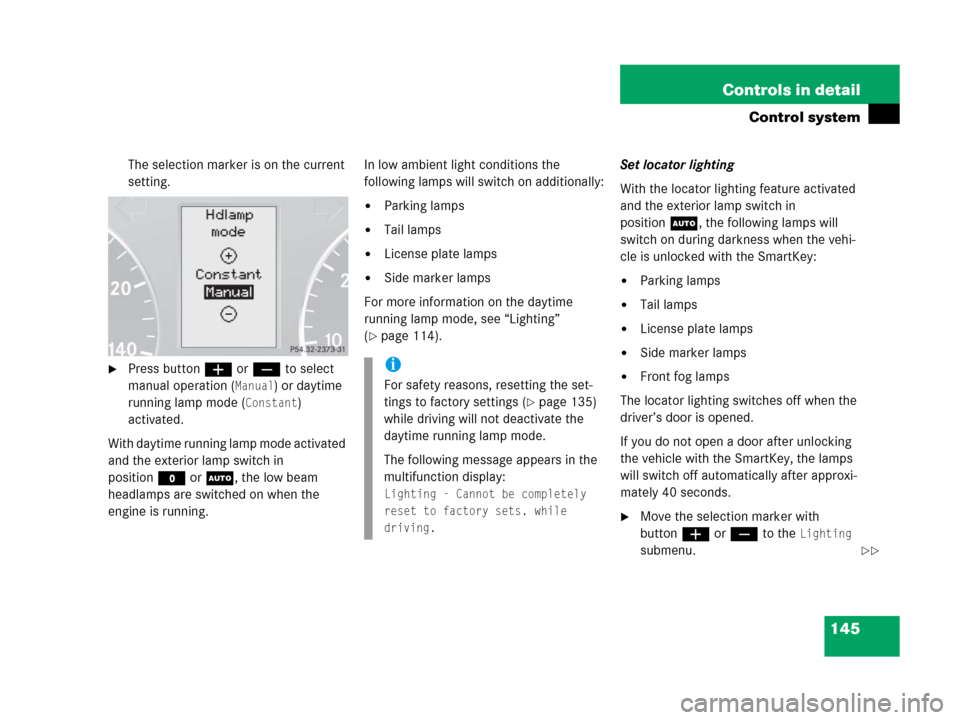
The selection marker is on the current
setting.
�Press buttonæ orç to select
manual operation (
Manual) or daytime
running lamp mode (
Constant)
activated.
With daytime running lamp mode activated
and the exterior lamp switch in
positionM orU, the low beam
headlamps are switched on when the
engine is running.In low ambient light conditions the
following lamps will switch on additionally:
�Parking lamps
�Tail lamps
�License plate lamps
�Side marker lamps
For more information on the daytime
running lamp mode, see “Lighting”
(
�page 114).Set locator lighting
With the locator lighting feature activated
and the exterior lamp switch in
positionU, the following lamps will
switch on during darkness when the vehi-
cle is unlocked with the SmartKey:
�Parking lamps
�Tail lamps
�License plate lamps
�Side marker lamps
�Front fog lamps
The locator lighting switches off when the
driver’s door is opened.
If you do not open a door after unlocking
the vehicle with the SmartKey, the lamps
will switch off automatically after approxi-
mately 40 seconds.
�Move the selection marker with
buttonæ orç to the
Lighting
submenu.
i
For safety reasons, resetting the set-
tings to factory settings (
�page 135)
while driving will not deactivate the
daytime running lamp mode.
The following message appears in the
multifunction display:
Lighting - Cannot be completely
reset to factory sets. while
driving.
��
Page 147 of 473
146 Controls in detail
Control system
�Press buttonj ork repeatedly
until the message
Surround lighting
appears in the multifunction display.
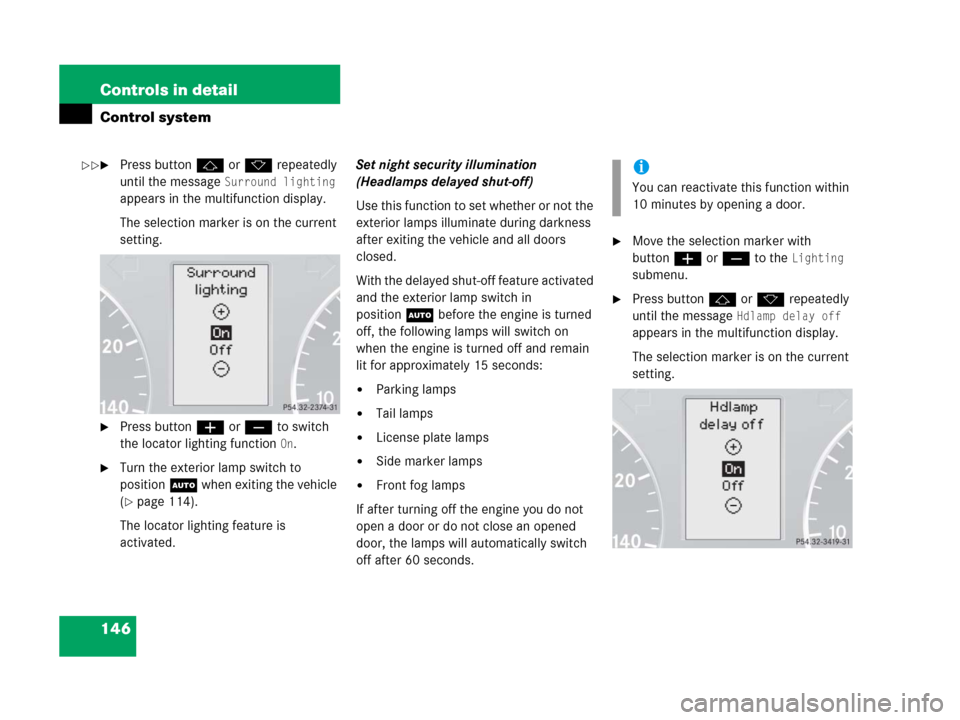
The selection marker is on the current
setting.
�Press buttonæ orç to switch
the locator lighting function
On.
�Turn the exterior lamp switch to
positionU when exiting the vehicle
(
�page 114).
The locator lighting feature is
activated.Set night security illumination
(Headlamps delayed shut-off)
Use this function to set whether or not the
exterior lamps illuminate during darkness
after exiting the vehicle and all doors
closed.
With the delayed shut-off feature activated
and the exterior lamp switch in
positionU before the engine is turned
off, the following lamps will switch on
when the engine is turned off and remain
lit for approximately 15 seconds:
�Parking lamps
�Tail lamps
�License plate lamps
�Side marker lamps
�Front fog lamps
If after turning off the engine you do not
open a door or do not close an opened
door, the lamps will automatically switch
off after 60 seconds.
�Move the selection marker with
buttonæ orç to the
Lighting
submenu.
�Press buttonj ork repeatedly
until the message
Hdlamp delay off
appears in the multifunction display.
The selection marker is on the current
setting.
i
You can reactivate this function within
10 minutes by opening a door.
��
Page 148 of 473
147 Controls in detail
Control system
�Press buttonæ orç to switch
the delayed shut-off feature
Off or On.
�Turn the exterior lamp switch to
positionU before turning off the
engine (
�page 114).
The headlamps delayed shut-off
feature is activated.
You can temporarily deactivate the
delayed shut-off feature:
�Before exiting the vehicle, turn the
SmartKey in the starter switch to
position0.
�Then turn it to position2 and back to
position0.
The delayed shut-off feature is
deactivated. It will reactivate as soon
as you reinsert the SmartKey in the
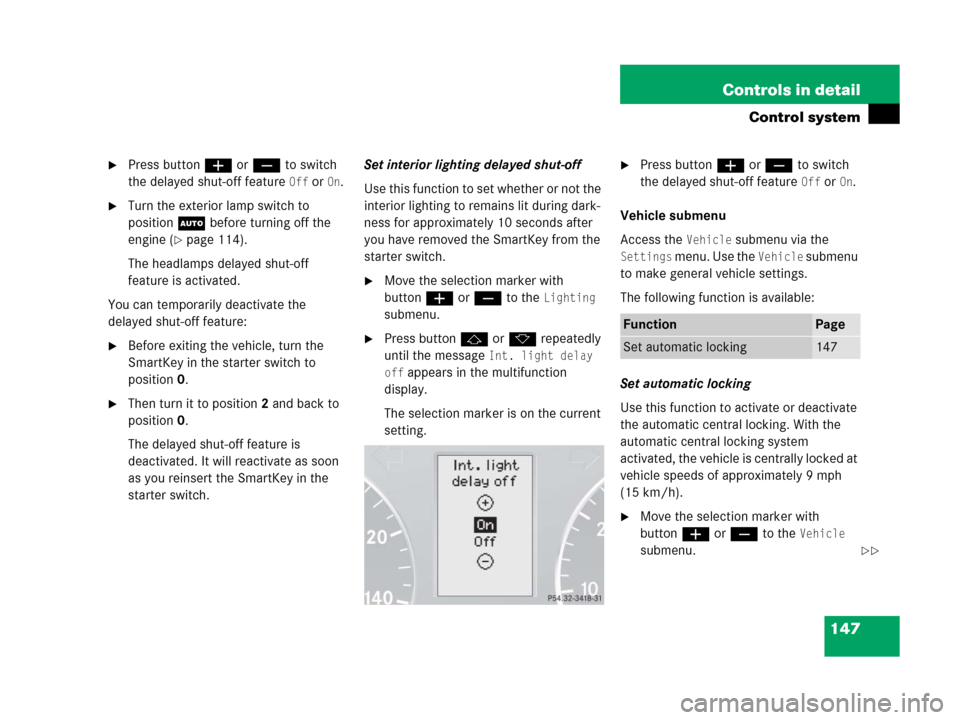
starter switch.Set interior lighting delayed shut-off
Use this function to set whether or not the
interior lighting to remains lit during dark-
ness for approximately 10 seconds after
you have removed the SmartKey from the
starter switch.
�Move the selection marker with
buttonæ orç to the
Lighting
submenu.
�Press buttonj ork repeatedly
until the message
Int. light delay
off
appears in the multifunction
display.
The selection marker is on the current
setting.
�Press buttonæ orç to switch
the delayed shut-off feature
Off or On.
Vehicle submenu
Access the
Vehicle submenu via the
Settings menu. Use the Vehicle submenu
to make general vehicle settings.
The following function is available:
Set automatic locking
Use this function to activate or deactivate
the automatic central locking. With the
automatic central locking system
activated, the vehicle is centrally locked at
vehicle speeds of approximately 9 mph
(15 km/h).
�Move the selection marker with
buttonæ orç to the
Vehicle
submenu.
FunctionPage
Set automatic locking147
��
Page 170 of 473

169 Controls in detail
Good visibility
�Good visibility
For information on the windshield wipers,
see “Windshield wipers” (
�page 50).
Headlamp cleaning system*
The button is located on the left side of the
dashboard.
1Headlamp washer button
�Switch on the ignition (�page 33).
�Press button1.
The headlamps are cleaned with a
high-pressure water jet.For information on filling up the washer
reservoir, see “Windshield washer system
and headlamp cleaning system*”
(
�page 304).
Rear view mirrors
For more information on setting the rear
view mirrors, see “Mirrors” (
�page 40).
Auto-dimming rear view mirrors
The reflection brightness of the exterior
rear view mirror on the driver’s side and
the interior rear view mirror will respond
automatically to glare when
�the ignition is switched on
and
�incoming light from headlamps falls on
the sensor in the interior rear view
mirror.
The rear view mirror will not react if
�reverse gearR is engaged
�the interior lighting is turned on
i
The headlamps will automatically be
cleaned when you have
�switched on the headlamps
and
�operated the windshield wipers
with windshield washer fluid
15 times
When you switch off the ignition, the
counter resets.
Page 295 of 473
294 Operation
At the gas station
�Replace fuel cap by turning it clockwise
until it audibly engages.
�Close fuel filler flap.
Check regularly and before a long trip
1Coolant
2Brake fluid (fuse box cover removed)
3Windshield washer and headlamp
cleaning system*
Warning!G
Overfilling of the fuel tank may create
pressure in the system which could cause a
gas discharge. This could cause the gas to
spray back out when removing the fuel
pump nozzle, which could cause personal
injury.
i
Leaving the engine running and the fuel
cap open can cause the yellow fuel
tank reserve warning lamp to flash and
theú malfunction indicator lamp
(USA only) or the± malfunction in-
dicator lamp (Canada only) to illumi-
nate.
For more information, see “Practical
hints” (
�page 352) and (�page 353).
i
Opening the hood, see (�page 297).
��
Page 296 of 473

295 Operation
At the gas station
Coolant
For normal replenishing, use water (pota-
ble water quality). For more information,
see “Coolant level” (
�page 301) and
“Fuels, coolants, lubricants, etc.”
(
�page 436).
Brake fluid
Removing fuse box cover (
�page 421).Windshield washer and headlamp
cleaning system*
For more information on filling up the
washer reservoir, see “Windshield washer
system and headlamp cleaning system*”
(
�page 304).
Engine oil level
For more information on engine oil level,
see “Engine oil” (
�page 298).Vehicle lighting
Check function and cleanliness. For more
information on replacing light bulbs, see
“Replacing bulbs” (
�page 394).
Exterior lamp switch (
�page 114).
!
If you find that the brake fluid in the
brake fluid reservoir has fallen to the
minimum mark or below, have the
brake system checked for brake pad
thickness and leaks immediately.
Notify an authorized Mercedes-Benz
Center immediately. Do not add brake
fluid as this will not solve the problem.
For more information, see “Practical
hints” (
�page 351).