Page 145 of 473
144 Controls in detail
Control system
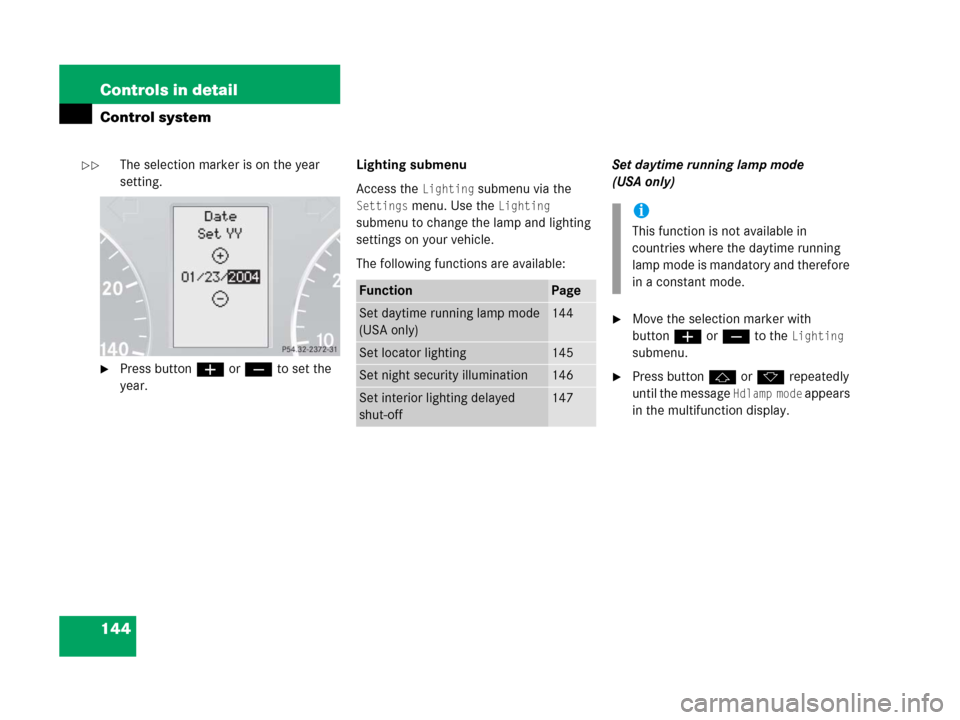
The selection marker is on the year
setting.
�Press buttonæ orç to set the
year.Lighting submenu
Access the
Lighting submenu via the
Settings menu. Use the Lighting
submenu to change the lamp and lighting
settings on your vehicle.
The following functions are available:Set daytime running lamp mode
(USA only)
�Move the selection marker with
buttonæ orç to the
Lighting
submenu.
�Press buttonj ork repeatedly
until the message
Hdlamp mode appears
in the multifunction display.
FunctionPage
Set daytime running lamp mode
(USA only)144
Set locator lighting145
Set night security illumination146
Set interior lighting delayed
shut-off147
i
This function is not available in
countries where the daytime running
lamp mode is mandatory and therefore
in a constant mode.
��
Page 211 of 473

(
�page 212).Cal")
210 Controls in detail
Audio system
Program categories
The channels are categorized. Categories
allow you to tune to stations broadcasting
a certain type of program (category mode)
(
�page 212).Calling up the SAT main menu
�Press SAT soft key.
SAT is displayed in the upper left-hand
corner of the display.
Prior to activation of the satellite radio
service (
�page 210).
After activation of satellite radio
service (
�page 211).
Prior to activation of the satellite radio
service
The telephone number of the SIRIUS
Service Center (888-539-7474) is
displayed.
i
Additional satellite radio equipment
and a subscription to a satellite radio
service provider are required for the
satellite radio operation described
here.
Contact an authorized Mercedes-Benz
Center for details and availability for
your vehicle.
Note that categories and channels
shown in illustrations are dependent on
programming content delivered by the
service provider. Programming content
is subject to change. Therefore,
channels and categories shown in
illustrations and descriptions
contained in this manual may differ
from the channels and categories
delivered by the service provider.
i
Satellite radio service may be unavail-
able or interrupted from time to time
for a variety of reasons, such as envi-
ronmental or topographic conditions
and other things beyond the service
provider’s or our control. Service might
also not be available in certain places
(e.g., in tunnels, parking garages, or
within or next to buildings) or near
other technologies.
Page 217 of 473

216 Controls in detail
Audio system
Tips on handling CDs
�Handle CDs carefully to prevent
interference during playback.
�Avoid scratches, fingerprints and dust
on the CDs.
�Do not write on CDs or apply any labels
or other material to them.
�Clean CDs from time to time with a
commercially available cleaning cloth.
Never wipe the CD in a circular motion;
instead, wipe it in a straight line start-
ing in the center and moving outward.
Do not use solvents, anti-static sprays,
etc. for cleaning.
�Replace the CD in its case after use.
�Protect CDs from heat and direct
sunlight.MP3 notes
The CD changer* can play audio CDs as
well as CDs with MP3 files.
Information on MP3 data carriersCompatible MP3 data carriers
The CD changer can read the following
data carriers in MP3 mode:
�CD-DA
�CD-R
�CD-RW
Compatible file systems and compres-
sion methods
Use Romeo or Joliet. Depending on file for-
mat used, up to 128 characters are possi-
ble.
The following compression methods are
compatible:
�MP3
�WMA
�WAV
i
CD media, CD burning software and
CD writers are available in great vari-
ety. Due to this variety, it cannot be
guaranteed that the CD changer will be
able to play every user-written CD.
The burning process can lead to data
errors and aging of the medium may re-
sult in data loss. Therefore, the
CD changer may be restricted in its
ability to play MP3 data carriers; it may
play them with reduced sound quality,
or it m ay not b e a bl e to pl ay them a t al l.
Problems may be encountered during
playback of user-written CDs with a
storage capacity of more than 700 MB.
These CDs do not meet valid standards
as of this printing.
Page 220 of 473

219 Controls in detail
Audio system
Loading/unloading the CD magazine
�Slide changer door to the right and
press gbutton.
Magazine will be ejected.
1CD
2CD changer
3CD tray
4CD magazine
�Remove magazine4 and pull
CD tray3 fully out.
�Place CD1 in recess of tray, label side
up.
�Push tray into magazine in direction of
arrow.
�Push magazine into CD changer*2 in
direction of arrow and close sliding
door.Playing CDs
Single CD player in the audio unit
�Pressi button.
CD 0 will appear in the upper left-hand
corner of the display.
The CD will resume playback at the point
where it was switched off.
CD changer*
�Press Q button.
CD and the selected magazine slot
number appear in the upper left-hand
corner of the display.
If you have not removed a CD since the last
time the CD audio source was activated,
the last CD listened to will begin to play at
the point where it was switched off.
After the last track on a CD has finished,
the next CD is automatically played.
i
The CD changer* may not be able to
play audio CDs with copy protection.
i
CDs which have been inserted
improperly or are unreadable will not
be played.
Page 223 of 473
222 Controls in detail
Audio system
Repeat
The track being played is repeated until the
repeat function is switched off.
�Switching on repeat
�Press RPT soft key.
RPT appears in the display.
�Switching off repeat
�Press RPT soft key again.Pause function
The CD changer mode is interrupted by an
incoming call on the telephone*
(
�page 227).
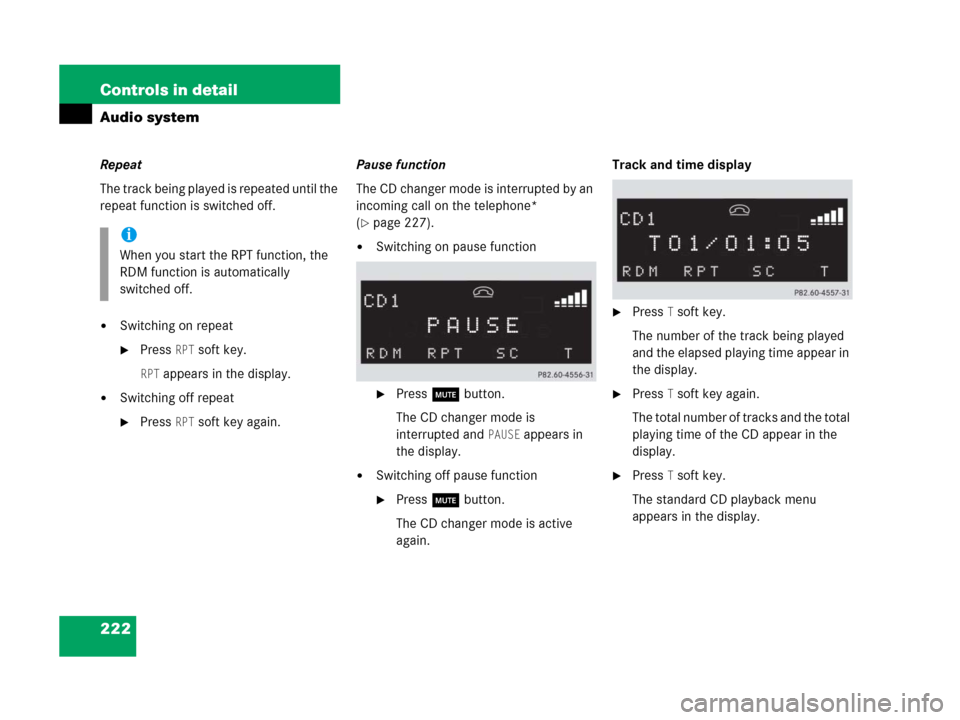
�Switching on pause function
�Press U button.
The CD changer mode is
interrupted and
PAUSE appears in
the display.
�Switching off pause function
�Press U button.
The CD changer mode is active
again.Track and time display
�Press T soft key.
The number of the track being played
and the elapsed playing time appear in
the display.
�Press T soft key again.
The total number of tracks and the total
playing time of the CD appear in the
display.
�Press T soft key.
The standard CD playback menu
appears in the display.
i
When you start the RPT function, the
RDM function is automatically
switched off.
Page 246 of 473

245 Controls in detail
Driving systems
�Driving systems
The driving system of your vehicle is
described on the following pages:
�Cruise control, with which the vehicle
can maintain a preset speed.
For information on the BAS, ABS and ESP
®,
see “Driving safety systems” (
�page 82).
Cruise control
The cruise control automatically maintains
the speed you set for your vehicle.
The use of cruise control is recommended
for driving at a constant speed for extend-
ed periods of time. You can set or resume
cruise control at any speed over 20 mph
(30 km/h).
The cruise control function is operated by
means of the cruise control lever.
The cruise control lever is the uppermost
lever on the left-hand side of the steering
column (
�page 22).
Warning!G
The cruise control is a convenience system
designed to assist the driver during vehicle
operation. The driver is and must always re-
main responsible for the vehicle’s speed and
for safe brake operation.
Only use cruise control if the road, traffic
and weather conditions make it advisable to
travel at a steady speed.
�The use of cruise control can be danger-
ous on winding roads or in heavy traffic
because conditions do not allow safe
driving at a steady speed.
�The use of cruise control can be danger-
ous on slippery roads. Rapid changes in
tire traction can result in wheel spin and
loss of control.
�Deactivate cruise control when driving
in fog.
The “Resume” function should only be oper-
ated if the driver is fully aware of the previ-
ously set speed and wishes to resume this
particular preset speed.
Page 276 of 473

275 Controls in detail
Useful features
Step 5:
�After the indicator lamp1 changes
from a slow to a rapidly flashing light,
release the hand-held remote control
button and the signal transmitter but-
ton.Step 6:
�Press and hold the just-trained signal
transmitter button (2, 3 or4) and
observe the indicator lamp1.
If the indicator lamp1 stays on
constantly, programming is complete
and your device should activate when
the respective signal transmitter
button (2, 3 or4) is pressed and re-
leased.Step 7:�To program the remaining two signal
transmitter buttons, repeat the steps
above starting with step 3.
Rolling code programming
To train a garage door opener (or other
rolling code devices) with the rolling code
feature, follow these instructions after
completing the “Programming” portion
(steps 1 through 6) of this text. (A second
person may make the following training
procedures quicker and easier.)
i
The indicator lamp1 flashes immedi-
ately the first time the signal transmit-
ter button is programmed. If this button
has already been programmed, the in-
dicator lamp will only start flashing af-
ter 20 seconds.
i
If the indicator lamp1 flashes rapidly
for about 2 seconds and then turns to a
constant light, continue with
programming steps 8 through 12 as
your garage door opener may be
equipped with the “rolling code”
feature.
Page 301 of 473

300 Operation
Engine compartment
If you see the message:
Observe waiting time
�If engine is at operating temperature,
wait 5 minutes before repeating check
procedure.
�If engine is not at operating tempera-
ture yet, wait 30 minutes before
repeating check procedure.
If you see the message:
Engine oil level
Not when engine on
�Turn off the engine.
�If the engine is at operating tempera-
ture, wait 5 minutes before checking
oil.
�If the engine is not at operating temper-
ature yet, you must wait 30 minutes
before checking oil.If there is excess engine oil with the engine
at operating temperature, the following
message will appear:
Engine oil level
Reduce oil level
�Have excess oil siphoned or drained
off. Contact an authorized
Mercedes-Benz Center.
For more information on messages in the
multifunction display concerning engine
oil, see the “Practical hints” section
(
�page 371) and (�page 372).Adding engine oil
!
Excess oil must be siphoned or drained
off. It could cause damage to the
engine and catalytic converter not
covered by the Mercedes-Benz Limited
Warranty.
!
Only use approved engine oils and oil
filters required for vehicles with
Maintenance System (U.S. vehicles) or
FSS (Canada vehicles). For a listing of
approved engine oils and oil filters,
refer to the Factory Approved Service
Products pamphlet in your vehicle
literature portfolio, or contact an
authorized Mercedes-Benz Center.
Using engine oils and oil filters of
specification other than those
expressly required for the Maintenance
System (U.S. vehicles) or FSS (Canada
vehicles), or changing of oil and oil filter
at change intervals longer than those
called for by the Maintenance System
(U.S. vehicles) or FSS (Canada
vehicles) will result in engine damage
not covered by the Mercedes-Benz
Limited Warranty.