Page 14 of 419

For your information
Main Owners Manual
Please note that this manual applies to all models and explains all equipment, includ-
ing options. Therefore, you may find some explanations for equipment not installed
on y
our vehicle.
All specifications provided in this manual are current at the time of printing. How -
ever, because of the Lexus policy of contin ua
l product improvement, we reserve the
right to make changes at any time without notice.
Depending on specifications, the vehicle show n in
the illustration may differ from
your vehicle in terms of color and equipment.
Accessories, spare parts and modification of your Lexus
A wide variety of non-genuine spare parts and accessories for Lexus vehicles are
currently available in the market. You should know that Toyota does not warrant
these products and is not responsible for their performance, repair, or replacement,
or for any damage they may cause to, or adverse effect they may have on, your
Lexus vehicle.
This vehicle should not be modified with non-genuine Lexus products. Modification
with
non-genuine Lexus products could affect its performance, safety or durability,
and may even violate governmental regula tions. In addition, damage or perfor-
mance problems resulting from the modi fication may not be
covered under war-
ranty.
Installation of a mobile two-way radio system
As the installation of a mobile two-way ra dio system in your vehicle could affect
electronic systems such as the multiport fuel injection system/sequential multiport
fuel injection system, dynamic radar/laser cruise control system, anti-lock brake sys -
tem, SRS airbag system and seat belt pret ensio
ner system, be sure to check with
your Lexus dealer for precautionary measures or special instructions regarding
installation.
Page 25 of 419

9
1-2. Opening, closing and locking the doors and trunk
1
Before driving
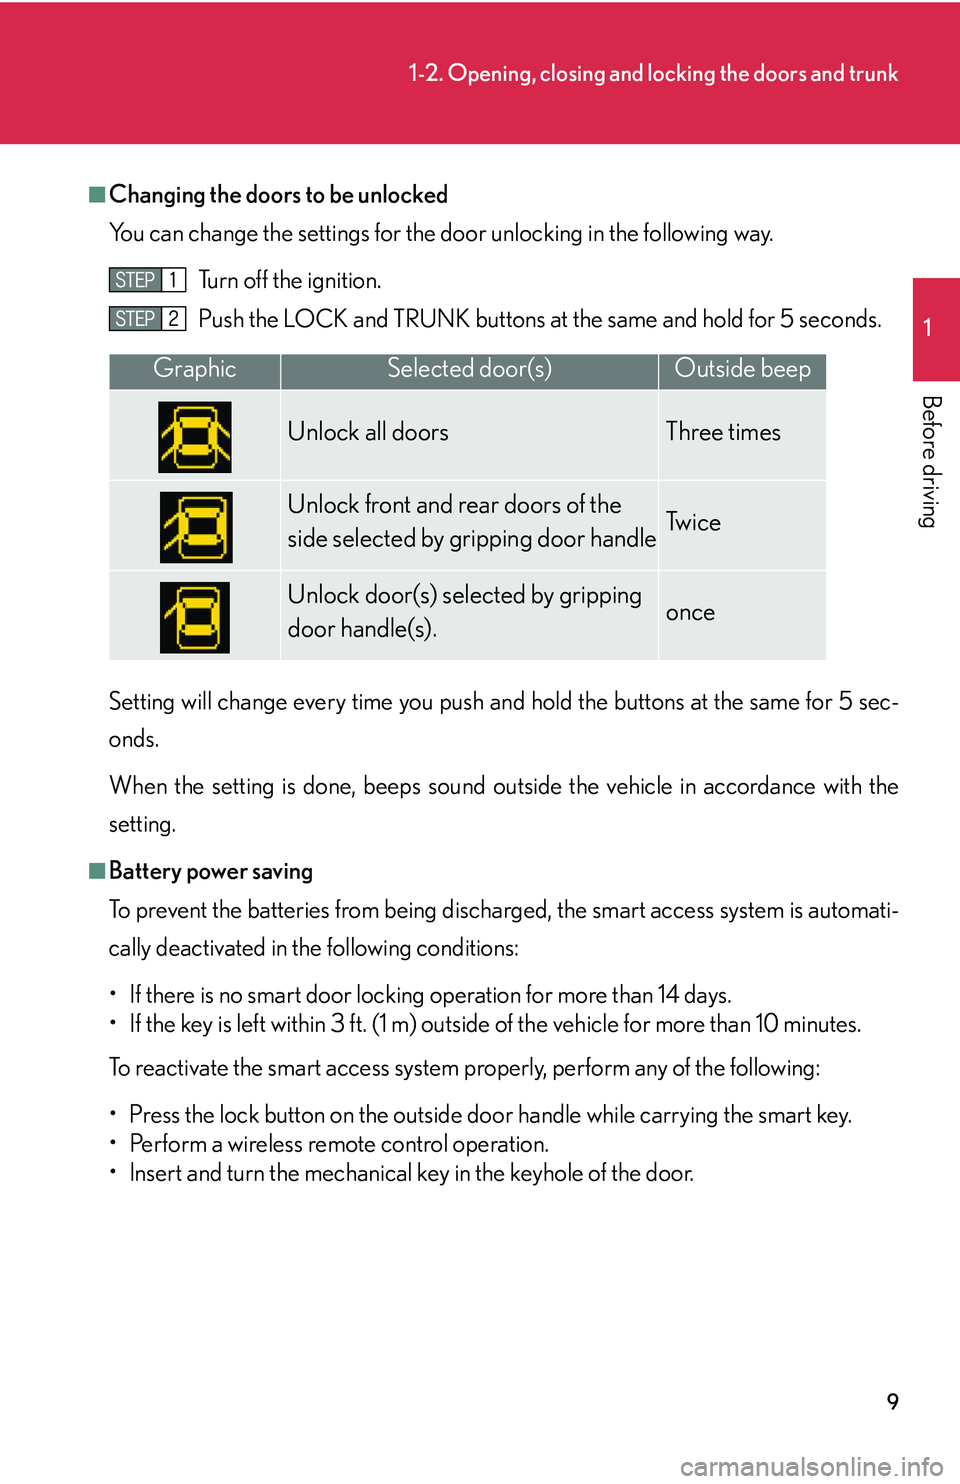
■Changing the doors to be unlocked
You can change the settings for the door unl
ocking in the following way.
Turn off the ignition.
Push the LOCK and TRUNK buttons at
the same and hold for 5 seconds.
Setting will change every time you push an d hold the bu
ttons at the same for 5 sec-
onds.
When the setting is done, beeps sound outside the vehicle in accordance with the
setting.
■Battery power saving
To prevent the batteries from being discharged, the smart access system is automati -
cally deactivated in the following conditions:
• If there is no smart door locking operation for more than 14 days.
• If the key is left within 3 ft. (1 m) outside of the vehicle for more than 10 minutes.
To reactivate the smart access system properly, perform any of the following:
• Press the lock button on the outside do o
r handle while carrying the smart key.
• Perform a wireless remote control operation.
• lnsert and turn the mechanical key in the keyhole of the door.
GraphicSelected door(s)Outside beep
Unlock all doors Three times
Unlock front and rear doors of the
side selected by gripping door handleTw i c e
Unlock door(s) selected by gripping
door handle(s).once
Page 43 of 419

27
1-3. Adjustable components
1
Before driving
■Recalling the driving position
Driver’s seat position, head restraint height, seat cushion length, shoulder
belt height, and ou
tside rear view mirrors are adjus ted to memorized
position when you unlock the driver’s door with the wireless remote con-
trol or the smart access system, if equipped.
The tilt and telescopic steering column position is ad justed to the memo-
rized position when you push the ignitio n switch, or inser
t the key into the
key slot depending on the model.
■ Er
asing the previous memory
Close the driver’s door and select the ignition switch in OFF posi-
tion and remove the key.
Push the “SET” button and the “LOCK” or “UNLOCK” button at the same time for about one second until you hear two beeps.
■To change the memorized position
Adjust the desired positions of the driver ’
s seat, tilt and telescopic steering
column and outside mirrors.
Push the “SET” button and the “1”, “2” or “3” button at the same time until
you hear a beep.
■Retained accessory power operation
Memorized positions (except for the tilt a
nd telescopic steering column) can be
activated within 30 seconds after the driver’s door is opened, even if the ignition
switch is turned off.
■If any position memory button is push ed while the adjustments are being made
The operation will stop. To reactivate the sy stem
, push the desired button (“1”, “2” or
“3”) again.
Page 123 of 419
107
2-2. Instrument cluster
2
When driving
Multi-information display
Cruise information
■Changing the cruise information displayed
Push . Pushing the button changes the cruise information in the fol-
lowing order
• Available driving distance
• Average fuel consumption
• Current fuel consumption
• Average fuel consumption after being refueling
• Driving distance after being refueled
• Elapsed time
• Average vehicle speed
• No display
The multi-information display provides information including your vehicle’s
driving condition, outside temperature, and warning messages.
Disp1
Disp2
RESET
Wa r n i n g m e s s a g e
Cruise information
Graphic
information
1
2
3
Page 125 of 419
109
2-2. Instrument cluster
2
When driving
Graphic information
Following graphic information is shown on the display
• Outside temperature display ( P.216 )
• Compass display (if equipped P.238 )
• Dynamic radar/ laser cruise control display (if equipped P.129 )
Appears when activate the system
• Lexus park assist system display (if equipped P.118 )
Appears when the system is activated
• Door ajar (with warning message P.334 )
Appears when any door is opened with the ignition s
witch is ON
position
Each time you push and hold for 1 or 2 seconds, the graphic informa-
tion changes in the following order
Compass display**
Outside temperature display Dynamic radar/
laser cruise control display**
Blank screen
**Skipped if not equipped or not activated
■Wa r n i n g m e s s a g e s
If any problem (malfunction) arises, a warning message appears on the
multi-information display. (
P. 334 )
Page 127 of 419

111
2-3. Operating the headlight and windshield wipers
2
When driving
Daytime running light system
The headlights turn on automatically (at a reduced intensity) whenever the
engine is started and the parking brake is released to make your vehicle
more visible to other drivers. Dayt ime running lights are not designed for
use at night.
■Headlight control sensor
■Automatic light off system
The headlights turn off automatically if the engine is stopped and the driver’s door is
opened wh
ile the headlights are turned on.
To turn the headlights on again, turn the key to ON, or turn the light switch off once
and then
back to or position.
■Automatic headlight leveling system
The level of the headlights is
automatically adjusted according to the number of
passengers and the loading condition of the vehicle to ensure that the headlights do
not interfere other road users.
■Customization
The time it takes for the headlights to automatically turn on or off can be changed.
( P.384 )
The sensor may not function properly if an
object is placed on the sensor, or anything
that blocks the sensor is affixed to the wind-
shield.
Doing so interferes with the sensor detect-
ing the level of ambient light and may cause
the automatic headlight system malfunc-
tion.
Page 131 of 419

115
2-3. Operating the headlight and windshield wipers
2
When driving
■Intermittent operation features
The time interval between sweeps decreases as vehicle speed increases. When
v
ehicle speed exceeds 12 mph (20 km/h) with the interval adjusted in the lowest
position, the time interval is set to the minimum 1.5 seconds.
If you stop the vehicle with the wiper switch in the “LO” position, the wipers auto -
matically change to intermittent operation.* This will not happen if the interval
adjuster is set
to the lowest position.
*This feature can be deactivated. ( P. 3 8 4 )
■Windshield wiper features
●When the washer button is pressed with the wipers OFF, the wipers will make 3
sweeps, then pause, then a final sweep to completely clear the windshield*. The
length of the pause will depend on the vehicle speed. The last sweep will not
happen if the vehicle is traveling above 106 mph (170 km/h).
*The last single sweep can be deactivated. ( P. 3 8 4 )
●When the windshield washer switch is pushed with the headlights on, the head -
light cleaners automatically operate once.
●The rear window and outside rear view mirror defoggers automatically turn on
when you operate the wipers.
Page 145 of 419
129
2-4. Using other driving systems
2
When driving
Dynamic radar/ laser cruise control
The vehicle-to-vehicle distance control mode allows the vehicle to follow
another vehicle, adjusting to the leading vehicle’s speed variations, and the
conventional cruise control mode allows for driving at a preset speed, both
without the need to press the accelerator pedal.
■ Selecting a cruise control mode
Selecting the vehicle-to-vehicle
distance contr
ol mode
Turn the ON-OFF switch ON
Push the main switch again to turn
off the system.
Selecting the conventional cruise
control mode Turn the ON-OFF switch ON
Push and hold the lever for more
than one second.
Change to the conventional
cruise mode
The system is set to the vehicle-to-
vehicle distance control mode
each time the ignition is turned
ON.
1
1
2