2006 KIA AMANTI roof
[x] Cancel search: roofPage 12 of 322
101
2
3
4
5
6
7
8
9
Keys / 3-2
Remote keyless entry / 3-4
Immobilizer system / 3-7
Door locks / 3-9
Window / 3-14
Seat / 3-18
Driver position memory system / 3-34
Safety belts / 3-36
Air bags-advanced supplemental restraint system / 3-60
Trunk / 3-84
Hood / 3-88
Fuel filler lid / 3-89
Mirrors / 3-92
Interior lights / 3-97
Storage compartment / 3-99
Interior features / 3-102
Sunroof / 3-108
Antenna / 3-111
Knowing your vehicle
10
Page 84 of 322
373
1
2
3
4
5
6
7
8
910
Knowing your vehicle
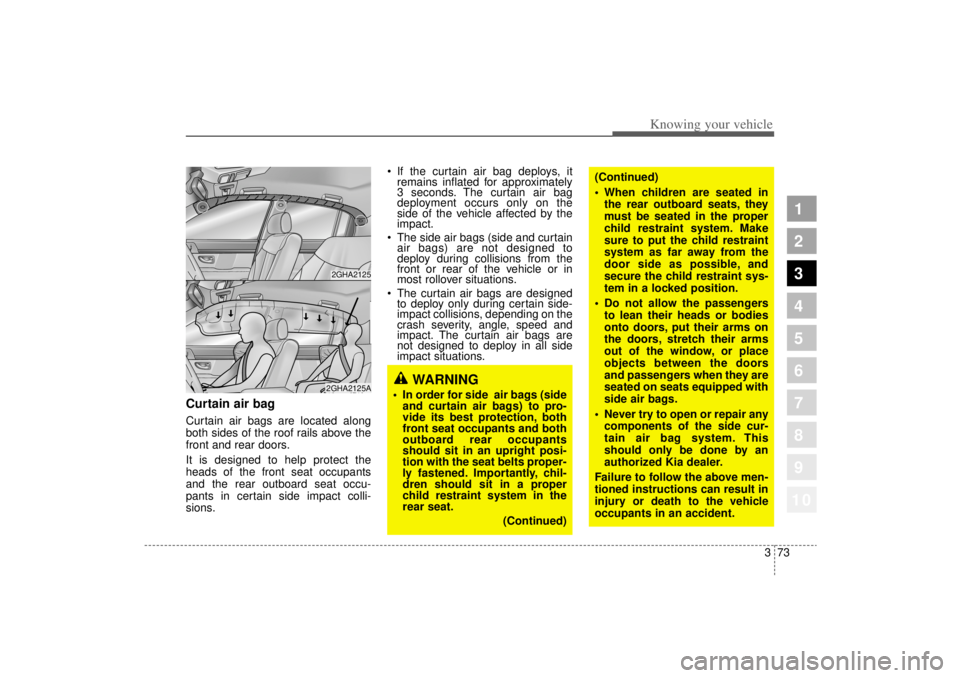
Curtain air bagCurtain air bags are located along
both sides of the roof rails above the
front and rear doors.
It is designed to help protect the
heads of the front seat occupants
and the rear outboard seat occu-
pants in certain side impact colli-
sions.
If the curtain air bag deploys, it
remains inflated for approximately
3 seconds. The curtain air bag
deployment occurs only on the
side of the vehicle affected by the
impact.
The side air bags (side and curtain
air bags) are not designed to
deploy during collisions from the
front or rear of the vehicle or in
most rollover situations.
The curtain air bags are designed
to deploy only during certain side-
impact collisions, depending on the
crash severity, angle, speed and
impact. The curtain air bags are
not designed to deploy in all side
impact situations.
WARNING
In order for side air bags (side
and curtain air bags) to pro-
vide its best protection, both
front seat occupants and both
outboard rear occupants
should sit in an upright posi-
tion with the seat belts proper-
ly fastened. Importantly, chil-
dren should sit in a proper
child restraint system in the
rear seat.
(Continued)
(Continued)
When children are seated in
the rear outboard seats, they
must be seated in the proper
child restraint system. Make
sure to put the child restraint
system as far away from the
door side as possible, and
secure the child restraint sys-
tem in a locked position.
Do not allow the passengers
to lean their heads or bodies
onto doors, put their arms on
the doors, stretch their arms
out of the window, or place
objects between the doors
and passengers when they are
seated on seats equipped with
side air bags.
Never try to open or repair any
components of the side cur-
tain air bag system. This
should only be done by an
authorized Kia dealer.
Failure to follow the above men-
tioned instructions can result in
injury or death to the vehicle
occupants in an accident.
2GHA21252GHA2125A
Page 91 of 322
Knowing your vehicle80
3
1
2
3
4
5
6
7
8
910
Noise and smokeWhen the air bags inflate, they make
a loud noise and they leave smoke
and powder in the air inside of the
vehicle. This is normal and is a result
of the ignition of the air bag inflator.
After the air bag inflates, you may
feel substantial discomfort in breath-
ing due to the contact of your chest
to both the safety belt and the air
bag, as well as from breathing the
smoke and powder. We strongly
urge you to open your doors
and/or windows as soon as possi-
ble after impact in order to reduce
discomfort and prevent prolonged
exposure to the smoke and pow-
der.
Though smoke and powder are non-
toxic, it may cause irritation to the
skin (eyes, nose and throat etc). If
this is the case, wash and rinse with
the cold water immediately and con-
sult the doctor if the symptom per-
sists.
WARNING -
Seated
positioning
Driver should sit as far back
(at least 10 inches (250 mm)
away) from the steering wheel
air bag as possible to reduce
the risk of injury or death in a
collision. The front passenger
should always move their seat
as far back as possible and sit
back in their seat.
Air bag inflates instantly in an
event of collision, passengers
may be injured by the air bag
expansion force if they are not
in proper position.
Air bag inflation may cause
injuries which normally include
facial or bodily abrasions,
injuries by the broken glasses
or burns by the explosives.
WARNING
When the air bags deploy, the
air bag related parts in steering
wheel and/or instrument panel
and/or in both sides of the roof
rails above the front and rear
doors are very hot. To prevent
injury, do not touch the air bag
storage areas internal compo-
nents immediately after an air
bag has inflated.
Page 93 of 322
Knowing your vehicle82
3
1
2
3
4
5
6
7
8
910
Air bag (Supplemental
Restraint System) service Your Supplemental Restraint System
is virtually maintenance-free. There
are no parts which you can service.
You must have the system serviced
under the following circumstances:
If an air bag ever inflates, the air
bag must be replaced. Do not try to
remove or discard the air bag by
yourself. This must be done by an
authorized Kia dealer.
If the air bag warning indicator light
alerts you to a problem, have the
air bag system checked as soon as
possible. Otherwise, your air bag
system may be ineffective.
When repairing or scrapping the
vehicles Repairing steering wheel, instru-
ment panel, center console or
roofs, or installing car audio around
center console or painting front
metal sheet could disable the air
bag system. Have them checked
by an authorized Kia dealer.
When leaving the vehicle at an
authorized Kia dealer, inform the
facility that the vehicle is equipped
with air bag system, and leave the
owner’ s manual in the vehicle.
Since air bag system contains
explosive chemical substances,
contact an authorized Kia dealer
when scrapping the vehicle.
WARNING
- No mainte-
nance or repair
Do not modify your steering
wheel, seat or any other part
of the Supplemental Restraint
System. Modification could
make the system inoperable.
Do not work on the system ’s
components or wiring. This
could cause the air bags to
inflate inadvertently, possibly
seriously injuring someone.
Working on the system could
also disable the system so
that the air bags would not
deploy in a collision.
Any work on the SRS system,
such as removing, installing,
repairing, or any work on the
steering wheel must be per-
formed by a qualified Kia tech-
nician. Improper handling of
the air bag system may result
in serious personal injury or
death.
CAUTION
- No modifica-
tion
Do not modify any part of the airbag system. Modification couldmake the air bag system ineffec-tive or could cause unneces-sary deployment.
Page 119 of 322
Knowing your vehicle108
3
1
2
3
4
5
6
7
8
910
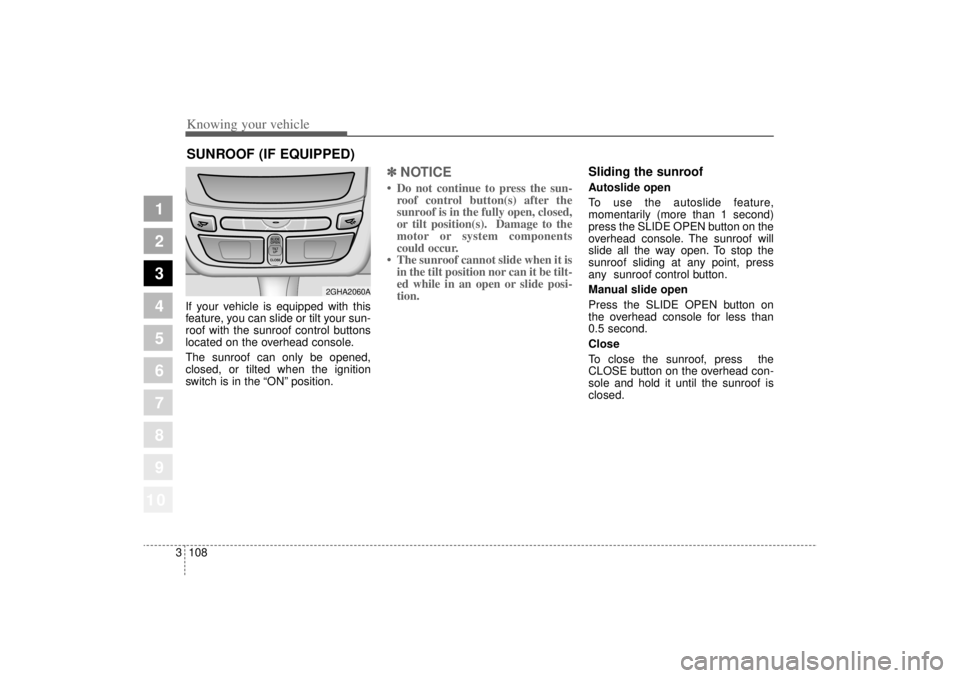
If your vehicle is equipped with this
feature, you can slide or tilt your sun-
roof with the sunroof control buttons
located on the overhead console.
The sunroof can only be opened,
closed, or tilted when the ignition
switch is in the “ON”position.
✽ ✽
NOTICE• Do not continue to press the sun-
roof control button(s) after the
sunroof is in the fully open, closed,
or tilt position(s). Damage to the
motor or system components
could occur.
• The sunroof cannot slide when it is in the tilt position nor can it be tilt-
ed while in an open or slide posi-
tion.
Sliding the sunroof Autoslide open
To use the autoslide feature,
momentarily (more than 1 second)
press the SLIDE OPEN button on the
overhead console. The sunroof will
slide all the way open. To stop the
sunroof sliding at any point, press
any sunroof control button.
Manual slide open
Press the SLIDE OPEN button on
the overhead console for less than
0.5 second.
Close
To close the sunroof, press the
CLOSE button on the overhead con-
sole and hold it until the sunroof is
closed.
SUNROOF (IF EQUIPPED)
SLIDESLIDEOPENOPENTILTTILT UP UPCLOSECLOSESLIDESLIDEOPENOPENTILTTILT UP UPCLOSECLOSE
2GHA2060A
Page 120 of 322
3 109
1
2
3
4
5
6
7
8
910
Knowing your vehicle
Tilting the sunroof Autotilt open
To use the autotilt feature, momen-
tarily (more than 1 second) press the
TILT UP button on the overhead
console. The sunroof will tilt all the
way open. To stop the sunroof tilting
at any point, press any sunroof con-
trol button.
Manual tilt open
Press the TILT UP button on the
overhead console for less than 0.5
second.
Close
To close the sunroof, press the
CLOSE button on the overhead con-
sole and hold it until the sunroof is
closed.
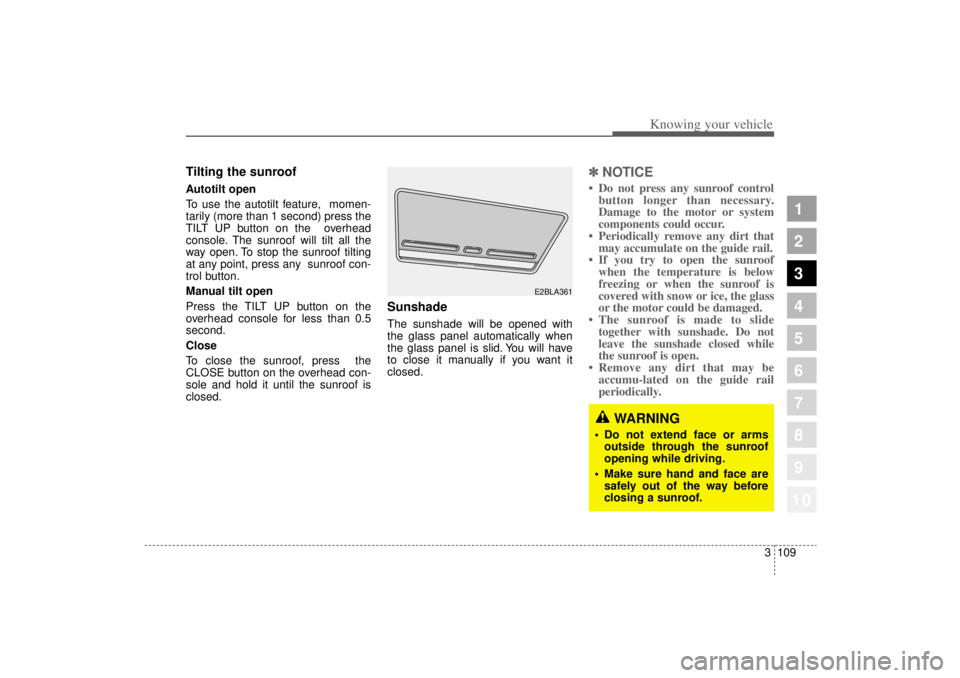
Sunshade The sunshade will be opened with
the glass panel automatically when
the glass panel is slid. You will have
to close it manually if you want it
closed.
✽ ✽NOTICE• Do not press any sunroof control
button longer than necessary.
Damage to the motor or system
components could occur.
• Periodically remove any dirt that may accumulate on the guide rail.
• If you try to open the sunroof when the temperature is below
freezing or when the sunroof is
covered with snow or ice, the glass
or the motor could be damaged.
• The sunroof is made to slide together with sunshade. Do not
leave the sunshade closed while
the sunroof is open.
• Remove any dirt that may be accumu-lated on the guide rail
periodically.
E2BLA361
WARNING
Do not extend face or arms
outside through the sunroof
opening while driving.
Make sure hand and face are
safely out of the way before
closing a sunroof.
Page 121 of 322

Knowing your vehicle110
3
1
2
3
4
5
6
7
8
910
In case of an emergency If the sunroof does not open electri-
cally:
1. Remove the lens.
2. Remove the two (2) screws, and
then remove the overhead con-
sole.
3. Insert the emergency handle (pro- vided with the vehicle) and turn
the handle clockwise to open or
counterclockwise to close.
Resetting the sunroofWhenever the vehicle battery is dis-
connected or discharged, or you use
the emergency handle to operate the
sunroof, you have to reset your sun-
roof system as follows:
1. Turn the ignition key to the ON position.
2. According to the position of the sunroof, do as follows.
1) in case that the sunroof hasclosed completely or been tilt-
ed
: Press the TILT UP button for 1 second.
2) in case that the sunroof has slide-opened
: Press and hold the CLOSE button for more than 5 sec-
onds until the sunroof has
closed completely. And then
press the TILT UP button for 1
second 3. Then, release it.
4. Press and hold the TILT UP button
once again until the sunroof has
returned to the original position of
TILT UP after it is raised a little
higher than the maximum TILT UP
position.
When this is complete, the sunroof
system is reset.
S2BLA329
Page 280 of 322
Maintenance36
7
1
2
3
4
5
6
7
8
910
Items to be reset after the battery
has been discharged or the bat-tery has been disconnected. Driver seat position memory sys-
tem (See page 3-34)
Power window (See page 3-15)
Clock (See page 3-106)
Climate control system (See pages
4-59)
Audio (See the audio manual)
Sunroof (See page 3-110)
✽ ✽
NOTICE• Before performing maintenance
or recharging the battery, turn off
all accessories and stop the engine.
• The negative battery cable must be removed first and installed last
when the battery is disconnected.
WARNING
- Recharging
battery
When recharging the battery,
observe the following precau-
tions:
The battery must be removed
from the vehicle and placed in
an area with good ventilation.
Do not allow cigarettes,
sparks, or flame near the bat-
tery.
Watch the battery during
charging, and stop or reduce
the charging rate if the battery
cells begin gassing (boiling)
violently or if the temperature
of the electrolyte of any cell
exceeds 120°F (49°C).
Wear eye protection when
checking the battery during
charging.
(Continued)
(Continued)
Disconnect the battery charg-
er in the following order.
1. Turn off the battery charger main switch.
2. Unhook the negative clamp from the negative battery ter-
minal.
3. Unhook the positive clamp from the positive battery ter-
minal.