Page 9 of 448
THINGS TO KNOW BEFORE STARTING YOUR VEHICLE
CONTENTS
�A Word About Your Keys..................12
▫Ignition Key..........................12
▫Key-In-Ignition Reminder................13
�Sentry Key Immobilizer System..............13
▫Important Note About Service.............14
▫Replacement Keys......................14
▫Customer Key Programming..............15
▫General Information....................16
�Illuminated Entry........................16�Doors And Door Locks....................16
▫Manual Door Locks.....................16
▫Power Door Locks.....................19
�Remote Keyless Entry.....................20
▫To Unlock The Doors...................20
▫To Lock The Doors.....................21
▫To Release The Liftgate Flipper Glass........21
▫Using The Panic Alarm..................22
▫General Information....................23
2
Page 10 of 448

▫Transmitter Battery Service...............23
�Security Alarm System—If Equipped.........24
▫To Set The Alarm......................25
▫To Disarm The System...................25
�Liftgate...............................26
▫Liftgate Flipper Glass...................26
�Power Windows........................28
▫Auto Down..........................29
▫Auto Up Feature With Anti-Pinch Protection
(Driver’s And Front Passenger Door Only)....29
▫Window Lockout Switch.................30
▫Wind Buffeting........................30
�Occupant Restraints......................31▫Lap/Shoulder Belts.....................32
▫Lap/Shoulder Belt Operating Instructions.....33
▫Adjustable Upper Shoulder Belt Anchorage....36
▫Automatic Locking Mode—If Equipped.....37
▫Energy Management Feature..............37
▫Seat Belt Pretensioners...................38
▫Enhanced Seat Belt Use Reminder System
(BeltAlert)...........................38
▫Seat Belts And Pregnant Women............40
▫Seat Belt Extender......................40
▫Driver And Front Passenger Supplemental
Restraint Systems (SRS)..................41
▫Child Restraint........................58
�Engine Break-In Recommendations...........68
10 THINGS TO KNOW BEFORE STARTING YOUR VEHICLE
Page 21 of 448

NOTE:If desired, the system can be programmed to
unlock all doors on the first press of the“Unlock”button.
Refer to“Remote Unlock Driver’s Door 1st”in the
Personal Settings section of the“Electronic Vehicle Infor-
mation Center (EVIC)”, or simply follow these steps:
1. Press and hold the“Lock”button for 4 to 10 seconds.
2. While the“Lock”button is pressed, (after 4 seconds)
press the“Unlock”button. Release both buttons.
The“Remote Unlock Driver’s Door 1st”feature can be
reactivated by repeating this procedure.
To Lock the Doors
Press and release the“Lock”button on the transmitter to
lock all doors. The turn signal lights will flash once to
acknowledge the lock signal. The horn will chirp once to
acknowledge the signal. If desired, the“Sound Horn On
Lock”feature can be turned on and off by referring to theCustomer Programmable Features of the“Electronic Ve-
hicle Information Center (EVIC)”section or by following
these steps.
1. Press and hold the“Lock”button for 4 to 10 seconds.
2. While the“Lock”button is pressed (after 4 seconds),
press the PANIC button. Release both buttons.
The“Sound Horn On Lock”feature can be reactivated by
repeating this procedure.
To Release the Liftgate Flipper Glass
Press the“Flipper Glass/Trunk Release”button on the
transmitter two times to release the flipper glass.
THINGS TO KNOW BEFORE STARTING YOUR VEHICLE 21
2
Page 22 of 448
WARNING!
Driving with the flipper glass open can allow poi-
sonous exhaust gases into your vehicle. You and your
passengers could be injured by these fumes. Keep
the flipper glass closed when you are operating the
vehicle.
Using The Panic Alarm
To turn the panic alarm feature ON or OFF, press and
hold the PANIC button on the transmitter for at least one
second and release. When the panic alarm is on, the
headlights and park lights will flash, the horn will pulse
on and off and the interior lights will turn on.
The panic alarm will stay on for 3 minutes unless you
turn it off by pressing the PANIC button a second time or
if the vehicle speed is 15 mph (24 km/h) or greater.NOTE:The interior lights will turn off when the ignition
is switched to the ACC or ON position after the panic
alarm is activated. However, the exterior lights and horn
will remain on.
NOTE:When you turn off the panic alarm by pressing
the PANIC button a second time, you may have to be
closer to the vehicle due to the radio frequency noises of
the system.To Turn Off“Flash Lights On Lock/Unlock”
NOTE:If desired, the“Flash Lights On Lock/Unlock”
feature can be turned on and off by referring to the
Customer Programmable Features of the“Electronic Ve-
hicle Information Center (EVIC)”section or by following
these steps.
1. Press and hold the“Unlock”button for 4 to 10
seconds.
22 THINGS TO KNOW BEFORE STARTING YOUR VEHICLE
Page 24 of 448
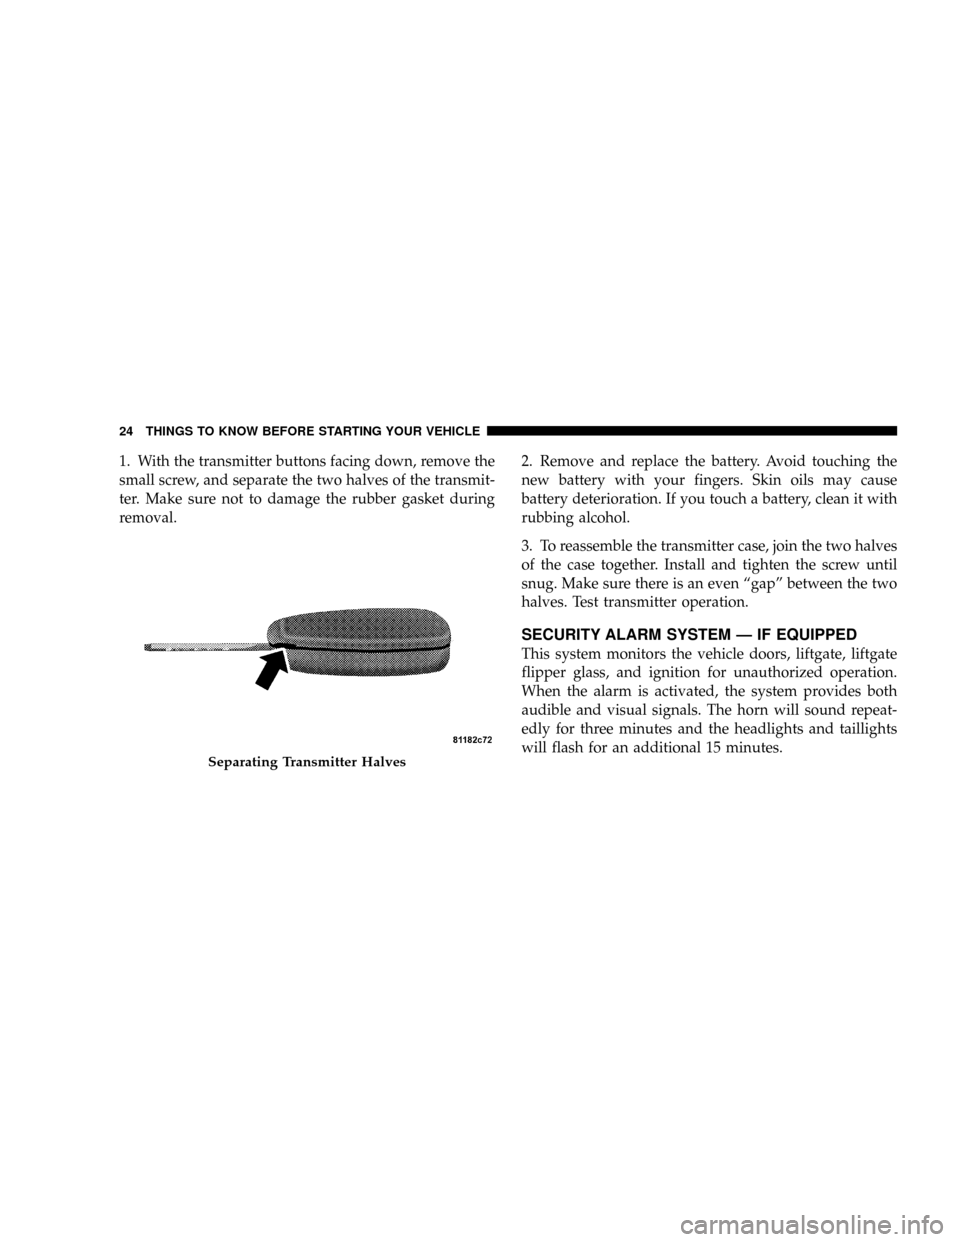
1. With the transmitter buttons facing down, remove the
small screw, and separate the two halves of the transmit-
ter. Make sure not to damage the rubber gasket during
removal.2. Remove and replace the battery. Avoid touching the
new battery with your fingers. Skin oils may cause
battery deterioration. If you touch a battery, clean it with
rubbing alcohol.
3. To reassemble the transmitter case, join the two halves
of the case together. Install and tighten the screw until
snug. Make sure there is an even“gap”between the two
halves. Test transmitter operation.
SECURITY ALARM SYSTEM — IF EQUIPPED
This system monitors the vehicle doors, liftgate, liftgate
flipper glass, and ignition for unauthorized operation.
When the alarm is activated, the system provides both
audible and visual signals. The horn will sound repeat-
edly for three minutes and the headlights and taillights
will flash for an additional 15 minutes.
Separating Transmitter Halves
24 THINGS TO KNOW BEFORE STARTING YOUR VEHICLE
Page 26 of 448
LIFTGATE
To open the liftgate, pull up (squeeze) on the handle and
lift. Manually unlocking the vehicle doors with the
plunger or a key in the lock cylinder will not unlock the
liftgate.WARNING!
Driving with the liftgate open can allow poisonous
exhaust gases into your vehicle. You and your pas-
sengers could be injured by these fumes. Keep the
liftgate closed when you are operating the vehicle.
Liftgate Flipper Glass
The liftgate flipper glass is also unlocked when the
liftgate is unlocked. To open the flipper glass, push up on
the window switch located on the liftgate.
Liftgate Release
26 THINGS TO KNOW BEFORE STARTING YOUR VEHICLE
Page 27 of 448
WARNING!
To avoid injury stand back when opening. Glass will
automatically rise.
Once the liftgate flipper glass has been opened, connec-
tion to the rear window wiper is interrupted, preventing
activation of the rear wiper blade while the flipper glass
is open.
NOTE:If a power malfunction to the power liftgate
latch should occur, an emergency liftgate latch release
can be used to open the liftgate. The emergency liftgate
latch release can be accessed through a snap-in cover
located on the liftgate trim panel.
WARNING!
Driving with the flipper glass open can allow poi-
sonous exhaust gases into your vehicle. You and your
passengers could be injured by these fumes. Keep
the flipper glass closed when you are operating the
vehicle.Liftgate Glass Release
THINGS TO KNOW BEFORE STARTING YOUR VEHICLE 27
2
Page 142 of 448
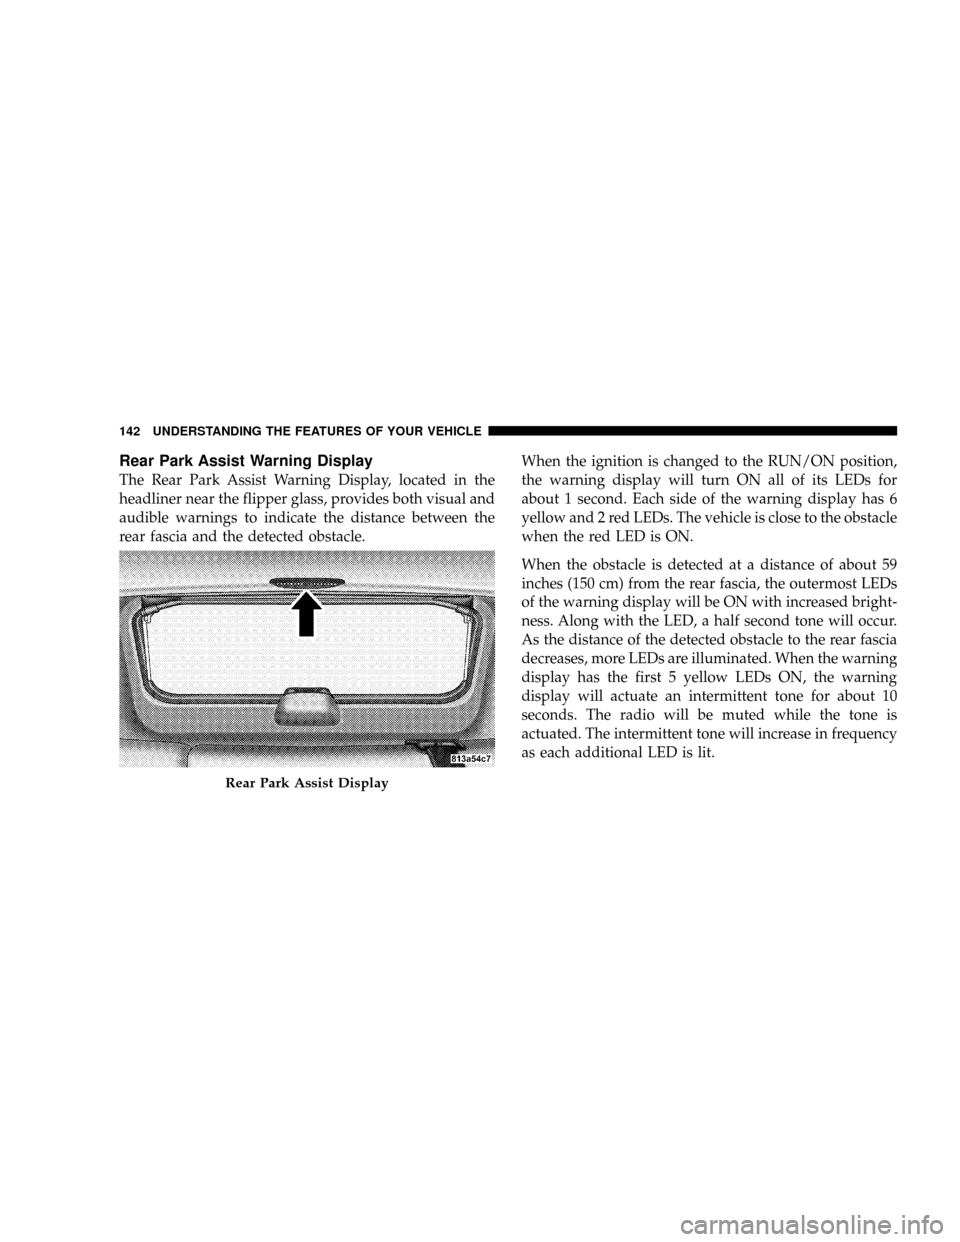
Rear Park Assist Warning Display
The Rear Park Assist Warning Display, located in the
headliner near the flipper glass, provides both visual and
audible warnings to indicate the distance between the
rear fascia and the detected obstacle.When the ignition is changed to the RUN/ON position,
the warning display will turn ON all of its LEDs for
about 1 second. Each side of the warning display has 6
yellow and 2 red LEDs. The vehicle is close to the obstacle
when the red LED is ON.
When the obstacle is detected at a distance of about 59
inches (150 cm) from the rear fascia, the outermost LEDs
of the warning display will be ON with increased bright-
ness. Along with the LED, a half second tone will occur.
As the distance of the detected obstacle to the rear fascia
decreases, more LEDs are illuminated. When the warning
display has the first 5 yellow LEDs ON, the warning
display will actuate an intermittent tone for about 10
seconds. The radio will be muted while the tone is
actuated. The intermittent tone will increase in frequency
as each additional LED is lit.
Rear Park Assist Display
142 UNDERSTANDING THE FEATURES OF YOUR VEHICLE


