2006 INFINITI M35 gas type
[x] Cancel search: gas typePage 3252 of 5621
![INFINITI M35 2006 Factory Service Manual OIL PAN AND OIL STRAINER
EM-189
[VK45DE]
C
D
E
F
G
H
I
J
K
L
MA
EM
Revision: 2006 January2006 M35/M45
CAUTION:
Do not scratch or damage the mating surfaces when cleaning off old liquid gasket.
b. Inst INFINITI M35 2006 Factory Service Manual OIL PAN AND OIL STRAINER
EM-189
[VK45DE]
C
D
E
F
G
H
I
J
K
L
MA
EM
Revision: 2006 January2006 M35/M45
CAUTION:
Do not scratch or damage the mating surfaces when cleaning off old liquid gasket.
b. Inst](/manual-img/42/57023/w960_57023-3251.png)
OIL PAN AND OIL STRAINER
EM-189
[VK45DE]
C
D
E
F
G
H
I
J
K
L
MA
EM
Revision: 2006 January2006 M35/M45
CAUTION:
Do not scratch or damage the mating surfaces when cleaning off old liquid gasket.
b. Install new O-rings to oil pump and front cover side.
c. Apply a continuous bead of liquid gasket with tube presser [SST:
WS39930000 ( — )] to the cylinder block mating surfaces of
oil pan to a limited portion as shown in the figure.
Use Genuine RTV Silicone Sealant or equivalent. Refer to
GI-48, "
RECOMMENDED CHEMICAL PRODUCTS AND SEAL-
ANTS".
CAUTION:
Attaching should be done within 5 minutes after coating.
d. Install oil pan.
CAUTION:
Install avoiding misalignment of O-rings.
Tighten mounting bolts in numerical order as shown in the fig-
ure.
NOTE:
Tighten mounting bolts No. 1 and 2 in two steps. The numeri-
cal order No. 11 and 17 shown second steps.
There are three types of mounting bolts. Refer to the following
for locating bolts.
e. Tighten transmission joint bolts. Refer to AT-271, "
TRANSMISSION ASSEMBLY" .
f. Install rear plate cover.
3. Install oil pan drain plug with new drain plug washer.
Refer to the figure of components of former page for installation direction of drain plug washer. Refer to
EM-187, "
Removal and Installation" .
4. Install in the reverse order of removal after this step.
NOTE:
At least 30 minutes after oil pan is installed, pour engine oil.
INSPECTION AFTER INSTALLATION
1. Check engine oil level and adjust engine oil. Refer to LU-26, "ENGINE OIL" .
2. Start engine, and check there is no leak of engine oil.
3. Stop engine and wait for 15 minutes.
4. Check engine oil level again. Refer to LU-26, "
ENGINE OIL" .
PBIC0195E
M6 30 mm. (1.18 in) : 18, 19
M8
100 mm (3.94 in) : 5, 9
M8
45 mm (1.77 in) : Except the abovePBIC0194E
Page 3275 of 5621
![INFINITI M35 2006 Factory Service Manual EM-212
[VK45DE]
TIMING CHAIN
Revision: 2006 January2006 M35/M45
a. Install new O-rings onto cylinder heads (right and left bank) and
cylinder block.
b. Apply a continuous bead of liquid gasket INFINITI M35 2006 Factory Service Manual EM-212
[VK45DE]
TIMING CHAIN
Revision: 2006 January2006 M35/M45
a. Install new O-rings onto cylinder heads (right and left bank) and
cylinder block.
b. Apply a continuous bead of liquid gasket](/manual-img/42/57023/w960_57023-3274.png)
EM-212
[VK45DE]
TIMING CHAIN
Revision: 2006 January2006 M35/M45
a. Install new O-rings onto cylinder heads (right and left bank) and
cylinder block.
b. Apply a continuous bead of liquid gasket with tube presser
[SST: WS39930000 ( — )] to front cover as shown in the fig-
ure.
Use Genuine RTV Silicone Sealant or equivalent. Refer to
GI-48, "
RECOMMENDED CHEMICAL PRODUCTS AND
SEALANTS" .
c. Make sure again that the mating marks on timing chain and that
on each sprocket are aligned. Then, install front cover.
CAUTION:
Be careful to avoid interference with the front end of oil
pump drive spacer. Such interference may damage front oil
seal.
d. Tighten mounting bolts in numerical order as shown in the fig-
ure.
There are four type mounting bolts.
e. After all mounting bolts are tightened, retighten them in numerical order as shown in the figure.
CAUTION:
Be sure to wipe off any excessive liquid gasket leaking onto surface mating with oil pan.
11. Install intake valve timing control cover as follows:
a. At the back of intake valve timing control cover, install new seal rings (three for each bank) to the area to
be inserted into camshaft sprocket (INT).
CAUTION:
Do not spread seal ring excessively to avoid breaks and deformation.
SBIA0373E
PBIC0062E
KBIA0354J
PBIC1681E
Page 3313 of 5621
![INFINITI M35 2006 Factory Service Manual EM-250
[VK45DE]
CYLINDER BLOCK
Revision: 2006 January2006 M35/M45
Disassembly and AssemblyNBS004PN
DISASSEMBLY
NOTE:
Explained here is how to disassemble with engine stand supporting transmission su INFINITI M35 2006 Factory Service Manual EM-250
[VK45DE]
CYLINDER BLOCK
Revision: 2006 January2006 M35/M45
Disassembly and AssemblyNBS004PN
DISASSEMBLY
NOTE:
Explained here is how to disassemble with engine stand supporting transmission su](/manual-img/42/57023/w960_57023-3312.png)
EM-250
[VK45DE]
CYLINDER BLOCK
Revision: 2006 January2006 M35/M45
Disassembly and AssemblyNBS004PN
DISASSEMBLY
NOTE:
Explained here is how to disassemble with engine stand supporting transmission surface. When using differ-
ent type of engine stand, note with difference in steps and etc.
1. Remove engine assembly from vehicle, and separate front suspension member, transmission from
engine. Refer to EM-244, "
ENGINE ASSEMBLY" .
2. Remove the parts that may restrict installation of engine to widely use engine stand.
NOTE:
The procedure is described assuming that you use widely use engine holding the surface, to which trans-
mission is installed.
a. Remove drive plate.
Holding ring gear with ring gear stopper (SST).
Loosen mounting bolts diagonally order.
CAUTION:
Do not disassemble drive plate.
Do not place drive plate with signal plate facing down.
When handling signal plate, take care not to damage or
scratch it.
Handle signal plate in a manner that prevents it from
becoming magnetized.
b. Remove rear plate.
3. Lift engine with hoist to install it onto widely use engine stand.
CAUTION:
Use engine stand that has a load capacity [approximately 240kg (529 lb) or more] large enough for
supporting the engine weight.
If the load capacity of stand is not adequate, remove the following parts beforehand to reduce the
potential risk of overturning stand.
–Intake manifolds (upper and lower); Refer to EM-179, "INTAKE MANIFOLD" .
–Exhaust manifold and three way catalyst; Refer to EM-183, "EXHAUST MANIFOLD AND THREE WAY
CATALYST" .
13. Piston pin 14. Connecting rod bearing 15. Connecting rod bearing cap
16. Block heater protector 17. Connector cap 18. Cylinder block heater
19. Gasket 20. Main bearing cap 21. Thrust bearing
22. Main bearing 23. Rear plate 24. Crankshaft
25. Pilot convertor 26. Drive plate 27. Thrust bearing
28. Side bolt 29. Reinforcement plate 30. Crankshaft position sensor (POS)
31. O-ring 32. Rear oil seal 33. Rear oil seal retainer
PBIC1656E
PBIC2367E
Page 3317 of 5621
![INFINITI M35 2006 Factory Service Manual EM-254
[VK45DE]
CYLINDER BLOCK
Revision: 2006 January2006 M35/M45
19. If pilot converter must be removed, remove it from the rear end
of the crankshaft using pilot bushing puller (SST).
ASSEMBLY
1. F INFINITI M35 2006 Factory Service Manual EM-254
[VK45DE]
CYLINDER BLOCK
Revision: 2006 January2006 M35/M45
19. If pilot converter must be removed, remove it from the rear end
of the crankshaft using pilot bushing puller (SST).
ASSEMBLY
1. F](/manual-img/42/57023/w960_57023-3316.png)
EM-254
[VK45DE]
CYLINDER BLOCK
Revision: 2006 January2006 M35/M45
19. If pilot converter must be removed, remove it from the rear end
of the crankshaft using pilot bushing puller (SST).
ASSEMBLY
1. Fully air-blow engine coolant and engine oil passages in cylinder block, cylinder bore and crankcase to
remove any foreign material.
CAUTION:
Use a goggles to protect your eye.
2. Install each plug to the cylinder block. (Only screwed-type plugs
are shown in the figure.)
Apply sealant to the thread of each plug “A” and “D”.
Use Genuine High Strength Locking Sealant or equiva-
lent. Refer to GI-48, "
RECOMMENDED CHEMICAL PROD-
UCTS AND SEALANTS".
Apply sealant to the thread of each plug “B” and “C”.
Use Anaerobic Liquid Gasket or equivalent. Refer to GI-
48, "RECOMMENDED CHEMICAL PRODUCTS AND SEAL-
ANTS".
Replace copper washers with new ones.
Tighten each plug as specified below.
3. Install main bearings and thrust bearings as follows:
a. Remove dust, dirt and oil on the bearing mating surfaces of cylinder block and main bearing caps.
b. Install thrust bearings to the both sides of the No. 3 journal hous-
ing on cylinder block and main bearing cap.
Install thrust bearings with the oil groove facing the crankshaft
arm (outside).
Install thrust bearing with a protrusion on one end on cylinder
block, and thrust bearing with a protrusion at center on main
bearing cap. Align each protrusion with mating notch.
PBIC0092E
PBIC1265E
Part Washer Tightening torque
A Yes 53.9 Nꞏm (5.5 kg-m, 40 ft-lb)
B No 19.6 Nꞏm (2.0 kg-m, 15 ft-lb)
C Yes 62.7 Nꞏm (6.4 kg-m, 46 ft-lb)
D Yes 62.7 Nꞏm (6.4 kg-m, 46 ft-lb)
PBIC2368E
Page 3522 of 5621

PRECAUTIONS
GW-3
C
D
E
F
G
H
J
K
L
MA
B
GW
Revision: 2006 January2006 M35/M45
PRECAUTIONSPFP:00001
Precautions for Supplemental Restraint System (SRS) “AIR BAG” and “SEAT
BELT PRE-TENSIONER”
NIS00216
The Supplemental Restraint System such as “AIR BAG” and “SEAT BELT PRE-TENSIONER”, used along
with a front seat belt, helps to reduce the risk or severity of injury to the driver and front passenger for certain
types of collision. This system includes seat belt switch inputs and dual stage front air bag modules. The SRS
system uses the seat belt switches to determine the front air bag deployment, and may only deploy one front
air bag, depending on the severity of a collision and whether the front occupants are belted or unbelted.
Information necessary to service the system safely is included in the SRS and SB section of this Service Man-
ual.
WAR NING :
To avoid rendering the SRS inoperative, which could increase the risk of personal injury or death
in the event of a collision which would result in air bag inflation, all maintenance must be per-
formed by an authorized NISSAN/INFINITI dealer.
Improper maintenance, including incorrect removal and installation of the SRS, can lead to per-
sonal injury caused by unintentional activation of the system. For removal of Spiral Cable and Air
Bag Module, see the SRS section.
Do not use electrical test equipment on any circuit related to the SRS unless instructed to in this
Service Manual. SRS wiring harnesses can be identified by yellow and/or orange harnesses or
harness connectors.
Precautions for Procedures without Cowl Top CoverNIS00217
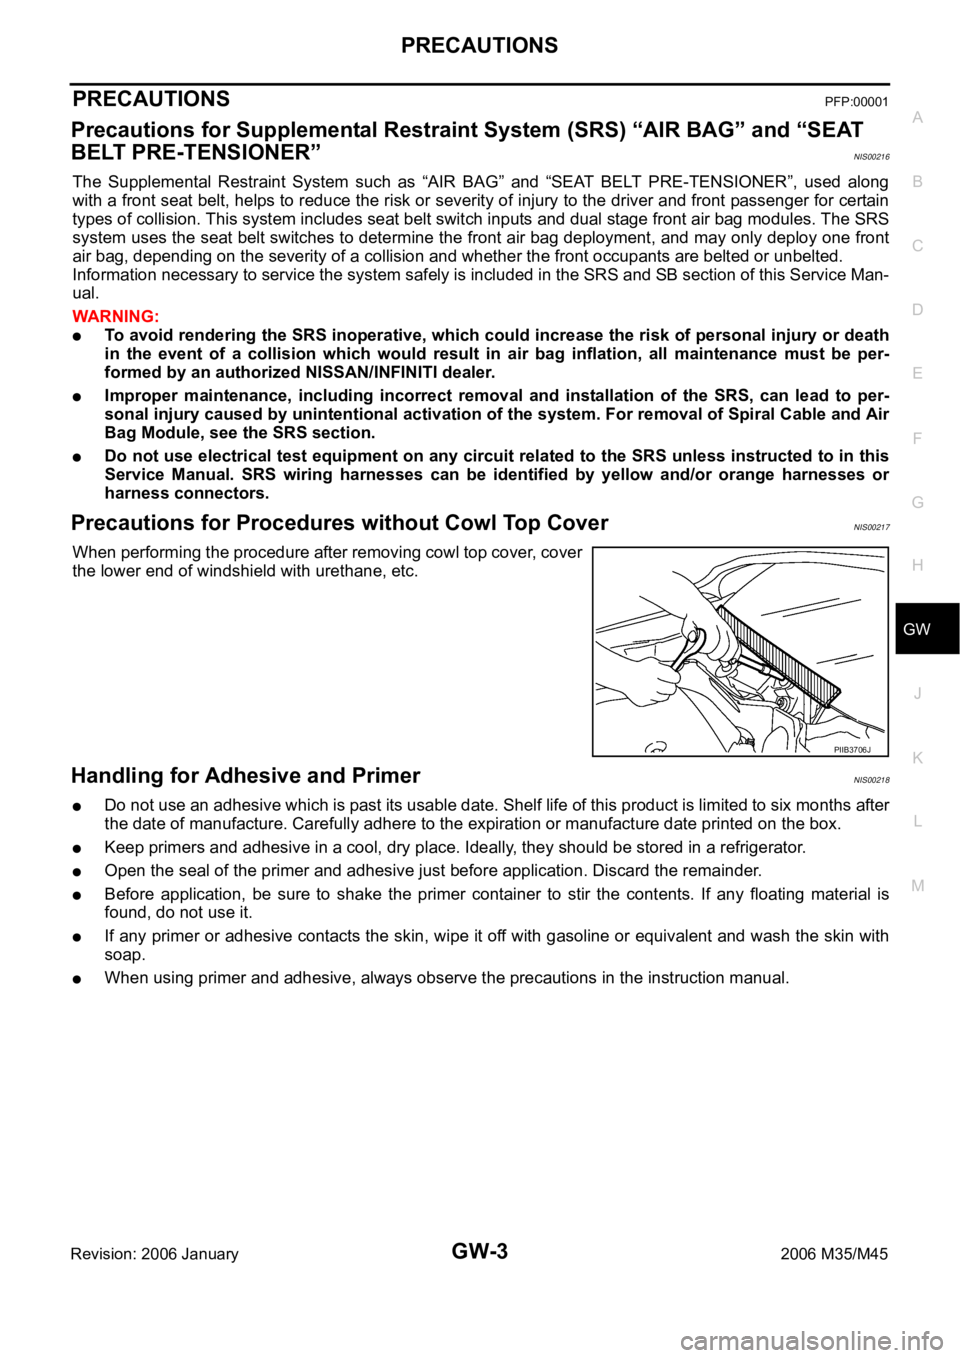
When performing the procedure after removing cowl top cover, cover
the lower end of windshield with urethane, etc.
Handling for Adhesive and PrimerNIS00218
Do not use an adhesive which is past its usable date. Shelf life of this product is limited to six months after
the date of manufacture. Carefully adhere to the expiration or manufacture date printed on the box.
Keep primers and adhesive in a cool, dry place. Ideally, they should be stored in a refrigerator.
Open the seal of the primer and adhesive just before application. Discard the remainder.
Before application, be sure to shake the primer container to stir the contents. If any floating material is
found, do not use it.
If any primer or adhesive contacts the skin, wipe it off with gasoline or equivalent and wash the skin with
soap.
When using primer and adhesive, always observe the precautions in the instruction manual.
PIIB3706J
Page 4473 of 5621

LT-46
HEADLAMP (FOR USA) - XENON TYPE -
Revision: 2006 January2006 M35/M45
COMBINATION SWITCH READING FUNCTION
Refer to BCS-3, "COMBINATION SWITCH READING FUNCTION" .
EXTERIOR LAMP BATTERY SAVER CONTROL
When the combination switch (lighting switch) is in the 2ND position (ON), and the ignition switch is turned
from ON or ACC to OFF, the battery saver control function is activated.
Under this condition, the headlamps remain illuminated for 5 minutes, then the headlamps are turned off.
Exterior lamp battery saver control mode can be changed by the function setting of CONSULT-II.
AUTO LIGHT OPERATION
Refer to LT-116, "System Description" .
XENON HEADLAMP
Xenon type lamps are used for to the low beam headlamps. Xenon bulbs do not use a filament. Instead, they
produce light when a high voltage current is passed between two tungsten electrodes through a mixture of
xenon (an inert gas) and certain other metal halides. In addition to strong lighting power, electronic control of
the power supply gives the headlamps stable quality and tone color.
Followings are some advantages of the xenon type headlamp.
The light produced by the headlamps is white color similar to sunlight that is easy to the eyes.
Light output is nearly double that of halogen headlamps, affording increased area of illumination.
Counter-reflected luminance increases and the contrast enhances on the wet road in the rain. That makes
visibility go up more than the increase of the light volume.
Power consumption is approximately 25 percent less than halogen headlamps, reducing battery load.
CAN Communication System DescriptionNKS003OM
CAN (Controller Area Network) is a serial communication line for real time application. It is an on-vehicle mul-
tiplex communication line with high data communication speed and excellent error detection ability. Many elec-
tronic control units are equipped onto a vehicle, and each control unit shares information and links with other
control units during operation (not independent). In CAN communication, control units are connected with 2
communication lines (CAN H line, CAN L line) allowing a high rate of information transmission with less wiring.
Each control unit transmits/receives data but selectively reads required data only.
CAN Communication UnitNKS003ON
Refer to LAN-34, "CAN Communication Unit" .
Page 4778 of 5621

MA-1
MAINTENANCE
L MAINTENANCE
CONTENTS
C
D
E
F
G
H
I
J
K
M
SECTION MA
A
B
MA
Revision: 2006 January2006 M35/M45
MAINTENANCE
PREPARATION ........................................................... 3
Special Service Tools ............................................... 3
Commercial Service Tools ........................................ 3
GENERAL MAINTENANCE ....................................... 4
Explanation of General Maintenance ....................... 4
PERIODIC MAINTENANCE ....................................... 7
Introduction of Periodic Maintenance ....................... 7
Schedule 1 ............................................................... 8
EMISSION CONTROL SYSTEM MAINTE-
NANCE .................................................................. 8
CHASSIS AND BODY MAINTENANCE ............... 9
Schedule 2 ............................................................. 10
EMISSION CONTROL SYSTEM MAINTE-
NANCE ................................................................ 10
CHASSIS AND BODY MAINTENANCE .............. 11
RECOMMENDED FLUIDS AND LUBRICANTS ...... 12
Fluids and Lubricants ............................................. 12
SAE Viscosity Number ........................................... 13
GASOLINE ENGINE OIL .................................... 13
Anti-Freeze Coolant Mixture Ratio ......................... 13
ENGINE MAINTENANCE (VQ35DE ENGINE) ......... 14
Checking Drive Belts .............................................. 14
Drive Belts Tension Adjustment ............................. 14
ALTERNATOR AND POWER STEERING OIL
PUMP BELT ........................................................ 15
A/C COMPRESSOR BELT ................................. 15
Changing Engine Coolant ...................................... 15
DRAINING ENGINE COOLANT ......................... 15
REFILLING ENGINE COOLANT ........................ 16
FLUSHING COOLING SYSTEM ......................... 17
Checking Fuel Lines ............................................ ... 18
Changing Air Cleaner Filter .................................... 18
VISCOUS PAPER TYPE ..................................... 18
Changing Engine Oil .............................................. 18
Changing Oil Filter ................................................. 19
REMOVAL ........................................................
... 19
INSTALLATION ................................................... 19
INSPECTION AFTER INSTALLATION ............... 20
Changing Spark Plugs (Platinum-Tipped Type) ..... 20
REMOVAL ........................................................
... 20INSPECTION AFTER REMOVAL ....................... 21
INSTALLATION ................................................... 21
Checking EVAP Vapor Lines .................................. 21
ENGINE MAINTENANCE (VK45DE ENGINE) ......... 22
Checking Drive Belts .............................................. 22
Tension Adjustment .............................................
... 22
Changing Engine Coolant ....................................... 22
DRAINING ENGINE COOLANT .......................... 22
REFILLING ENGINE COOLANT ......................... 23
FLUSHING COOLING SYSTEM ......................... 24
Checking Fuel Lines ............................................ ... 25
Changing Air Cleaner Filter .................................... 25
VISCOUS PAPER TYPE ..................................... 25
Changing Engine Oil ............................................
... 25
Changing Oil Filter .................................................. 26
REMOVAL ........................................................
... 26
INSTALLATION ................................................... 26
INSPECTION AFTER INSTALLATION ................ 27
Changing Spark Plugs (Platinum-Tipped Type) ...... 27
REMOVAL ........................................................
... 27
INSPECTION AFTER REMOVAL ....................... 27
INSTALLATION ................................................... 28
Checking EVAP Vapor Lines .................................. 28
CHASSIS AND BODY MAINTENANCE ................... 29
Checking Exhaust System ...................................... 29
Checking A/T Fluid ................................................. 29
Changing A/T Fluid ................................................. 31
Checking Transfer Fluid ......................................... 31
Changing Transfer Fluid ......................................... 32
Checking Propeller Shaft ........................................ 32
Checking Differential Gear Oil ................................ 32
Changing Differential Gear Oil ................................ 33
Balancing Wheels (Bonding Weight Type) ............. 33
REMOVAL ........................................................
... 33
WHEEL BALANCE ADJUSTMENT ..................... 33
Tire Rotation ........................................................... 35
Checking Brake Fluid Level and Leaks .................. 35
Checking Brake Lines and Cables ......................... 35
Changing Brake Fluid ............................................. 35
Checking Disc Brake .............................................. 36
Page 4790 of 5621

RECOMMENDED FLUIDS AND LUBRICANTS
MA-13
C
D
E
F
G
H
I
J
K
MA
B
MA
Revision: 2006 January2006 M35/M45
SAE Viscosity NumberNLS0007F
GASOLINE ENGINE OIL
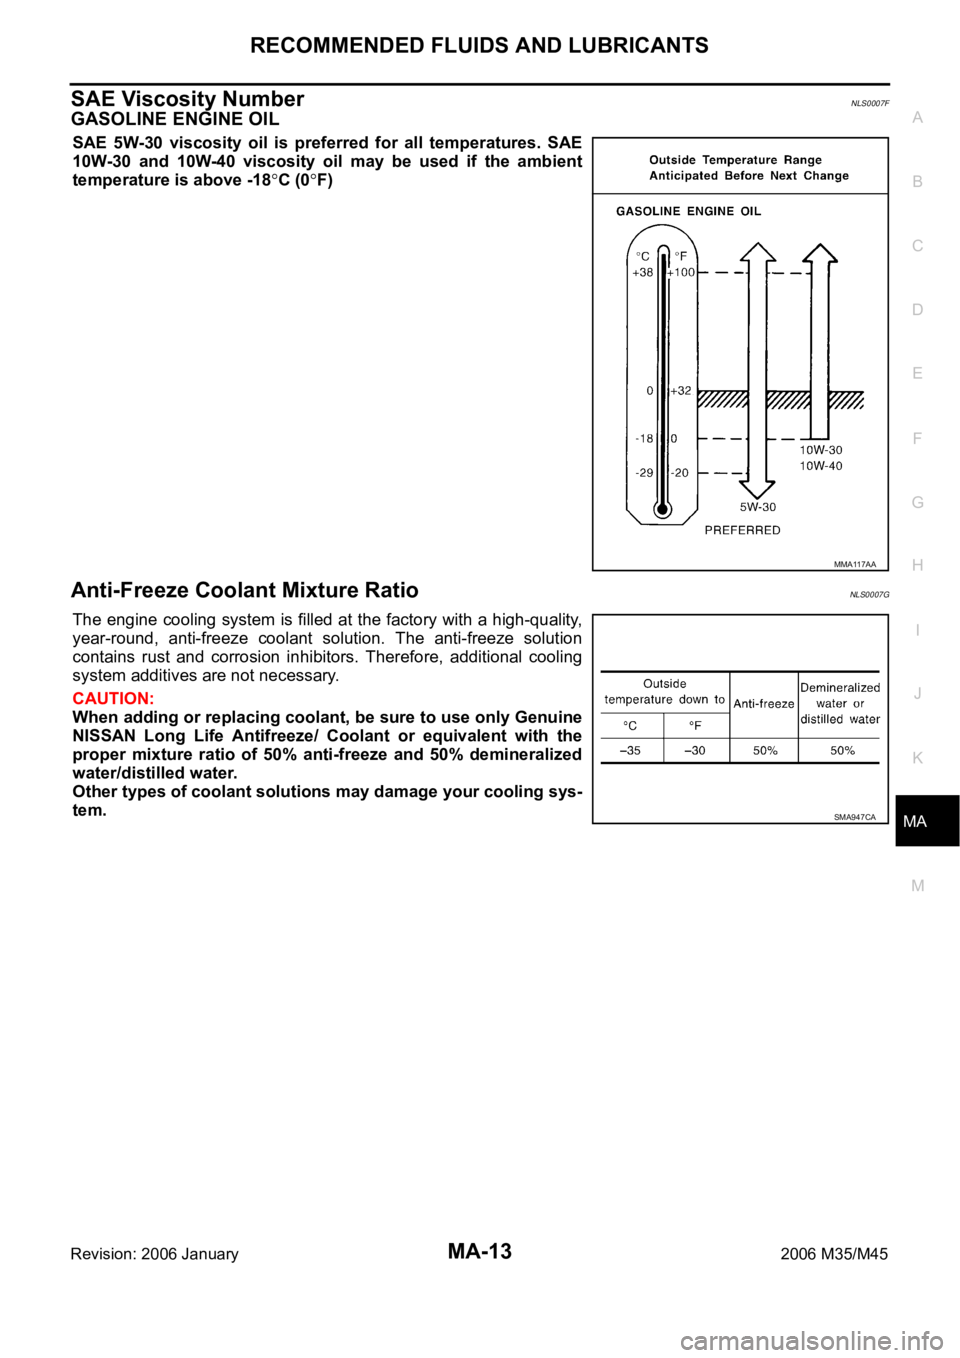
SAE 5W-30 viscosity oil is preferred for all temperatures. SAE
10W-30 and 10W-40 viscosity oil may be used if the ambient
temperature is above -18
C (0F)
Anti-Freeze Coolant Mixture RatioNLS0007G
The engine cooling system is filled at the factory with a high-quality,
year-round, anti-freeze coolant solution. The anti-freeze solution
contains rust and corrosion inhibitors. Therefore, additional cooling
system additives are not necessary.
CAUTION:
When adding or replacing coolant, be sure to use only Genuine
NISSAN Long Life Antifreeze/ Coolant or equivalent with the
proper mixture ratio of 50% anti-freeze and 50% demineralized
water/distilled water.
Other types of coolant solutions may damage your cooling sys-
tem.
MMA117AA
SMA947CA