2006 Hyundai Tiburon ECU
[x] Cancel search: ECUPage 167 of 266

32WHAT TO DO IN AN EMERGENCY
IF THE ENGINE WILL NOT START!
D010A01A-AAT D010B02A-AAT
If Engine Doesn’t Turn Over or Turns
Over Slowly
D010C02Y-AATIf Engine Turns Over Normally but Does
Not Start1. Check fuel level.
2. With the key in the "OFF" position, check all
connectors at ignition, coils and spark plugs.
Reconnect any that may be disconnected or
loose.
3. Check the fuel line in the engine compart-
ment.
4. If the engine still does not to start, call a
Hyundai dealer or seek other qualified assis-
tance.D010D01A-AATIf the Engine Stalls While Driving1. Reduce your speed gradually, keeping a
straight line. Move cautiously off the road to
a safe place.
2. Turn on your emergency flashers.
3. Try to start the engine again. If your vehicle
will not start, contact a Hyundai dealer or
seek other qualified assistance.
WARNING:
If the engine will not start, do not push or
pull the car to start it. This could result in a
collision or cause other damage. In addi-
tion, push or pull starting may cause the
catalytic converter to be overloaded and
create a fire hazard.
1. If your car has an automatic transaxle, be
sure the gear selector lever is in "N" or "P"
and the emergency brake is set.
2. Check the battery connections to be sure
they are clean and tight.
3. Turn on the interior light. If the light dims or
goes out when you operate the starter, the
battery is discharged.
4. Check the starter connections to be sure
they are securely tightened.
5. Do not push or pull the vehicle to start it. See
instructions for "Jump Starting".
D010B01GK
Page 176 of 266

3
WHAT TO DO IN AN EMERGENCY
11
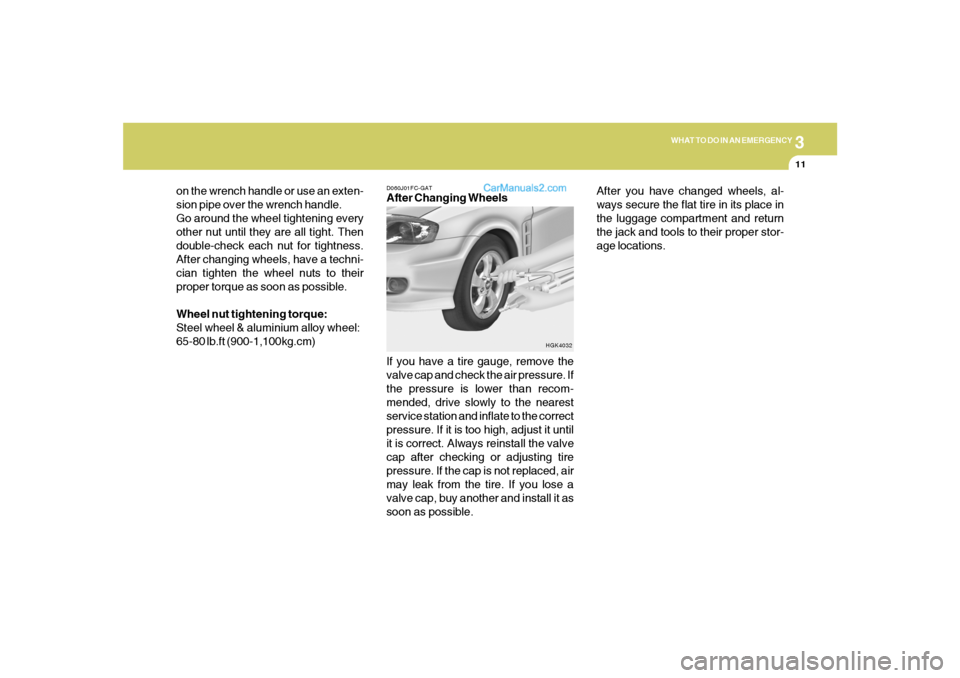
D060J01FC-GATAfter Changing Wheels
If you have a tire gauge, remove the
valve cap and check the air pressure. If
the pressure is lower than recom-
mended, drive slowly to the nearest
service station and inflate to the correct
pressure. If it is too high, adjust it until
it is correct. Always reinstall the valve
cap after checking or adjusting tire
pressure. If the cap is not replaced, air
may leak from the tire. If you lose a
valve cap, buy another and install it as
soon as possible.
HGK4032
on the wrench handle or use an exten-
sion pipe over the wrench handle.
Go around the wheel tightening every
other nut until they are all tight. Then
double-check each nut for tightness.
After changing wheels, have a techni-
cian tighten the wheel nuts to their
proper torque as soon as possible.
Wheel nut tightening torque:
Steel wheel & aluminium alloy wheel:
65-80 lb.ft (900-1,100kg.cm)After you have changed wheels, al-
ways secure the flat tire in its place in
the luggage compartment and return
the jack and tools to their proper stor-
age locations.
Page 192 of 266

5
VEHICLE MAINTENANCE REQUIREMENTS
7
F060D01A-AATo Fuel Lines, Fuel Hoses and
ConnectionsCheck the fuel lines, fuel hoses and connec-
tions for leakage and damage. Have a trained
technician replace any damaged or leaking
parts immediately.
F060M01A-AATo Engine Oil and FilterThe engine oil and filter should be changed at the
intervals specified in the maintenance sched-
ule. If the car is being driven in severe condi-
tions, more frequent oil and filter changes are
required.F060C01A-AATo Fuel FilterA clogged filter can limit the speed at which the
vehicle may be driven, damage the emission
system and cause hard starting. If an exces-
sive amount of foreign matter accumulates in
the fuel tank, the filter may require replacement
more frequently.
After installing a new filter, run the engine for
several minutes, and check for leaks at the
connections. Fuel filters should be installed by
trained technicians.
F060F02A-AATo Crankcase Ventilation HosesInspect the surface of hoses for evidence of
heat and/or mechanical damage. Hard and
brittle rubber, cracking, tears, cuts, abrasions,
and excessive swelling indicate deterioration.
Particular attention should be paid to examine
those hose surfaces nearest to high heat
sources, such as the exhaust manifold.
Inspect the hose routing to assure that the
hoses do not come in contact with any heat
source, sharp edges or moving component
which might cause heat damage or mechanical
wear. Inspect all hose connections, such as
clamps and couplings, to make sure they are
secure, and that no leaks are present. Hoses
should be replaced immediately if there is any
evidence of deterioration or damage.
EXPLANATION OF SCHEDULED MAINTENANCE ITEMS
F060H01A-AATo Air cleaner filterA Genuine Hyundai air cleaner filter is recom-
mended when the filter is replaced.F060G01A-AATo Vapor Hose and Fuel Filler CapThe vapor hose and fuel filler cap should be
inspected at those intervals specified in the
maintenance schedule. Make sure that a new
vapor hose or fuel filler cap is correctly re-
placed.F060J01A-AATo Spark plugsMake sure to install new spark plugs of the
correct heat range.F060N02E-AATo Valve Clearance (2.0L)Inspect excessive valve noise and/or engine
vibration and adjust if necessary. A qualified
technician should perform the operation.
Page 202 of 266

6
DO-IT-YOURSELF MAINTENANCE
8
G050C01A-AATTo Check the Coolant Level
G050D02A-AATTo Change the Engine CoolantThe engine coolant should be changed at those
intervals specified in the vehicle maintenance
schedule in Section 5.
CAUTION:
Engine coolant can damage the finish of
your car. If you spill engine coolant on the
car, wash it off thoroughly with clean water.
1. Park the car on level ground, set the park-
ing brake and remove the radiator cap when
cool.
2. Be sure your drain receptacle is in place.
Open the drain cock on the radiator. Allow all
the engine coolant to drain from the cooling
system, then securely close the drain cock.
3. Check Section 9 for the capacity of the
cooling system in your car. Then, following
the manufacturer’s directions on the engine
coolant container, add the appropriate quan-
tity of coolant to the radiator.
!
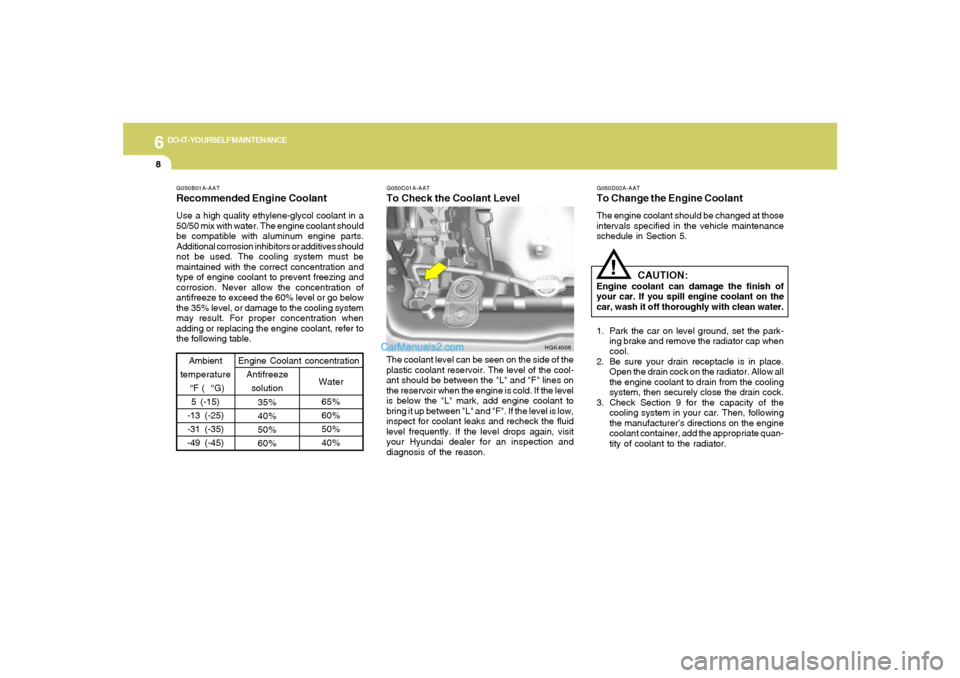
The coolant level can be seen on the side of the
plastic coolant reservoir. The level of the cool-
ant should be between the "L" and "F" lines on
the reservoir when the engine is cold. If the level
is below the "L" mark, add engine coolant to
bring it up between "L" and "F". If the level is low,
inspect for coolant leaks and recheck the fluid
level frequently. If the level drops again, visit
your Hyundai dealer for an inspection and
diagnosis of the reason.
HGK4006 G050B01A-AAT
Recommended Engine CoolantUse a high quality ethylene-glycol coolant in a
50/50 mix with water. The engine coolant should
be compatible with aluminum engine parts.
Additional corrosion inhibitors or additives should
not be used. The cooling system must be
maintained with the correct concentration and
type of engine coolant to prevent freezing and
corrosion. Never allow the concentration of
antifreeze to exceed the 60% level or go below
the 35% level, or damage to the cooling system
may result. For proper concentration when
adding or replacing the engine coolant, refer to
the following table.
Ambient
temperature
°F ( °G)
5 (-15)
-13 (-25)
-31 (-35)
-49 (-45)
65%
60%
50%
40% 35%
40%
50%
60%Water Antifreeze
solution Engine Coolant concentration
Page 233 of 266

6
DO-IT-YOURSELF MAINTENANCE
39
PROTECTED COMPONENTS
Generator(2.0L)
BCM BOX(Tail lamp relay,Power connector,Fuse(2,7,12,13,19,20,24)
Condenser fan relay
Radiator fan relay
Engine control relay, Fuel pump relay, A/T control relay,
Generator,ECM(Z2.7L),PCM(2.0L)
Ignition switch,Start relay
ABS/ESP control module,ESP Air bleeding connector
ABS/ESP control module,ESP Air bleeding connector
Blower relay
Injector
Oxygen sensor,Camshaft position sensor, Idle speed control actuator
DRL control module
Front fog lamp relay
TCM(2.7L),ECM(2.7L)
Horn relay,A/C relay
Head lamp relay(High)
Head lamp relay(Low)
FUSERATING
120A
50A
30A
30A
30A
30A
40A
40A
30A
15A
10A
15A
15A
10A
15A
15A
15A DESCRIPTION
BATT
BATT
COND
RAD
ECU
IGN
ABS 1
ABS 2
BLOWER
INJ
SNSR
DRL
F/FOG
ECU
HORN,A/CON
H/LP (HI)
H/LP (LO)
Page 235 of 266

6
DO-IT-YOURSELF MAINTENANCE
41
DESCRIPTION
IG COIL
AMP
B/UP LAMP
A/BAG IND
A/BAG
HTD MIR
HAZARD
R/WIPER
TAIL-RH
F/WIPER
A/C SW
RR DEFOG
STOP
TAIL-LH
A/CON
ECU
CLUSTER
ROOM LP
P/WINDOW
T/GATE
IGN
RR FOG
C/LIGHT
S/ROOF
S/HTR
ABS
AUDIO
PROTECTED COMPONENTS
Ignition coil(2.7L), Electronic chrome mirror
AMP
Back-up lamp switch,Transaxle range switch,Cruise control module,Stop lamp switch
Instrument cluster (A/BAG IND.)
SRS control module
Mirror defogger
Hazard relay
Rear wiper motor,Rear intermittent wiper relay
Right tail lamps,Glove box lamp
Front wiper motor,Front wiper relay
Blower relay,Blower motor
Defogger relay
Stop lamp switch,Burglar alarm horn relay,Folding/Unfolding rely
Left tail lamps
A/C control module, Blower relay
ECM, Multi gauge unit, TCM, Vehicle speed sensor
Instrument cluster (Power), Per-excitation resister, DRL Control module,Generator
Room lamp,Clock,Audio,Data link connector,Multi gauge unit
Power window relay
Trunk lid switch
AQS sensor,Head lamp relay,DRL Control module
Rear fog lamp
Cigarette lighter,Outside mirror switch
Sunroof,Power door lock/Unlock relay
Seat warmer
ESP/ABS control module
Audio,Digital clock FUSERATING
20A
20A
10A
10A
15A
10A
10A
15A
10A
20A
10A
30A
15A
10A
10A
10A
10A
10A
30A
15A
10A
10A
15A
15A
20A
10A
10A