2006 Hyundai Tiburon lock
[x] Cancel search: lockPage 20 of 266

1FEATURES OF YOUR HYUNDAI8
!
B070F02A-AATKEYLESS ENTRY SYSTEM (If installed)
NOTE:This device complies with Part 15 of the
FCC rules. Operation is subject to the fol-
lowing two conditions:
(1) This device may not cause harmful in-
terference, and (2) this device must accept
any interference received, including inter-
ference that may cause undesired opera-
tion.
WARNING:
Changes or modifications not expressly
approved by the party responsible for com-
pliance could void the user's authority to
operate the equipment.Locking doors1. Close all doors.
2. Push the "LOCK" button on the transmitter.
3. At the same time all doors lock, the turn signal
lights will blink once to indicate that the
system is armed.Unlocking doors1. Push the "UNLOCK" button on the transmitter.
2. At the same time all doors unlock, the turn
signal lights will blink twice to indicate that the
system is disarmed.
NOTE:The transmitter will not work if any of fol-
lowing occur:
- The ignition key is in ignition switch.
- You exceed the operating distance limit
(10 m).
- The battery in the transmitter is weak.
- Other vehicles or objects may be block-
ing the signal.
- The weather is extremely cold.
- The transmitter is close to a radio trans-
mitter such as a radio station or an
airport which can interfere with normal
operation of the transmitter.
When the transmitter does not work cor-
rectly, open and close the door with the
ignition key. If you have a problem with the
transmitter, contact an authorized Hyundai
Dealer.NOTE:Keep the transmitter away from water or
any liquid. If the keyless entry system is
inoperative due to exposure to water or
liquids, it will not be covered by your manu-
facturer vehicle warranty.
B075E01O-AATPanic Warning1. Push the "PANIC" button on the transmitter.
2. At the same time, the siren will sound and the
turn signal lights will blink for 30 seconds.
3. To turn off the system, push the "PANIC"
button again on the transmitter.
HGK102
PANIC
Page 21 of 266

1
FEATURES OF YOUR HYUNDAI
9
B070E02GK-GATReplacing the batteryWhen the transmitter's battery begins to get
weak, it may take several pushes on the button
to lock or unlock the doors, and the LED will not
light. Replace the battery as soon as possible.
Battery type : CR2016
Replacement instructions:
1. Carefully separate the case with a blade
screwdriver as shown in the illustration.
HGK122
Screwdriver
2. Remove the old battery from the case and
note the polarity. Make sure the polarity of
the new battery is the same(+side facing up),
then insert it in the transmitter.NOTE:Install a new battery within 30 seconds after
removing the old one. If installing a new
battery takes more than 30 seconds, take
the following steps.
1) Turn the ignition key to the "ACC" posi-
tion.
2) Make sure that the turn signal lamps
blink once by pushing the "LOCK" or
"UNLOCK" button on the transmitter.
HGK121
Battery
POWER WINDOWB050A01GK-AATThe power windows operate only when the
ignition key is in the "ON" position. The main
switches are located on the driver's arm rest
and control the front windows on the respective
sides of the vehicle. The windows may be
opened by depressing the front portion of the
switch. To stop at the desired opening, release
the switch. The window may be closed by pulling
the front portion of the switch. In order to prevent
operation of the passenger front window by the
passenger, a window lock switch (1) is provided
on the arm rest of the driver's door. To disable
the passenger's power window, push the win-
dow lock switch. To revert to normal operation,
push in on the window lock switch again.
HGK2015
(1)
Page 23 of 266

1
FEATURES OF YOUR HYUNDAI
11
!
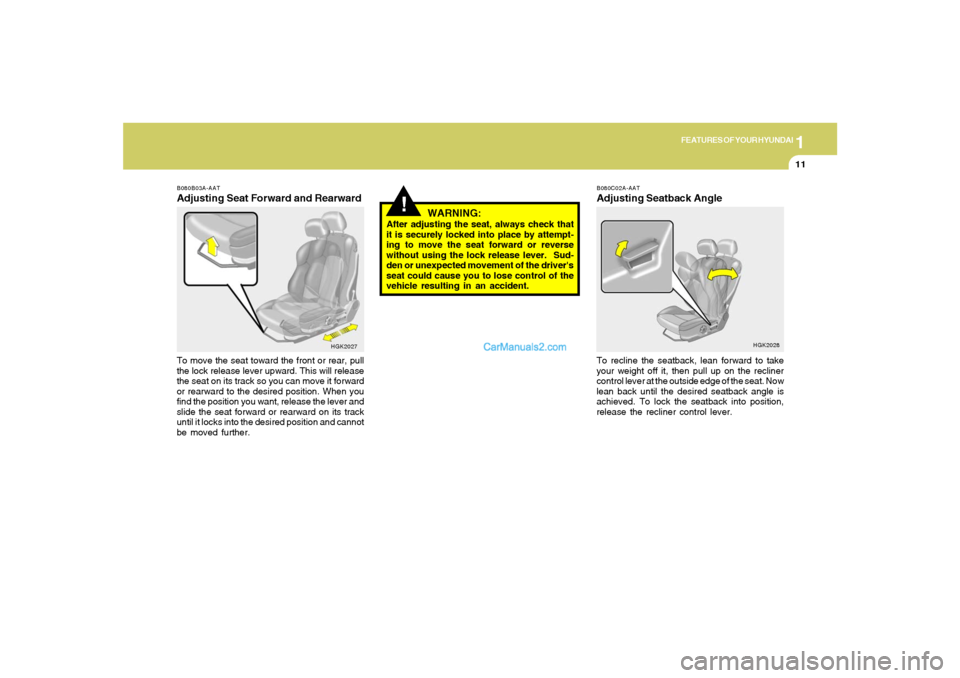
B080B03A-AATAdjusting Seat Forward and RearwardTo move the seat toward the front or rear, pull
the lock release lever upward. This will release
the seat on its track so you can move it forward
or rearward to the desired position. When you
find the position you want, release the lever and
slide the seat forward or rearward on its track
until it locks into the desired position and cannot
be moved further.
HGK2027
WARNING:
After adjusting the seat, always check that
it is securely locked into place by attempt-
ing to move the seat forward or reverse
without using the lock release lever. Sud-
den or unexpected movement of the driver's
seat could cause you to lose control of the
vehicle resulting in an accident.
B080C02A-AATAdjusting Seatback AngleTo recline the seatback, lean forward to take
your weight off it, then pull up on the recliner
control lever at the outside edge of the seat. Now
lean back until the desired seatback angle is
achieved. To lock the seatback into position,
release the recliner control lever.
HGK2028
Page 24 of 266

1FEATURES OF YOUR HYUNDAI12
!
B080D01JM
o For maximum effectiveness in case of an
accident the headrest should be ad-
justed so the middle of the headrest is at
the same height as the top of the
occupant's eyes. For this reason, the
use of a cushion that holds the body
away from the seatback is not recom-
mended.
o Do not operate vehicle with the head-
rests removed as injury to the occupants
may occur in the event of an accident.
Headrests may provide protection against
neck injuries when properly adjusted.
o Do not adjust the headrest hejght while
the vehicle is in motion.
WARNING:
!
WARNING:
Riding with a reclined seatback increases
your chance of serious or fatal injuries in
the event of a collision or sudden stop. The
protection of your restraint system (seat
belts and airbags) is greatly reduced by
reclining your seat. Seat belts must be snug
against your hips and chest to work prop-
erly. The more the seatback is reclined, the
greater the chance that an occupant's hips
will slide under the lap belt or the occupant's
neck will strike the shoulder belt. Drivers
and passengers should always sit well back
in their seats, properly belted, and with the
seatbacks upright.
B080D02JM-AATAdjustable HeadrestsHeadrests are designed to help reduce the risk
of neck injuries.
To raise the headrest, pull it up. To lower the
headrest, push it down while pressing the lock
knob. To remove the headrest, raise it as far as
it can go then press the lock knob while pulling
upward. This should only be done when the seat
is not occupied.Lock Knob
HGK2032
Page 26 of 266

1FEATURES OF YOUR HYUNDAI14
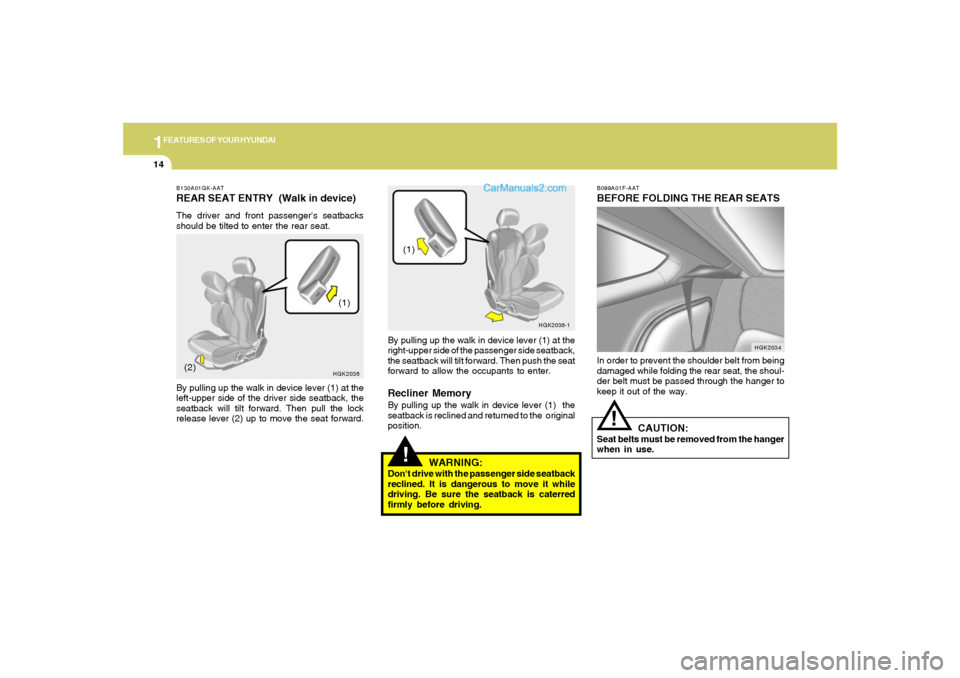
B099A01F-AATBEFORE FOLDING THE REAR SEATSIn order to prevent the shoulder belt from being
damaged while folding the rear seat, the shoul-
der belt must be passed through the hanger to
keep it out of the way.
CAUTION:
Seat belts must be removed from the hanger
when in use.
!
HGK2034
B130A01GK-AATREAR SEAT ENTRY (Walk in device)The driver and front passenger's seatbacks
should be tilted to enter the rear seat.
By pulling up the walk in device lever (1) at the
left-upper side of the driver side seatback, the
seatback will tilt forward. Then pull the lock
release lever (2) up to move the seat forward.
HGK2036(1)
(2)
!
By pulling up the walk in device lever (1) at the
right-upper side of the passenger side seatback,
the seatback will tilt forward. Then push the seat
forward to allow the occupants to enter.Recliner MemoryBy pulling up the walk in device lever (1) the
seatback is reclined and returned to the original
position.
WARNING:
Don't drive with the passenger side seatback
reclined. It is dangerous to move it while
driving. Be sure the seatback is caterred
firmly before driving.
HGK2036-1
(1)
Page 27 of 266

1
FEATURES OF YOUR HYUNDAI
15
!
WARNING:
The purpose of the fold-down rear
seatbacks is to allow you to carry longer
objects than could otherwise be accommo-
dated. Never allow passengers to sit on top
of the folded down seat back while the car
is moving as this is not a proper seating
position and no seat belts are available for
use. This could result in injury in case of an
accident or sudden stop. Objects carried
on the folded down seatback should not
extend higher than the top of the front
seats. This could allow cargo to slide for-
ward and cause injury or damage during
sudden stops.
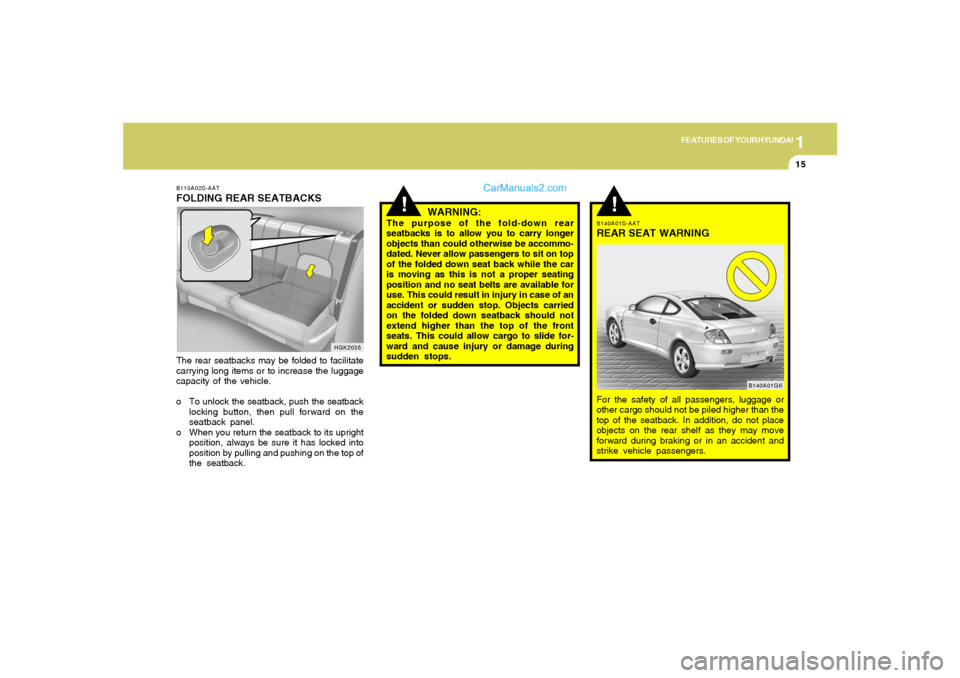
B110A02S-AATFOLDING REAR SEATBACKSThe rear seatbacks may be folded to facilitate
carrying long items or to increase the luggage
capacity of the vehicle.
o To unlock the seatback, push the seatback
locking button, then pull forward on the
seatback panel.
o When you return the seatback to its upright
position, always be sure it has locked into
position by pulling and pushing on the top of
the seatback.
HGK2035
!
B140A01S-AATREAR SEAT WARNINGFor the safety of all passengers, luggage or
other cargo should not be piled higher than the
top of the seatback. In addition, do not place
objects on the rear shelf as they may move
forward during braking or in an accident and
strike vehicle passengers.
B140A01GK
Page 30 of 266

1FEATURES OF YOUR HYUNDAI18
!
Release the button to lock the anchor into
position. Try sliding the height adjuster to make
sure that it has locked into the position.
WARNING:
o Verify the shoulder belt anchor is locked
into position at the appropriate height.
Never position the shoulder belt across
your neck or face. Improperly posi-
tioned seat belts can cause serious inju-
ries in an accident.
o Failure to replace seat belts after an
accident could leave you with damaged
seat belts that will not provide protec-
tion in the event of another collision
leading to personal injury or death.
Replace your seat belts after being in an
accident as soon as possible.
B160C01A-AATKeep Belts Clean and DrySeat belts should be kept clean and dry. If belts
become dirty, they can be cleaned by using a
mild soap solution and warm water. Bleach, dye,
strong detergents or abrasives should not be
used because they may damage and weaken
the fabric.B160D01A-AATWhen to Replace Seat BeltsEntire in-use seat belt assembly or assemblies
should be replaced if the vehicle has been
involved in an accident. This should be done
even if no damage is visible. Additional ques-
tions concerning seat belt operation should be
directed to your Hyundai Dealer.
B170A04A-AATHEIGHT ADJUSTABLE FRONT SEAT
SHOULDER BELTYou can adjust the height of the shoulder belt
anchor to one of the 4 positions for maximum
comfort and safety.
If the height of the adjusting seat belt is too near
your neck, you will not be getting the most
effective protection. The shoulder portion should
be adjusted so that it lies across your chest and
midway over your shoulder nearest the door
and not your neck.
To adjust the height of the seat belt anchor,
lower or raise the height adjuster into an appro-
priate position. To raise the height adjuster, pull
it up. To lower it, push it down while pressing the
height adjuster button.
HGK2038
Page 31 of 266

1
FEATURES OF YOUR HYUNDAI
19
B190A02Y-AATSEAT BELTS -Front Passenger and Rear
Seat 3-Point System with Combination
Locking Retractor
To Fasten Your BeltCombination retractor type seat belts are in-
stalled in the rear seat positions to help accom-
modate the installation of child restraint sys-
tems. Hyundai strongly recommends that chil-
dren always be seated in the rear seat. NEVER
place any infant restraint system in the front
seat of the vehicle.
This type of seat belt combines the features of
both an emergency locking retractor seat belt
and an automatic locking retractor seat belt. To
fasten your seat belt, pull it out of the retractor
and insert the metal tab into the buckle. There
will be an audible "click" when the tab locks into
the buckle.NOTE:Seat belt reminder light comes and stays on
until the seat belt is fastened when the
ignition key is turned "ON" or "START".
And, the warning chime will also sound for
about 6 seconds.
B180A01L-AATSEAT BELT-Driver's 3-Point System with
Emergency Locking Retractor:
To Fasten Your BeltTo fasten your seat belt, pull it out of the retractor
and insert the metal tab into the buckle. There
will be an audible "click" when the tab locks into
the buckle.
The seat belt automatically adjusts to the proper
length only after the lap belt portion is adjusted
manually so that it fits snugly around your hips.
If you lean forward in a slow, easy motion, the
belt will extend and let you move around. If there
is a sudden stop or impact, however, the belt will
lock into position. It will also lock if you try to lean
forward too quickly. Check to make sure that
the belt is properly locked and that the belt is not
twisted.
B180A01L
When not securing a child restraint, the seat belt
operates in the same way as the driver's seat
belt (Emergency Locking Retractor Type). It
automatically adjusts to the proper length only
after the lap belt portion of the seat belt is
adjusted manually so that it fits snugly around
your hips. When the seat belt is fully extended
from the retractor to allow the installation of a
child restraint system, the seat belt operation
changes to allow the belt to retract, but not to
extend. (Automatic Locking Retractor Type)
see page 1-25.NOTE:Although the combination retractor pro-
vides the same level of protection for seated
passengers in either emergency or auto-
matic locking modes, it is recommended
that seated passengers use the emergency
locking feature for improved convenience.
The automatic locking function is intended
to facilitate child restraint installation. To
convert from the automatic locking feature
to the emergency locking operation mode,
allow the unbuckled seat belt to fully re-
tract.