2006 Hyundai Tiburon clock
[x] Cancel search: clockPage 128 of 266
1FEATURES OF YOUR HYUNDAI
116
CLASSIC → JAZZ → ROCK → DEFEAT
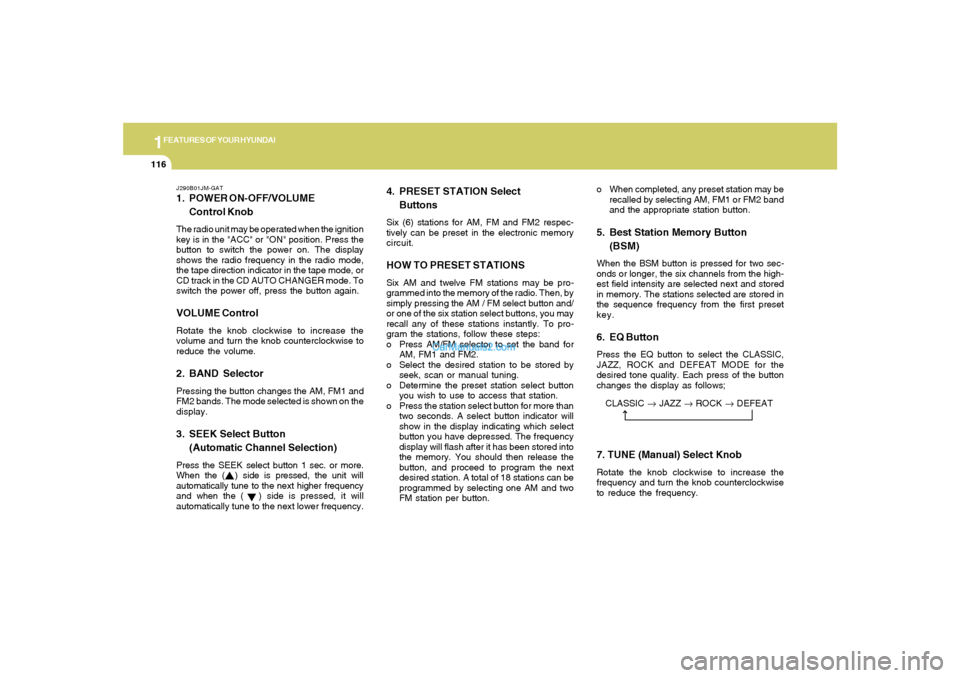
J290B01JM-GAT1. POWER ON-OFF/VOLUME
Control KnobThe radio unit may be operated when the ignition
key is in the "ACC" or "ON" position. Press the
button to switch the power on. The display
shows the radio frequency in the radio mode,
the tape direction indicator in the tape mode, or
CD track in the CD AUTO CHANGER mode. To
switch the power off, press the button again.VOLUME ControlRotate the knob clockwise to increase the
volume and turn the knob counterclockwise to
reduce the volume.2. BAND SelectorPressing the button changes the AM, FM1 and
FM2 bands. The mode selected is shown on the
display.3. SEEK Select Button
(Automatic Channel Selection)Press the SEEK select button 1 sec. or more.
When the ( ) side is pressed, the unit will
automatically tune to the next higher frequency
and when the ( ) side is pressed, it will
automatically tune to the next lower frequency.o When completed, any preset station may be
recalled by selecting AM, FM1 or FM2 band
and the appropriate station button.
5. Best Station Memory Button
(BSM)When the BSM button is pressed for two sec-
onds or longer, the six channels from the high-
est field intensity are selected next and stored
in memory. The stations selected are stored in
the sequence frequency from the first preset
key.6. EQ ButtonPress the EQ button to select the CLASSIC,
JAZZ, ROCK and DEFEAT MODE for the
desired tone quality. Each press of the button
changes the display as follows;
4. PRESET STATION Select
ButtonsSix (6) stations for AM, FM and FM2 respec-
tively can be preset in the electronic memory
circuit.HOW TO PRESET STATIONSSix AM and twelve FM stations may be pro-
grammed into the memory of the radio. Then, by
simply pressing the AM / FM select button and/
or one of the six station select buttons, you may
recall any of these stations instantly. To pro-
gram the stations, follow these steps:
o Press AM/FM selector to set the band for
AM, FM1 and FM2.
o Select the desired station to be stored by
seek, scan or manual tuning.
o Determine the preset station select button
you wish to use to access that station.
o Press the station select button for more than
two seconds. A select button indicator will
show in the display indicating which select
button you have depressed. The frequency
display will flash after it has been stored into
the memory. You should then release the
button, and proceed to program the next
desired station. A total of 18 stations can be
programmed by selecting one AM and two
FM station per button.
7. TUNE (Manual) Select KnobRotate the knob clockwise to increase the
frequency and turn the knob counterclockwise
to reduce the frequency.
Page 129 of 266
1
FEATURES OF YOUR HYUNDAI
117
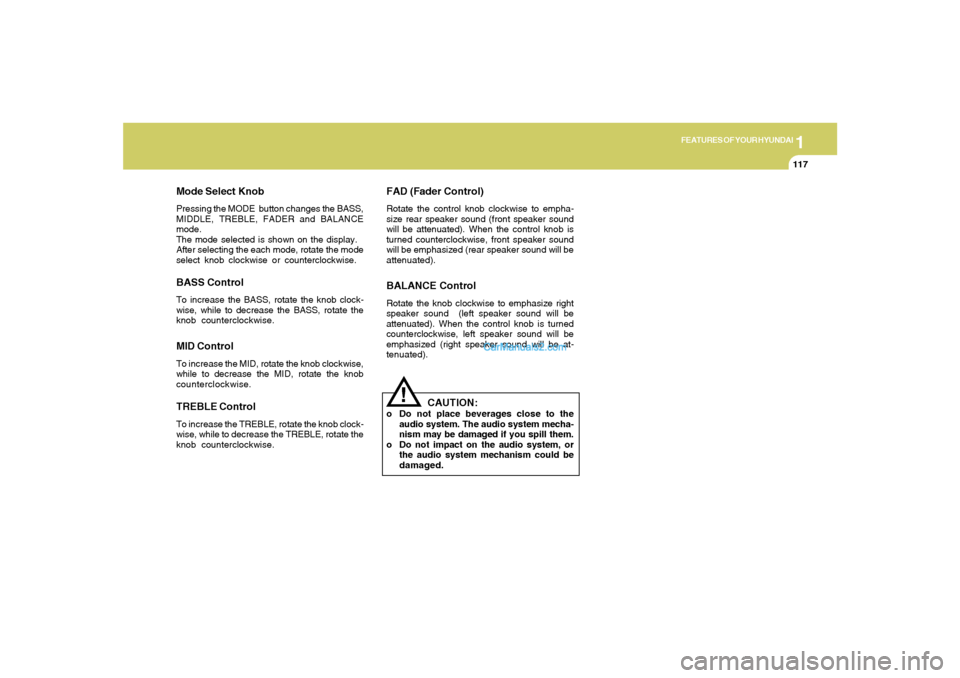
Mode Select KnobPressing the MODE button changes the BASS,
MIDDLE, TREBLE, FADER and BALANCE
mode.
The mode selected is shown on the display.
After selecting the each mode, rotate the mode
select knob clockwise or counterclockwise.BASS ControlTo increase the BASS, rotate the knob clock-
wise, while to decrease the BASS, rotate the
knob counterclockwise.MID ControlTo increase the MID, rotate the knob clockwise,
while to decrease the MID, rotate the knob
counterclockwise.TREBLE ControlTo increase the TREBLE, rotate the knob clock-
wise, while to decrease the TREBLE, rotate the
knob counterclockwise.
FAD (Fader Control)Rotate the control knob clockwise to empha-
size rear speaker sound (front speaker sound
will be attenuated). When the control knob is
turned counterclockwise, front speaker sound
will be emphasized (rear speaker sound will be
attenuated).BALANCE ControlRotate the knob clockwise to emphasize right
speaker sound (left speaker sound will be
attenuated). When the control knob is turned
counterclockwise, left speaker sound will be
emphasized (right speaker sound will be at-
tenuated).
!
CAUTION:
o Do not place beverages close to the
audio system. The audio system mecha-
nism may be damaged if you spill them.
o Do not impact on the audio system, or
the audio system mechanism could be
damaged.
Page 139 of 266

1
FEATURES OF YOUR HYUNDAI
127
!
ANTENNA
B860A03L
NOTE:Look at a tape before you insert it.
If the tape is loose, tighten it by turning one
of the hubs with a pencil or your finger.
If the label is peeling off, do not put it in the
drive mechanism.
Do not leave tapes sitting where they are
exposed to hot, warm, or high humidity,
such as on top of the dashboard or in the
player.
If a tape is exposed to excessively hot or
cold, let it reach a moderate temperature
before putting it in the player.
B870A01A-AATFixed Rod AntennaYour car uses a fixed rod antenna to receive
both AM and FM broadcast signals.
This antenna is a removable type. To remove
the antenna, turn it counterclockwise. To install
the antenna, turn it clockwise.
CAUTION:
o Be sure to remove the antenna before
washing the car in an automatic car
wash or it may be damaged.
o When reinstalling your antenna, it is
important that it is fully tightened to
ensure proper reception.
B870A01A
Page 143 of 266
2
DRIVING YOUR HYUNDAI
4
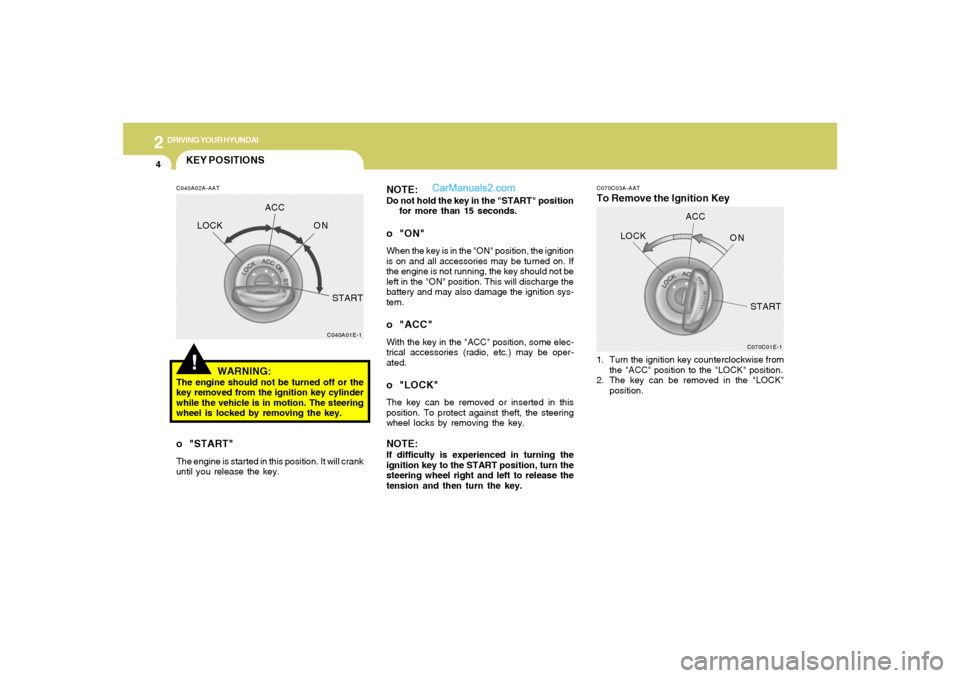
C070C03A-AATTo Remove the Ignition Key NOTE:
Do not hold the key in the "START" position
for more than 15 seconds.o "ON"When the key is in the "ON" position, the ignition
is on and all accessories may be turned on. If
the engine is not running, the key should not be
left in the "ON" position. This will discharge the
battery and may also damage the ignition sys-
tem.o "ACC"With the key in the "ACC" position, some elec-
trical accessories (radio, etc.) may be oper-
ated.o "LOCK"The key can be removed or inserted in this
position. To protect against theft, the steering
wheel locks by removing the key.NOTE:If difficulty is experienced in turning the
ignition key to the START position, turn the
steering wheel right and left to release the
tension and then turn the key.1. Turn the ignition key counterclockwise from
the "ACC" position to the "LOCK" position.
2. The key can be removed in the "LOCK"
position.
C070C01E-1
LOCKACC
ON
START
!KEY POSITIONSC040A02A-AAT
WARNING:
The engine should not be turned off or the
key removed from the ignition key cylinder
while the vehicle is in motion. The steering
wheel is locked by removing the key.o "START"The engine is started in this position. It will crank
until you release the key.
C040A01E-1
LOCKACC
ON
START
Page 172 of 266

3
WHAT TO DO IN AN EMERGENCY
7
CHANGING A FLAT TIRED060A02A-AATThe procedure described on the follow-
ing pages can be used to rotate tires as
well as to change a flat tire. When
preparing to change a flat tire, check to
be sure the gear selector lever is in "P"
(automatic transaxle) or reverse gear
(manual transaxle) and that the parking
brake is set, then:
D060A01GKD060B02GK-AAT
1. Obtain Spare Tire and Tool
Remove the spare tire and remove the
jack and tool bag from the trunk.
HGK4008
The jack is located behind the right side
of luggage trim. Remove the jack cover
by unscrewing the bolts. Turn the jack
end counterclockwise to lower the jack
height by using a screw driver or wrench
bar and remove it from the bracket.
HGK4009
Page 173 of 266
38WHAT TO DO IN AN EMERGENCY
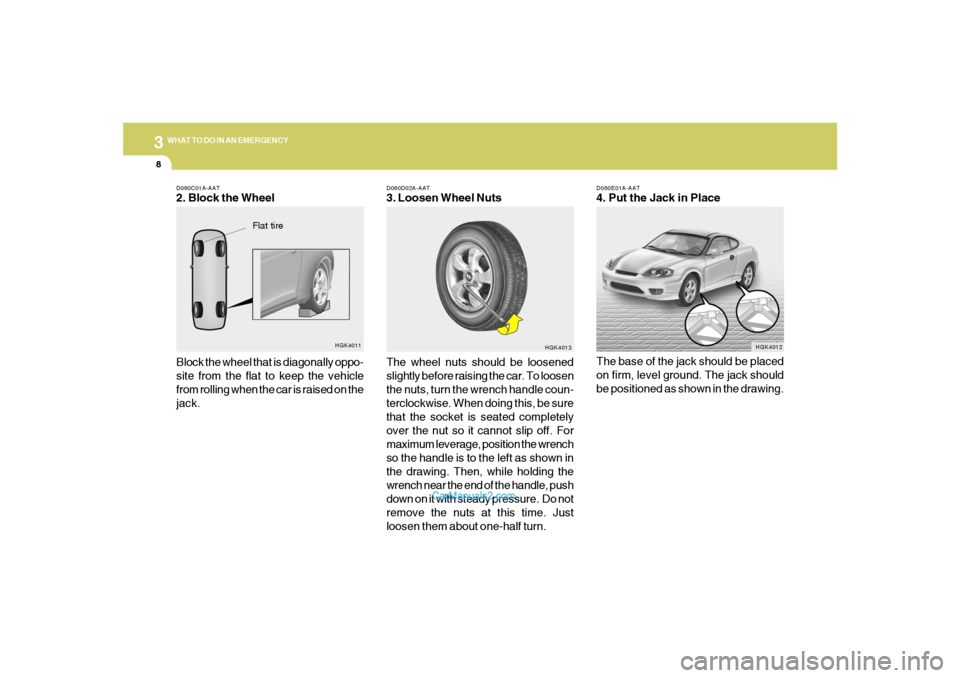
D060E01A-AAT4. Put the Jack in Place
The base of the jack should be placed
on firm, level ground. The jack should
be positioned as shown in the drawing.
HGK4012 D060D02A-AAT
3. Loosen Wheel Nuts
The wheel nuts should be loosened
slightly before raising the car. To loosen
the nuts, turn the wrench handle coun-
terclockwise. When doing this, be sure
that the socket is seated completely
over the nut so it cannot slip off. For
maximum leverage, position the wrench
so the handle is to the left as shown in
the drawing. Then, while holding the
wrench near the end of the handle, push
down on it with steady pressure. Do not
remove the nuts at this time. Just
loosen them about one-half turn.
HGK4013
D060C01A-AAT2. Block the Wheel
Block the wheel that is diagonally oppo-
site from the flat to keep the vehicle
from rolling when the car is raised on the
jack.
HGK4011
Flat tire
Page 174 of 266
3
WHAT TO DO IN AN EMERGENCY
9
!
WARNING:
Do not get under the car when it is
supported by the jack! This is very
dangerous as the jack could fall and
cause serious injury or death. No
one should stay in the car while the
jack is being used.
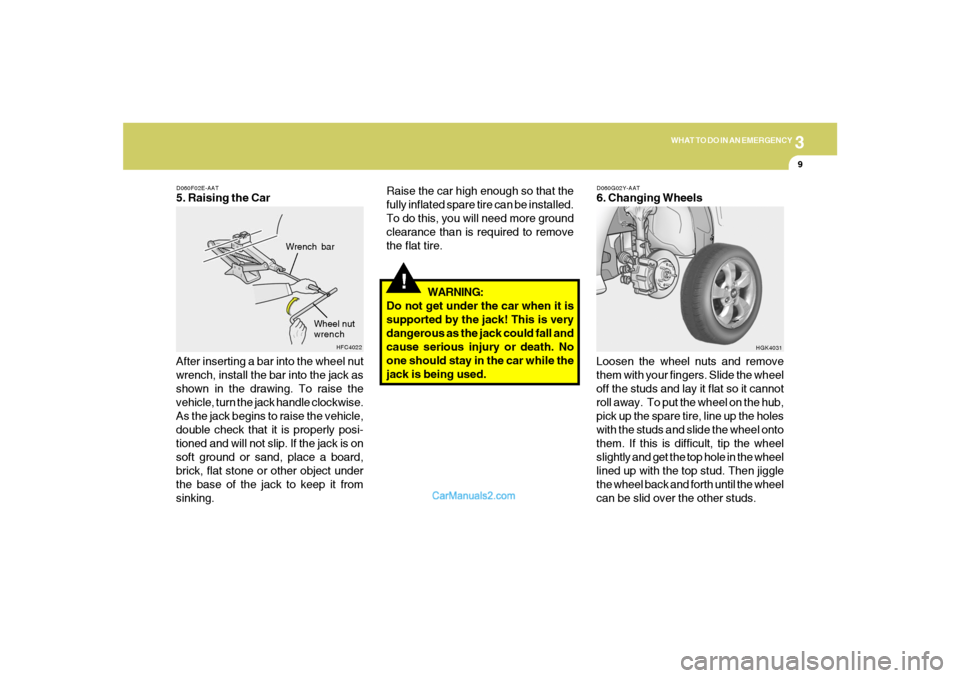
D060F02E-AAT5. Raising the Car
After inserting a bar into the wheel nut
wrench, install the bar into the jack as
shown in the drawing. To raise the
vehicle, turn the jack handle clockwise.
As the jack begins to raise the vehicle,
double check that it is properly posi-
tioned and will not slip. If the jack is on
soft ground or sand, place a board,
brick, flat stone or other object under
the base of the jack to keep it from
sinking.
HFC4022
Wrench bar
Wheel nut
wrench
D060G02Y-AAT6. Changing Wheels
Loosen the wheel nuts and remove
them with your fingers. Slide the wheel
off the studs and lay it flat so it cannot
roll away. To put the wheel on the hub,
pick up the spare tire, line up the holes
with the studs and slide the wheel onto
them. If this is difficult, tip the wheel
slightly and get the top hole in the wheel
lined up with the top stud. Then jiggle
the wheel back and forth until the wheel
can be slid over the other studs.
HGK4031
Raise the car high enough so that the
fully inflated spare tire can be installed.
To do this, you will need more ground
clearance than is required to remove
the flat tire.
Page 175 of 266
310
WHAT TO DO IN AN EMERGENCY
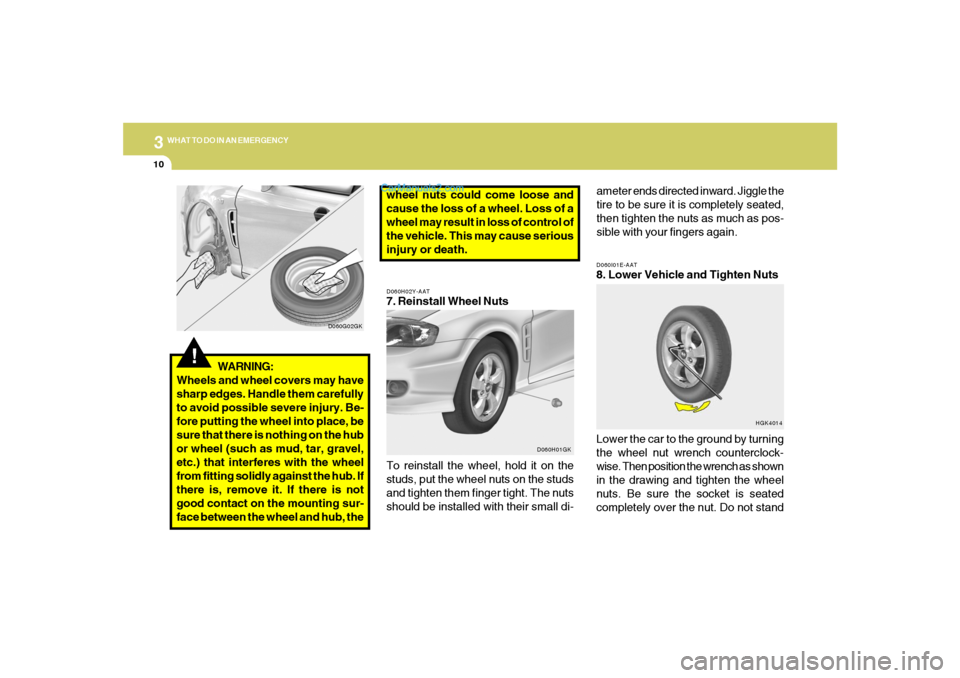
D060I01E-AAT8. Lower Vehicle and Tighten Nuts
Lower the car to the ground by turning
the wheel nut wrench counterclock-
wise. Then position the wrench as shown
in the drawing and tighten the wheel
nuts. Be sure the socket is seated
completely over the nut. Do not stand
HGK4014 D060H02Y-AAT
7. Reinstall Wheel Nuts
To reinstall the wheel, hold it on the
studs, put the wheel nuts on the studs
and tighten them finger tight. The nuts
should be installed with their small di-
D060H01GK
wheel nuts could come loose and
cause the loss of a wheel. Loss of a
wheel may result in loss of control of
the vehicle. This may cause serious
injury or death.ameter ends directed inward. Jiggle the
tire to be sure it is completely seated,
then tighten the nuts as much as pos-
sible with your fingers again.
!
WARNING:
Wheels and wheel covers may have
sharp edges. Handle them carefully
to avoid possible severe injury. Be-
fore putting the wheel into place, be
sure that there is nothing on the hub
or wheel (such as mud, tar, gravel,
etc.) that interferes with the wheel
from fitting solidly against the hub. If
there is, remove it. If there is not
good contact on the mounting sur-
face between the wheel and hub, the
D060G02GK