2006 Hyundai Tiburon tow
[x] Cancel search: towPage 15 of 266

1
FEATURES OF YOUR HYUNDAI
3
BREAKING IN YOUR NEW
HYUNDAI
B010E01A-AATGasolines for Cleaner AirTo help contribute to cleaner air, Hyundai rec-
ommends that you use gasolines treated with
detergent additives, which help prevent deposit
formation in the engine. These gasolines will
help the engine run cleaner and enhance per-
formance of the Emission Control System.B010F01A-AATOperation in Foreign CountriesIf you are going to drive your Hyundai in another
country, be sure to:
o Observe all regulations regarding registra-
tion and insurance.
o Determine that acceptable fuel is available.
B020A01S-AATDuring the First 1,200 Miles (2,000 Km)No formal "break-in" procedure is required with
your new Hyundai. However, you can contrib-
ute to the economical operation and durability of
your Hyundai by observing the following recom-
mendations during the first 1,200 miles (2,000
km).
o Don't drive faster than 55 MPH (88 km/h).
o While driving, keep your engine speed (rpm,
or revolutions per minute) between 2,000
rpm and 4,000 rpm.
o Use moderate acceleration. Don't start
quickly or depress the accelerator pedal
fully.
o For the first 200 miles (300 km), try to avoid
hard stops.
o Don't lug the engine (in other words, don't
drive so slowly in too high a gear that the
engine "bucks"-shift to a lower gear).
o Whether going fast or slow, vary your speed
from time to time.
o Don't let the engine idle longer than 3 minutes
at one time.
o Don't tow a trailer during the first 1,200 miles
(2,000 km) of operation.
KEYSB030A01A-AATFor greater convenience, the same key oper-
ates all the locks in your Hyundai. However,
because the doors can be locked without a key,
carrying a spare key is recommended in case
you accidentally lock one key inside the car.
B030A01E
Page 17 of 266

1
FEATURES OF YOUR HYUNDAI
5
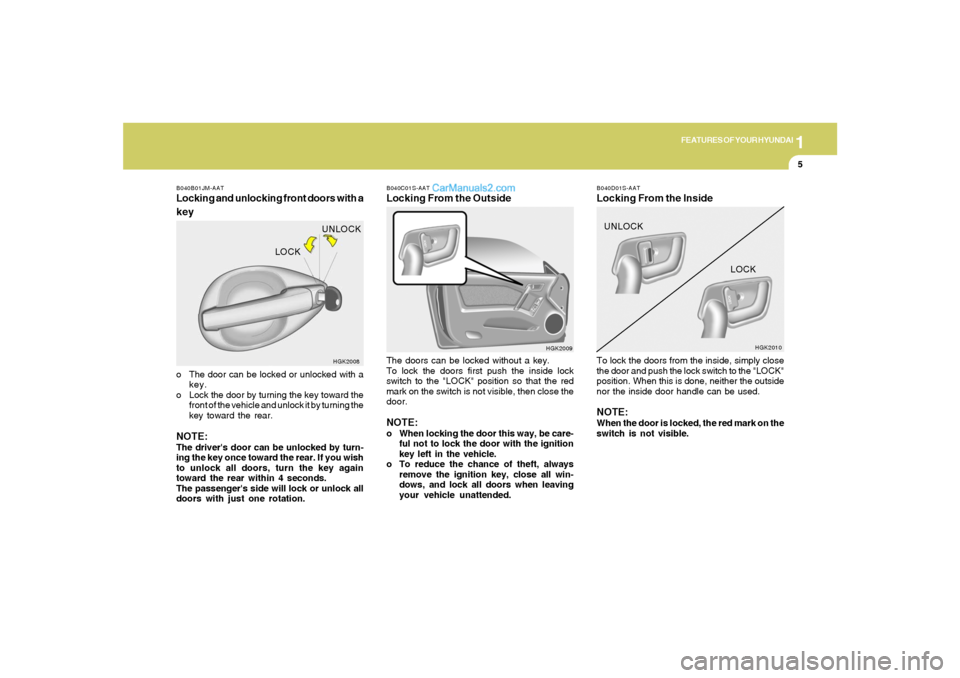
B040C01S-AATLocking From the OutsideThe doors can be locked without a key.
To lock the doors first push the inside lock
switch to the "LOCK" position so that the red
mark on the switch is not visible, then close the
door.NOTE:o When locking the door this way, be care-
ful not to lock the door with the ignition
key left in the vehicle.
o To reduce the chance of theft, always
remove the ignition key, close all win-
dows, and lock all doors when leaving
your vehicle unattended.
HGK2009
B040B01JM-AATLocking and unlocking front doors with a
keyo The door can be locked or unlocked with a
key.
o Lock the door by turning the key toward the
front of the vehicle and unlock it by turning the
key toward the rear.NOTE:The driver's door can be unlocked by turn-
ing the key once toward the rear. If you wish
to unlock all doors, turn the key again
toward the rear within 4 seconds.
The passenger's side will lock or unlock all
doors with just one rotation.
HGK2008
LOCKUNLOCK
B040D01S-AATLocking From the InsideTo lock the doors from the inside, simply close
the door and push the lock switch to the "LOCK"
position. When this is done, neither the outside
nor the inside door handle can be used.NOTE:When the door is locked, the red mark on the
switch is not visible.
HGK2010
UNLOCK
LOCK
Page 18 of 266

1FEATURES OF YOUR HYUNDAI6
B070B02GK-AATArmed StagePark the car and stop the engine. Arm the
system as described below.
1) Remove the ignition key from the ignition
switch.
2) Make sure that the engine hood and tail gate
are closed and latched.
3) Lock the doors using the transmitter of the
keyless entry system.
After completion of the steps above, the turn
signal light will blink once to indicate that the
system is armed.
HGK2009 B040G02GK-GAT
Central Door LockThe central door locking is operated by pushing
the driver's door lock switch toward the front or
rear of the vehicle. If the passenger door is open
when the switch is pushed, the door will remain
locked when closed.NOTE:o When pushing the switch toward the
rear, all doors will unlock.
When pushing the switch toward the
front, all doors will lock.
o When the door is unlocked, the red mark
on the switch is visible.
o The central door locking is operated by
turning the key (driver's door only) to-
ward the front or rear of the vehicle.
THEFT-ALARM SYSTEMB070A01A-AAT(If Installed)This system is designed to provide protection
from unauthorized entry into the car. This sys-
tem is operated in three stages: the first is the
"Armed" stage, the second is the "Alarm" stage,
and the third is the "Disarmed" stage. If trig-
gered, the system provides an audible alarm
with blinking of the turn signal light. o If the door is locked/unlocked multiple
times in rapid succession with either the
vehicle key or door lock switch, the sys-
tem may stop operating temporarily in
order to protect the circuit and prevent
damage to system components.
Page 23 of 266

1
FEATURES OF YOUR HYUNDAI
11
!
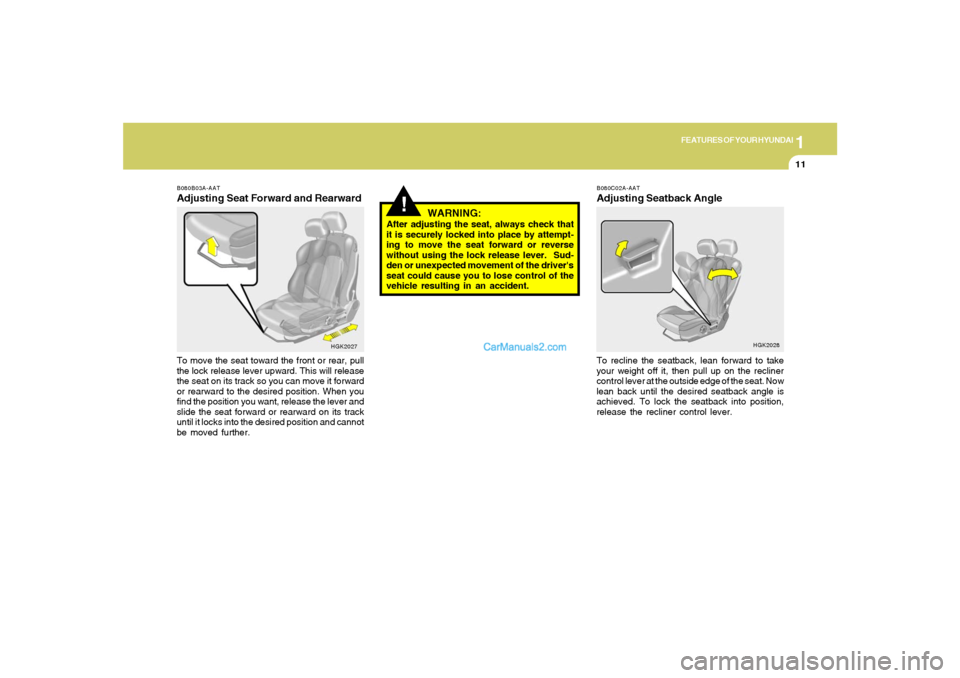
B080B03A-AATAdjusting Seat Forward and RearwardTo move the seat toward the front or rear, pull
the lock release lever upward. This will release
the seat on its track so you can move it forward
or rearward to the desired position. When you
find the position you want, release the lever and
slide the seat forward or rearward on its track
until it locks into the desired position and cannot
be moved further.
HGK2027
WARNING:
After adjusting the seat, always check that
it is securely locked into place by attempt-
ing to move the seat forward or reverse
without using the lock release lever. Sud-
den or unexpected movement of the driver's
seat could cause you to lose control of the
vehicle resulting in an accident.
B080C02A-AATAdjusting Seatback AngleTo recline the seatback, lean forward to take
your weight off it, then pull up on the recliner
control lever at the outside edge of the seat. Now
lean back until the desired seatback angle is
achieved. To lock the seatback into position,
release the recliner control lever.
HGK2028
Page 25 of 266

1
FEATURES OF YOUR HYUNDAI
13
B080F01F-AATSeat Cushion Height Adjustment
(Driver's Seat Only) (If Installed)To raise or lower the front part of the seat
cushion, turn the knob forward or rearward.
HGK2029
B080E01F-AATLumbar Support Control
(Driver's seat only)The driver's seat is equipped with adjustable
lumbar support.
To increase the amount of lumbar support, pull
the lever forward.
To decrease it, push the lever toward the rear.SOFT
HGK2030
FIRM
!
B129A01F-AATREAR SEAT POSITIONS
WARNING:This vehicle contains two rear seating po-
sitions only and a seat belt for each seating
position. Thus, never permit more than two
occupants to ride in the rear seat because
an unrestrained occupant could be seri-
ously injured or killed in the event of a
vehicle crash.
B129A01GK
Page 38 of 266

1FEATURES OF YOUR HYUNDAI26
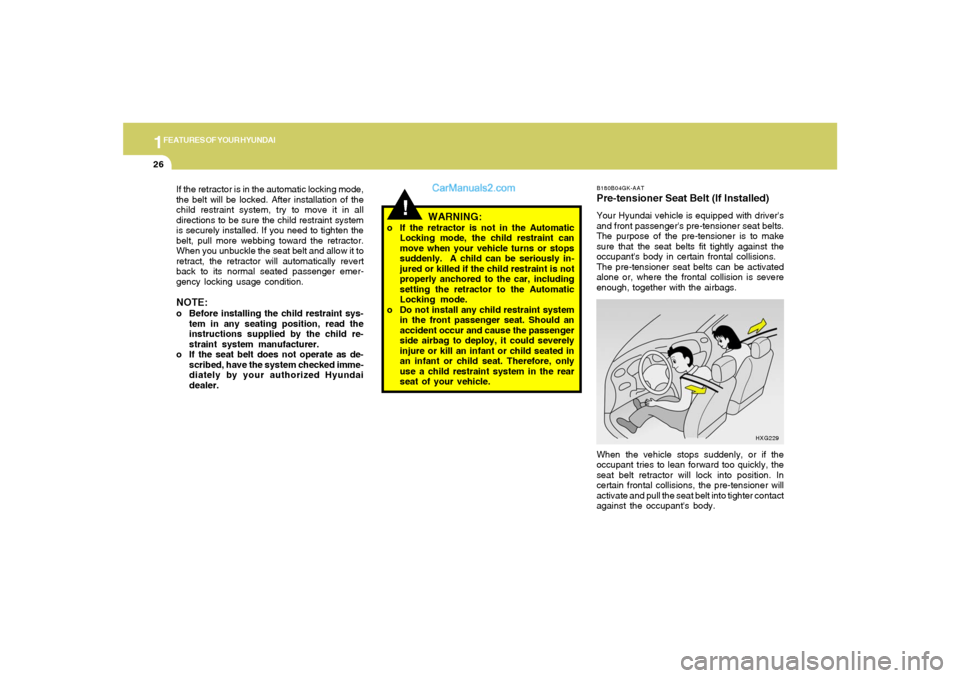
B180B04GK-AATPre-tensioner Seat Belt (If Installed)Your Hyundai vehicle is equipped with driver's
and front passenger's pre-tensioner seat belts.
The purpose of the pre-tensioner is to make
sure that the seat belts fit tightly against the
occupant's body in certain frontal collisions.
The pre-tensioner seat belts can be activated
alone or, where the frontal collision is severe
enough, together with the airbags.
When the vehicle stops suddenly, or if the
occupant tries to lean forward too quickly, the
seat belt retractor will lock into position. In
certain frontal collisions, the pre-tensioner will
activate and pull the seat belt into tighter contact
against the occupant's body.
HXG229
!
WARNING:
o If the retractor is not in the Automatic
Locking mode, the child restraint can
move when your vehicle turns or stops
suddenly. A child can be seriously in-
jured or killed if the child restraint is not
properly anchored to the car, including
setting the retractor to the Automatic
Locking mode.
o Do not install any child restraint system
in the front passenger seat. Should an
accident occur and cause the passenger
side airbag to deploy, it could severely
injure or kill an infant or child seated in
an infant or child seat. Therefore, only
use a child restraint system in the rear
seat of your vehicle. If the retractor is in the automatic locking mode,
the belt will be locked. After installation of the
child restraint system, try to move it in all
directions to be sure the child restraint system
is securely installed. If you need to tighten the
belt, pull more webbing toward the retractor.
When you unbuckle the seat belt and allow it to
retract, the retractor will automatically revert
back to its normal seated passenger emer-
gency locking usage condition.
NOTE:o Before installing the child restraint sys-
tem in any seating position, read the
instructions supplied by the child re-
straint system manufacturer.
o If the seat belt does not operate as de-
scribed, have the system checked imme-
diately by your authorized Hyundai
dealer.
Page 46 of 266

1FEATURES OF YOUR HYUNDAI34
!
o If your car was flooded and has soaked
carpeting or water on the floor, you
shouldn't try to start the engine; have
the car towed to an authorized Hyundai
dealer.
WARNING:
!
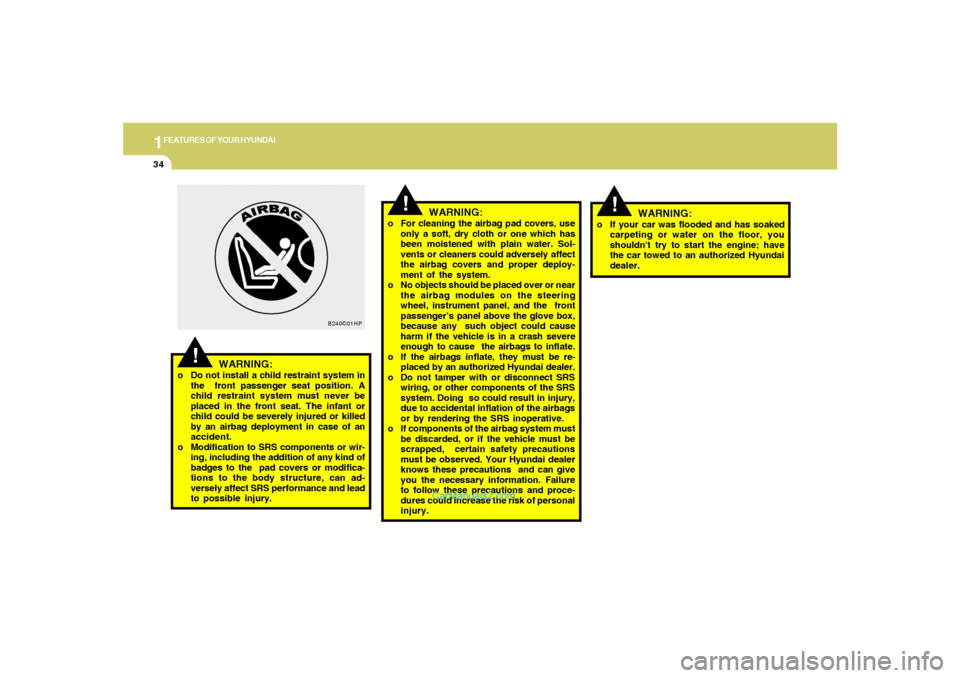
WARNING:
o Do not install a child restraint system in
the front passenger seat position. A
child restraint system must never be
placed in the front seat. The infant or
child could be severely injured or killed
by an airbag deployment in case of an
accident.
o Modification to SRS components or wir-
ing, including the addition of any kind of
badges to the pad covers or modifica-
tions to the body structure, can ad-
versely affect SRS performance and lead
to possible injury.
B240C01HP
!
o For cleaning the airbag pad covers, use
only a soft, dry cloth or one which has
been moistened with plain water. Sol-
vents or cleaners could adversely affect
the airbag covers and proper deploy-
ment of the system.
o No objects should be placed over or near
the airbag modules on the steering
wheel, instrument panel, and the front
passenger’s panel above the glove box,
because any such object could cause
harm if the vehicle is in a crash severe
enough to cause the airbags to inflate.
o If the airbags inflate, they must be re-
placed by an authorized Hyundai dealer.
o Do not tamper with or disconnect SRS
wiring, or other components of the SRS
system. Doing so could result in injury,
due to accidental inflation of the airbags
or by rendering the SRS inoperative.
o If components of the airbag system must
be discarded, or if the vehicle must be
scrapped, certain safety precautions
must be observed. Your Hyundai dealer
knows these precautions and can give
you the necessary information. Failure
to follow these precautions and proce-
dures could increase the risk of personal
injury.
WARNING:
Page 51 of 266

1
FEATURES OF YOUR HYUNDAI
39
B260H01GK-AAT
Parking Brake/Low Brake Fluid
Level Warning Light
CAUITON:
If you suspect brake trouble, have your
brakes checked by a Hyundai dealer as
soon as possible. Driving your car with a
problem in either the brake electrical sys-
tem or brake hydraulic system is danger-
ous, and could result in a serious injury or
death.Warning Light OperationThe parking brake/low brake fluid level warning
light should come on when the parking brake is
applied and the ignition switch is turned to "ON"
or "START". After the engine is started, the light
should go out in three seconds.
If the parking brake is not applied, the warning
light should come on when the ignition switch is
turned to "ON" or "START", then go out in three
seconds. If the light comes on at any other time,
you should slow the vehicle and bring it to a
complete stop in a safe location off the roadway.The brake fluid level warning light indicates that
the brake fluid level in the brake master cylinder
is low and hydraulic brake fluid conforming to
DOT 3 or DOT 4 specifications should be
added. After adding fluid, if no other trouble is
found, the car should be immediately and care-
fully driven to a Hyundai dealer for inspection.
If further trouble is experienced, the vehicle
should not be driven at all but taken to a dealer
by a professional towing service.
Your Hyundai is equipped with dual-diagonal
braking systems. This means you still have
braking on two wheels even if one of the dual
systems should fail. With only one of the dual
systems working, more than normal pedal travel
and greater pedal pressure are required to stop
the car. Also, the car will not stop in as short a
distance with only half of the brake system
working. If the brakes fail while you are driving,
shift to a lower gear for additional engine braking
and stop the car as soon as it is safe to do so.
!
B260J01A-AAT
Charging System Warning Light
The charging system warning light should come
on when the ignition is turned on, then go out
when the engine is running. If the light stays on
while the engine is running, there is a malfunc-
tion in the electrical charging system. If the light
comes on while you are driving, stop, turn off the
engine and check under the hood. First, make
certain the generator drive belt is in place. If it is,
check the tension of the belt. Do this as shown
on page 6-23 by pushing down on the center of
the belt. Have the system checked by your
Hyundai dealer as soon as possible.