2006 Hyundai Terracan lock
[x] Cancel search: lockPage 141 of 539
1
FEATURES OF YOUR HYUNDAI
127
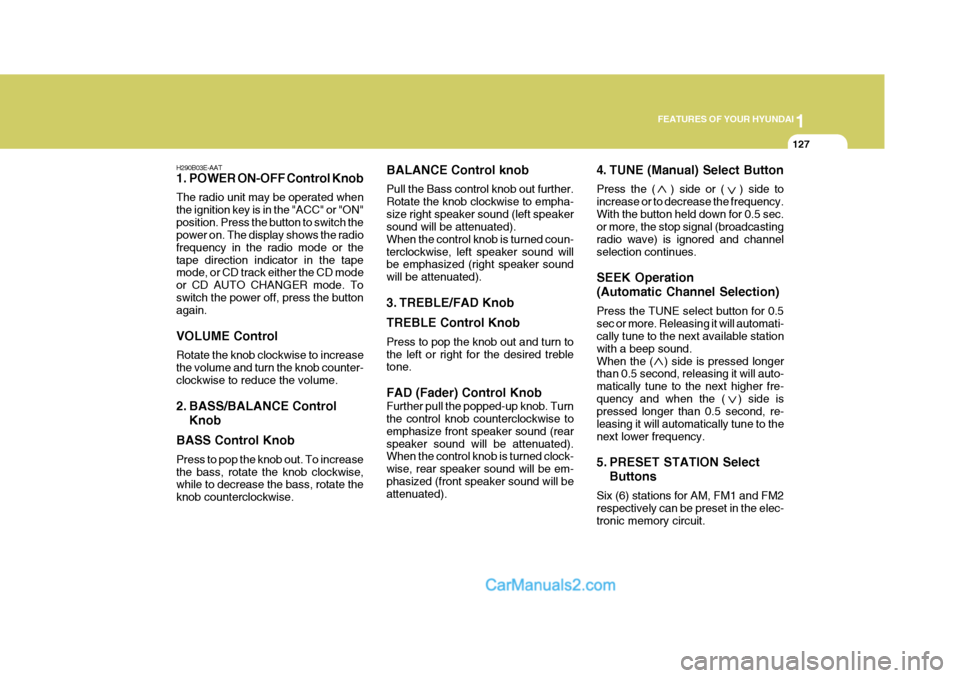
H290B03E-AAT
1. POWER ON-OFF Control Knob The radio unit may be operated when the ignition key is in the "ACC" or "ON"position. Press the button to switch the power on. The display shows the radio frequency in the radio mode or thetape direction indicator in the tape mode, or CD track either the CD mode or CD AUTO CHANGER mode. Toswitch the power off, press the button again. VOLUME Control Rotate the knob clockwise to increase the volume and turn the knob counter-clockwise to reduce the volume.
2. BASS/BALANCE Control Knob
BASS Control Knob Press to pop the knob out. To increase the bass, rotate the knob clockwise, while to decrease the bass, rotate the knob counterclockwise. BALANCE Control knob Pull the Bass control knob out further. Rotate the knob clockwise to empha-size right speaker sound (left speaker sound will be attenuated). When the control knob is turned coun-terclockwise, left speaker sound will be emphasized (right speaker sound will be attenuated).
3. TREBLE/FAD Knob TREBLE Control Knob Press to pop the knob out and turn to the left or right for the desired treble tone. FAD (Fader) Control Knob Further pull the popped-up knob. Turn the control knob counterclockwise to emphasize front speaker sound (rearspeaker sound will be attenuated). When the control knob is turned clock- wise, rear speaker sound will be em-phasized (front speaker sound will be attenuated).
4. TUNE (Manual) Select Button Press the ( ) side or ( ) side to increase or to decrease the frequency.With the button held down for 0.5 sec. or more, the stop signal (broadcasting radio wave) is ignored and channelselection continues. SEEK Operation (Automatic Channel Selection) Press the TUNE select button for 0.5 sec or more. Releasing it will automati- cally tune to the next available station with a beep sound.When the ( ) side is pressed longer than 0.5 second, releasing it will auto- matically tune to the next higher fre-quency and when the ( ) side is pressed longer than 0.5 second, re- leasing it will automatically tune to thenext lower frequency.
5. PRESET STATION Select
Buttons
Six (6) stations for AM, FM1 and FM2 respectively can be preset in the elec- tronic memory circuit.
Page 154 of 539
1FEATURES OF YOUR HYUNDAI
140ANTENNA
!
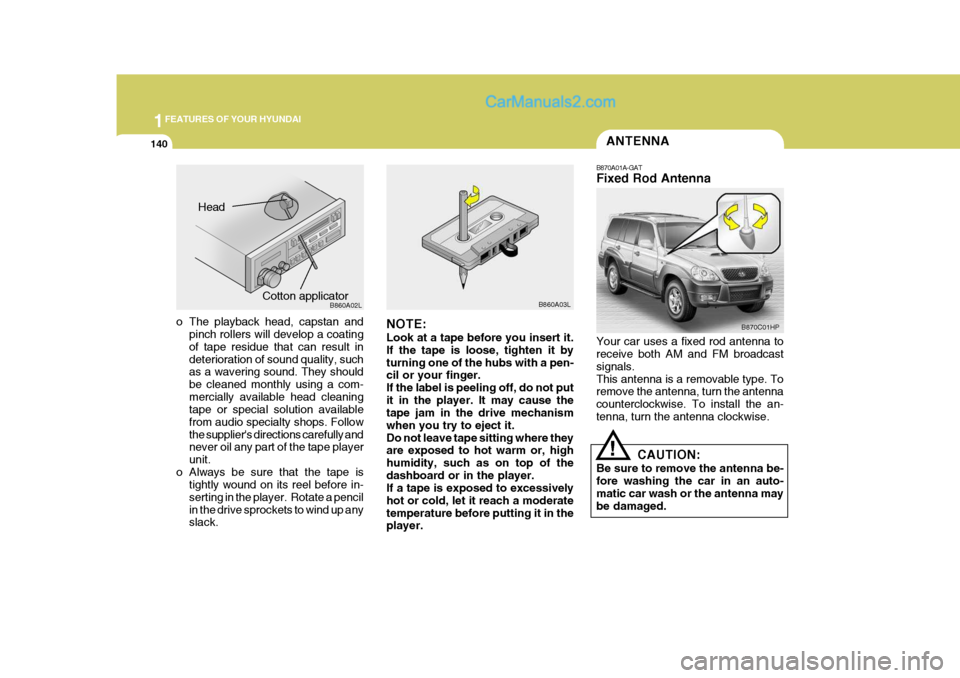
B870A01A-GAT Fixed Rod Antenna Your car uses a fixed rod antenna to receive both AM and FM broadcast signals.This antenna is a removable type. To remove the antenna, turn the antenna counterclockwise. To install the an-tenna, turn the antenna clockwise.
CAUTION:
Be sure to remove the antenna be-fore washing the car in an auto- matic car wash or the antenna may be damaged.
o The playback head, capstan and pinch rollers will develop a coating of tape residue that can result in deterioration of sound quality, such as a wavering sound. They should be cleaned monthly using a com-mercially available head cleaning tape or special solution available from audio specialty shops. Followthe supplier's directions carefully and never oil any part of the tape player unit.
o Always be sure that the tape is tightly wound on its reel before in-serting in the player. Rotate a pencilin the drive sprockets to wind up any slack. NOTE: Look at a tape before you insert it. If the tape is loose, tighten it byturning one of the hubs with a pen- cil or your finger. If the label is peeling off, do not putit in the player. It may cause the tape jam in the drive mechanism when you try to eject it.Do not leave tape sitting where they are exposed to hot warm or, high humidity, such as on top of thedashboard or in the player. If a tape is exposed to excessively hot or cold, let it reach a moderatetemperature before putting it in the player.B860A03L
Head
Cotton applicator B860A02LB870C01HP
Page 156 of 539
2
Engine Exhaust Can Be Dangerous! ........................... 2-2
Before Starting the Engine ........................................... 2-3
Key Positions ................................................................ 2-4Starting......................................................................... 2-5
Operating the Manual Transmission ............................ 2-7
Automatic Transmission ............................................... 2-9
Four-Wheel Drive (4WD) ............................................ 2-14
Anti-Lock Brake System (ABS) .................................. 2-21
Limited-Slip Differential (LSD) .................................... 2-22
Good Braking Practices ............................................. 2-22
Driving for Economy ................................................... 2-23
Smooth Cornering ...................................................... 2-25
Winter Driving ............................................................. 2-25
Trailer or Vehicle Towing ........................................... 2-28
DRIVING YOUR HYUNDAI
2
Page 158 of 539
2
DRIVING YOUR HYUNDAI
3
!
BEFORE STARTING THE ENGINE
C020A02A-AAT Before you start the engine, you should always:
1. Look around the vehicle to be sure
there are no flat tires, puddles of oil, water or other indications of possible trouble.
2. After entering the car, check to be sure the parking brake is engaged.
3. Check that all windows, and lights are clean.
4. Check that the interior and exterior
mirrors are clean and in position.
5. Check your seat, seatback and headrest to be sure they are in theirproper positions.
6. Lock all the doors.
7. Fasten your seat belt and be sure
that all other occupants have fas- tened theirs.
8. Turn off all lights and accessories
that are not needed.
9. When you turn the ignition switch to "ON", check that all appropriatewarning lights are operating andthat you have sufficient fuel.
10. Check the operation of warning
lights and all bulbs when key is inthe "ON" position.
WARNING:
Your vehicle is equipped with tires designed to provide for safe ride and handling capability.Do not use a size and type of tire and wheel that is different from the one that was originally installed onyour vehicle. It can affect the safety and performance of your vehicle, which could lead to handling fail-ure or rollover and serious injury. When replacing the tires, be sure to equip all four tires with the tire andwheel of the same size, type, tread, brand and load-carrying capacity. If you nevertheless decide to equipyour vehicle with any tire/wheel combination not recommended by Hyundai for off-road driving, youshould not use these tires for high- way driving.
!WARNING:
Always wear appropriate shoes when operating your vehicle.Unsuitable shoes (high heels, ski boots, etc.) may interfere with your ability to use the brake and accelera-tor pedal, and the clutch (if installed).
Page 159 of 539
2 DRIVING YOUR HYUNDAI
4
!WARNING: (Diesel only)
To ensure that sufficient vacuum exists within the brake system dur- ing cold weather start-up condi- tions, it is necessary to run theengine at idle after starting accord- ing to the following table.
Ambient temp. Above -15°C (5°F) Below -15°C (5°F)
After starting the engine, do not drive the vehicle until the brake vacuum warning light has turn-ed off.Failure to carry out the above proce- dure may result in the need to apply greater pedal pressure in order toeffect the necessary braking effort. Warm up time 3 min. or longer 6 min. or longer
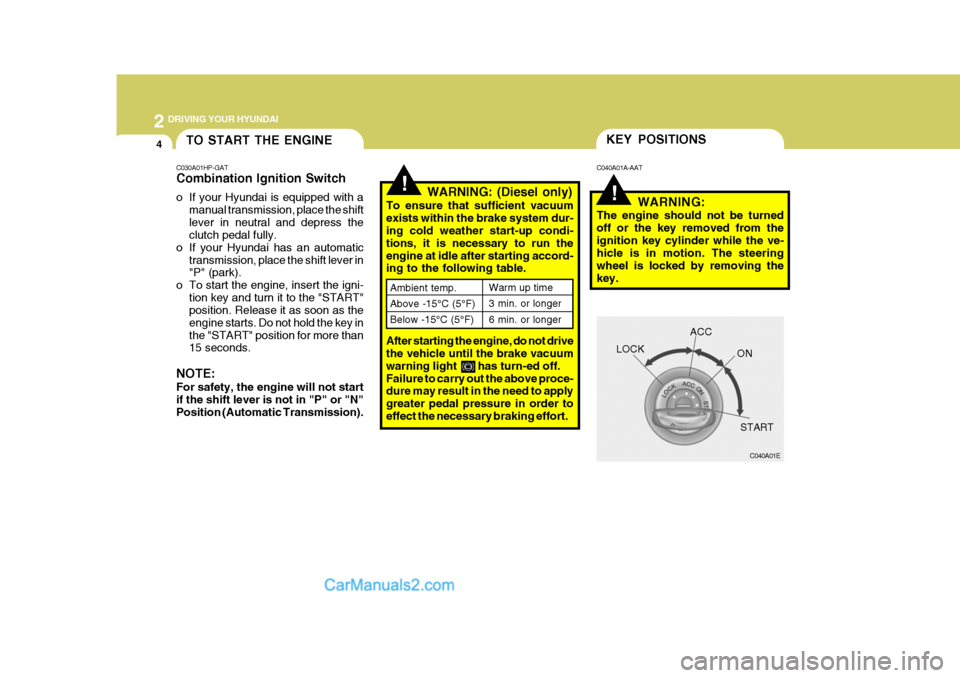
KEY POSITIONS
!
C040A01A-AAT
WARNING:
The engine should not be turned off or the key removed from theignition key cylinder while the ve- hicle is in motion. The steering wheel is locked by removing thekey.
C040A01E
LOCK
ACC
ON
START
TO START THE ENGINE
C030A01HP-GAT Combination Ignition Switch
o If your Hyundai is equipped with a manual transmission, place the shift lever in neutral and depress the clutch pedal fully.
o If your Hyundai has an automatic transmission, place the shift lever in"P" (park).
o To start the engine, insert the igni- tion key and turn it to the "START"position. Release it as soon as the engine starts. Do not hold the key inthe "START" position for more than 15 seconds.
NOTE: For safety, the engine will not start if the shift lever is not in "P" or "N" Position (Automatic Transmission).
Page 160 of 539
2
DRIVING YOUR HYUNDAI
5
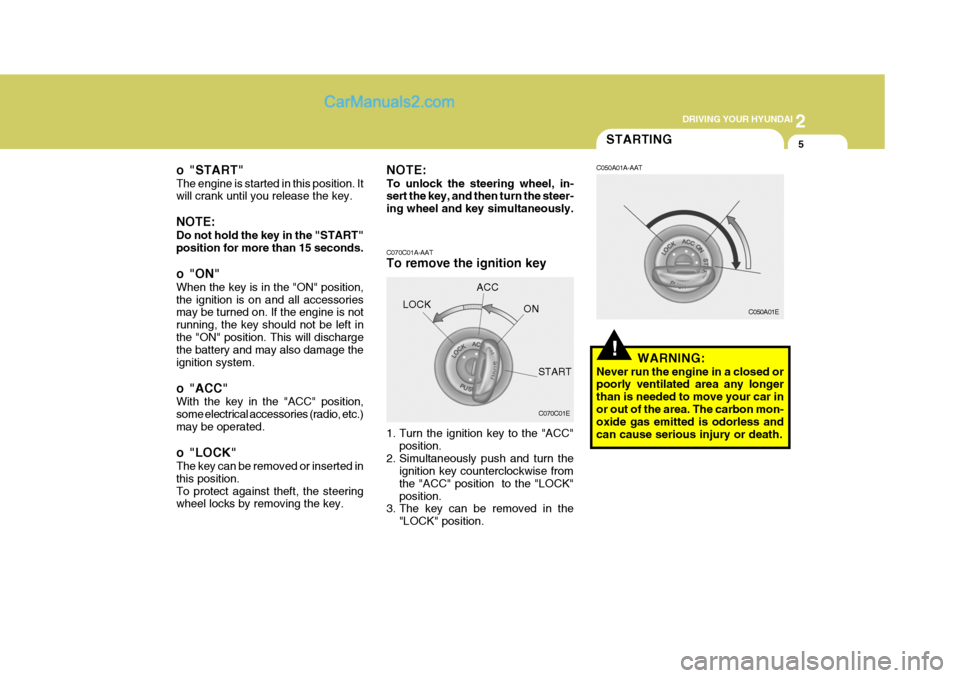
o "START" The engine is started in this position. It will crank until you release the key. NOTE: Do not hold the key in the "START" position for more than 15 seconds.
o "ON" When the key is in the "ON" position, the ignition is on and all accessories may be turned on. If the engine is not running, the key should not be left inthe "ON" position. This will discharge the battery and may also damage the ignition system.
o "ACC" With the key in the "ACC" position, some electrical accessories (radio, etc.)may be operated.
o "LOCK" The key can be removed or inserted in this position.To protect against theft, the steering wheel locks by removing the key.STARTING
!
NOTE: To unlock the steering wheel, in- sert the key, and then turn the steer- ing wheel and key simultaneously. C070C01A-AAT To remove the ignition key
1. Turn the ignition key to the "ACC" position.
2. Simultaneously push and turn the ignition key counterclockwise from the "ACC" position to the "LOCK"position.
3. The key can be removed in the
"LOCK" position.LOCK
C050A01A-AAT
WARNING:
Never run the engine in a closed or poorly ventilated area any longer than is needed to move your car inor out of the area. The carbon mon- oxide gas emitted is odorless and can cause serious injury or death.
C070C01E C050A01E
ACC
ON
START
Page 161 of 539
2 DRIVING YOUR HYUNDAI
6
(1) When the atmospheric tempera-ture is moderate or the engine is warm: Start the engine without de- pressing the accelerator pedal.
(2) When the atmospheric tempera- ture is low and the engine iscold:Start the engine while depress- ing the accelerator pedal. If the atmospheric temperature is verylow, setting the ignition switch to "ON" for one or two seconds before attempting to start theengine will make it easier to start.
6. Turn the ignition key to the "START" position and release it when the engine starts.
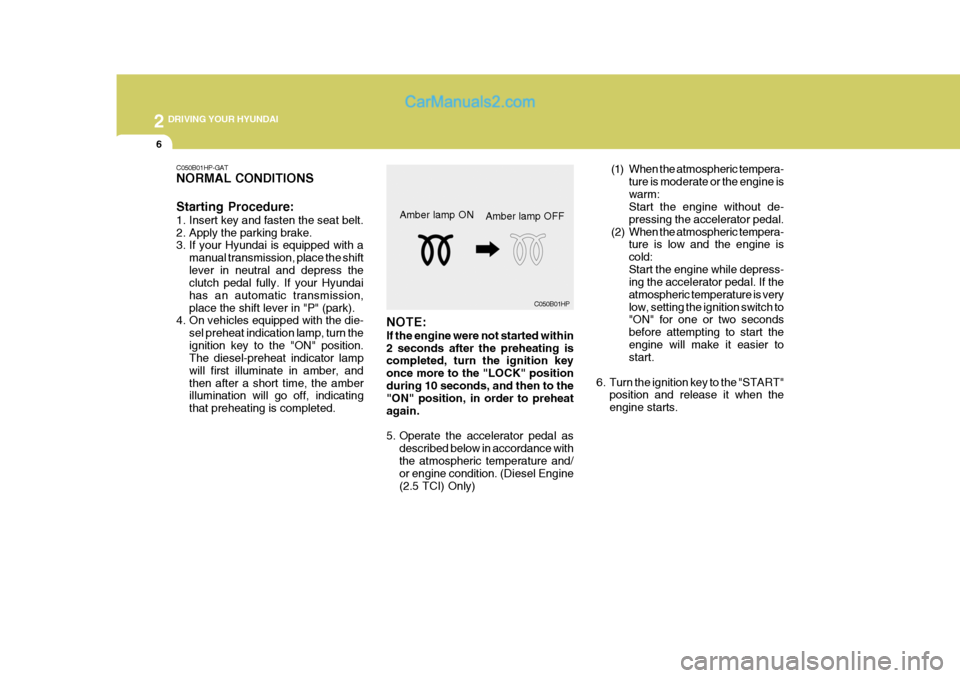
NOTE: If the engine were not started within 2 seconds after the preheating is completed, turn the ignition key once more to the "LOCK" positionduring 10 seconds, and then to the "ON" position, in order to preheat again.
5. Operate the accelerator pedal as
described below in accordance with the atmospheric temperature and/ or engine condition. (Diesel Engine (2.5 TCI) Only)Amber lamp ON
C050B01HP
Amber lamp OFF
C050B01HP-GAT NORMAL CONDITIONS Starting Procedure:
1. Insert key and fasten the seat belt.
2. Apply the parking brake.
3. If your Hyundai is equipped with a
manual transmission, place the shift lever in neutral and depress the clutch pedal fully. If your Hyundai has an automatic transmission,place the shift lever in "P" (park).
4. On vehicles equipped with the die-
sel preheat indication lamp, turn theignition key to the "ON" position. The diesel-preheat indicator lamp will first illuminate in amber, andthen after a short time, the amber illumination will go off, indicating that preheating is completed.
Page 176 of 539
2
DRIVING YOUR HYUNDAI
21ANTI-LOCK BRAKE SYSTEM (ABS)
!WARNING:
o Avoid high cornering speeds.
o Do not make quick steering wheel movements, such as sharp lane charges or fast, sharp turns.
o The risk of rollover is greatly in-
creased if you lose control ofyour vehicle at highway speeds.
o In a collision crash, an unbelted
person is significantly more likelyto die than a person wear a seatbelt.
o Loss of control often occurs if two or more wheels drop off theroadway and the driver oversteers to reenter the roadway.
o In the event your vehicle leaves the roadway, do not steer sharply.Instead, slow down before pull-ing back into the travel lanes. C120A02A-AAT (If Installed) The Anti-Lock Brake System (ABS) is designed to prevent wheel lock-upduring sudden braking or on hazard- ous road surfaces. The ABS control module monitors the wheel speed andcontrols the pressure applied to each brake. Thus, in emergency situations or on slick roads, ABS will increasevehicle control during braking. NOTE: During ABS operation, a slight pul- sation may be felt in the brake pedal when the brakes are applied. Also, a noise may be heard in the enginecompartment while braking. These conditions are normal and indicate that the anti-lock brake system isfunctioning properly.!WARNING:
ABS will not prevent accidents due to improper or dangerous drivingmaneuvers. Even though vehicle control is improved during emer- gency braking, always maintain asafe distance between you and ob- jects ahead. Vehicle speeds should always be reduced during extremeroad conditions. The braking distance for cars equipped with an anti-lock brakingsystem may be longer than for those without it in the following road con- ditions. During these conditions thevehicle should be driven at reduced speeds.
o Rough, gravel or snow-covered roads.
o With tire chains installed.
o Roads where the road surface is pitted or has different surfaceheight.
The safety features of an ABSequipped vehicle should not betested by high speed driving or cornering. This could endanger the safety of yourself or others.