2006 Hyundai Terracan turn signal
[x] Cancel search: turn signalPage 308 of 539
YOUR VEHICLE AT A GLANCE
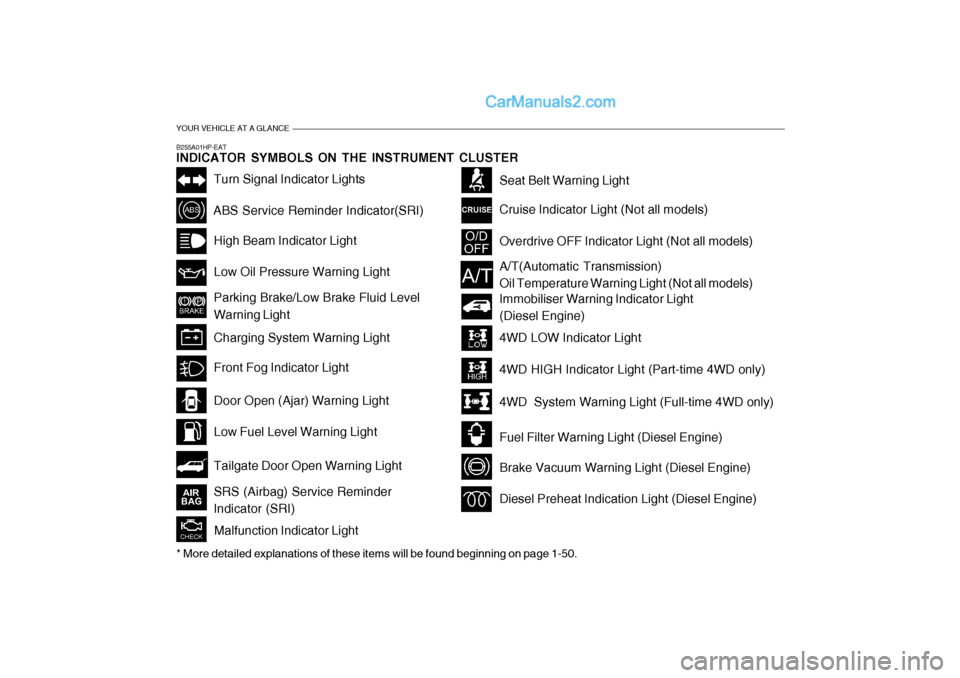
B255A01HP-EAT INDICATOR SYMBOLS ON THE INSTRUMENT CLUSTER
Turn Signal Indicator Lights
ABS Service Reminder Indicator(SRI)High Beam Indicator Light Low Oil Pressure Warning Light Parking Brake/Low Brake Fluid Level Warning Light Charging System Warning Light
Tailgate Door Open Warning Light
Door Open (Ajar) Warning Light Low Fuel Level Warning Light
Front Fog Indicator Light
Overdrive OFF Indicator Light (Not all models)
Immobiliser Warning Indicator Light (Diesel Engine)
Seat Belt Warning Light Cruise Indicator Light (Not all models)
Malfunction Indicator Light
A/T(Automatic Transmission) Oil Temperature Warning Light (Not all models)
4WD LOW Indicator Light 4WD HIGH Indicator Light (Part-time 4WD only)
4WD System Warning Light (Full-time 4WD only)
Fuel Filter Warning Light (Diesel Engine)
Brake Vacuum Warning Light (Diesel Engine)
Diesel Preheat Indication Light (Diesel Engine)
* More detailed explanations of these items will be found beginning on page 1-50.SRS (Airbag) Service Reminder Indicator (SRI)
Page 320 of 539

1CONTROLS AND EQUIPMENT
12
!
1) Remove the ignition key from the
ignition switch.
2) Make sure that the bonnet, doors and tailgate door are closed and latched.
3) Lock the doors using the transmitter of the keyless entry system.
After completion of the steps above, the turn signal lights will blink once to indicate that the system is armed. NOTE:
1) If any door, tailgate door or engine bonnet remains open, the system will not be armed.
2) If this happens, rearm the system as previously described.
CAUTION:
Do not arm the system until all pas-sengers have left the car. If the sys- tem is armed whilst a passenger(s) remains in the car, the alarm may beactivated when the remaining passenger(s) leaves the car.
!
B070C01HP-EAT Alarm Stage The alarm will be activated if any of the following occurs whilst the car is parked and the system is armed.
1) A front or rear door is opened with-
out using the transmitter.
2) The tailgate door is opened without using the transmitter.
3) The engine bonnet is opened.The siren will sound and the turn signal lights will blink continuouly for approxi- mately 27 seconds. To turn off thesystem, unlock the door or tailgate door with the transmitter. CAUTION:
Avoid trying to start the engine whilst the system is armed.
B070C01HP B070D01HP-EAT Disarmed Stage The system will be disarmed when the driver's or passenger's door is unlocked by depressing the "UNLOCK" button onthe transmitter. After completion of the step above, the turn signal lights will blink twice to indicate that the system is disarmed.
B070D01HP-1
Page 321 of 539
1
CONTROLS AND EQUIPMENT
13
!
NOTE: If any door,
tailgate door or engine
bonnet is not opened within 30 sec- onds, the system will be rearmedand all doors re-locked.
CAUTION:
Only the transmitter can disarm thearmed stage. If the transmitter doesnot disarm the system, it is neces- sary to take the following steps;
1. Unlock the door with the key, which will cause, the alarm to be acti- vated.
2. Insert the key in the ignition key cylinder and turn the ignition keyto "ON" position.
3. Wait for 30 seconds. After completion of the steps above, the system will be disarmed. B070F02A-EAT Keyless Entry System (Not all models) Locking doors
1. Close all doors.
2. Push the "LOCK" button on the trans-
mitter.
3. At the same time, all doors lock and the turn signal lights will blink once to indicate that the system is armed.
Unlocking doors
1. Push the "UNLOCK" button on the transmitter.
2. At the same time, all doors unlock and the turn signal lights will blink twice to indicate that the system isdisarmed.
NOTE: The transmitter will not work if any of following occur:
- The ignition key is in ignition switch.
- You exceed the operating distance limit (10 m). - The battery in the transmitter is
weak.
- Other vehicles or objects may be blocking the signal.
- The weather is extremely cold.
- The transmitter is close to a radio transmitter such as a radio stationor an airport which can interferewith normal operation of the trans- mitter.
When the transmitter does not work correctly, open and close the door with the ignition key. If you have a problem with the transmitter, con-tact an authorised Hyundai repairer. NOTE: Keep the transmitter away from wa- ter or any liquid. If the keyless entrysystem is inoperative due to expo- sure to water or liquids, it will not be covered by your manufacturer ve-hicle warranty.
Page 355 of 539

1
CONTROLS AND EQUIPMENT
47
1. Tachometer
2. Turn Signal Indicator Light
3. Coolant Temperature Gauge
4. Fuel Gauge
5. Speedometer
6. ABS Service Reminder Indicator(SRI) (Not all models)
7. Supplemental Restraint (AirBag) System Service Reminder lndicator (SRI)
8. Low Oil Pressure Warning Light
9. Parking Brake/Low Brake Fluid LevelWarning Light
10. Charging System Warning Light
11. A/T Oil Temperature Warning Light (Not all models)
12. Overdrive OFF Indicator Light (Not all models)
13. High Beam Indicator Light 14. Front Fog Indicator Light
15. Automatic Transmission Position Indicator Light (Not all models)
16. Cruise Indicator Light (Not all models)
17. 4WD LOW Indicator Light
18. 4WD HIGH Indicator Light (Part-time 4WD)
/4WD System Warning Light (Full-time 4WD)
19. Malfunction Indicator Light (MIL)
20. Trip Odometer
21. Odometer 22.Trip odometer Reset Knob
23. Tailgate Door Open Warning Light
24. Door Open (Ajar) Warning Light
25. Seat Belt Warning Light
26. Low Fuel Warning Light
Page 357 of 539
1
CONTROLS AND EQUIPMENT
49
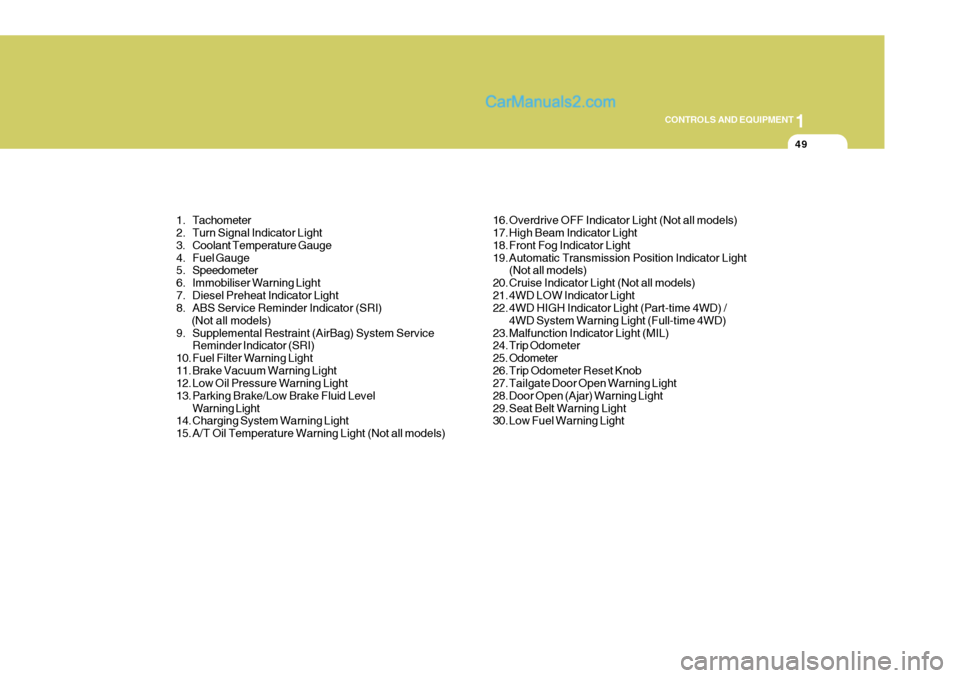
1. Tachometer
2. Turn Signal Indicator Light
3. Coolant Temperature Gauge
4. Fuel Gauge
5. Speedometer
6. Immobiliser Warning Light
7. Diesel Preheat Indicator Light
8. ABS Service Reminder Indicator (SRI) (Not all models)
9. Supplemental Restraint (AirBag) System Service Reminder Indicator (SRI)
10. Fuel Filter Warning Light
11. Brake Vacuum Warning Light
12. Low Oil Pressure Warning Light
13. Parking Brake/Low Brake Fluid Level Warning Light
14. Charging System Warning Light
15. A/T Oil Temperature Warning Light (Not all models) 16. Overdrive OFF Indicator Light (Not all models)
17. High Beam Indicator Light
18. Front Fog Indicator Light
19. Automatic Transmission Position Indicator Light
(Not all models)
20. Cruise Indicator Light (Not all models)
21. 4WD LOW Indicator Light
22. 4WD HIGH Indicator Light (Part-time 4WD) / 4WD System Warning Light (Full-time 4WD)
23. Malfunction Indicator Light (MIL)
24. Trip Odometer
25. Odometer
26. Trip Odometer Reset Knob
27. Tailgate Door Open Warning Light
28. Door Open (Ajar) Warning Light
29. Seat Belt Warning Light
30. Low Fuel Warning Light
Page 358 of 539
1CONTROLS AND EQUIPMENT
50
!
!
!
B260P02Y-EAT
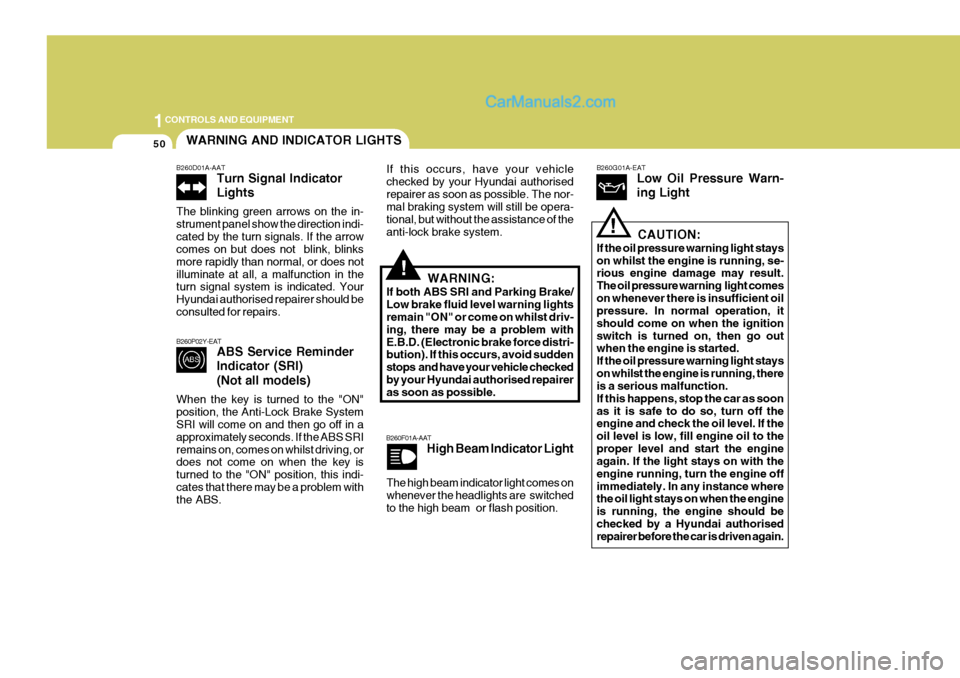
ABS Service Reminder Indicator (SRI) (Not all models)
When the key is turned to the "ON" position, the Anti-Lock Brake System SRI will come on and then go off in a approximately seconds. If the ABS SRIremains on, comes on whilst driving, or does not come on when the key is turned to the "ON" position, this indi-cates that there may be a problem with the ABS. If this occurs, have your vehicle checked by your Hyundai authorisedrepairer as soon as possible. The nor- mal braking system will still be opera- tional, but without the assistance of theanti-lock brake system.
B260F01A-AAT High Beam Indicator Light B260G01A-EAT
Low Oil Pressure Warn- ing Light
CAUTION:
If the oil pressure warning light stays on whilst the engine is running, se- rious engine damage may result. The oil pressure warning light comeson whenever there is insufficient oil pressure. In normal operation, it should come on when the ignitionswitch is turned on, then go out when the engine is started. If the oil pressure warning light stayson whilst the engine is running, there is a serious malfunction. If this happens, stop the car as soonas it is safe to do so, turn off the engine and check the oil level. If the oil level is low, fill engine oil to theproper level and start the engine again. If the light stays on with the engine running, turn the engine offimmediately. In any instance where the oil light stays on when the engine is running, the engine should bechecked by a Hyundai authorised repairer before the car is driven again.
WARNING AND INDICATOR LIGHTS
B260D01A-AAT Turn Signal Indicator Lights
The blinking green arrows on the in- strument panel show the direction indi-cated by the turn signals. If the arrow comes on but does not blink, blinks more rapidly than normal, or does notilluminate at all, a malfunction in the turn signal system is indicated. Your Hyundai authorised repairer should beconsulted for repairs.
The high beam indicator light comes on whenever the headlights are switched to the high beam or flash position. WARNING:
If both ABS SRI and Parking Brake/ Low brake fluid level warning lights remain "ON" or come on whilst driv- ing, there may be a problem withE.B.D. (Electronic brake force distri- bution). If this occurs, avoid sudden stops and have your vehicle checkedby your Hyundai authorised repairer as soon as possible.
Page 368 of 539
1CONTROLS AND EQUIPMENT
60
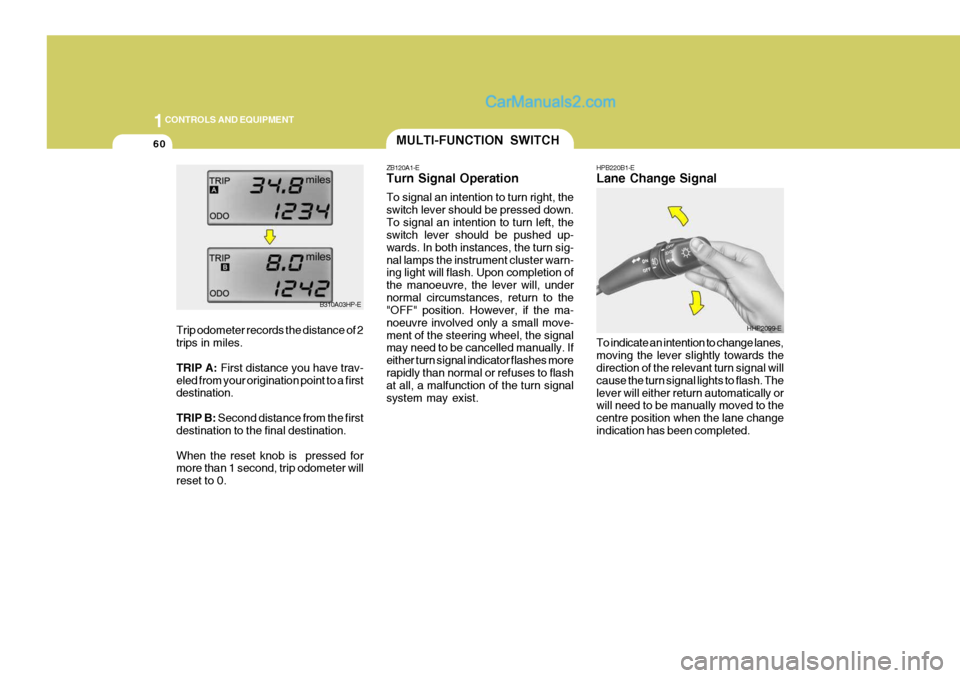
HPB220B1-E Lane Change Signal To indicate an intention to change lanes, moving the lever slightly towards the direction of the relevant turn signal will cause the turn signal lights to flash. Thelever will either return automatically or will need to be manually moved to the centre position when the lane changeindication has been completed.MULTI-FUNCTION SWITCH
ZB120A1-E Turn Signal Operation To signal an intention to turn right, the switch lever should be pressed down.To signal an intention to turn left, the switch lever should be pushed up- wards. In both instances, the turn sig-nal lamps the instrument cluster warn- ing light will flash. Upon completion of the manoeuvre, the lever will, undernormal circumstances, return to the "OFF" position. However, if the ma- noeuvre involved only a small move-ment of the steering wheel, the signal may need to be cancelled manually. If either turn signal indicator flashes morerapidly than normal or refuses to flash at all, a malfunction of the turn signal system may exist.
HHP2099-E
B310A03HP-E
Trip odometer records the distance of 2 trips in miles. TRIP A: First distance you have trav-
eled from your origination point to a first destination. TRIP B: Second distance from the first
destination to the final destination.When the reset knob is pressed for more than 1 second, trip odometer will reset to 0.
Page 369 of 539
1
CONTROLS AND EQUIPMENT
61
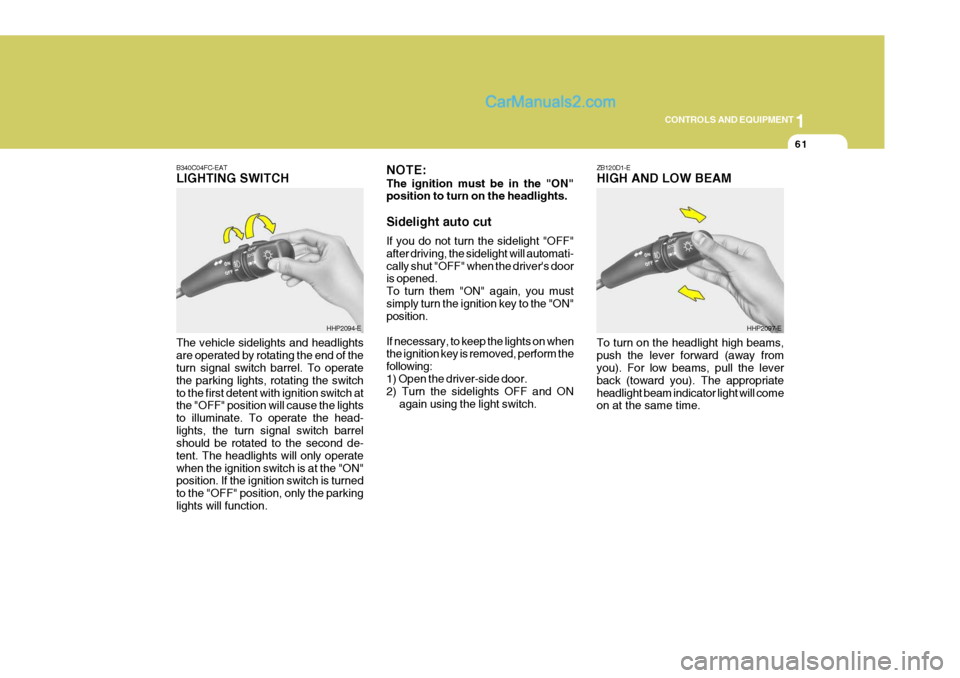
ZB120D1-E HIGH AND LOW BEAM
B340C04FC-EATLIGHTING SWITCH The vehicle sidelights and headlights are operated by rotating the end of the turn signal switch barrel. To operate the parking lights, rotating the switchto the first detent with ignition switch at the "OFF" position will cause the lights to illuminate. To operate the head-lights, the turn signal switch barrel should be rotated to the second de- tent. The headlights will only operatewhen the ignition switch is at the "ON" position. If the ignition switch is turned to the "OFF" position, only the parkinglights will function.
HHP2094-E NOTE: The ignition must be in the "ON" position to turn on the headlights. Sidelight auto cut If you do not turn the sidelight "OFF" after driving, the sidelight will automati-cally shut "OFF" when the driver's door is opened. To turn them "ON" again, you mustsimply turn the ignition key to the "ON" position. If necessary, to keep the lights on when the ignition key is removed, perform the following:1) Open the driver-side door. 2) Turn the sidelights OFF and ON
again using the light switch.HHP2097-E
To turn on the headlight high beams, push the lever forward (away from you). For low beams, pull the lever back (toward you). The appropriateheadlight beam indicator light will come on at the same time.