Page 28 of 539

1FEATURES OF YOUR HYUNDAI
14
!
!
1) Remove the ignition key from the
ignition switch.
2) Make sure that the engine hood and tail gate are closed and latched.
3) Lock the doors using the transmitter
of the keyless entry system.
After completion of the steps above, the turn signal lights will blink once to indicate that the system is armed. NOTE:
1) If any door, tail gate or engine hood remains open, the system will not be armed.
2) If this happens, rearm the system as previously described.
CAUTION:
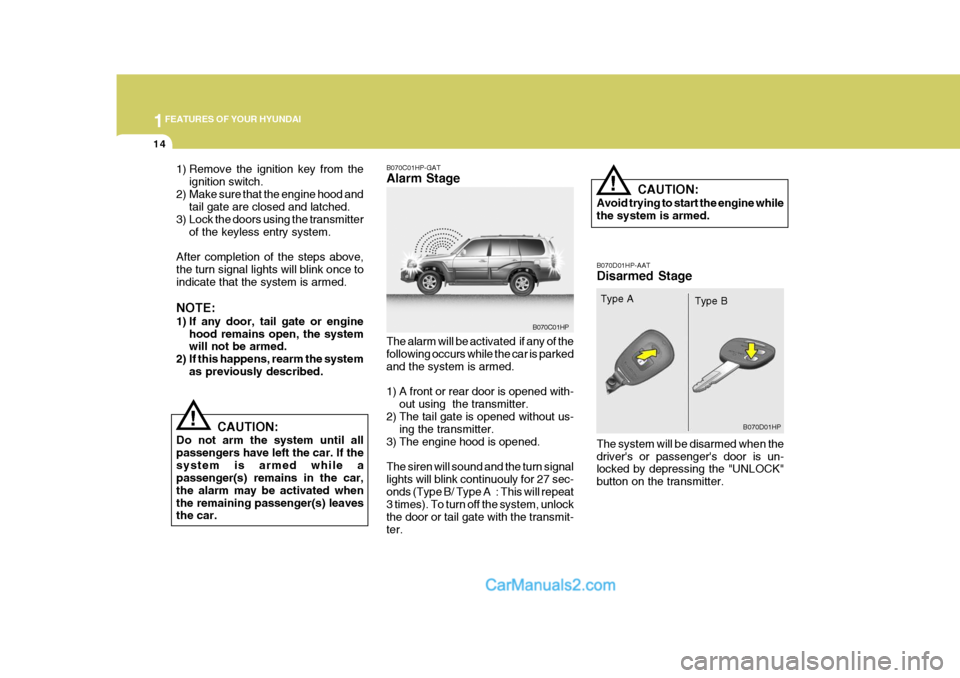
Do not arm the system until all passengers have left the car. If thesystem is armed while a passenger(s) remains in the car, the alarm may be activated whenthe remaining passenger(s) leaves the car. B070C01HP-GAT Alarm Stage The alarm will be activated if any of the following occurs while the car is parked and the system is armed.
1) A front or rear door is opened with-
out using the transmitter.
2) The tail gate is opened without us- ing the transmitter.
3) The engine hood is opened.The siren will sound and the turn signal lights will blink continuouly for 27 sec-
onds (Type B/ Type A : This will repeat 3 times). To turn off the system, unlock the door or tail gate with the transmit-ter. CAUTION: Avoid trying to start the engine while the system is armed. B070D01HP-AAT Disarmed Stage The system will be disarmed when the driver's or passenger's door is un- locked by depressing the "UNLOCK" button on the transmitter.
B070C01HP
B070D01HP
Type A
Type B
Page 29 of 539

1
FEATURES OF YOUR HYUNDAI
15
!
After completion of the step above, the turn signal lights will blink twice toindicate that the system is disarmed. NOTE: If any door, tail gate or engine hood is not opened within 30 seconds,the system will be rearmed.
CAUTION:
Only the transmitter can disarm thearmed stage. If the transmitter does not disarm the system, it is neces- sary to take the following steps;
1. Unlock the door with the key, which will cause the alarm to be activated.
2. Insert the key in the ignition key
cylinder and turn the ignition keyto "ON" position.
3. Wait for 30 seconds. After completing the steps above, the system will be disarmed. B070F02A-GAT Keyless Entry System (If Installed) Locking doors
1. Close all doors.
2. Push the "LOCK" button on the trans-
mitter.
3. At the same time all doors lock, the
turn signal lights will blink once toindicate that the system is armed.
Unlocking doors
1. Push the "UNLOCK" button on the transmitter.
2. At the same time all doors unlock,
the turn signal lights will blink twice to indicate that the system is dis- armed.
NOTE: The transmitter will not work if any of following occur:
- The ignition key is in ignition switch.
- You exceed the operating distance
limit (10 m).
- The battery in the transmitter is weak. - Other vehicles or objects may be
blocking the signal.
- The weather is extremely cold.
- The transmitter is close to a radio transmitter such as a radio station or an airport which can interfere with normal operation of the trans- mitter.
When the transmitter does not work correctly, open and close the door with the ignition key. If you have aproblem with the transmitter, con- tact an authorized Hyundai Dealer. NOTE: Keep the transmitter away from wa- ter or any liquid. If the keyless entry system is inoperative due to expo- sure to water or liquids, it will not becovered by your manufacturer ve- hicle warranty.
Page 30 of 539
1FEATURES OF YOUR HYUNDAI
16
2. Remove the old battery from the
case and note the polarity. Make sure the polarity of the new battery is the same(+side facing down), then insert it in the transmitter.
3. Installation is the reverse order of disassembly. Type B:
1. Carefully separate the case with a
phillips screwdriver.
MSO-0048-2
HMXOM033-2
Case
Battery
CaseTransmitter
B070E02HP-GAT Replacing the battery When the transmitter's battery begins to get weak, it may take several pushes on the button to lock or unlock thedoors, and the LED will not light. Re- place the battery as soon as possible.
Battery type : CR2032(Type A) or CR1616 (Type B)
Replacement instructions: Type A:
MSO-0048-1
1. Carefully separate the case with a blade screwdriver as shown in the illustration.
Screwdriver
Page 60 of 539

1FEATURES OF YOUR HYUNDAI
46
!
1. SRS airbag warning light
2. Seat belt pre-tensioner assembly
3. SRS control module o When the pre-tensioner seat belts
are activated, a loud noise maybe heard and fine dust, which may appear to be smoke, may be visible in the passenger compart-ment. These are normal operat- ing conditions and are not haz- ardous.
o Although it is harmless, the fine dust may cause skin irritationand should not be breathed forprolonged periods. Wash your hands and face thoroughly after an accident in which the pre-tensioner seat belts were acti- vated.
WARNING:
To obtain maximum benefit from a pre-tensioner seat belt:
1. The seat belt must be worn cor- rectly.
2. The seat belt must be adjusted to the correct position.
NOTE:
o Both the driver's and front passenger's pre-tensioner seat belts will be activated in certainfrontal collisions. The pre- tensioner seat belts can be acti- vated alone or, where the frontalcollision is severe enough, to- gether with the airbags.
When the vehicle stops suddenly, or if the occupant tries to lean forward tooquickly, the seat belt retractor will lock into position. In certain frontal colli- sions, the pre-tensioner will activateand pull the seat belt into tighter con- tact against the occupant's body.
B180B01HP
The seat belt pre-tensioner system consists mainly of the following com- ponents. Their locations are shown in the illus-tration.
Driver's airbag1
2 3Passenger's airbag
Page 61 of 539

1
FEATURES OF YOUR HYUNDAI
47
!WARNING:
o Pre-tensioners are designed to operate only one time. After acti- vation, pre-tensioner seat belts must be replaced. All seat belts,of any type, should always be replaced after they have been worn during a collision.
o The pre-tensioner seat belt as- sembly mechanisms become hotduring activation. Do not touchthe pre-tensioner seat belt as- semblies for several minutes af- ter they have been activated.
o Do not attempt to inspect or re- place the pre-tensioner seat beltsyourself. This must be done byan authorized Hyundai dealer.
o Do not strike the pre-tensioner
seat belt assemblies.
o Do not attempt to service or re- pair the pre-tensioner seat beltsystem in any manner.! CAUTION:
o Because the sensor that activates the SRS airbag is connected with pre-tensioner seat belt, the SRS airbag warning light on the instrument panel will blink for approximately 6 seconds after the ignition key has been turned to the "ON" position or after the engine is started, and then it should turn off.
o If pre-tensioner seat belt is not working properly, this warning light will illuminate even if there is no malfunction of the SRS airbag. If the SRS airbag warning light does not blink for about 6 seconds when the ignition key is turned to "ON" or the engine is started, or if it remains illumi- nated after blinking for approxi- mately 6 seconds, or if it illumi- nates while the vehicle is being driven, please have an authorized Hyundai dealer inspect the pre- tensioner seat belts and SRS airbag system as soon as pos- sible.
AIR
BAG
o Improper handling of the pre-
tensioner seat belt assemblies, and failure to heed the warnings to not strike, modify, inspect, re-place, service or repair the pre- tensioner seat belt assemblies may lead to improper operationor inadvertent activation and se- rious injury.
o Always wear seat belts when driv-
ing or riding in a motor vehicle.
Page 62 of 539

1FEATURES OF YOUR HYUNDAI
48
!
The Hyundai SRS consists of airbags installed under the pad covers in thecenter of the steering wheel and the passenger's side front panel above the glove box. The purpose of the SRSis to provide the vehicle's driver and/or the front passenger with additional pro- tection than that offered by the seat-belt system alone, in case of a frontal impact of sufficient severity. NOTE: Be sure to read information about the SRS on the labels provided on the front of the sun visor and in the glove box. WARNING:
o As its name implies, the SRS is designed to work with, and be supplemental to, the driver's and the passenger's three point seatbelt systems and is not a substi- tute for them. Therefore, your seat belts must be worn at all timeswhile the vehicle is in motion. The airbags deploy only in cer- tain frontal impact conditionssevere enough to likely cause significant injury to the vehicle occupants.
o The SRS is designed to deploy the airbags only when an impactis sufficiently severe and whenthe impact angle is less than 30° from the forward longitudinal axis of the vehicle and will not deployin side, rear or rollover impacts. Additionally, the airbags will only deploy once. Thus, seat beltsmust be worn at all times.
o Front airbags are not intended to
deploy in light collisions in whichprotection can be provided by the seat belt alone.
SUPPLEMENTAL RESTRAINT (AIRBAG) SYSTEM
B240A01HP-AAT (If Installed)
Your Hyundai is equipped with a Supplemental Restraint (Airbag) Sys- tem. The indications of the system'spresence are the letters "SRS AIR BAG" embossed on the airbag pad cover in the steering wheel and thepassenger's side front panel pad above the glove box. Driver's Airbag
B240A01HP
Page 68 of 539
1FEATURES OF YOUR HYUNDAI
54INSTRUMENT CLUSTER AND INDICATOR LIGHTS
B260A03HP-GAT Gasoline Engine
B260A01HP
Part-time 4WD: Full-time 4WD:
Page 69 of 539

1
FEATURES OF YOUR HYUNDAI
55
1. Tachometer
2. Turn Signal Indicator Light
3. Coolant Temperature Gauge
4. Fuel Gauge
5. Speedometer
6. ABS Service Reminder Indicator (SRI) (If Installed)
7. Supplemental Restraint (AirBag) System Service Reminder lndicator (SRI) (If Installed)
8. Low Oil Pressure Warning Light
9. Parking Brake/Low Brake Fluid Level Warning Light
10.Charging System Warning Light
11.A/T Oil Temperature Warning Light (If Installed)
12.Overdrive Off Indicator Light (If Installed)
13.High Beam Indicator Light 14.Front Fog Indicator Light
15.Automatic Transmission Position Indicator Light (If Installed)
16.Cruise Indicator Light (If Installed)
17.4WD LOW Indicator Light
18.4WD HIGH Indicator Light (Part-time 4WD)
/4WD System Warning Light (Full-time 4WD)
19.Malfunction Indicator Light (MIL) (If Installed)
20.Trip Odometer
21.Odometer 22.Trip Odometer Reset Knob
23.Tail Gate Open Warning Light
24.Door Ajar Warning Light
25.Seat Belt Warning Light
26.Low Fuel Warning Light