Page 140 of 539
1FEATURES OF YOUR HYUNDAI
126
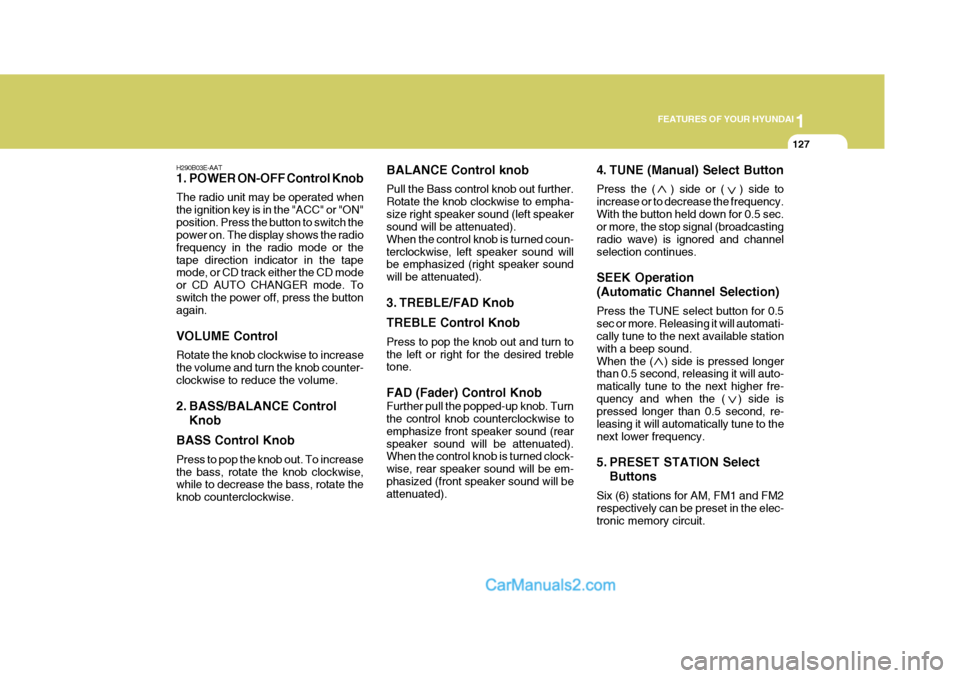
H290A01E-GAT STEREO RADIO OPERATION (H280) (If Installed)
1. POWER ON/OFF, VOLUME Control Knob
H290A01HP
2. BASS/BALANCE Control Knob
3. TREBLE/FAD Konb
4. TUNE/SEEK Select Button 5. PRESET Buttons
6. BAND Select Button 7. EQUALIZER Button
8. BEST STATION MEMORY or
SCAN Button (If Installed)
Page 141 of 539
1
FEATURES OF YOUR HYUNDAI
127
H290B03E-AAT
1. POWER ON-OFF Control Knob The radio unit may be operated when the ignition key is in the "ACC" or "ON"position. Press the button to switch the power on. The display shows the radio frequency in the radio mode or thetape direction indicator in the tape mode, or CD track either the CD mode or CD AUTO CHANGER mode. Toswitch the power off, press the button again. VOLUME Control Rotate the knob clockwise to increase the volume and turn the knob counter-clockwise to reduce the volume.
2. BASS/BALANCE Control Knob
BASS Control Knob Press to pop the knob out. To increase the bass, rotate the knob clockwise, while to decrease the bass, rotate the knob counterclockwise. BALANCE Control knob Pull the Bass control knob out further. Rotate the knob clockwise to empha-size right speaker sound (left speaker sound will be attenuated). When the control knob is turned coun-terclockwise, left speaker sound will be emphasized (right speaker sound will be attenuated).
3. TREBLE/FAD Knob TREBLE Control Knob Press to pop the knob out and turn to the left or right for the desired treble tone. FAD (Fader) Control Knob Further pull the popped-up knob. Turn the control knob counterclockwise to emphasize front speaker sound (rearspeaker sound will be attenuated). When the control knob is turned clock- wise, rear speaker sound will be em-phasized (front speaker sound will be attenuated).
4. TUNE (Manual) Select Button Press the ( ) side or ( ) side to increase or to decrease the frequency.With the button held down for 0.5 sec. or more, the stop signal (broadcasting radio wave) is ignored and channelselection continues. SEEK Operation (Automatic Channel Selection) Press the TUNE select button for 0.5 sec or more. Releasing it will automati- cally tune to the next available station with a beep sound.When the ( ) side is pressed longer than 0.5 second, releasing it will auto- matically tune to the next higher fre-quency and when the ( ) side is pressed longer than 0.5 second, re- leasing it will automatically tune to thenext lower frequency.
5. PRESET STATION Select
Buttons
Six (6) stations for AM, FM1 and FM2 respectively can be preset in the elec- tronic memory circuit.
Page 142 of 539
1FEATURES OF YOUR HYUNDAI
128
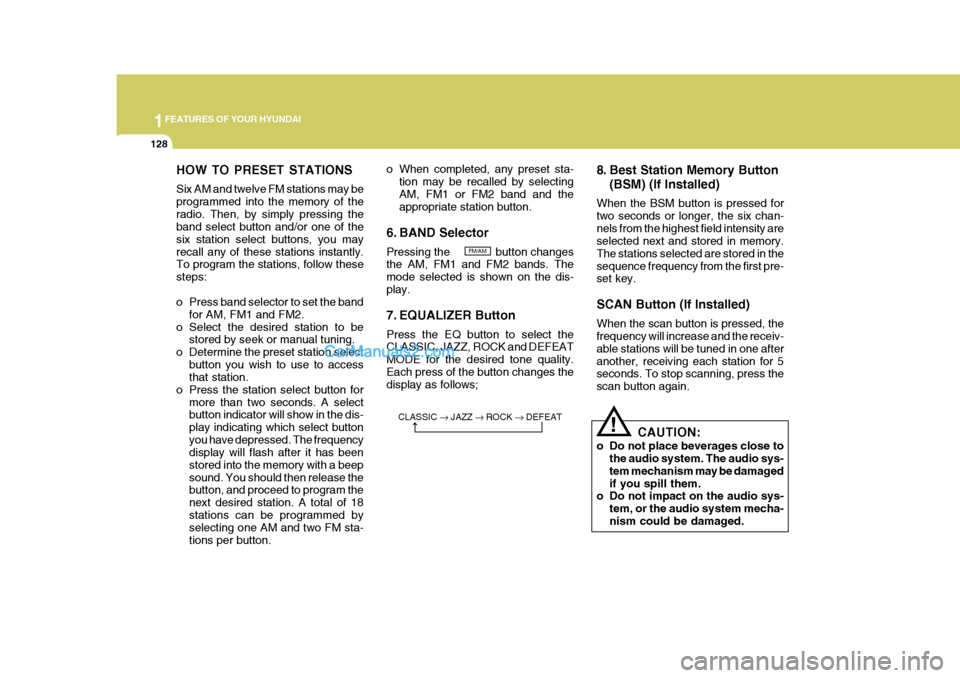
HOW TO PRESET STATIONS Six AM and twelve FM stations may be programmed into the memory of theradio. Then, by simply pressing the band select button and/or one of the six station select buttons, you mayrecall any of these stations instantly. To program the stations, follow these steps:
o Press band selector to set the bandfor AM, FM1 and FM2.
o Select the desired station to be stored by seek or manual tuning.
o Determine the preset station select button you wish to use to access that station.
o Press the station select button for more than two seconds. A selectbutton indicator will show in the dis- play indicating which select buttonyou have depressed. The frequency display will flash after it has been stored into the memory with a beepsound. You should then release the button, and proceed to program the next desired station. A total of 18stations can be programmed by selecting one AM and two FM sta- tions per button. o When completed, any preset sta-
tion may be recalled by selectingAM, FM1 or FM2 band and the appropriate station button.
6. BAND Selector Pressing the button changes the AM, FM1 and FM2 bands. The mode selected is shown on the dis-play.
7. EQUALIZER Button Press the EQ button to select the CLASSIC, JAZZ, ROCK and DEFEAT MODE for the desired tone quality.Each press of the button changes the display as follows; 8. Best Station Memory Button
(BSM) (If Installed)
When the BSM button is pressed for two seconds or longer, the six chan-nels from the highest field intensity are selected next and stored in memory. The stations selected are stored in thesequence frequency from the first pre- set key. SCAN Button (If Installed) When the scan button is pressed, the frequency will increase and the receiv- able stations will be tuned in one afteranother, receiving each station for 5 seconds. To stop scanning, press the scan button again.
! CAUTION:
o Do not place beverages close to the audio system. The audio sys- tem mechanism may be damagedif you spill them.
o Do not impact on the audio sys-
tem, or the audio system mecha-nism could be damaged.
FM/AM
CLASSIC � JAZZ � ROCK � DEFEAT
Page 374 of 539
1CONTROLS AND EQUIPMENT
66DIGITAL CLOCK
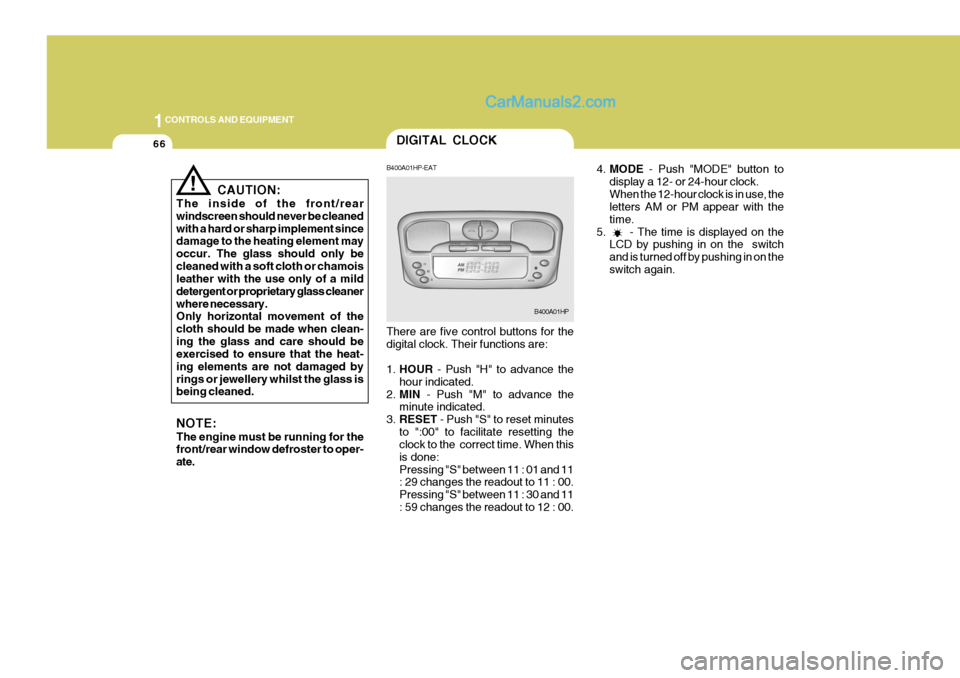
4.MODE - Push "MODE" button to
display a 12- or 24-hour clock. When the 12-hour clock is in use, the letters AM or PM appear with the time.
5. - The time is displayed on the LCD by pushing in on the switchand is turned off by pushing in on theswitch again.
! CAUTION:
The inside of the front/rear windscreen should never be cleanedwith a hard or sharp implement since damage to the heating element may occur. The glass should only becleaned with a soft cloth or chamois leather with the use only of a mild detergent or proprietary glass cleanerwhere necessary. Only horizontal movement of the cloth should be made when clean-ing the glass and care should be exercised to ensure that the heat- ing elements are not damaged byrings or jewellery whilst the glass is being cleaned. NOTE: The engine must be running for the front/rear window defroster to oper- ate. B400A01HP-EAT There are five control buttons for the digital clock. Their functions are: 1.
HOUR - Push "H" to advance the
hour indicated.
2. MIN - Push "M" to advance the
minute indicated.
3. RESET - Push "S" to reset minutes
to ":00" to facilitate resetting the clock to the correct time. When this is done:Pressing "S" between 11 : 01 and 11 : 29 changes the readout to 11 : 00. Pressing "S" between 11 : 30 and 11: 59 changes the readout to 12 : 00.
B400A01HP
Page 381 of 539
1
CONTROLS AND EQUIPMENT
73
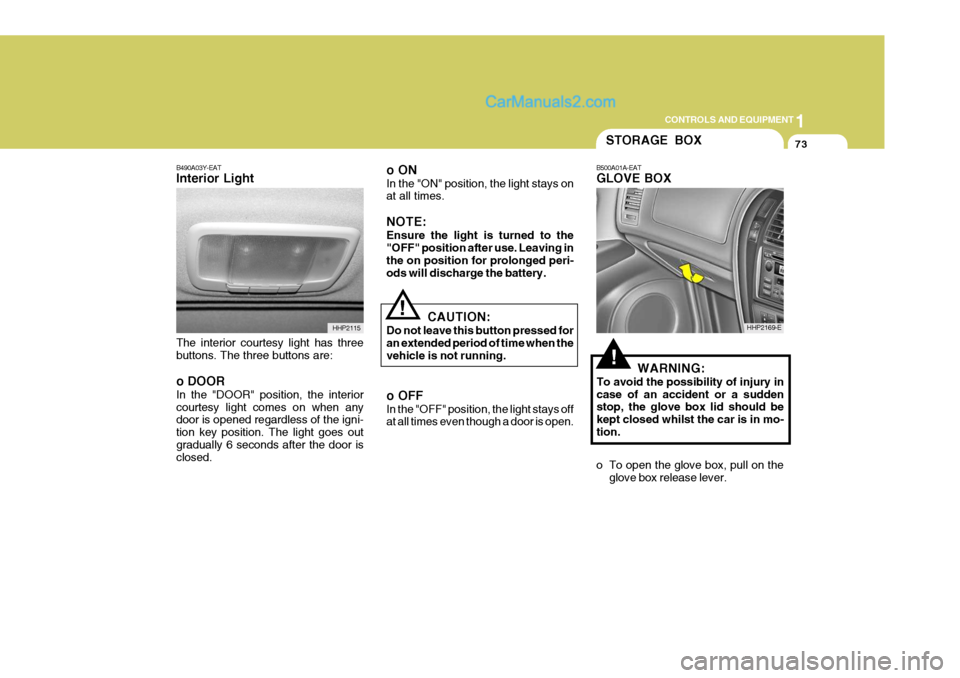
B490A03Y-EAT Interior Light The interior courtesy light has three buttons. The three buttons are: o DOOR In the "DOOR" position, the interior courtesy light comes on when any door is opened regardless of the igni- tion key position. The light goes outgradually 6 seconds after the door is closed. o ON In the "ON" position, the light stays on at all times. NOTE: Ensure the light is turned to the "OFF" position after use. Leaving in the on position for prolonged peri-ods will discharge the battery.
HHP2115
!
!WARNING:
To avoid the possibility of injury in case of an accident or a sudden stop, the glove box lid should be kept closed whilst the car is in mo-tion.
o To open the glove box, pull on the glove box release lever.
STORAGE BOX
B500A01A-EAT GLOVE BOX
HHP2169-E
CAUTION:
Do not leave this button pressed for an extended period of time when the vehicle is not running. o OFF In the "OFF" position, the light stays off at all times even though a door is open.
Page 389 of 539
1
CONTROLS AND EQUIPMENT
81
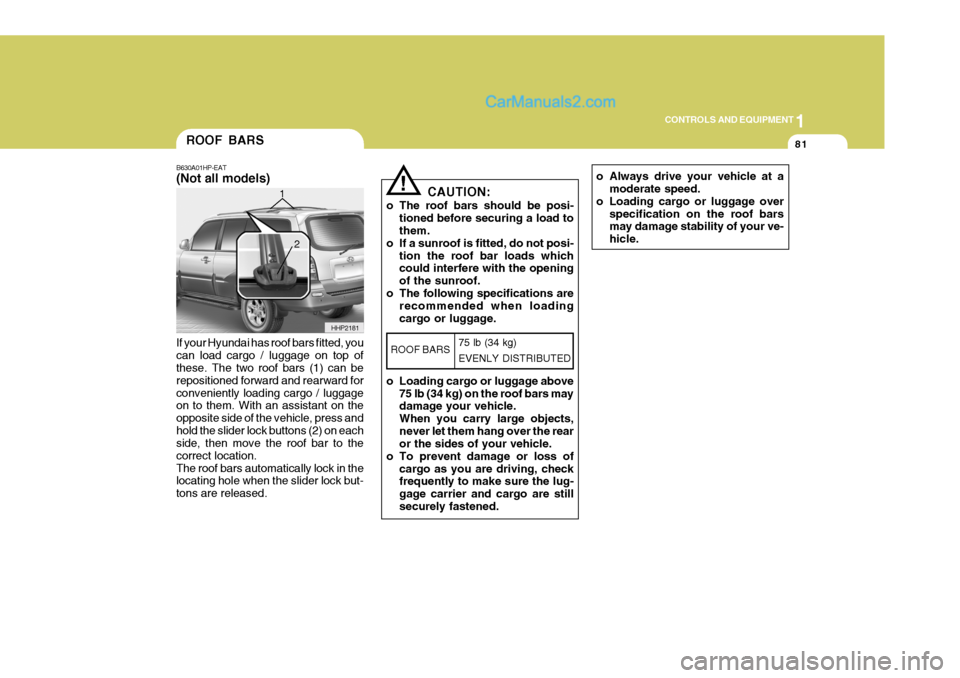
If your Hyundai has roof bars fitted, you can load cargo / luggage on top of these. The two roof bars (1) can be repositioned forward and rearward forconveniently loading cargo / luggage on to them. With an assistant on the opposite side of the vehicle, press andhold the slider lock buttons (2) on each side, then move the roof bar to the correct location.The roof bars automatically lock in the locating hole when the slider lock but- tons are released.ROOF BARS
B630A01HP-EAT (Not all models)
HHP2181
1
2
o Always drive your vehicle at a
moderate speed.
o Loading cargo or luggage over specification on the roof bars may damage stability of your ve- hicle.! CAUTION:
o The roof bars should be posi- tioned before securing a load to them.
o If a sunroof is fitted, do not posi-
tion the roof bar loads whichcould interfere with the opening of the sunroof.
o The following specifications are recommended when loadingcargo or luggage.
o Loading cargo or luggage above 75 lb (34 kg) on the roof bars may damage your vehicle. When you carry large objects,never let them hang over the rear or the sides of your vehicle.
o To prevent damage or loss of cargo as you are driving, checkfrequently to make sure the lug- gage carrier and cargo are stillsecurely fastened.
ROOF BARS 75 lb (34 kg) EVENLY DISTRIBUTED
Page 409 of 539
1
CONTROLS AND EQUIPMENT
101
B995A01Y-AAT AMBIENT TEMPERATURE SWITCH Pressing the AMB button displays the ambient temperature on the display. B980A01Y-AAT MANUAL OPERATION The heating and cooling system can be controlled manually as well as by pushing buttons other than the "AUTO" button. In this state, the system se-quentially works according to the order of buttons selected. The function of the buttons which arenot selected will be controlled auto- matically. Press the "AUTO" button in order toconvert to automatic control of the system.
HHP2147
NOTE: Never place anything covering the photo sensor which is located in the car on the instrument panel to en-sure better control of the heating and cooling system.
HHP2096
Photo sensor