2006 Hyundai Terracan battery replacement
[x] Cancel search: battery replacementPage 30 of 539
1FEATURES OF YOUR HYUNDAI
16
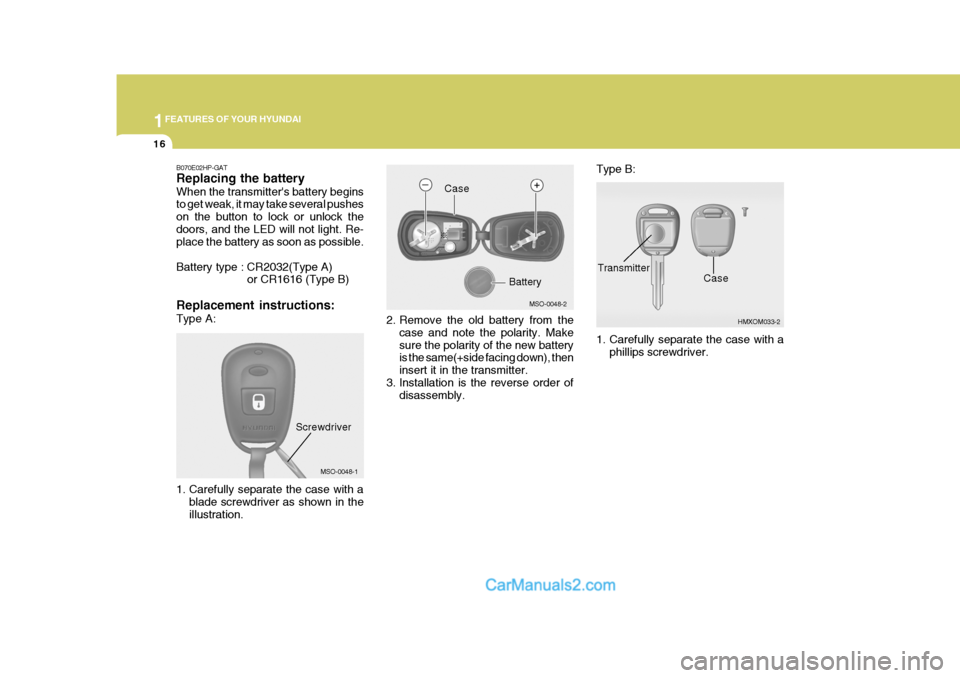
2. Remove the old battery from the
case and note the polarity. Make sure the polarity of the new battery is the same(+side facing down), then insert it in the transmitter.
3. Installation is the reverse order of disassembly. Type B:
1. Carefully separate the case with a
phillips screwdriver.
MSO-0048-2
HMXOM033-2
Case
Battery
CaseTransmitter
B070E02HP-GAT Replacing the battery When the transmitter's battery begins to get weak, it may take several pushes on the button to lock or unlock thedoors, and the LED will not light. Re- place the battery as soon as possible.
Battery type : CR2032(Type A) or CR1616 (Type B)
Replacement instructions: Type A:
MSO-0048-1
1. Carefully separate the case with a blade screwdriver as shown in the illustration.
Screwdriver
Page 228 of 539

Engine Compartment .................................................... 6-2
General Checks ........................................................... 6-5
Checking the Engine Oil .............................................. 6-6 Changing the Engine Oil and Filter ............................. 6-10
Checking and Changing the Engine Coolant ..............6-11
Changing the Air Cleaner Filte r ...................................6-14
Checking the Transmission Oil (Manual)................... 6-17
Checking the Transmission Fluid (Automatic)............6-18
Checking the Brakes .................................................. 6-21
Checking the Clutch Fluid ........................................... 6-22
Air Conditioning Care .................................................. 6-23
Changing the Climate Control Air Filter .. ....................6-24
Checking Drive Belts .................................................. 6-27
Checking and Replacing Fuses ..................................6-28
Checking The Battery ................................................. 6-31
Checking The Electric Cooling Fans ..........................6-33
Power Steering Fluid Level ......................................... 6-33
Fuel Filter ..................................................................... 6-34
Replacement of Headlight Bulbs ................................. 6-38
Headlight Aiming Adjustment ...................................... 6-39
Bulb Wattages ............................................................. 6-42
Fuse Panel D escription ............................................... 6-43
DO-IT-YOURSELF MAINTENANCE
6
6
Page 258 of 539
6
DO-IT-YOURSELF MAINTENANCE
31CHECKING THE BATTERY
!
G210A01A-AAT
WARNING:
Batteries can be dangerous! When
working with batteries, carefully observe the following precautionsto avoid serious injuries. o If battery fluid is on your skin, flush
the affected areas with water for atleast 15 minutes and then seek medical assistance.
o If battery fluid is in your eyes, rinse out your eyes with water and getmedical assistance as soon as possible. While you are being drivento get medical assistance, continue to rinse your eyes by using a sponge or soft cloth saturated withwater.
o If you swallow battery fluid, drink a large quantity of water or milk fol- lowed by milk of magnesia, eat a raw egg or drink vegetable oil. Getmedical assistance as soon as possible.
While batteries are being charged (either by a battery charger or by thevehicle's alternator), they produce explosive gases. Always observe these warnings to prevent injuries fromoccurring:
o Charge batteries only in a well ven- tilated area.
o Do not permit flames, sparks or smoking in the area.
o Keep children away from the area.
The fluid in the battery contains a
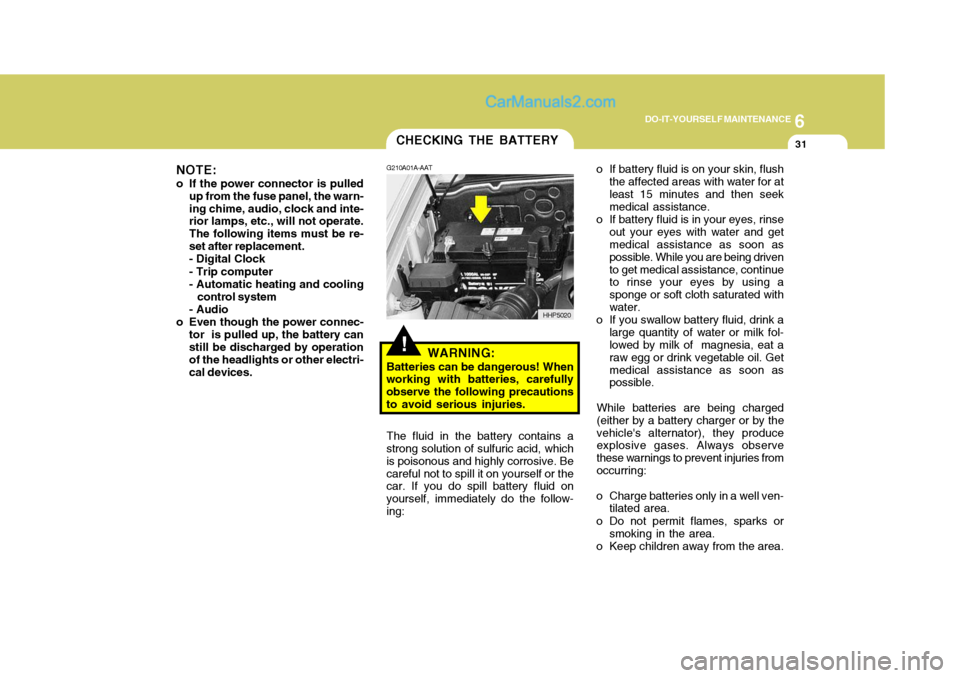
strong solution of sulfuric acid, whichis poisonous and highly corrosive. Becareful not to spill it on yourself or the car. If you do spill battery fluid on yourself, immediately do the follow-ing: HHP5020
NOTE:
o If the power connector is pulled up from the fuse panel, the warn-ing chime, audio, clock and inte- rior lamps, etc., will not operate. The following items must be re-set after replacement.- Digital Clock - Trip computer
- Automatic heating and cooling
control system
- Audio
o Even though the power connec- tor is pulled up, the battery can still be discharged by operation of the headlights or other electri-cal devices.
Page 322 of 539
1CONTROLS AND EQUIPMENT
14
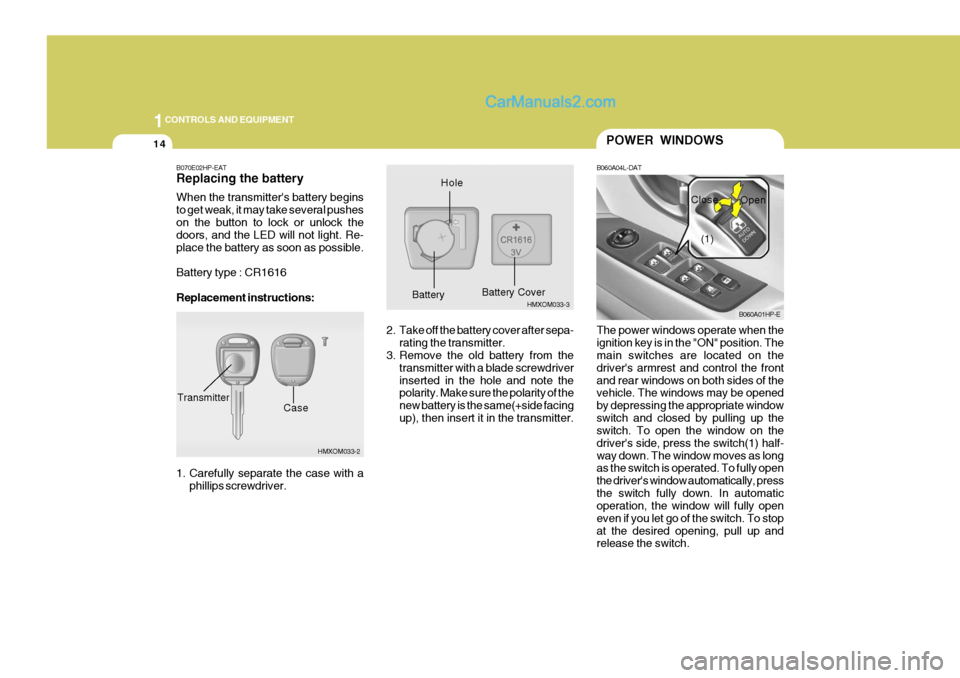
B070E02HP-EAT Replacing the battery When the transmitter's battery begins to get weak, it may take several pusheson the button to lock or unlock the doors, and the LED will not light. Re- place the battery as soon as possible. Battery type : CR1616 Replacement instructions:
1. Carefully separate the case with aphillips screwdriver.
HMXOM033-2
CaseTransmitter
HMXOM033-3
HoleBattery
Battery Cover
The power windows operate when the ignition key is in the "ON" position. The main switches are located on the driver's armrest and control the frontand rear windows on both sides of the vehicle. The windows may be opened by depressing the appropriate windowswitch and closed by pulling up the switch. To open the window on the driver's side, press the switch(1) half-way down. The window moves as long as the switch is operated. To fully open the driver's window automatically, pressthe switch fully down. In automatic operation, the window will fully open even if you let go of the switch. To stopat the desired opening, pull up and release the switch.
POWER WINDOWS
B060A04L-DAT
B060A01HP-E
(1)
Close
Open
2. Take off the battery cover after sepa- rating the transmitter.
3. Remove the old battery from the
transmitter with a blade screwdriver inserted in the hole and note the polarity. Make sure the polarity of the new battery is the same(+side facingup), then insert it in the transmitter.
Page 466 of 539
44APPEARANCE CARE
4
JE070A1-E POLISHING The exterior paint work should be pol- ished with a proprietary wax polish when water no longer collects in beadform on the paint work. The instruc- tions of the product manufacturer should be adhered to. JE080A1-E BUMPER MAINTENANCE The special material from which the bumpers are manufactured warrantsspecial attention to preserve the ap- pearance of the bumpers. Avoid con- tact with battery electrolyte or brakefluid and ensure that accidental spill- ages are immediately flushed with water.Do not use abrasive cleaning materi- als which may damage the bumpers. Avoid subjecting the bumpers to hightemperatures E.g encountered in high bake paint ovens.
JE090A1-E BODY WORK REPAIRS In the event of the body work sustain- ing damage, the following points shouldbe noted prior to repairs being under- taken. If body panels are replaced or re-paired, anti corrosion treatment must be applied to the repair area. The product used must be compatible withthose used in manufacture. It is rec- ommended that repairs are entrusted to a Hyundai authorised repairer to en-sure that replacement parts used are of the same high quality as those used in manufacture of the vehicle and that thecorrect repair methods and materials will ensure adequate levels of corrosion protection and the continued validity ofthe Anti Perforation Warranty.
JE060A1-E STAIN/SPOT REMOVAL Should tree sap, dead insects or tar prove to be difficult to remove from thepaint film, turpentine or a proprietary paint cutting compound may be used. Ensure that the area to be cleaned isnot rubbed intensively to prevent break- ing through the colour coat and expos- ing the under coat.
Page 479 of 539
Engine Compartment ................................................... 6-2
Daily Operating Checks ............................................... 6-4
Engine Oil ..................................................................... 6-4
Engine Oil and Filter Replacement .............................. 6-8
Engine Coolant Checking and Replacing .................... 6-9
Changing the Air Cleaner Filter ...................................6-12
Manual Transmission Lubricant ..................................6-15
Automatic Transmission Lubricant ..............................6-16
Brake System Checking ............................................. 6-18
Checking the Clutch Fluid ........................................... 6-19
Air Conditioning System Maintenance ........................ 6-20
Changing the Climate Control Air Filter .. ....................6-22
Checking Engine Drive Belts ...................................... 6-24
Fusible Links ............................................................... 6-25
Battery Mai ntenance ................................................... 6-27
Checking Electric Cooling Fans .................................6-29
Power Steering Fluid Level ......................................... 6-29
Fuel Filter ..................................................................... 6-30
Replacing Headlight Bulbs .......................................... 6-31
Headlight Aiming Adjustment ...................................... 6-33
Bulb Wattages ............................................................. 6-35
Fuse Panel D escription ............................................... 6-36
OWNER MAINTENANCE
6
6
Page 505 of 539
6
OWNER MAINTENANCE
27
!WARNING:
Motor vehicle batteries contain sulphuric acid which is corrosive and poisonous. Hydrogen gas isemitted from the battery which is explosive when combined with oxygen. The following precautionsmust be strictly observed to avoid personal injury or damage to the vehicle.
BATTERY MAINTENANCE
DG210A2-E
HHP5020-E
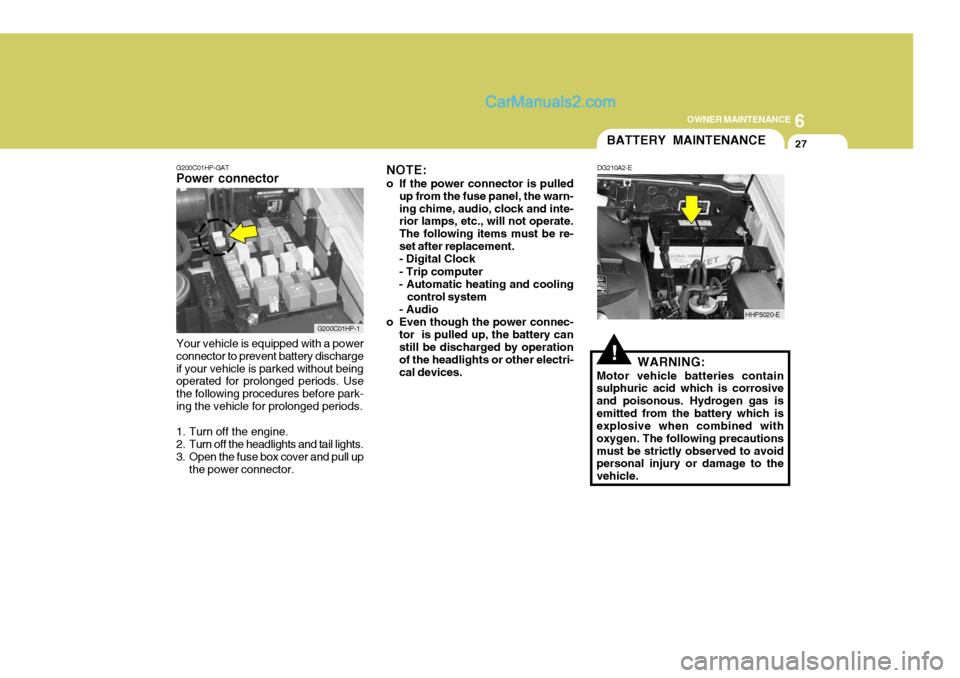
G200C01HP-GAT
Power connector NOTE:
o If the power connector is pulled up from the fuse panel, the warn- ing chime, audio, clock and inte- rior lamps, etc., will not operate. The following items must be re-set after replacement.- Digital Clock - Trip computer
- Automatic heating and cooling
control system
- Audio
o Even though the power connec- tor is pulled up, the battery can still be discharged by operation of the headlights or other electri-cal devices.
Your vehicle is equipped with a powerconnector to prevent battery dischargeif your vehicle is parked without being operated for prolonged periods. Use the following procedures before park-ing the vehicle for prolonged periods.
1. Turn off the engine.
2. Turn off the headlights and tail lights.
3. Open the fuse box cover and pull up the power connector.
G200C01HP-1