Page 165 of 420

Follow these precautions when using
the seat heaters:Use the HI setting only to heat the
seats quickly, because it draws
large amounts of current f rom the
battery.
If the engine is lef t idling f or an
extended period, do not use the
seat heaters, even on the LO
setting. It can weaken the battery,
causing hard starting.
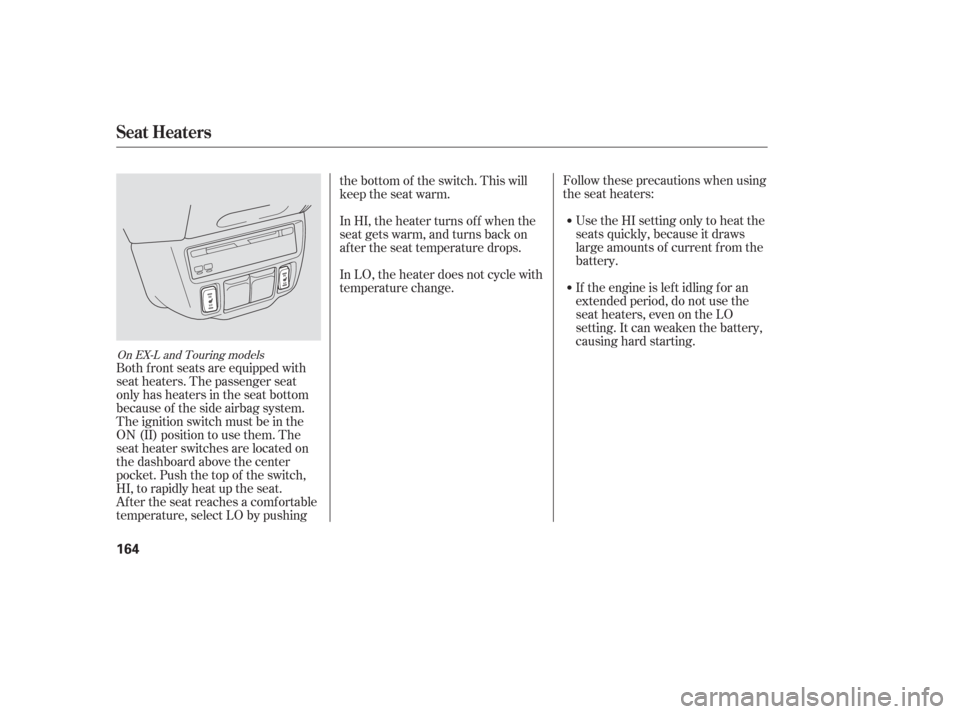
Both f ront seats are equipped with
seat heaters. The passenger seat
only has heaters in the seat bottom
because of the side airbag system.
The ignition switch must be in the
ON (II) position to use them. The
seat heater switches are located on
the dashboard above the center
pocket. Push the top of the switch,
HI, to rapidly heat up the seat.
After the seat reaches a comfortable
temperature, select LO by pushing the bottom of the switch. This will
keep the seat warm.
In HI, the heater turns of f when the
seat gets warm, and turns back on
after the seat temperature drops.
In LO, the heater does not cycle with
temperature change.
On EX-L and Touring models
Seat Heaters
164
Page 174 of 420
You can adjust the position of the
brake pedal, and accelerator pedal
when the shif t lever is in the Park
position. Push the top of the
adjustment switch to move the
pedals f orward, and the bottom to
move them backward.To adjust the pedals:
Pushandholdthetopof the
adjustment switch until pedals are
closest to you.
Adjust your seat and the steering
wheel so you can operate the
controls and steering wheel easily.
Pushandholdthebottomof the
adjustment switch until pedals are
in the position you can press them
f ully and comf ortably.
Do not adjust the pedals with your
f oot on or under either pedal. 1.
2.
3.
On Touring models only
Parking Brake, Adjustable Driver’s Foot Pedals
A djustable Driver’s Foot Pedals
Inst rument s and Cont rols
173
PEDAL POSITION
ADJUSTMENT SWITCHDriving the vehicle with the parking
brake applied can damage the rear
brakes and axles.
Page 181 of 420
There is a removable console
between the second row bucket
seats.To remove the console, pull up the
tab at the f ront edge to unlock the
rear of the console f rom the f loor.To reinstall the console, hook the
f ront of it to the f loor, then push
down the back until it locks. Make
sure the console is securely locked in
place. A console that is not locked in
place could f ly around and cause
injury in a sudden stop or crash.
If you remove the second seat center
console, store it in a saf e place
outside the vehicle.
Unhook the f ront of the console
f rom the f loor by pulling it back
slightly, then pivoting it upward.
To open the console, push the tab,
and slide the lid to the rear.
On Touring models only
Removable Second Row Console
Interior Convenience Items
180
TAB
TAB
Page 182 of 420
There is a large storage area under
the floor between the front seats and
the second row bucket seats.
To place or remove large items f rom
the storage area, pull off the carpet
near the second seat, and pull the
handle to open the large lid.To place or remove small items f rom
the storage area, pull off the carpet
in the center of the lid, and pull the
handle to open the small lid.
On EX, EX-L and Touring models,
this handle can be locked with the
master key. To keep the lid open, attach the hook
to the grab rail on the back of the
f ront seat-back.
You can adjust the length of the
hook strap. Pull down the upper
edge of the stopper, and slide it up or
down.
CONT INUED
In-Floor Storage A rea
Interior Convenience Items
Inst rument s and Cont rols
181
HANDLE HOOK
LID HANDLE
Page 184 of 420
On EX, EX-L and Touring models,
the floor storage area has a Lazy
Susan inside which makes it easier to
f ind items through the small lid.
TheLazySusancanberemoved.
When it is removed, a larger item,
such as the stowable second row
plus-one seat, can be stored.To remove the Lazy Susan, open the
large lid. Attach the hook to the grab
rail on the back of the f ront seat to
keep the lid open. Hold the two
handles on the edge of the Lazy
Susan, and pull it out of the storage
area. Store the removed Lazy Susan
in a saf e place outside the vehicle.
Do not place it on the vehicle f loor or
seat, or in the cargo area. It can f ly
around the interior in a crash.The Lazy Susan can be damaged if it
is kept in a humid place. Always
store the Lazy Susan in a dry place
when it is removed.
Interior Convenience Items
Inst rument s and Cont rols
183
STOWABLE SECOND ROW
PLUS-ONE SEAT
LAZY SUSAN
HANDLE
Page 243 of 420

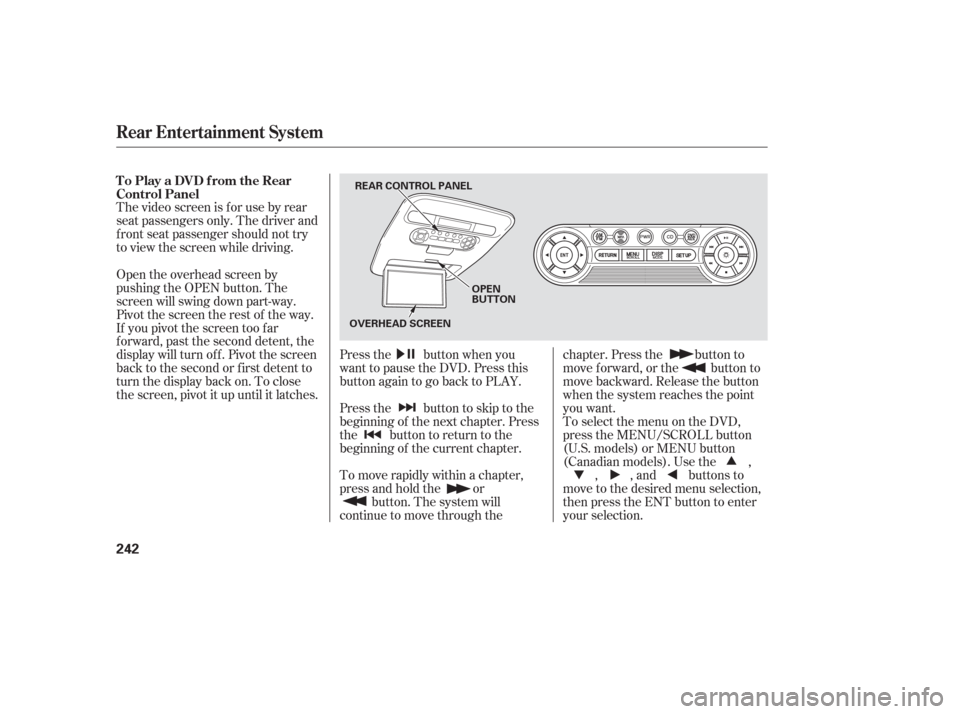
The video screen is f or use by rear
seat passengers only. The driver and
f ront seat passenger should not try
to view the screen while driving.Press the button when you
want to pause the DVD. Press this
button again to go back to PLAY.
Pressthe buttontoskiptothe
beginning of the next chapter. Press
the button to return to the
beginning of the current chapter.
To move rapidly within a chapter,
press and hold the orbutton. The system will
continue to move through the chapter. Press the button to
move forward, or the button to
move backward. Release the button
when the system reaches the point
you want.
ToselectthemenuontheDVD,
press the MENU/SCROLL button
(U.S. models) or MENU button
(Canadian models). Use the ,
, , and buttons to
move to the desired menu selection,
then press the ENT button to enter
your selection.
Open the overhead screen by
pushing the OPEN button. The
screen will swing down part-way.
Pivot the screen the rest of the way.
If you pivot the screen too f ar
f orward, past the second detent, the
display will turn of f . Pivot the screen
back to the second or first detent to
turn the display back on. To close
the screen, pivot it up until it latches. To Play a DVD from the Rear
Control Panel
Rear Entertainment System
242
REAR CONTROL PANEL
OPEN
BUTTON
OVERHEAD SCREEN
Page 266 of 420

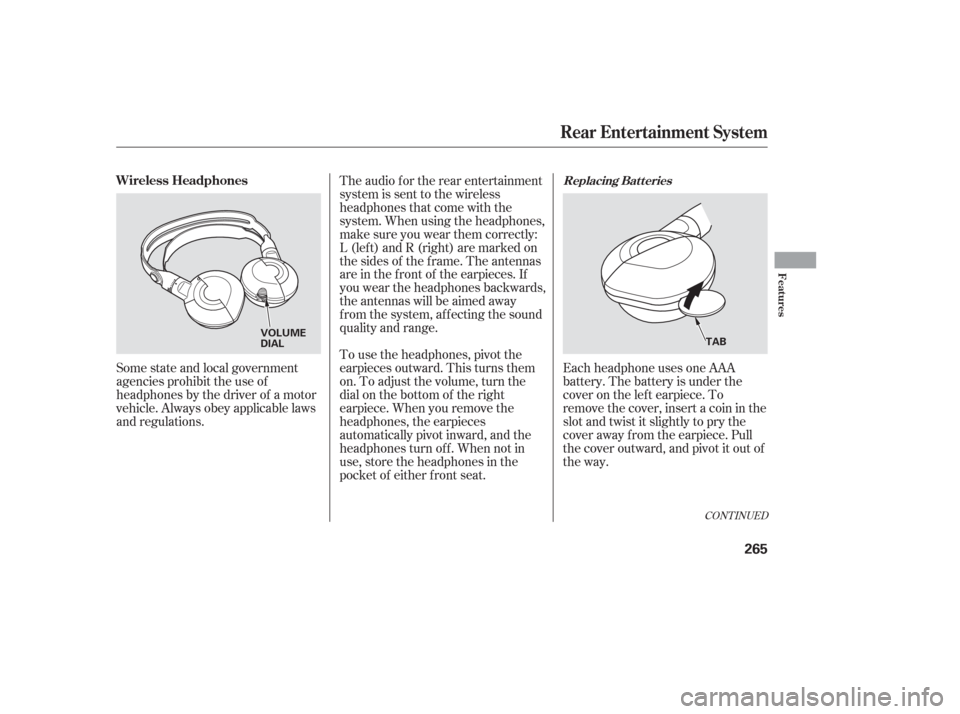
Each headphone uses one AAA
battery. The battery is under the
cover on the lef t earpiece. To
remove the cover, insert a coin in the
slot and twist it slightly to pry the
cover away f rom the earpiece. Pull
the cover outward, and pivot it out of
the way.
Some state and local government
agencies prohibit the use of
headphones by the driver of a motor
vehicle. Always obey applicable laws
and regulations. The audio f or the rear entertainment
system is sent to the wireless
headphones that come with the
system. When using the headphones,
make sure you wear them correctly:
L (lef t) and R (right) are marked on
the sides of the frame. The antennas
are in the f ront of the earpieces. If
you wear the headphones backwards,
the antennas will be aimed away
from the system, affecting the sound
quality and range.
To use the headphones, pivot the
earpieces outward. This turns them
on. To adjust the volume, turn the
dial on the bottom of the right
earpiece. When you remove the
headphones, the earpieces
automatically pivot inward, and the
headphones turn of f . When not in
use, store the headphones in the
pocket of either f ront seat.
CONT INUED
Replacing Bat t eriesWireless Headphones
Rear Entertainment System
Features
265
VOLUME
DIAL
TAB
Page 267 of 420
Auxiliary input jacks and headphone
connectors f or the rear
entertainment system are under the
third seat armrest on the driver’s
side. To access these connectors,
open the cover by pulling up on the
lever.The system will accept auxiliary
inputs f rom standard video games
and video equipment.
Some video game power supplies
may cause poor picture quality.
V=Videojack
L = Lef t audio jack
R = Right audio jack
Remove the battery. Install the new
battery in the earpice as shown in
the diagram next to the battery slot.
Slide the cover back into place on the
earpiece, then press down on the
back edge to lock it in place. Auxiliary Input Jacks
Rear Entertainment System
266
COVER
BATTERY ARMREST
LEVER
AUXILIARY INPUT JACKS